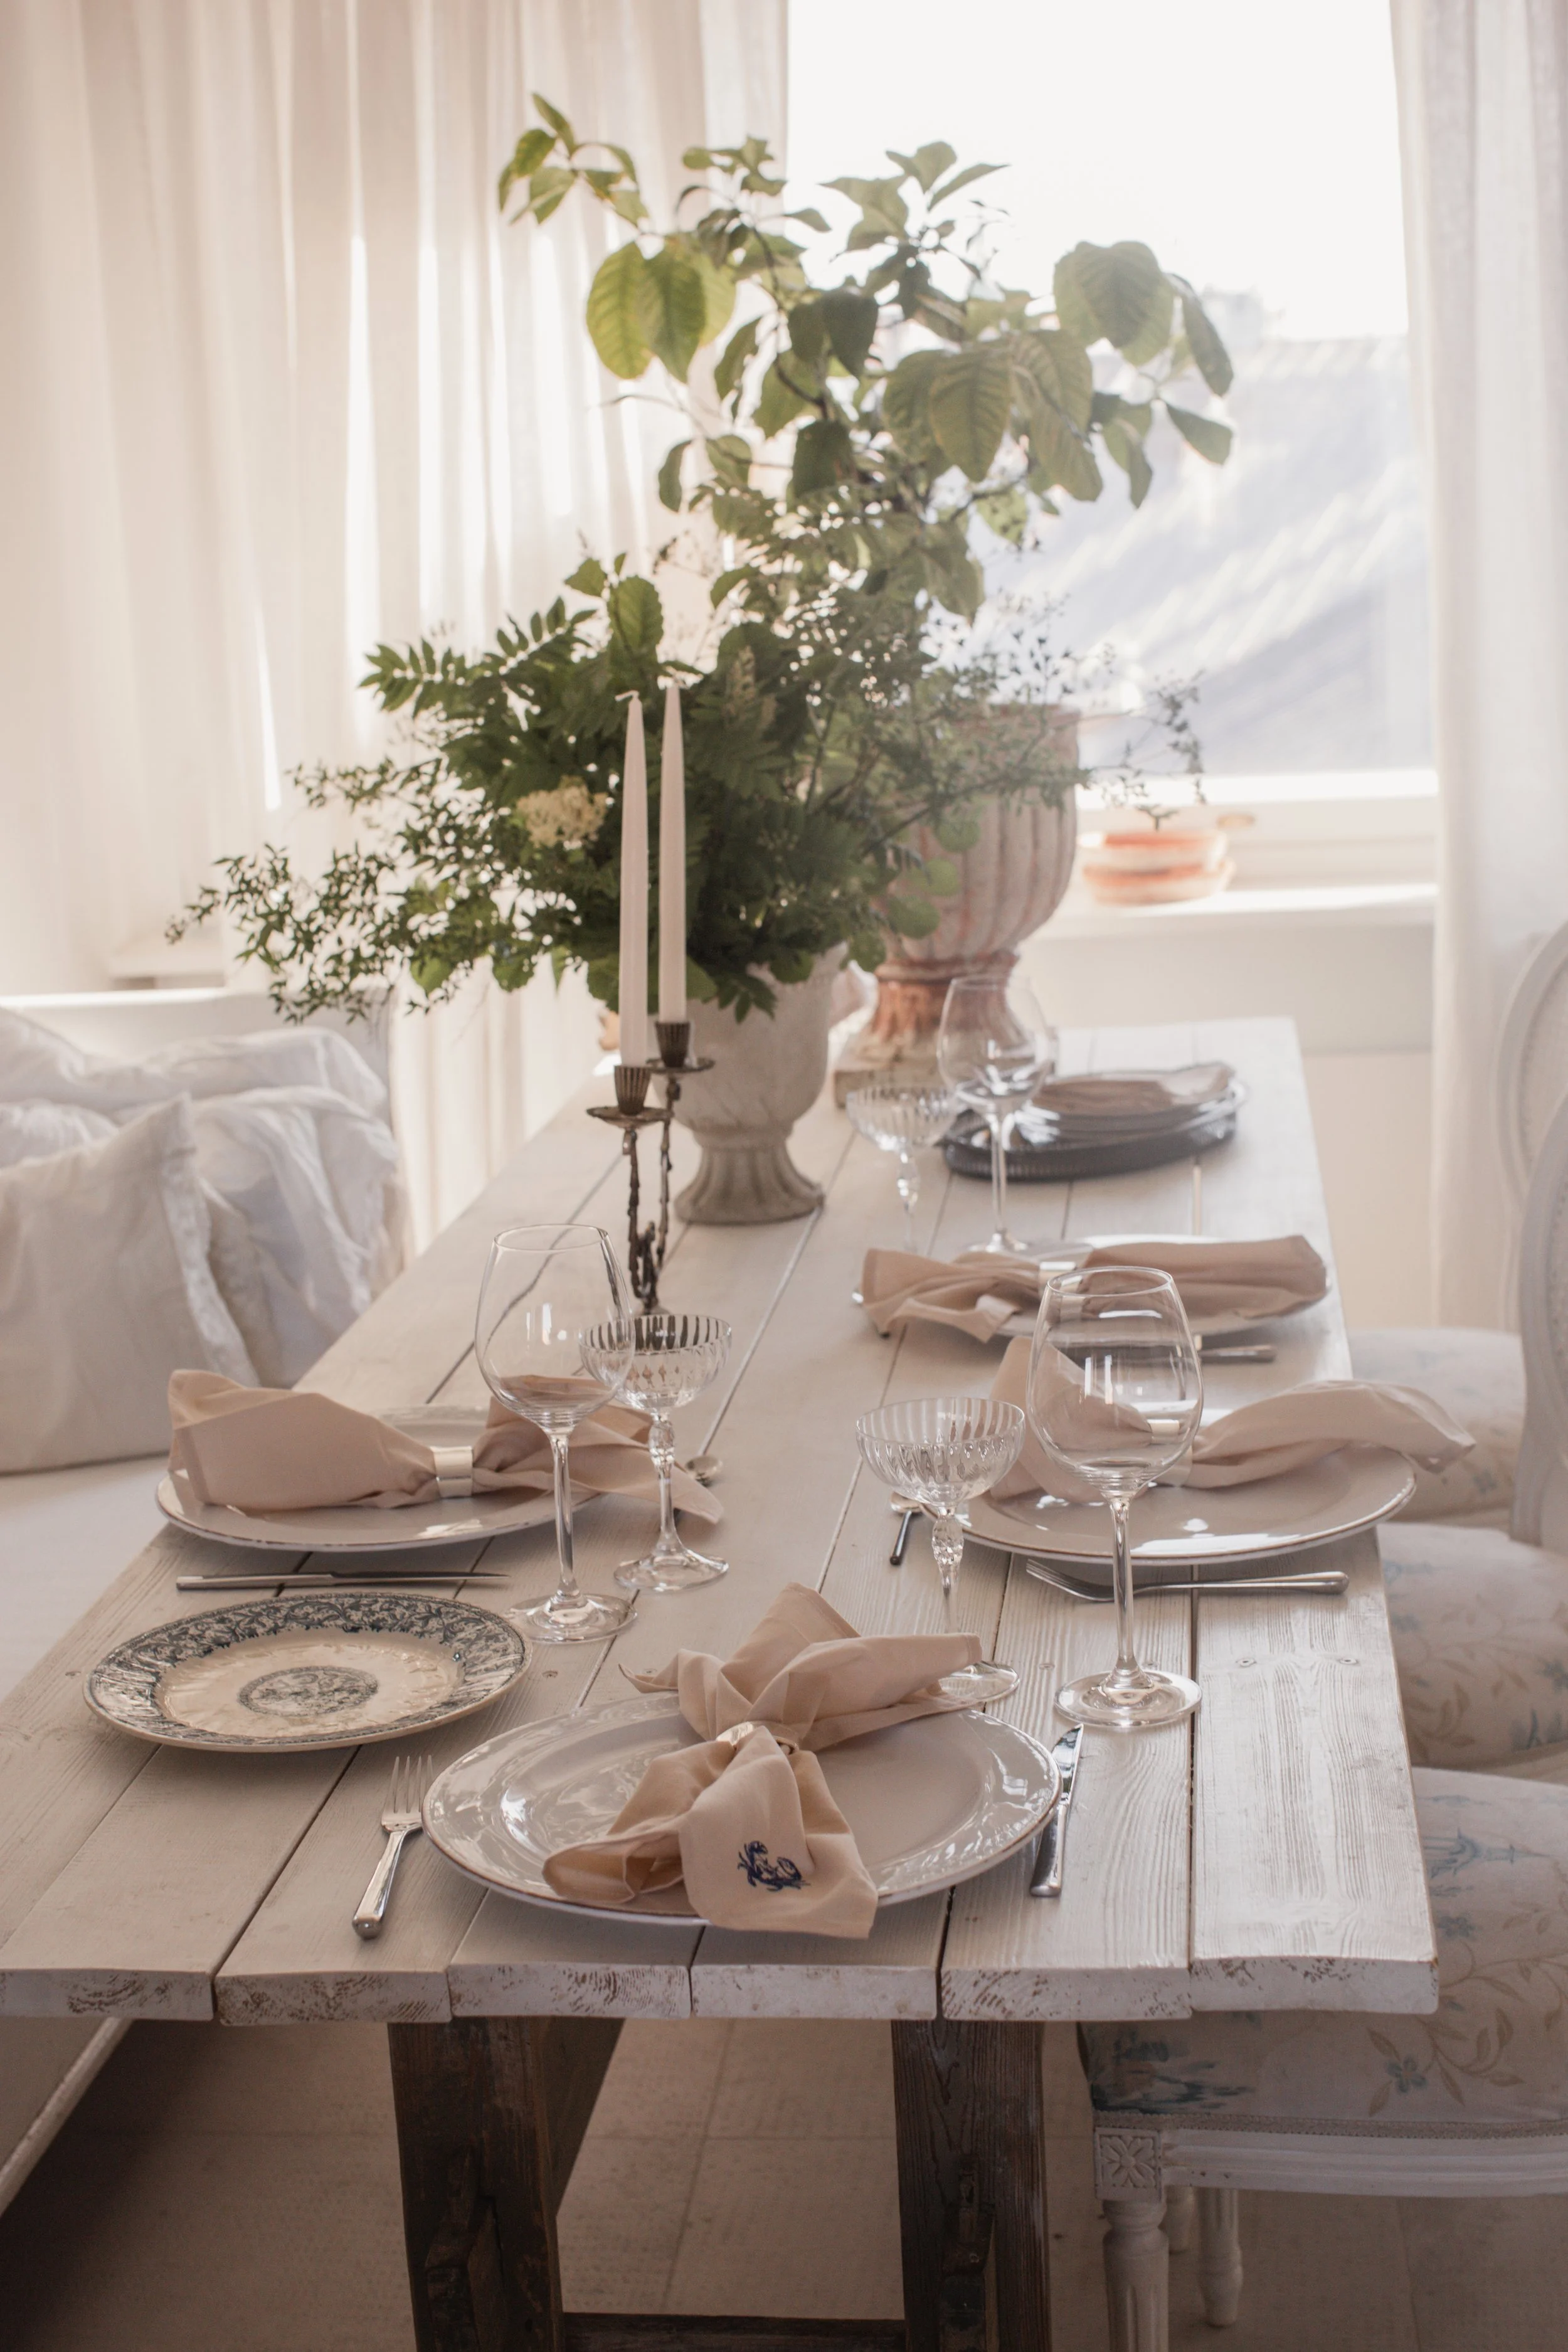
Summer aesthetic
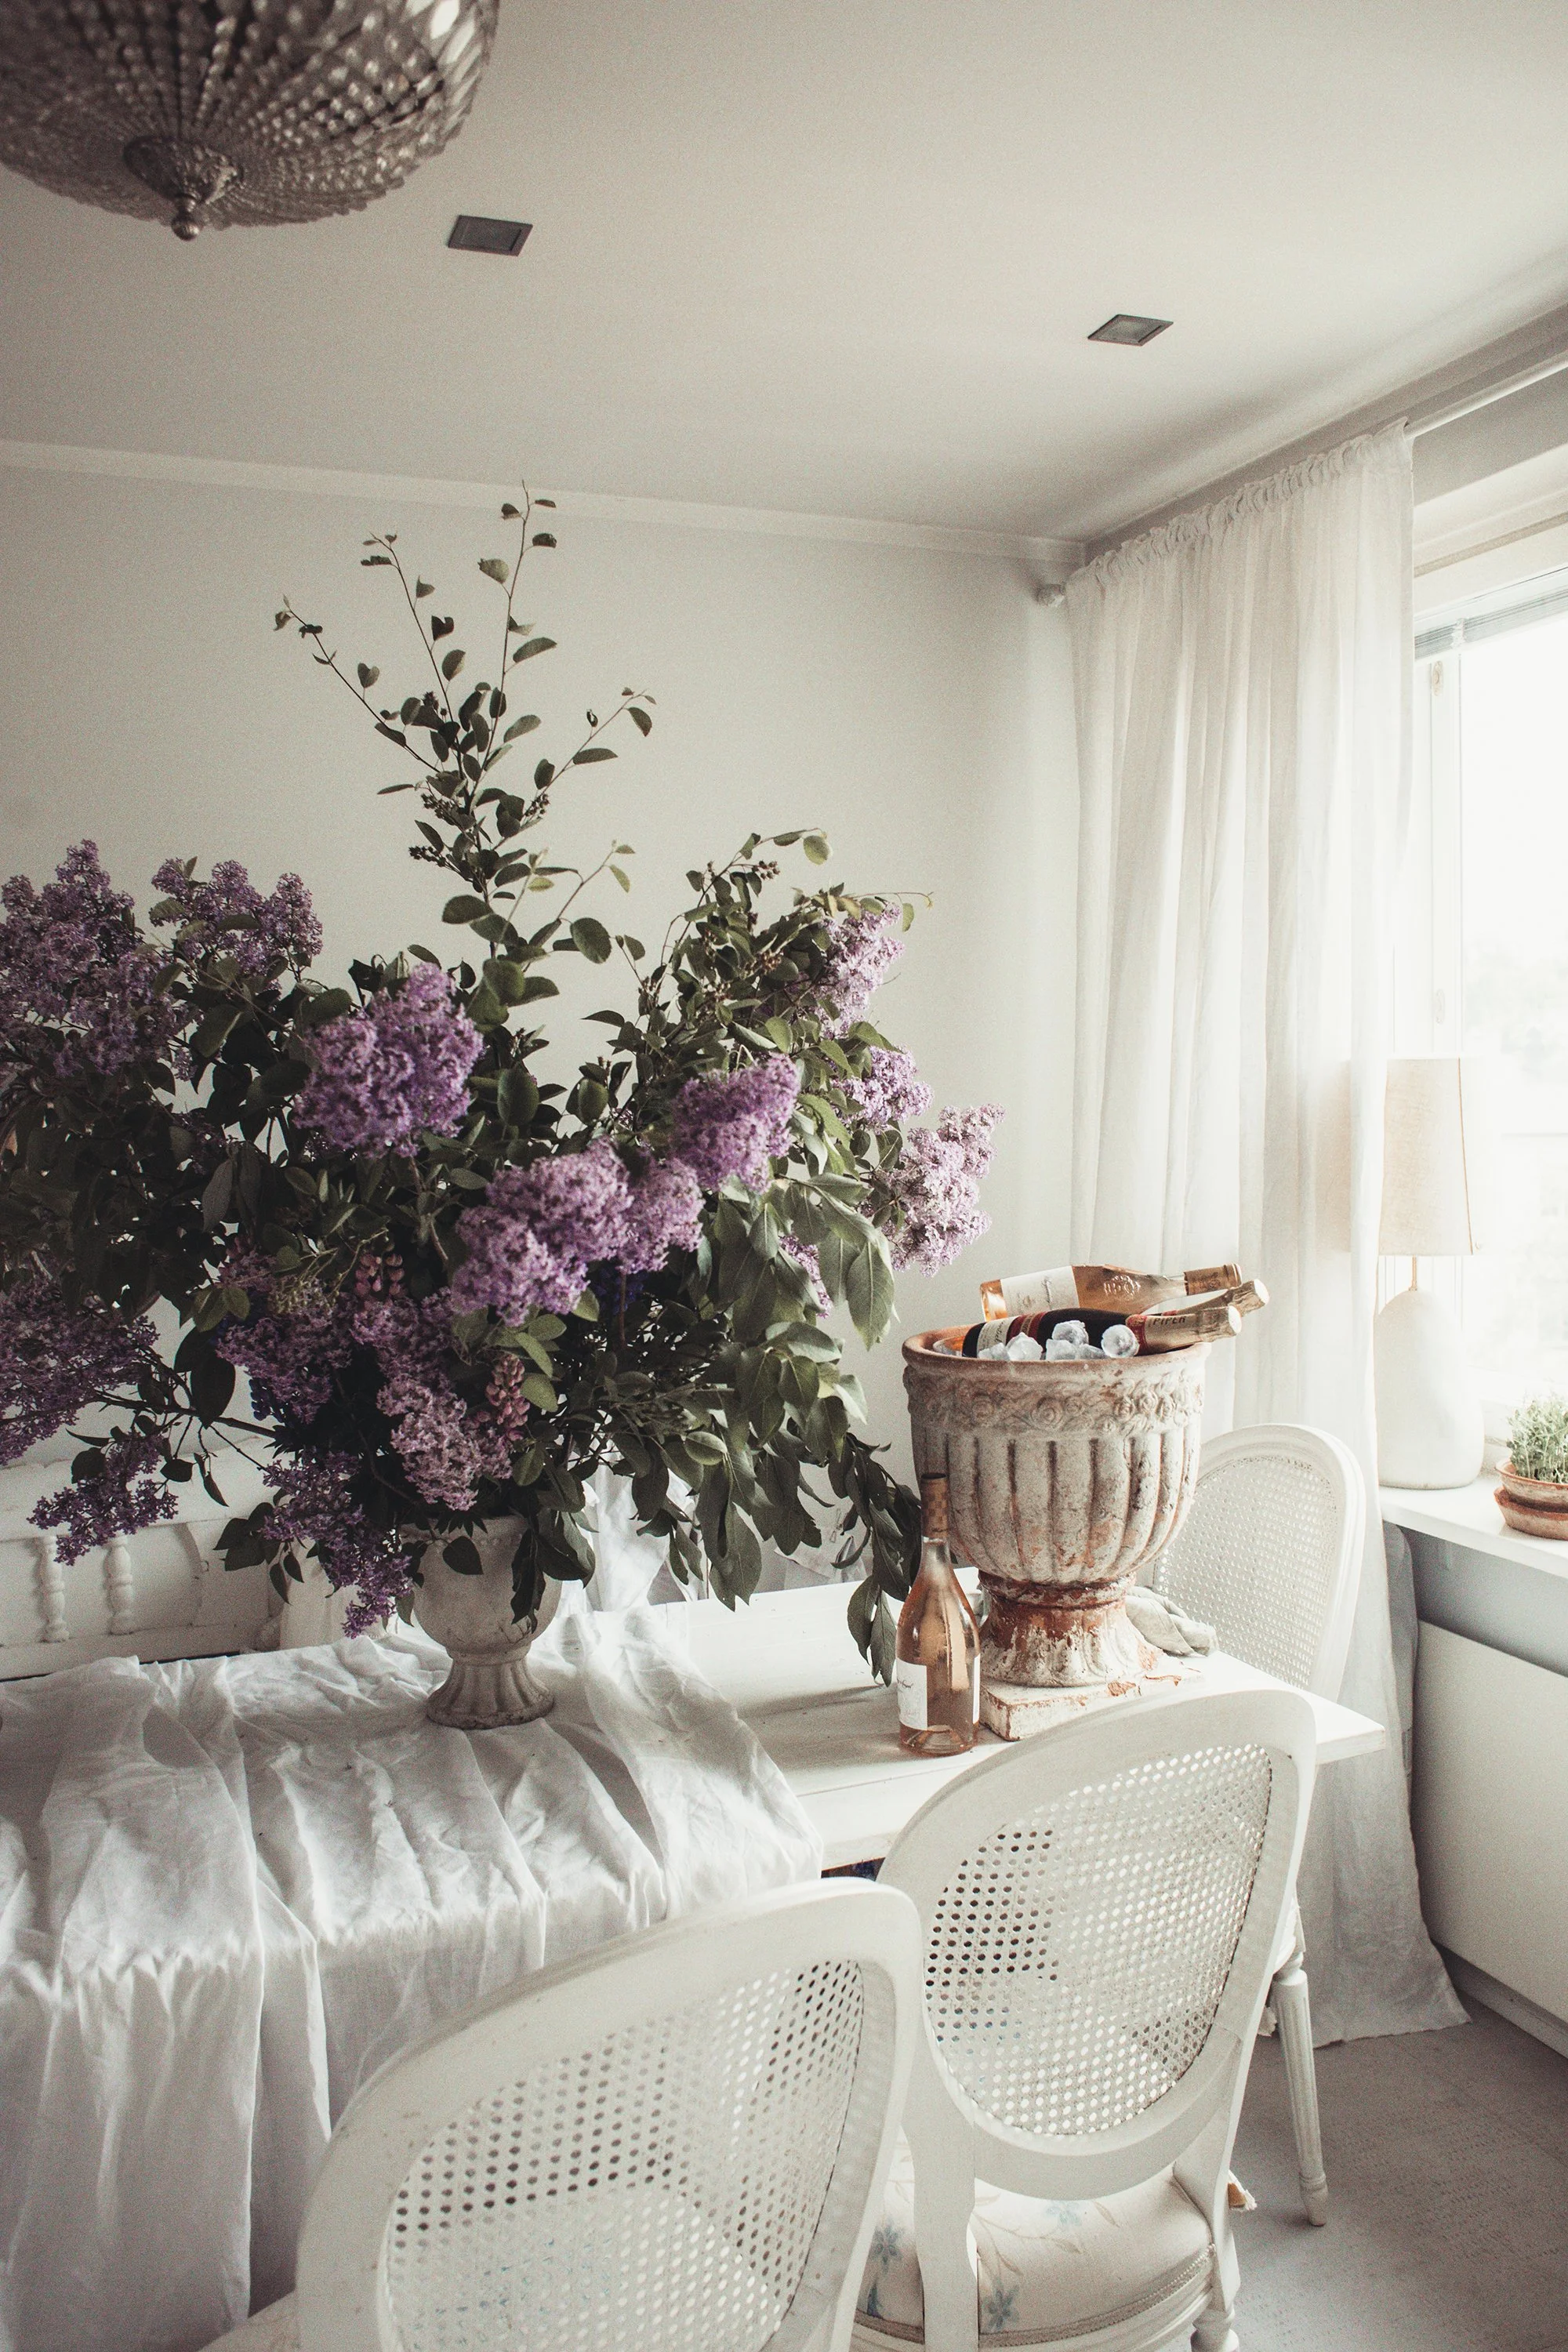
large lilac bouquets & antique urns as coolers for parties
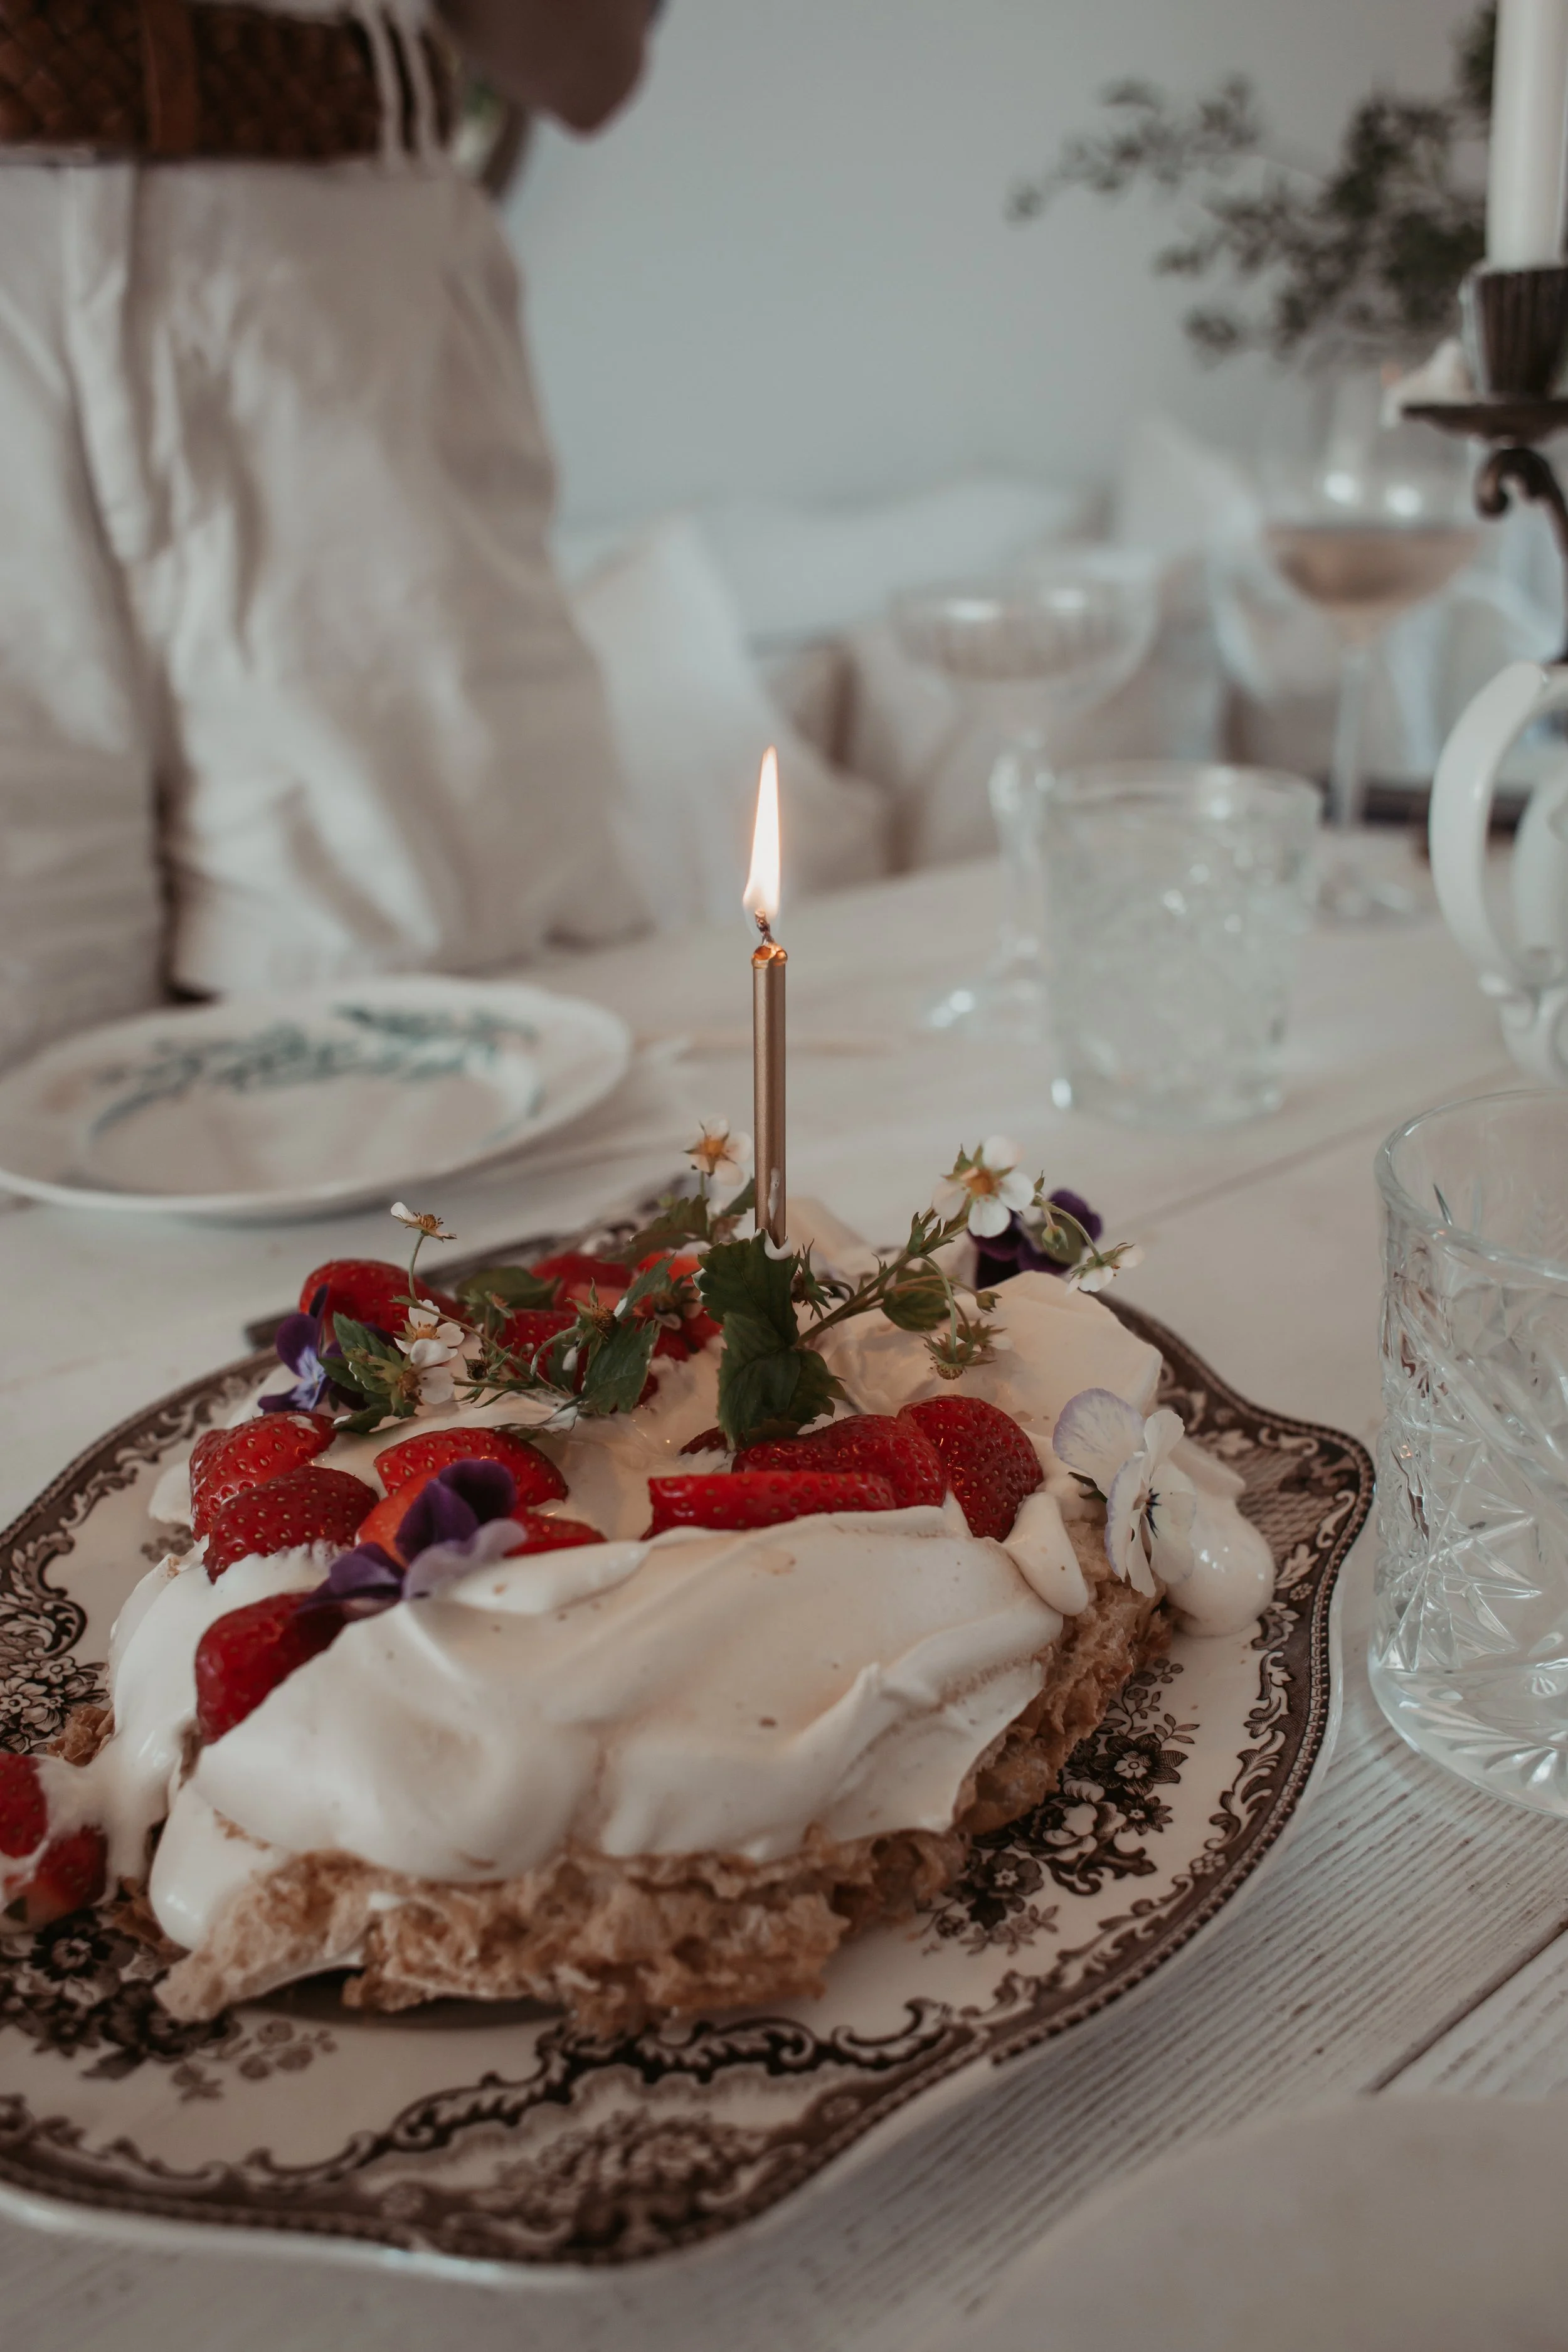
Just a few images showing what our summer as been like this far- we have been in the city and in the countryside. Celebrated birthdays and taken a day trip trip Hanko.


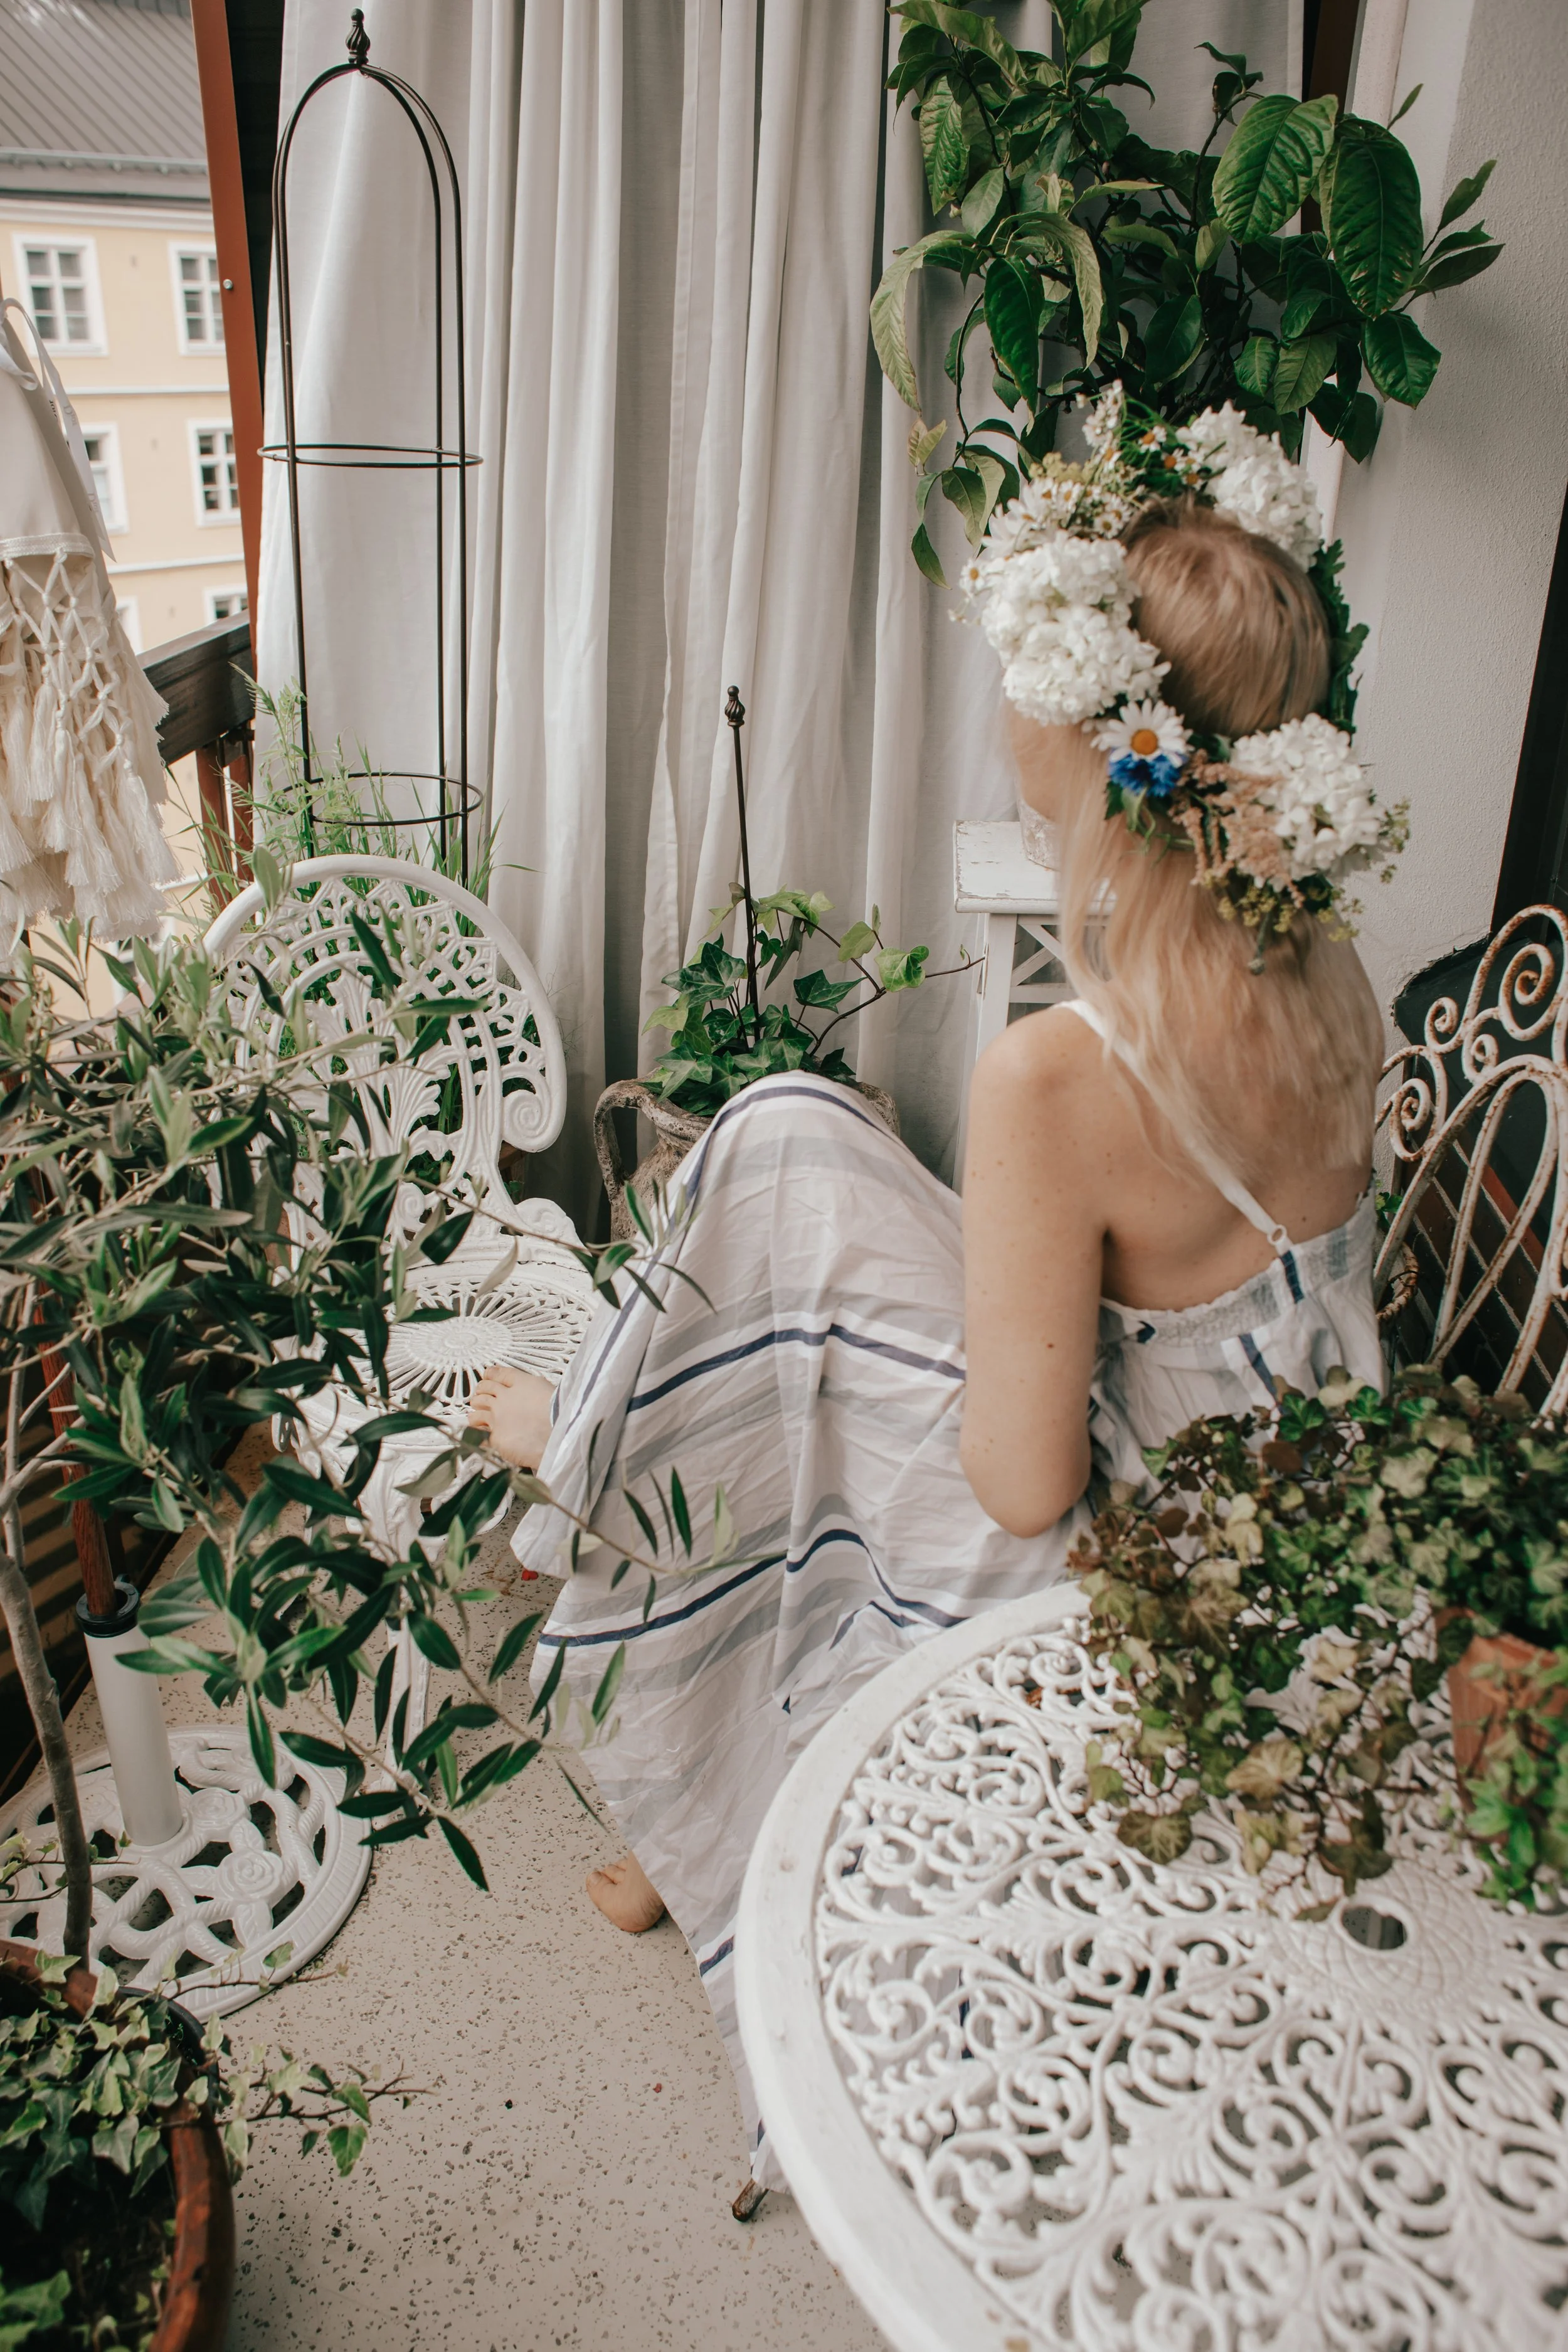
Making a midsummer flower crown

green wild flower bouquets for a table setting
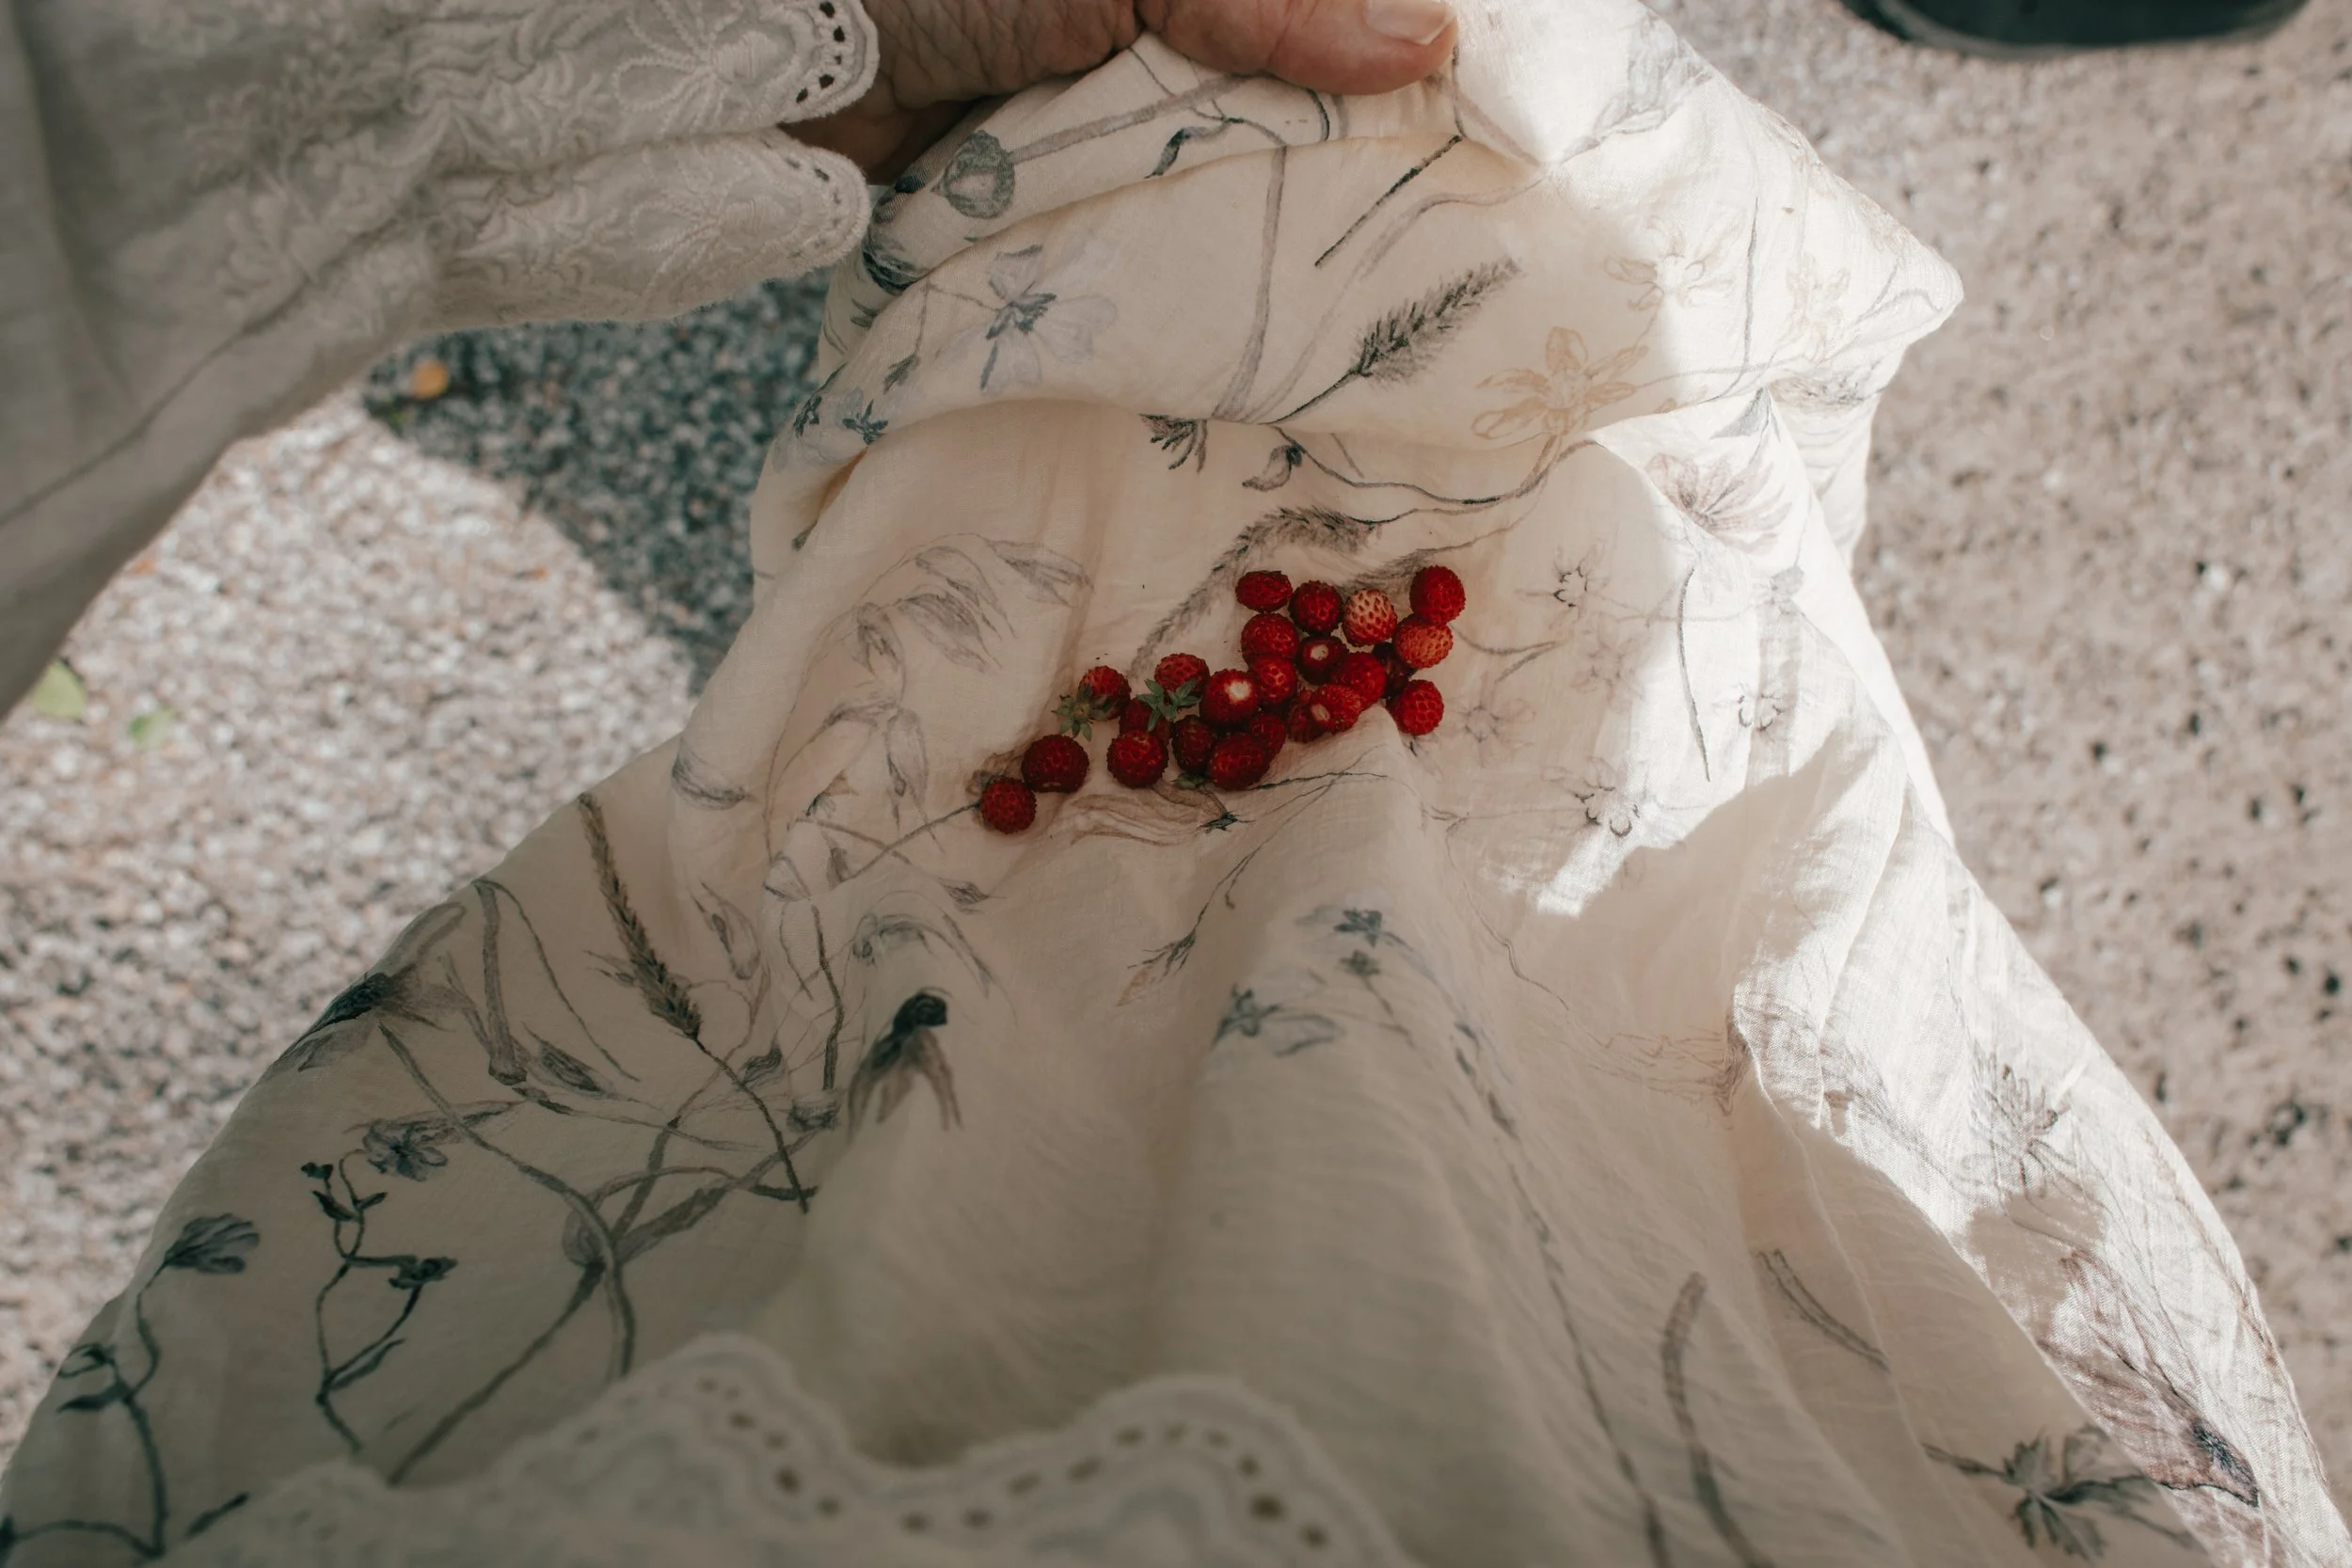
wild strawberries


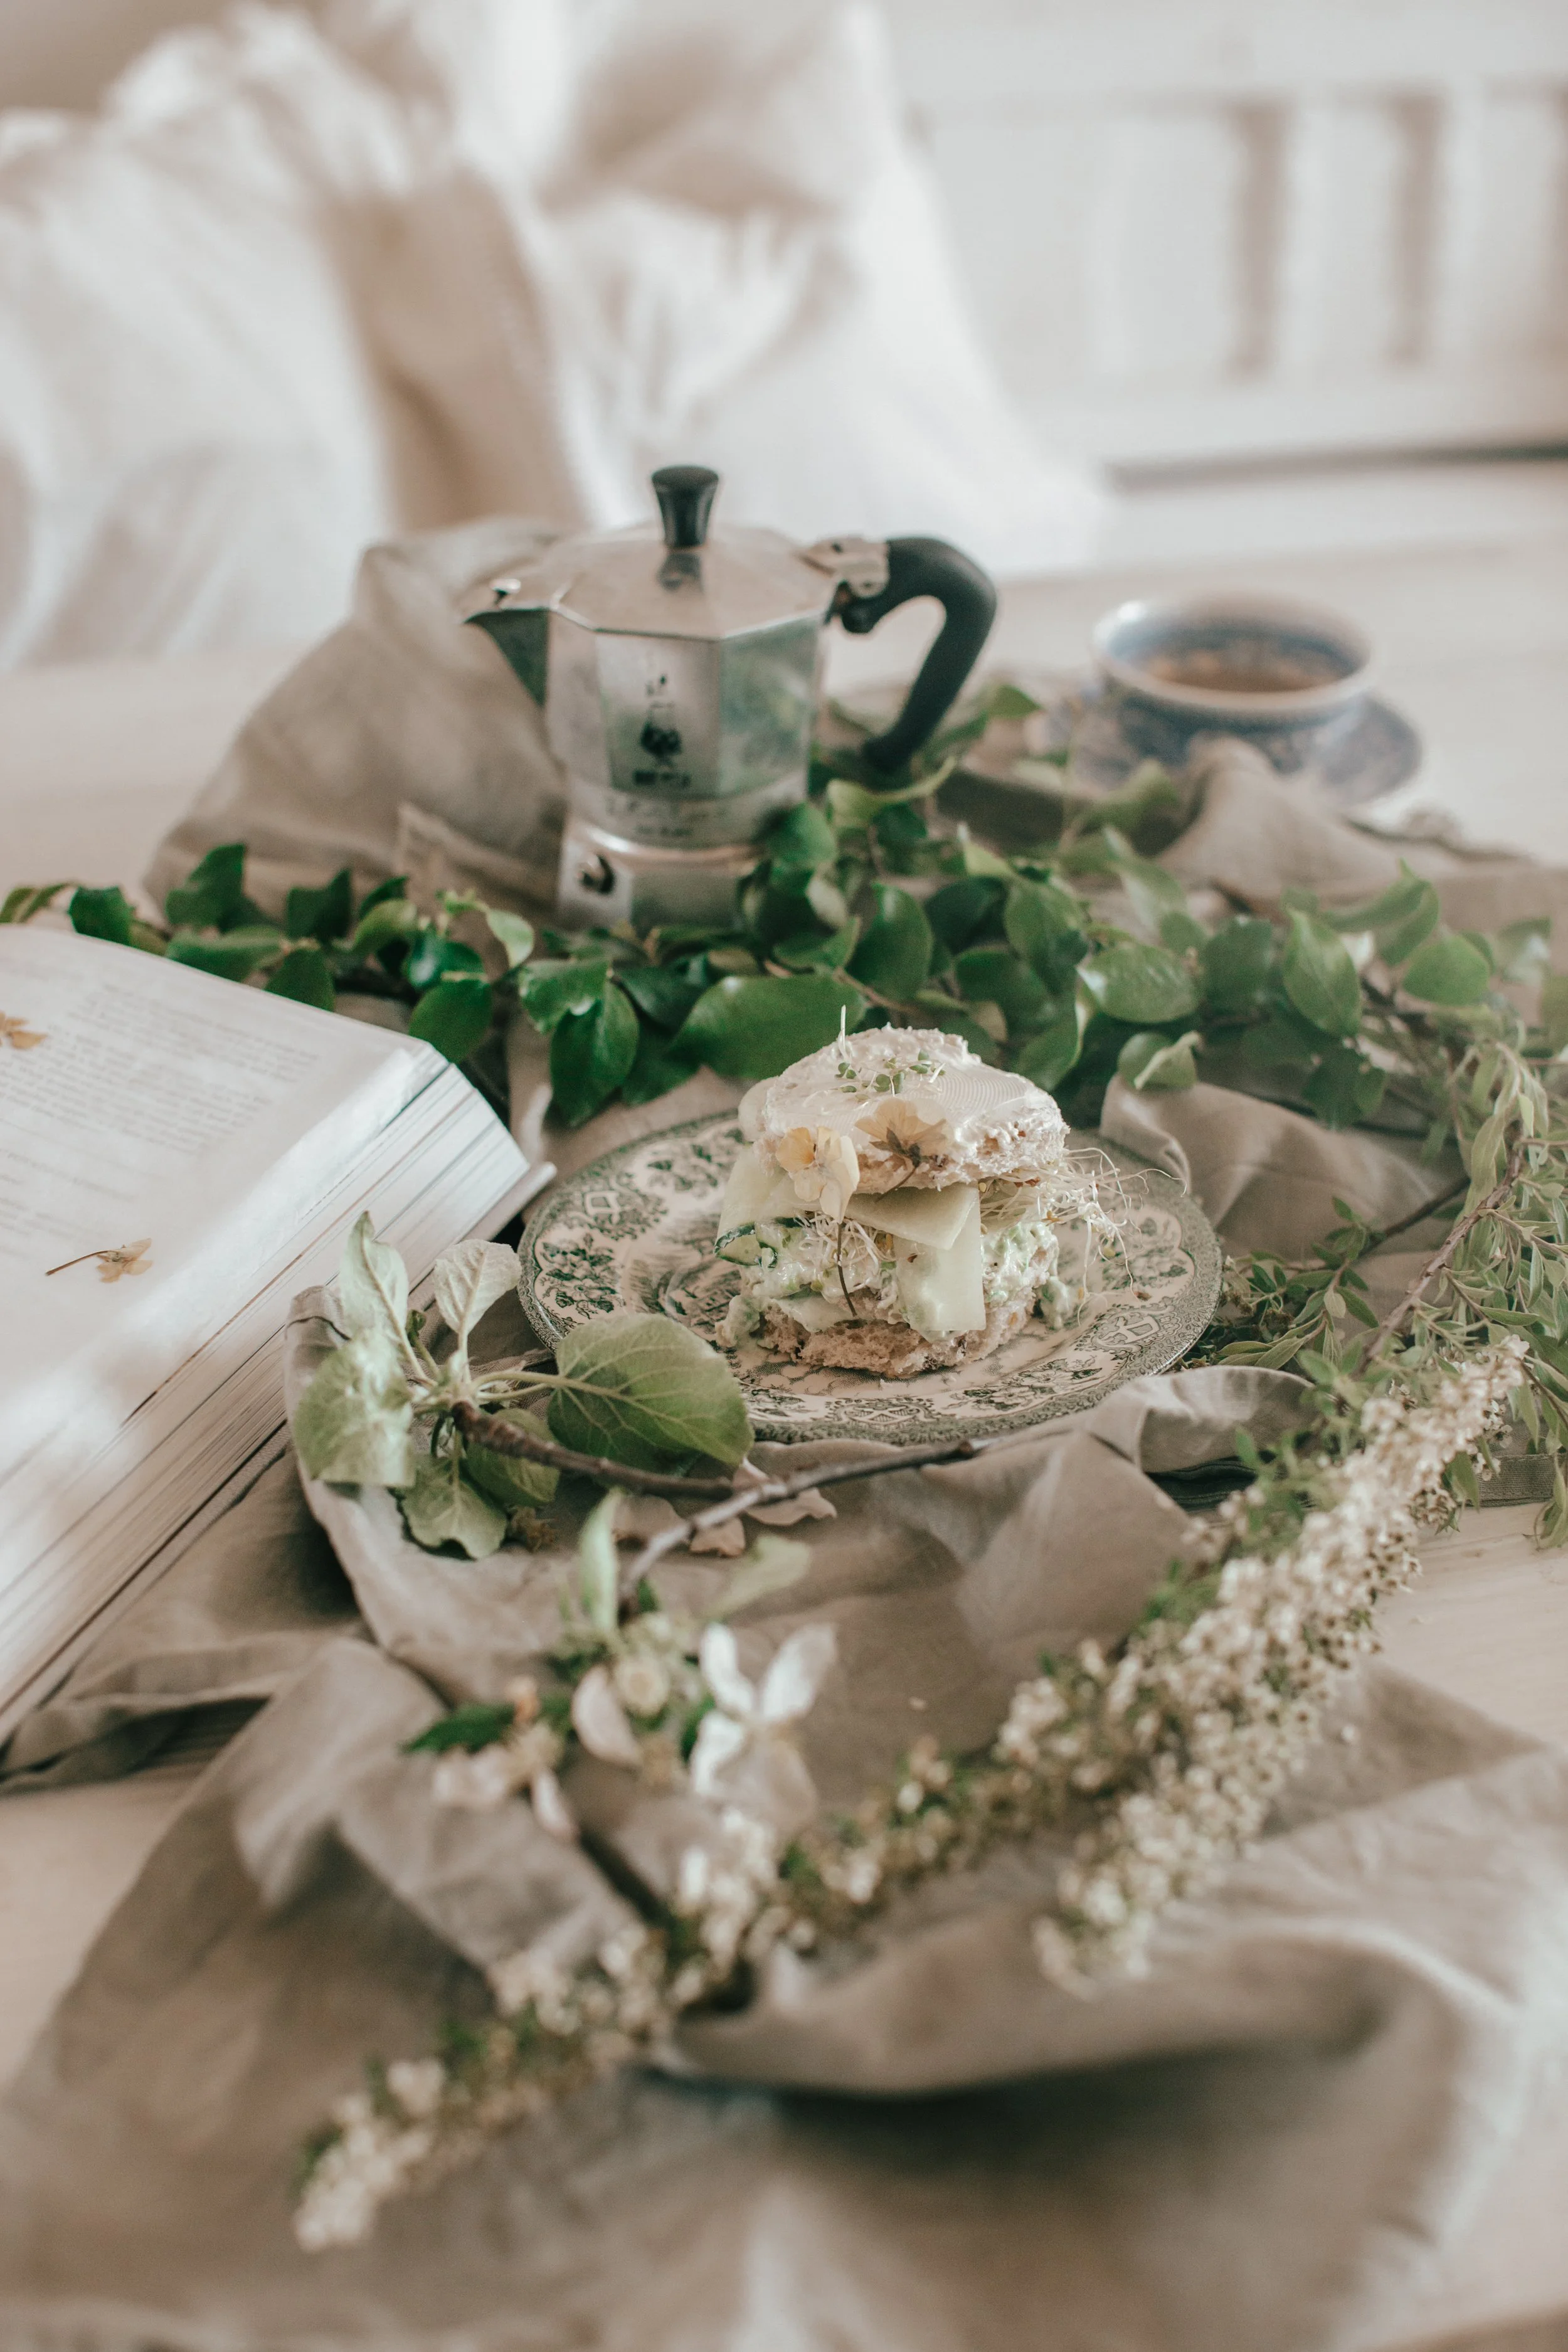
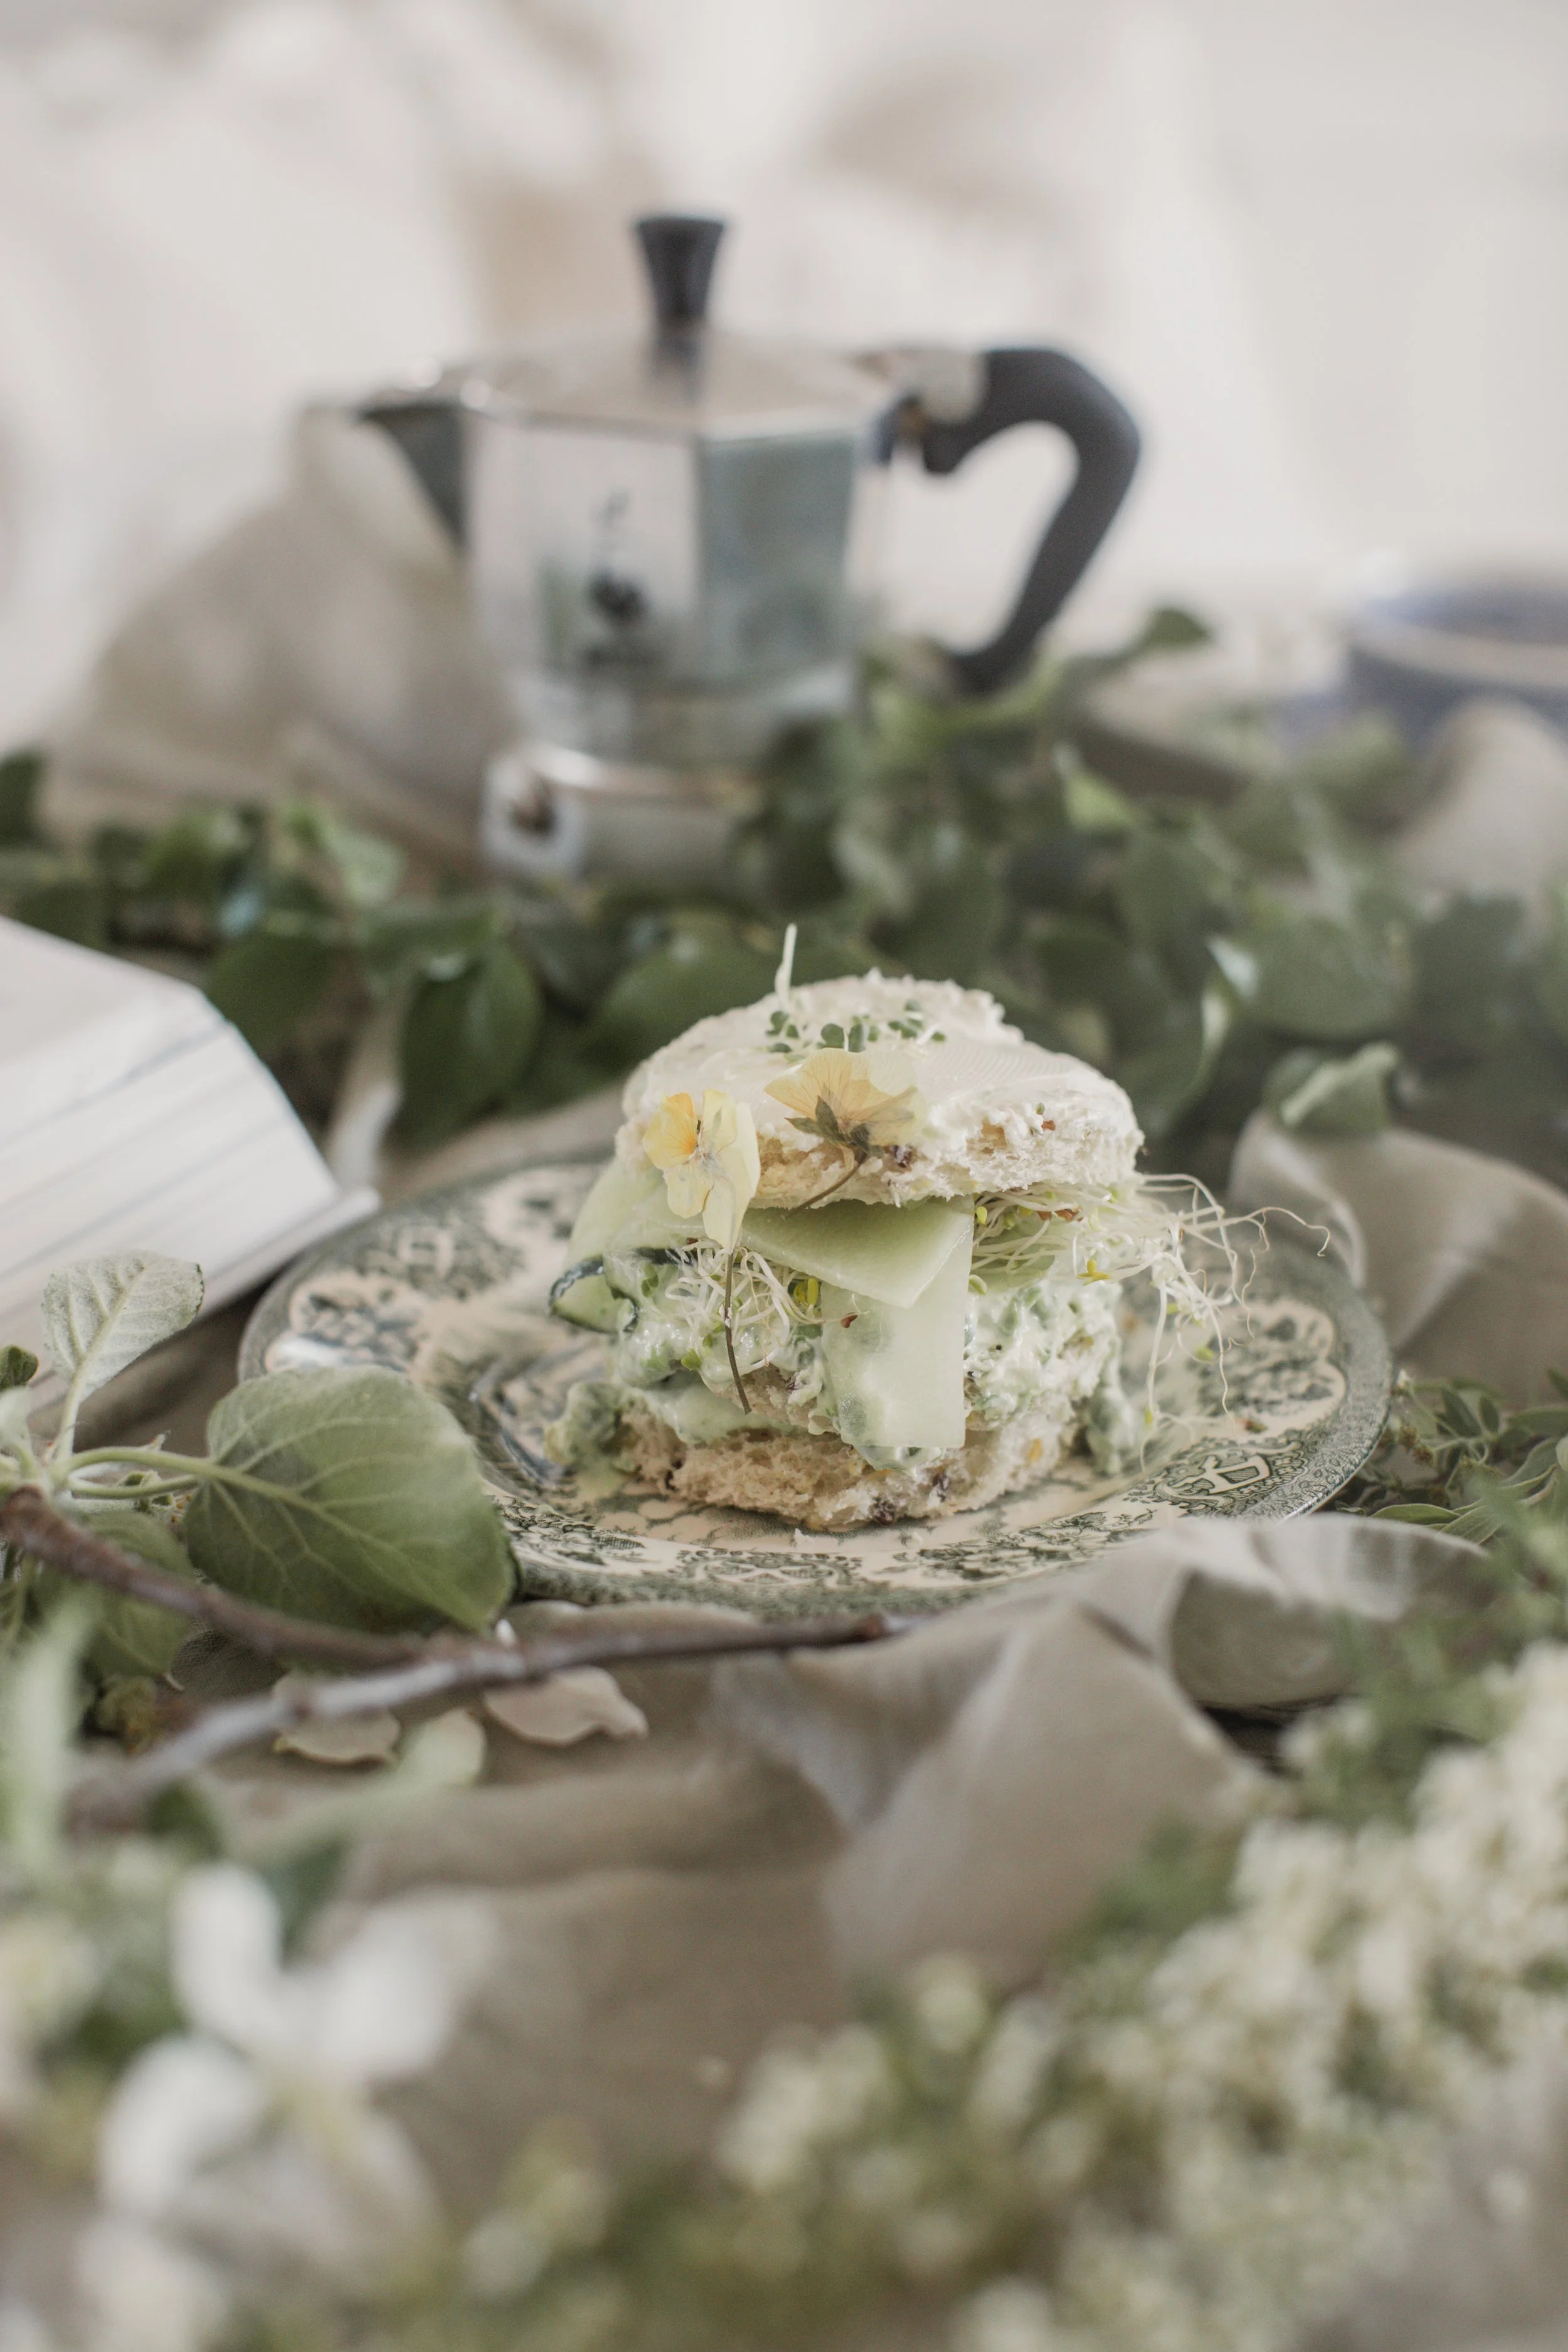
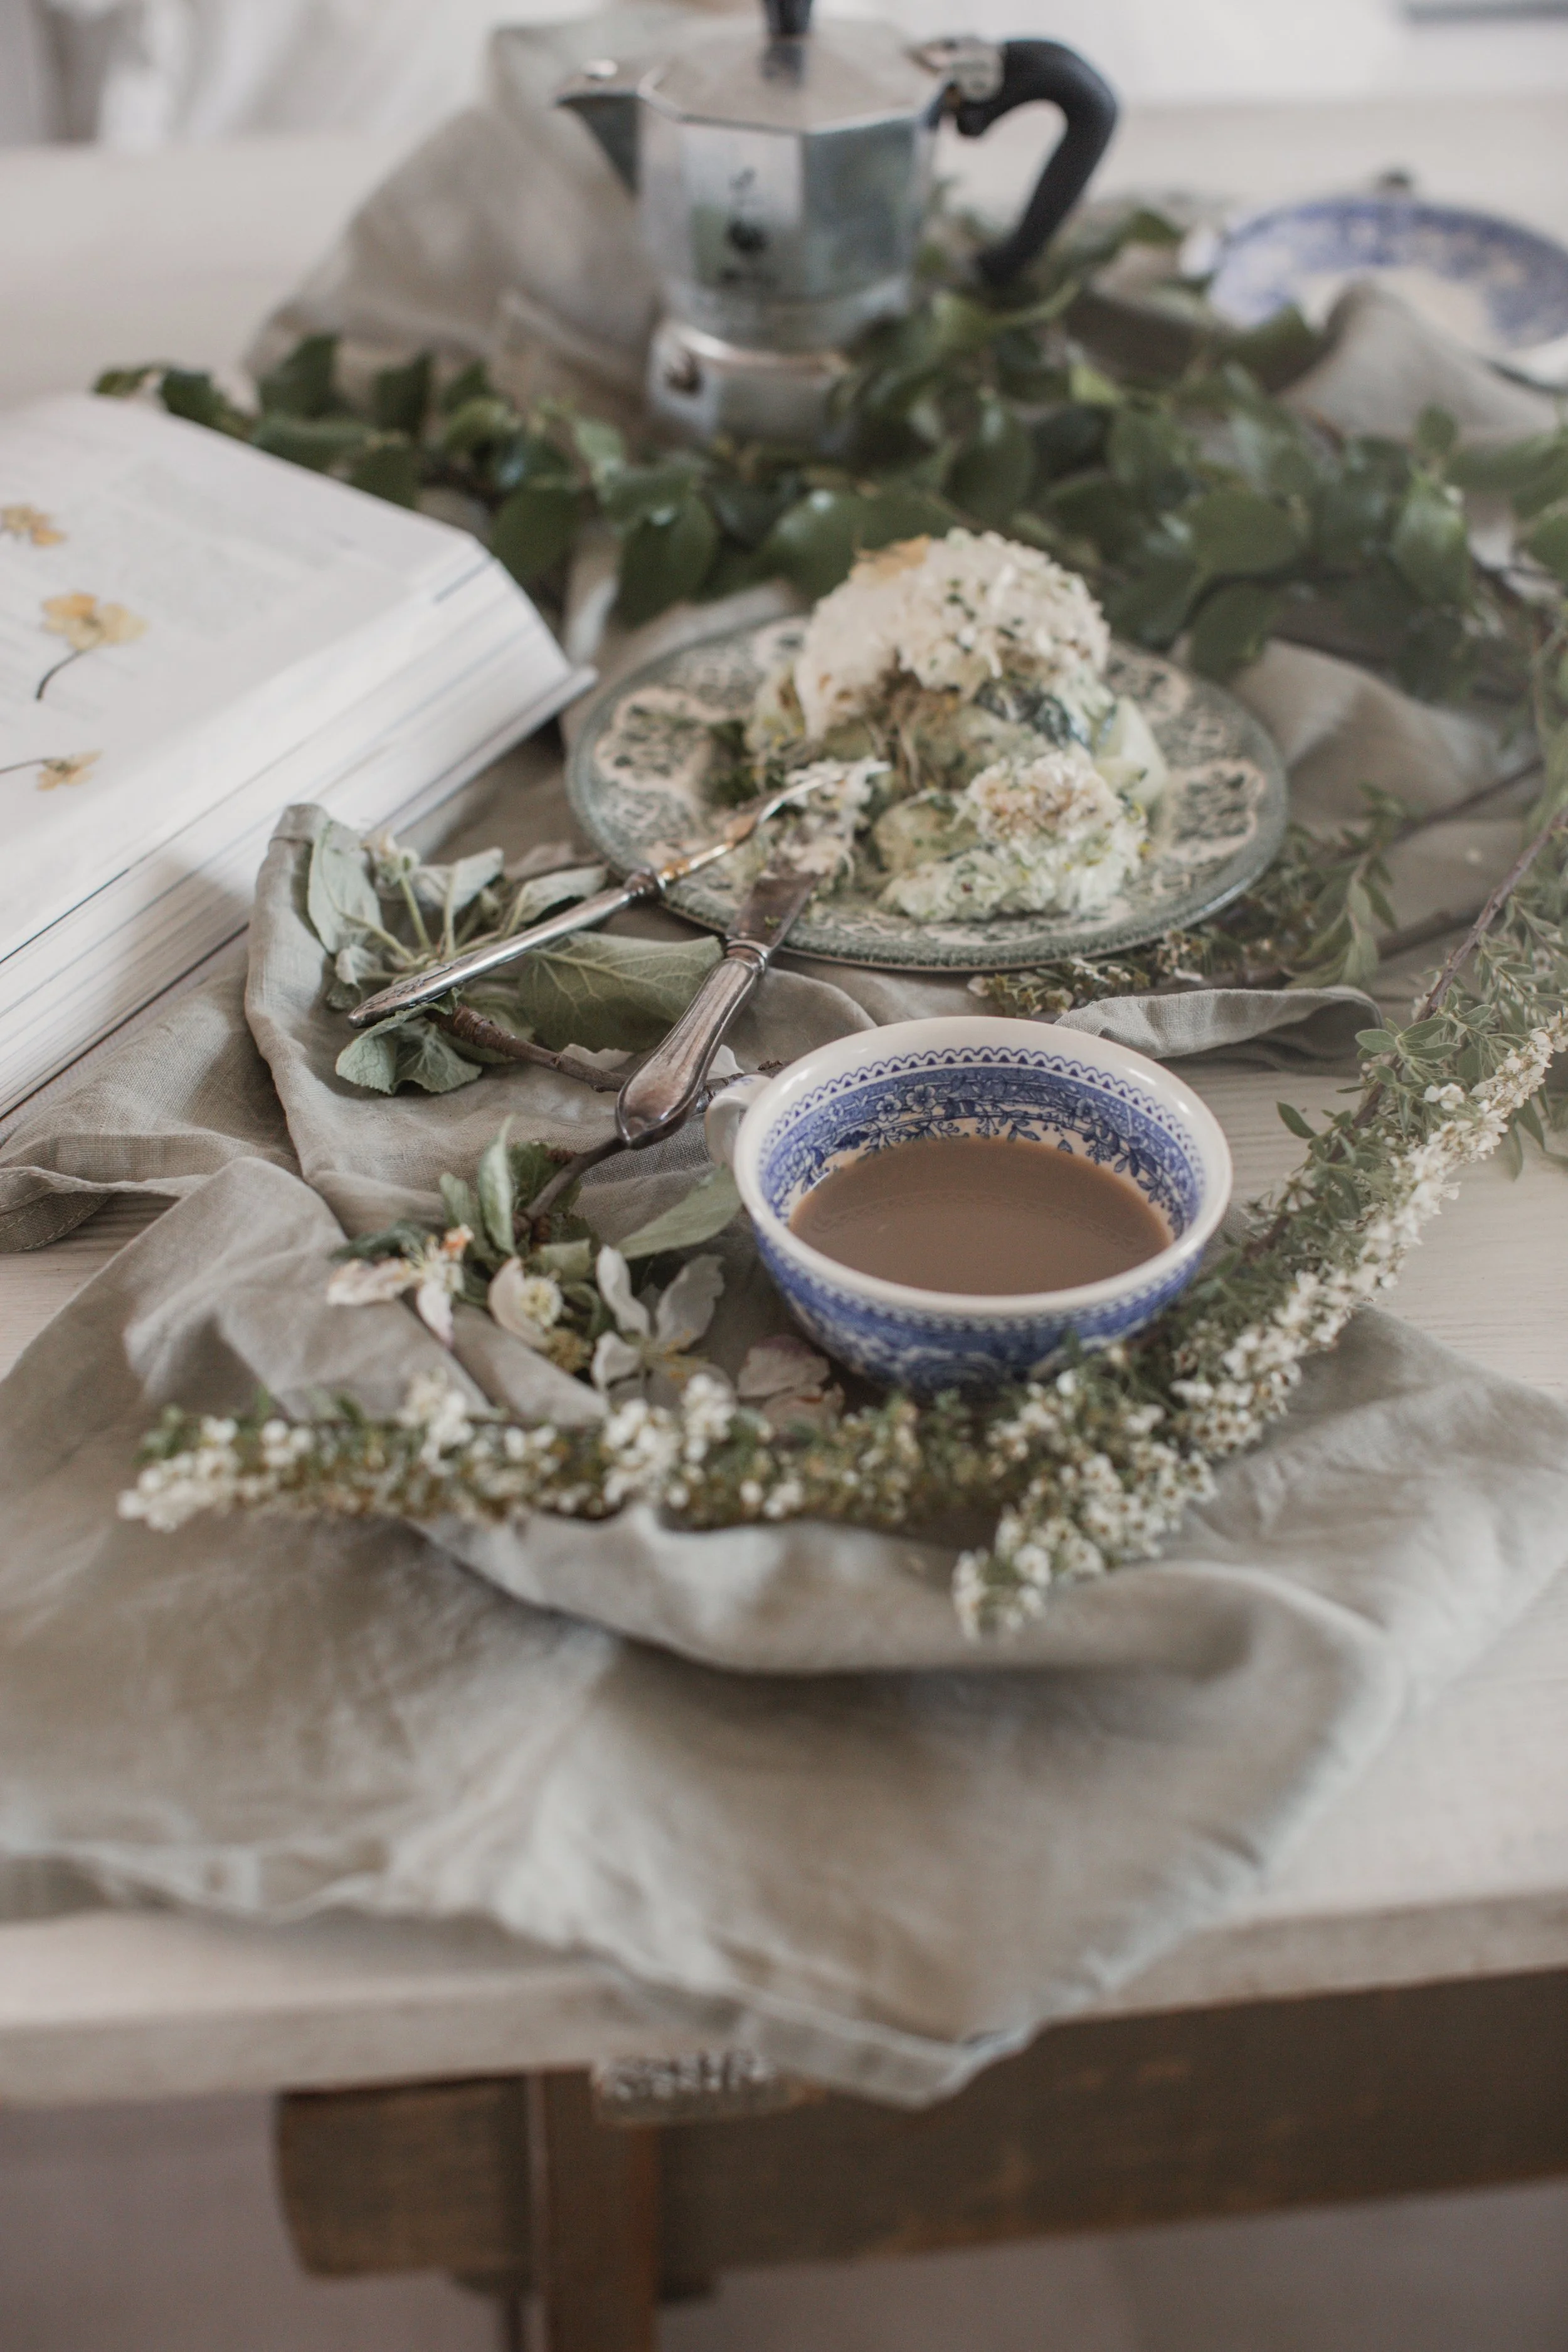
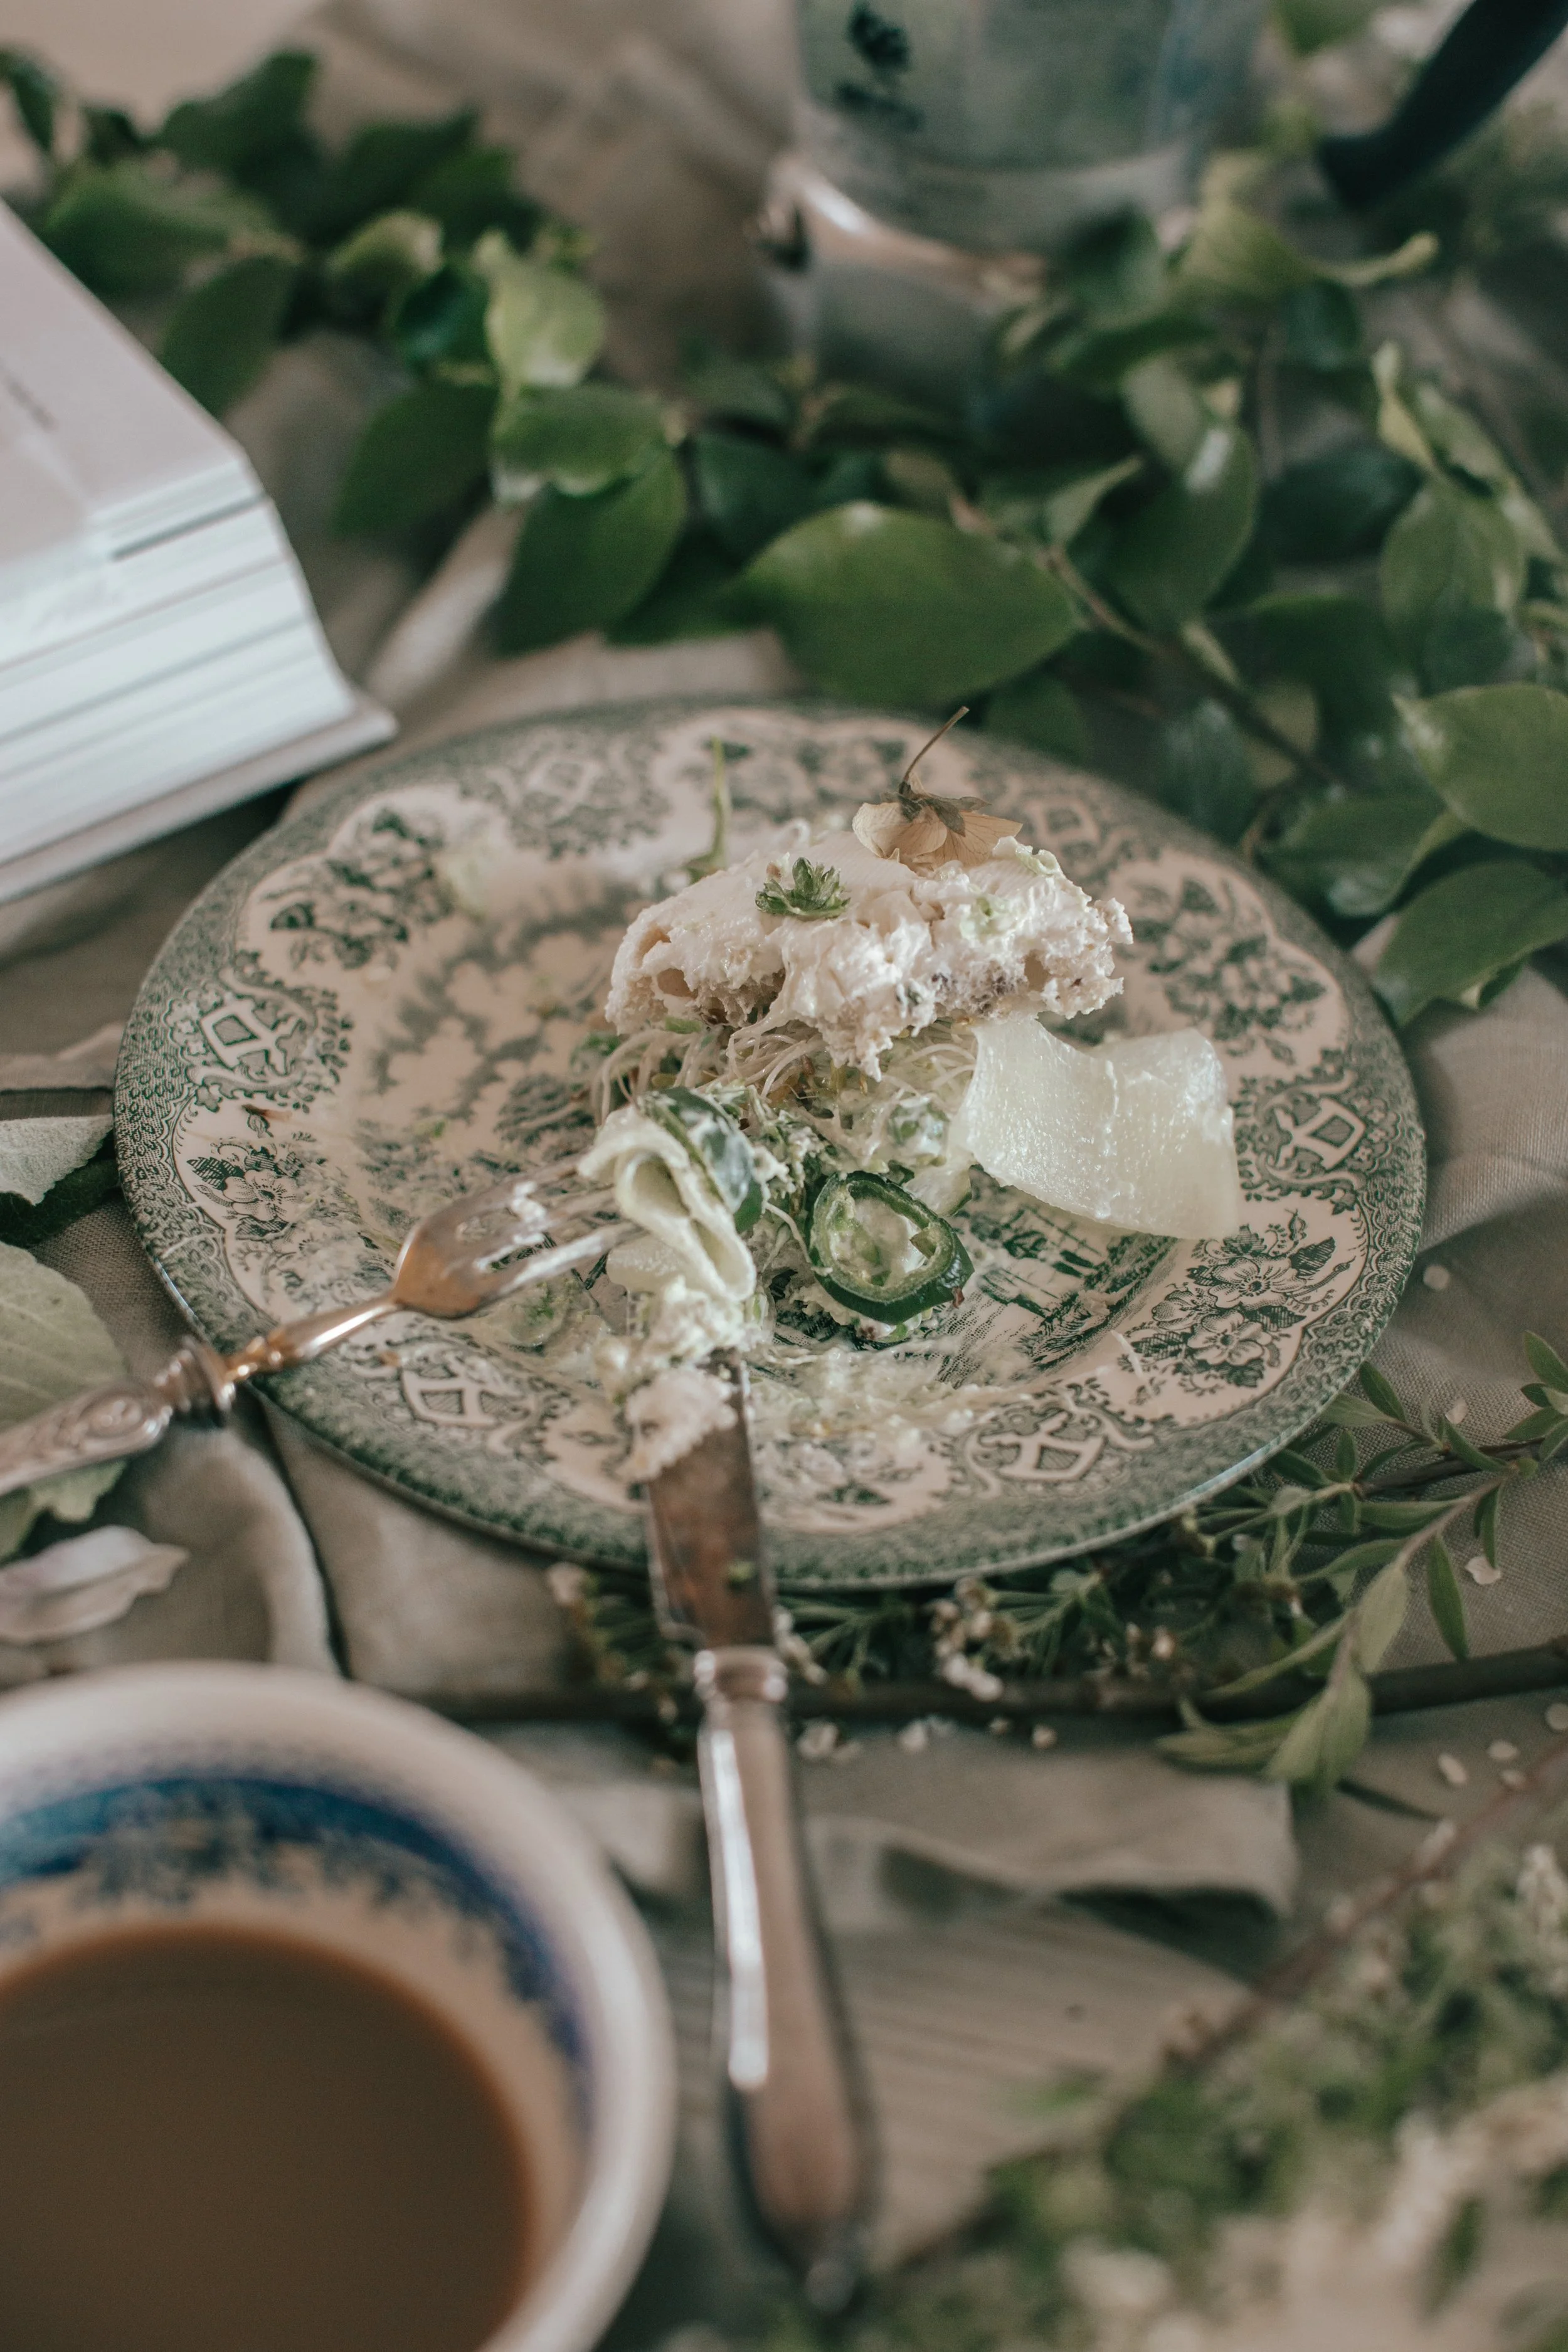
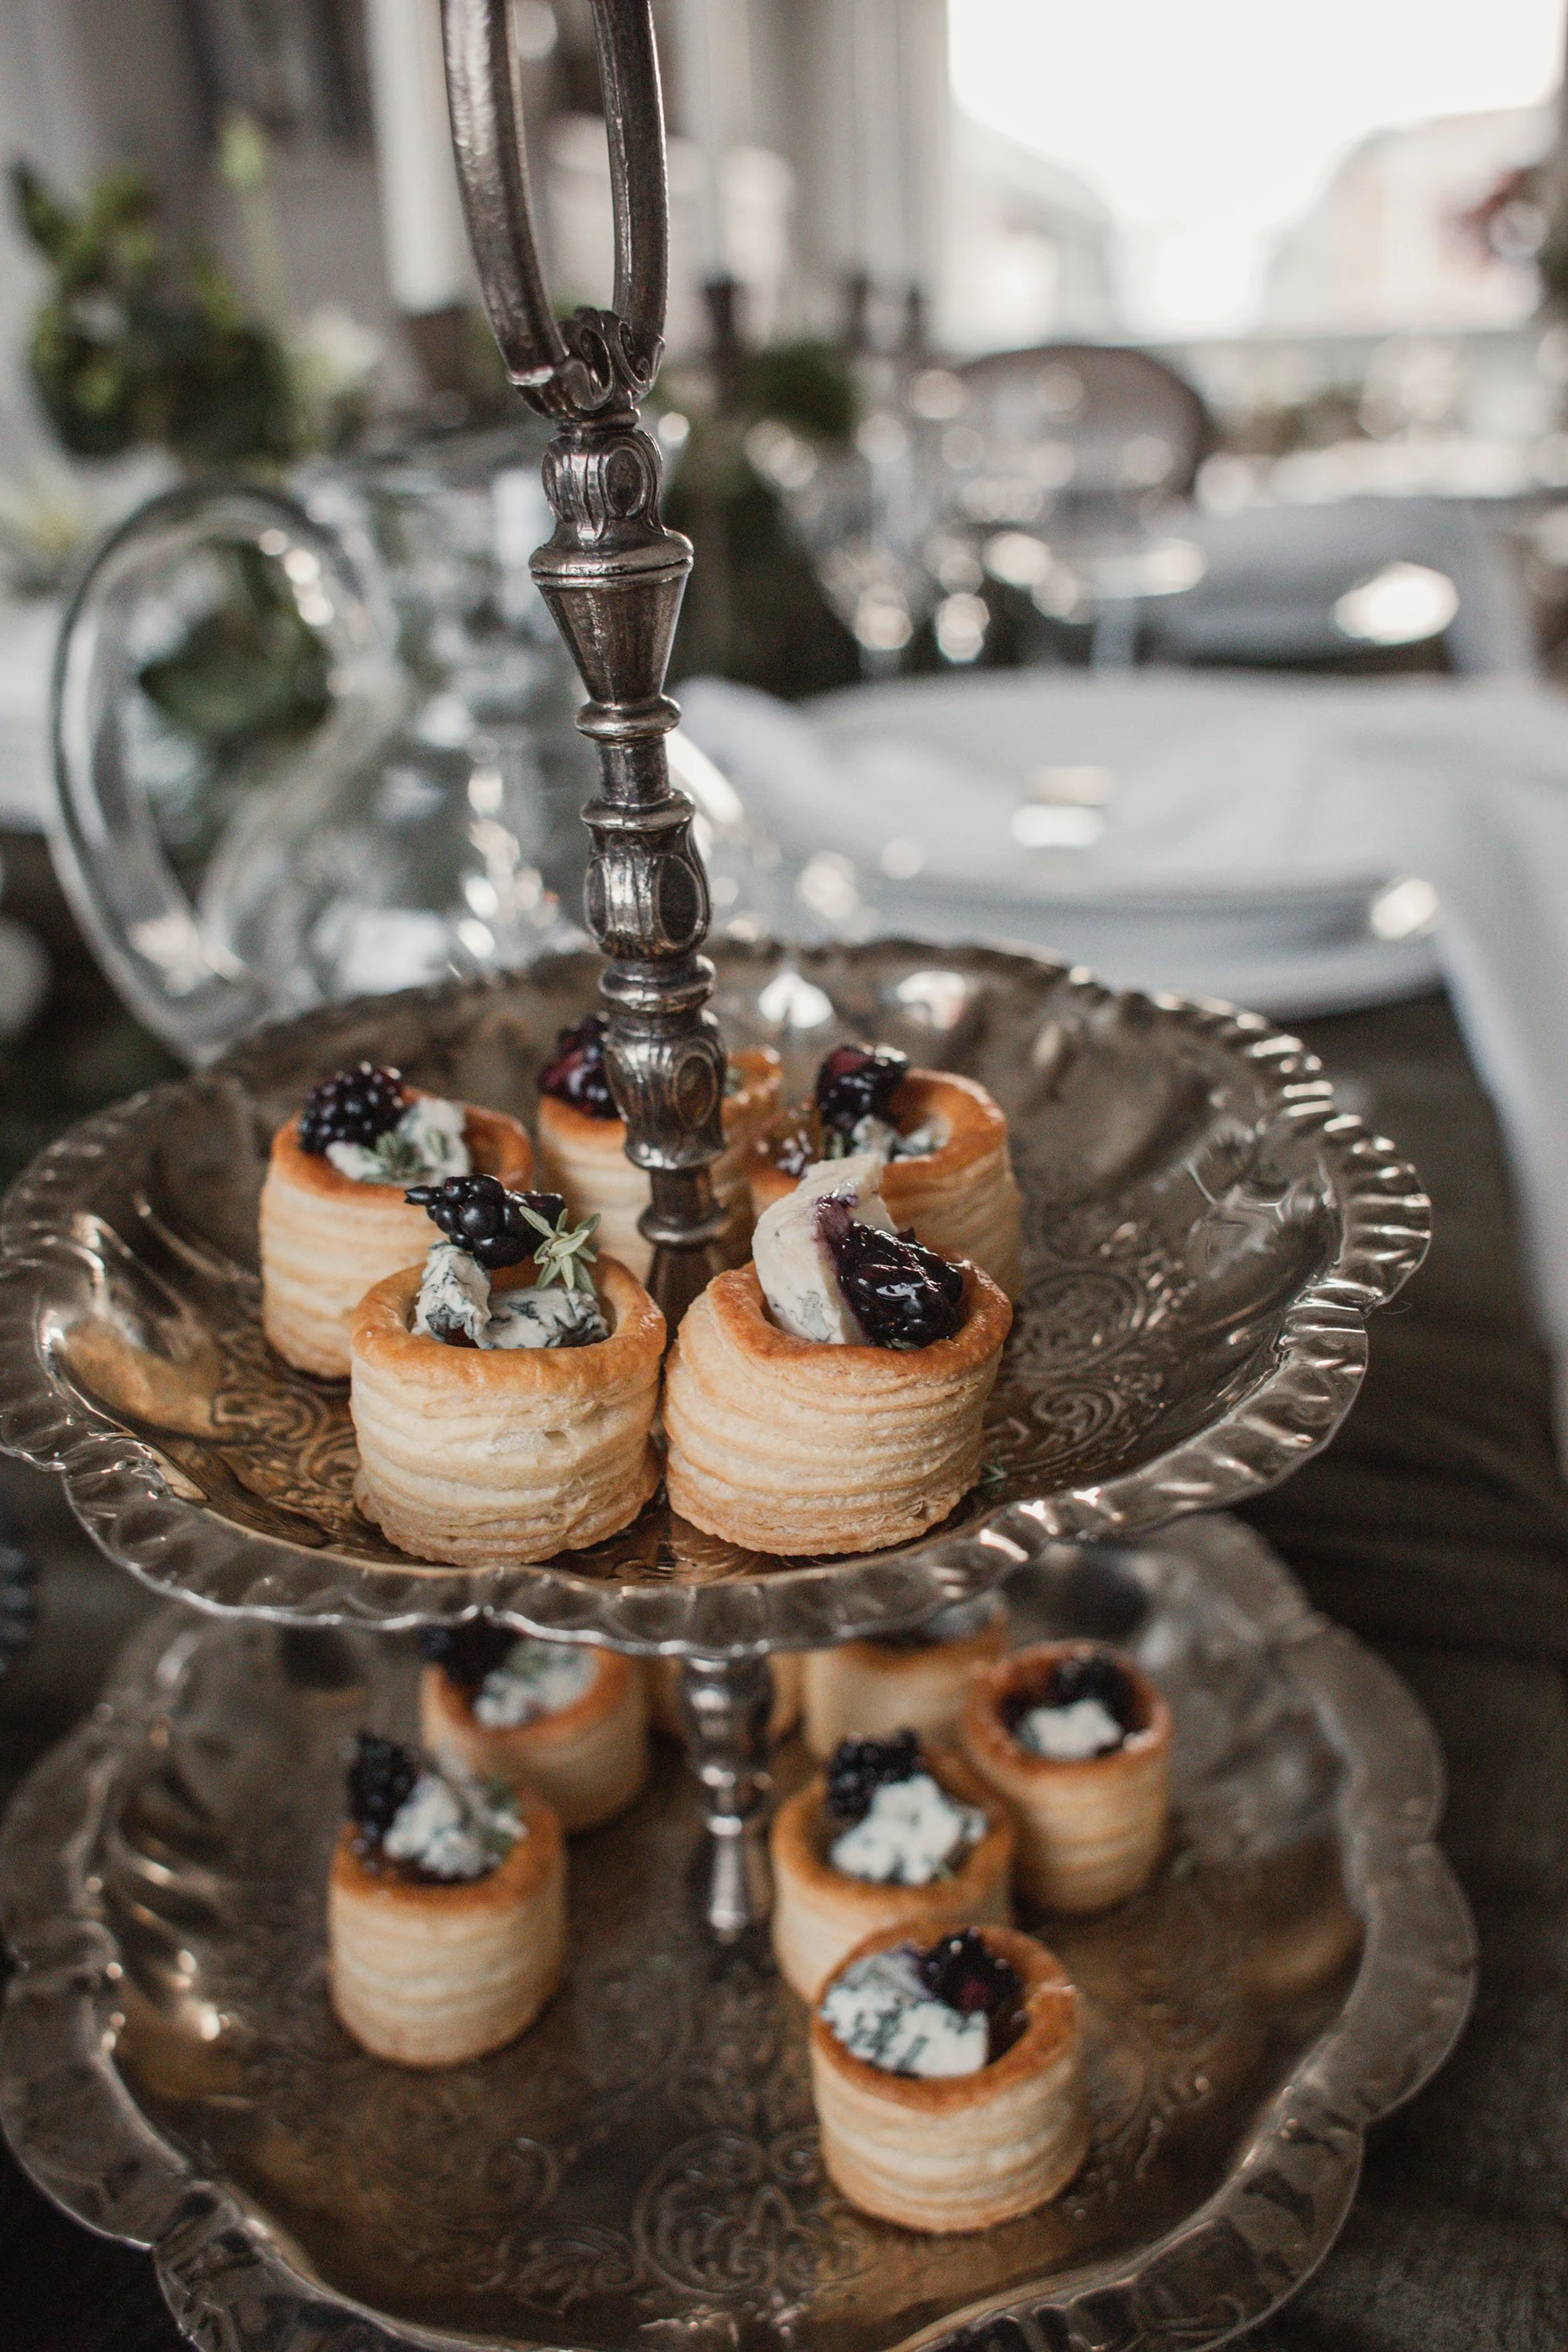
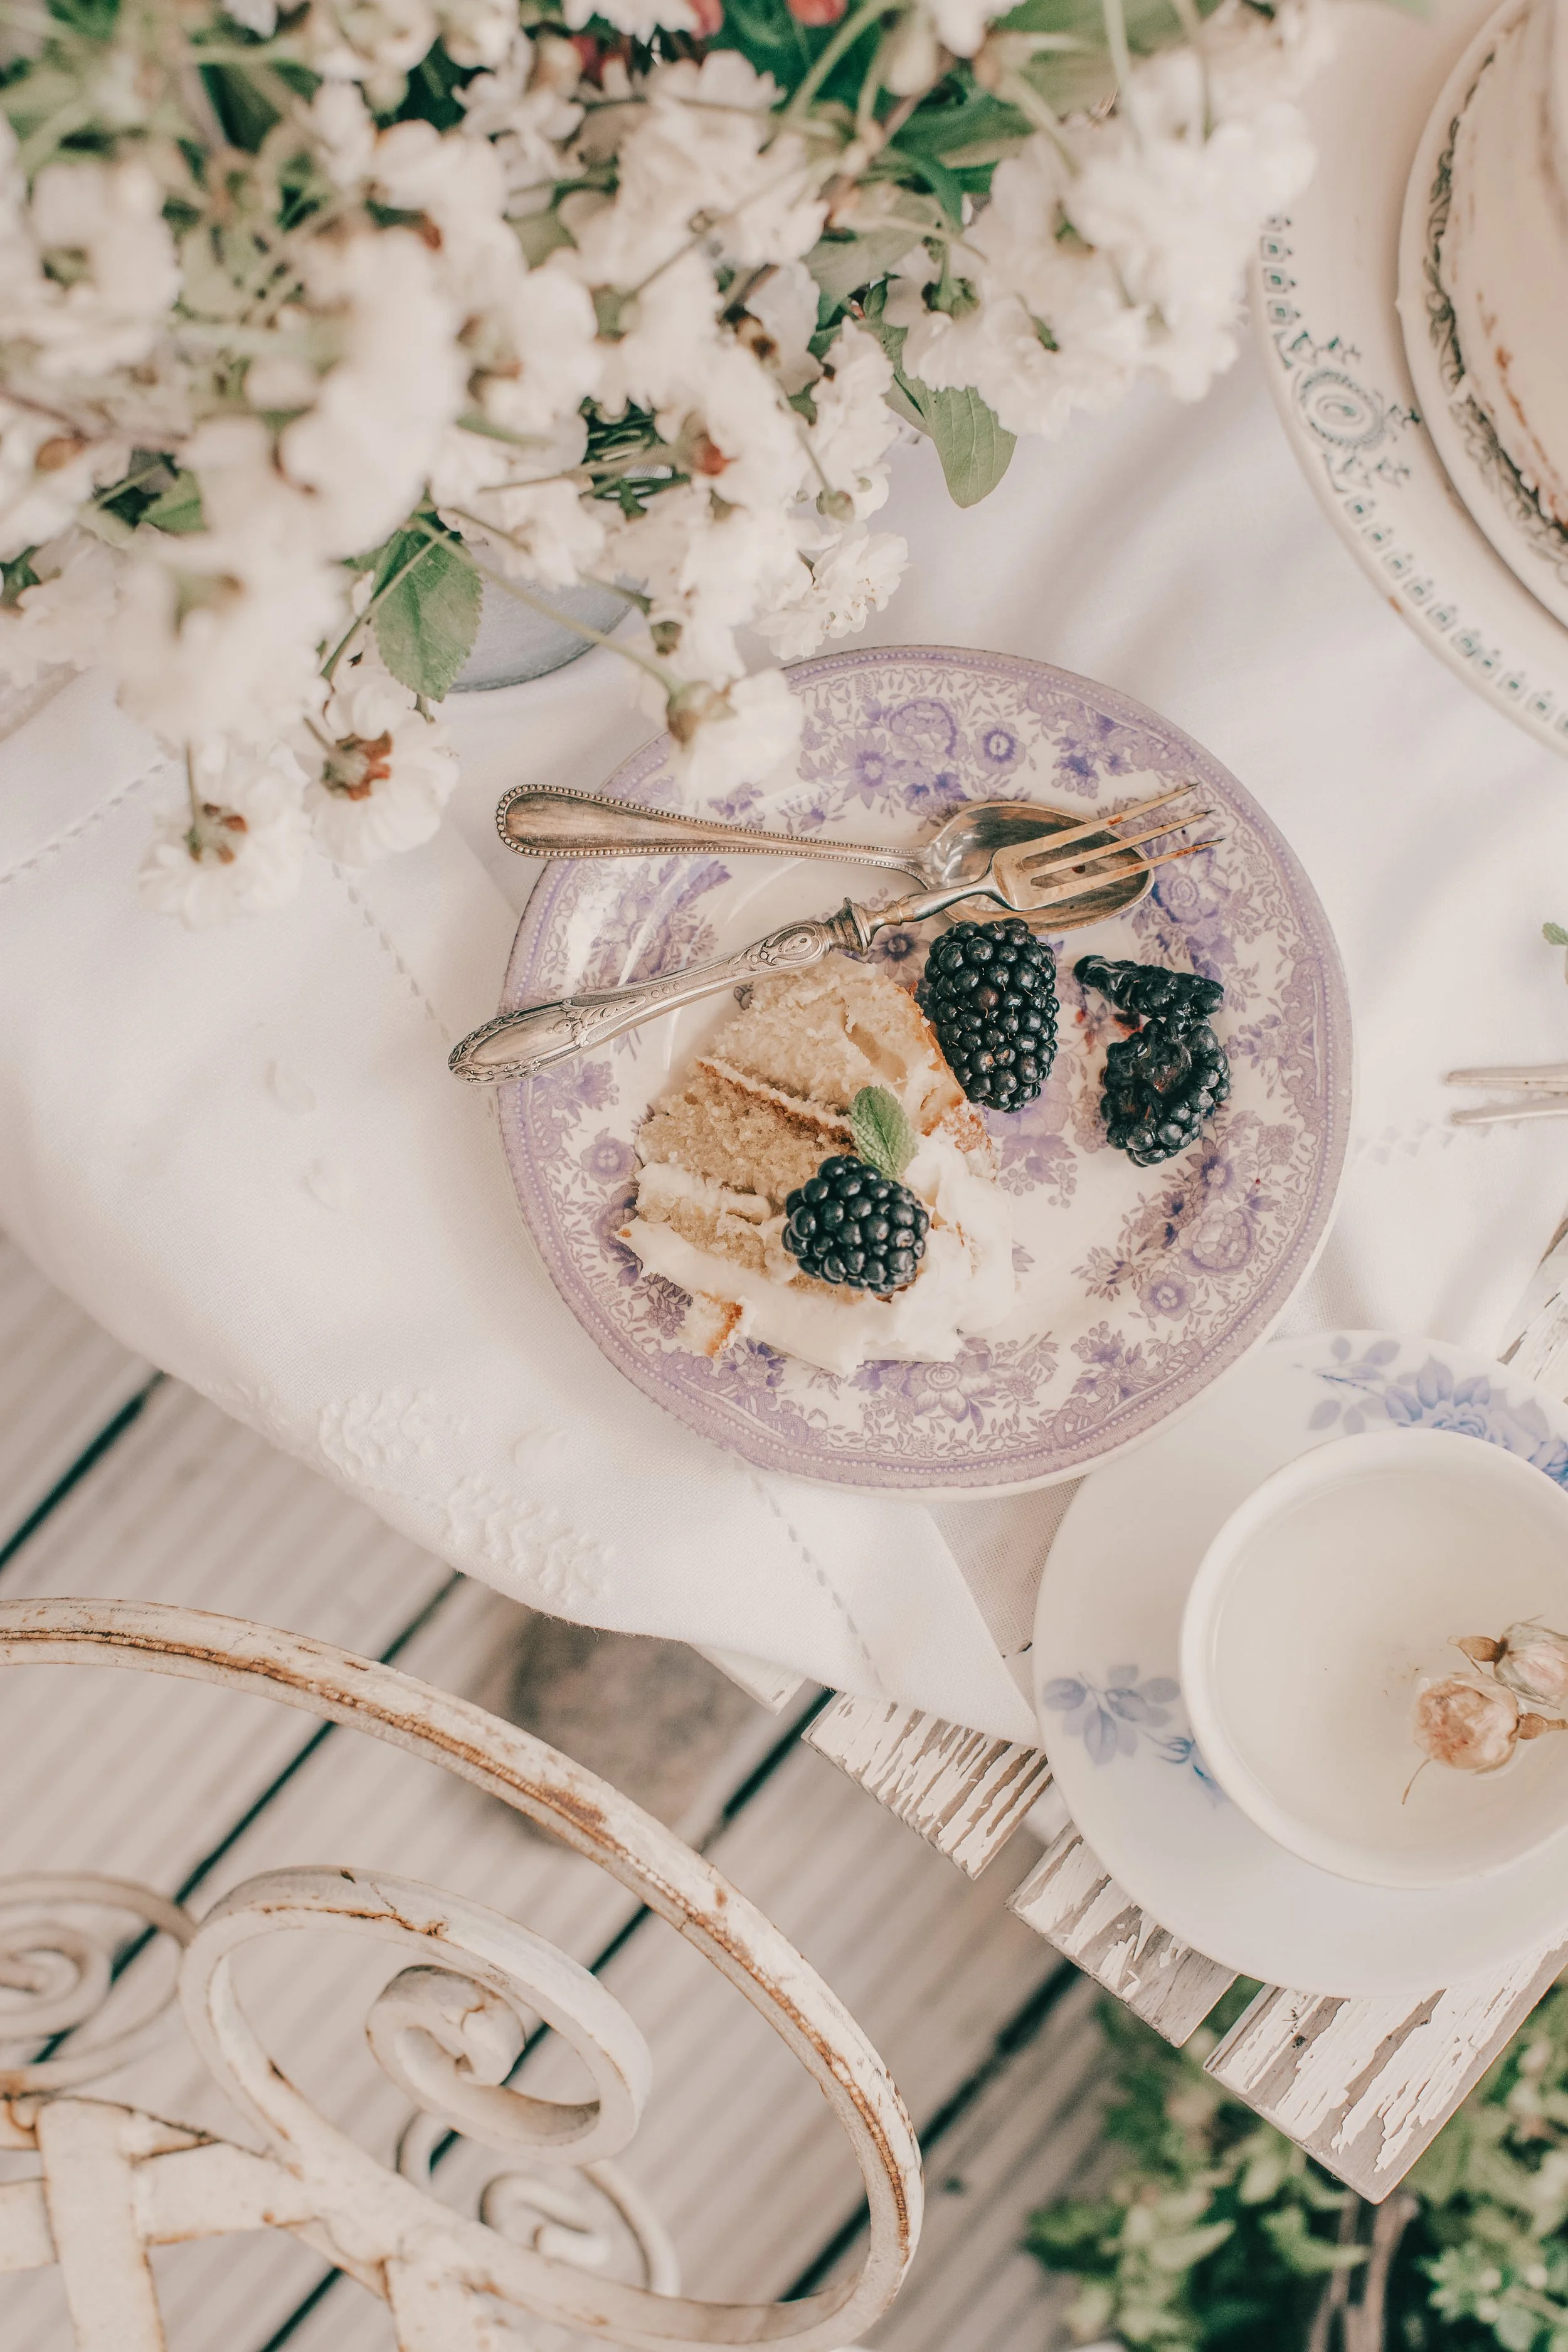
Tea Sandwich Cake with Pea Herb Cream
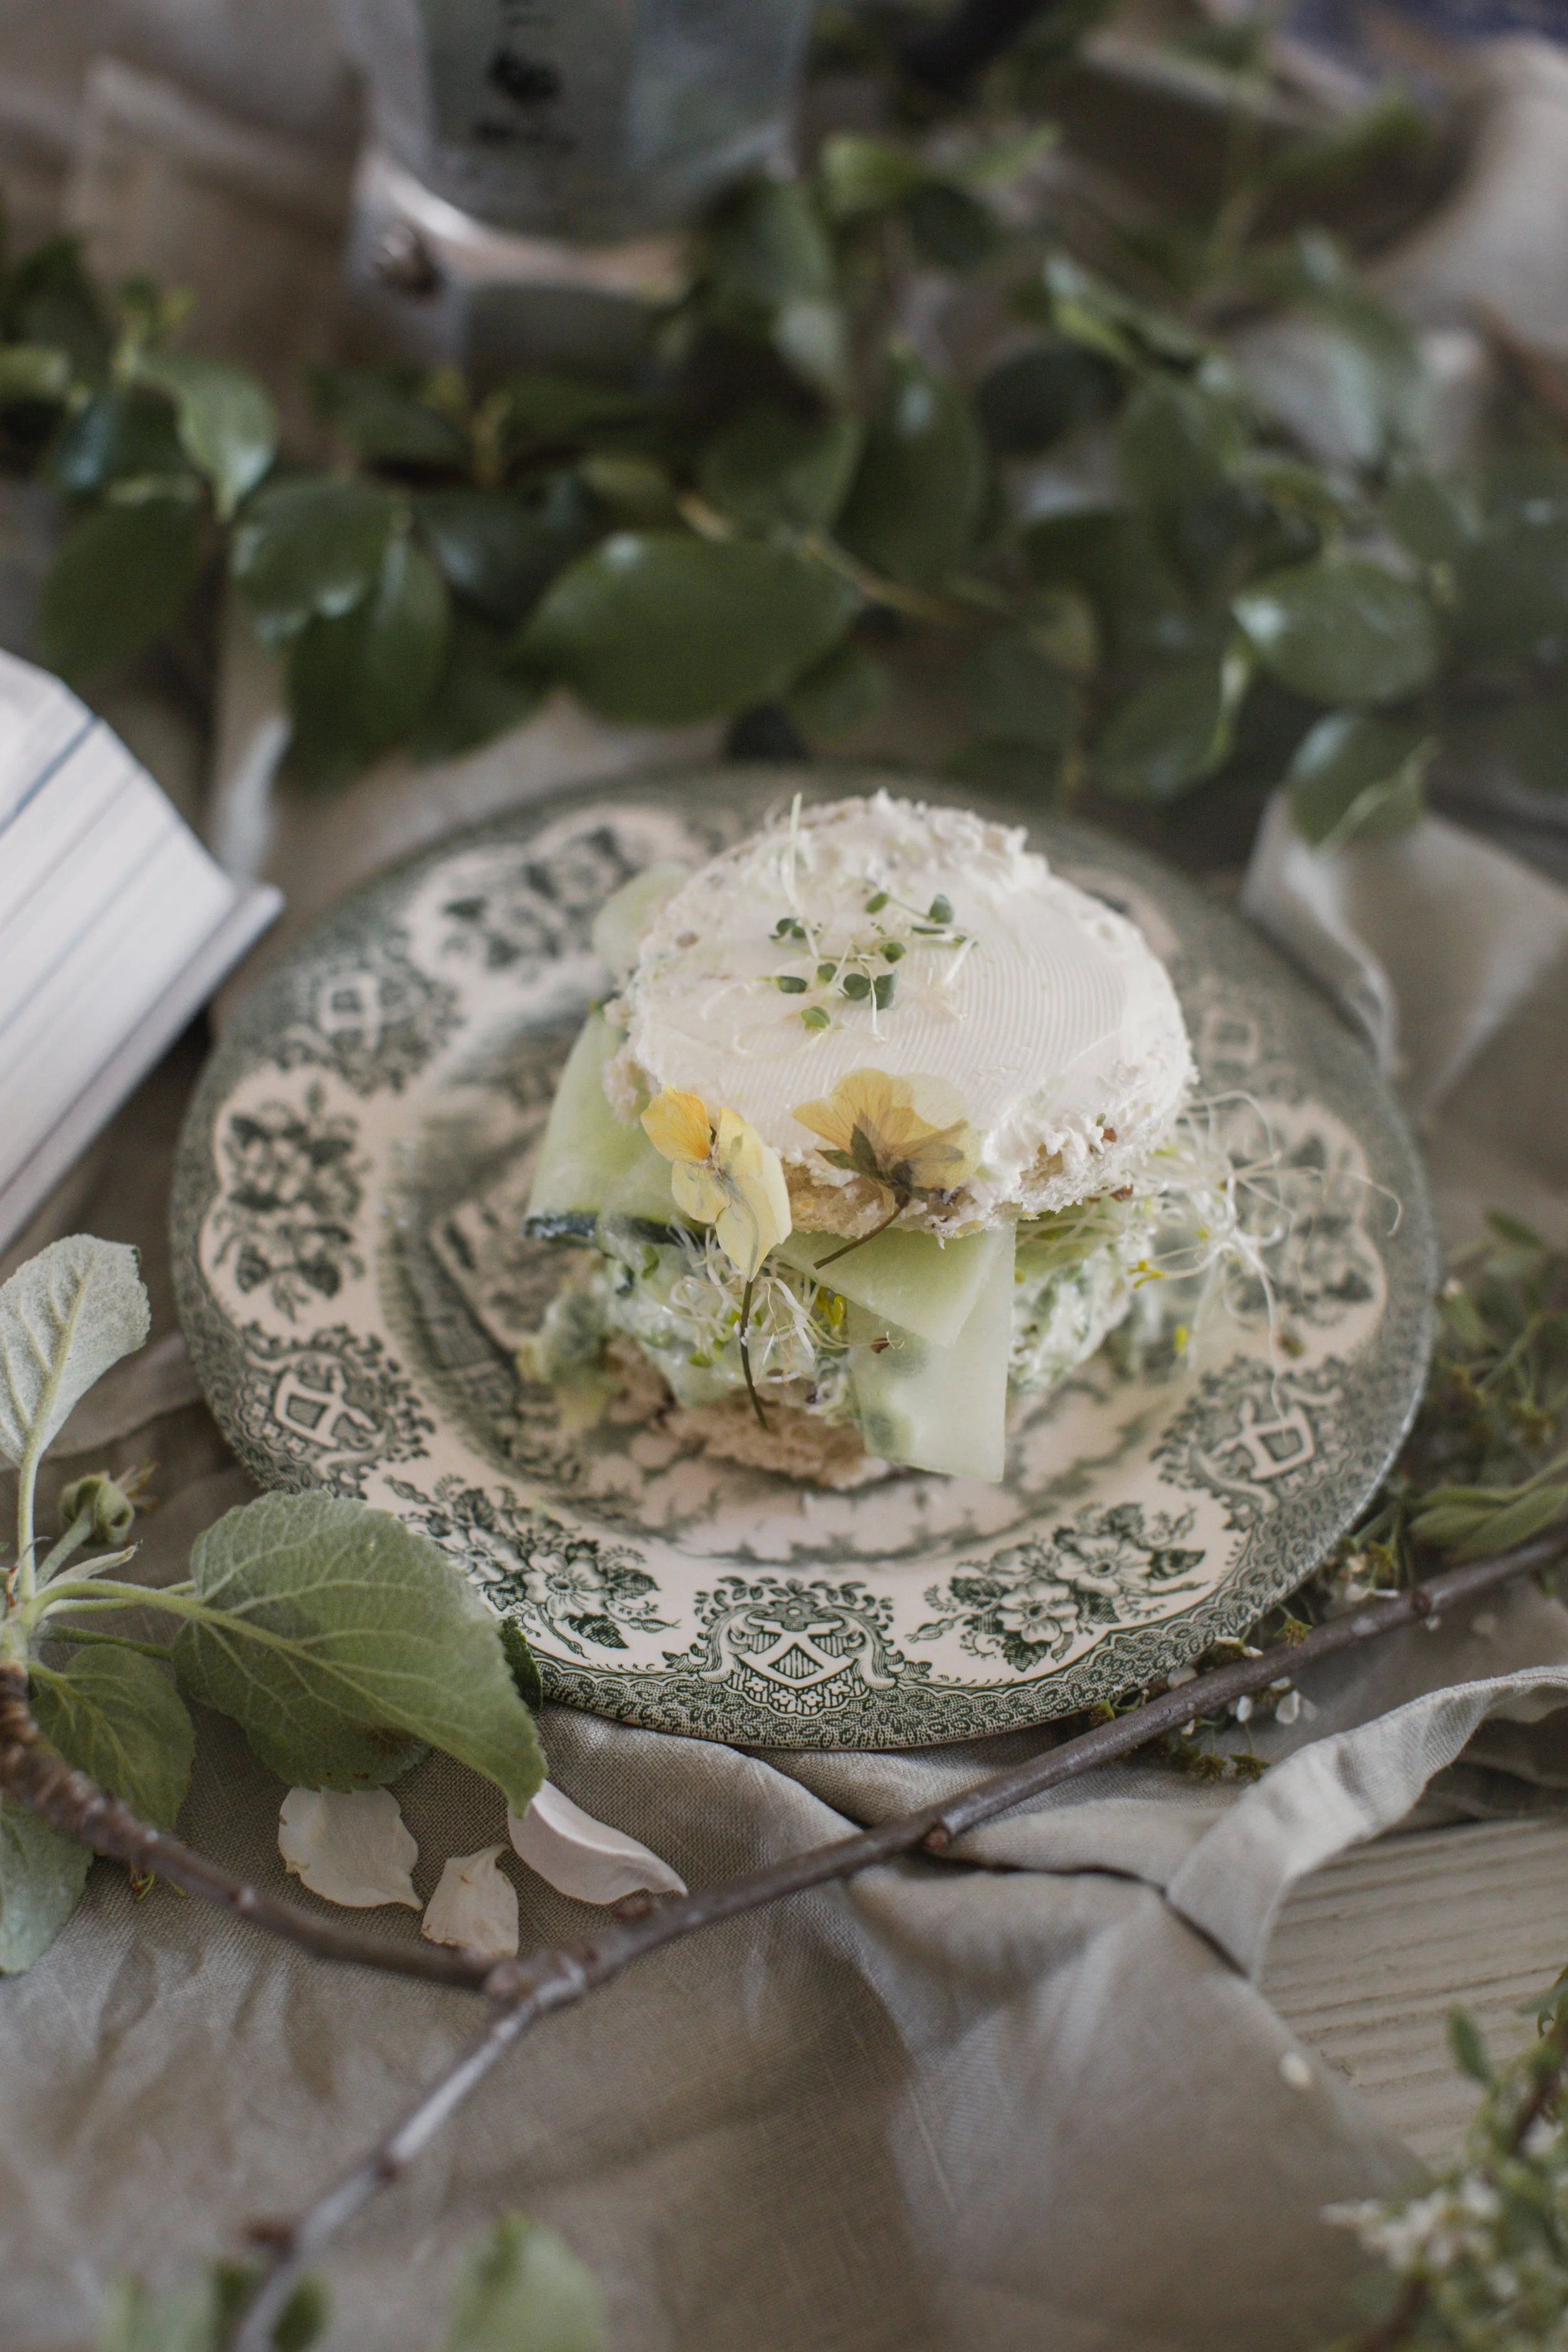
Delicate, fresh, and almost too pretty to eat, this tea sandwich cake transforms simple ingredients into an elegant centerpiece for brunches, garden parties, brirthdays, or slow afternoon tea. Built with three layers of soft toast bread cut into perfect rounds, this savory “cake” is layered with a vibrant pea and herb cream — a silky blend of peas, basil, parsley, Greek yogurt, cream cheese, and olive oil. Thin cucumber ribbons, broccoli sprouts, and jalapeños add freshness, crunch, and just a hint of heat between each tier.
Finished with a soft cream cheese frosting and decorated with dried violet flowers, it feels romantic and whimsical while still being wonderfully easy to assemble. The result is light, creamy, herbaceous, and beautifully balanced — somewhere between a classic English tea sandwich and an edible spring tablescape.

Serves 4
Ingredients
For the Pea Herb Cream
2 cups frozen peas, thawed
½ cup cream cheese, softened
¼ cup Greek yogurt
2 tablespoons olive oil
Small handful fresh basil
Small handful fresh parsley
Salt and black pepper, to taste
For the Layers
12 slices soft toast bread
½ cucumber, shaved into ribbons
½ cup broccoli sprouts
Fresh jalapeño slices, to taste
For the Frosting
½ cup cream cheese
2–3 tablespoons Greek yogurt
For Decoration
Dried violet flowers
Extra sprouts or herbs (optional)
Instructions
1. Prepare the Pea Herb Cream
Add the thawed peas, cream cheese, Greek yogurt, olive oil, basil, parsley, salt, and pepper to a bowl or tall container. Blend with a hand-held blender until smooth and creamy. Taste and adjust seasoning if needed.
2. Cut the Bread
Using a round cookie cutter or circle mold, cut each slice of toast bread into circles. You will need three rounds for stacking per mini cake. So depending on how many cakes you want, you need to x3.
3. Assemble the First Layer
Place one bread round onto a serving plate. Spread a generous layer of the pea herb cream on top. Add cucumber ribbons, broccoli sprouts, and a few jalapeño slices.
4. Repeat the Layers
Add the second bread round and repeat with the pea mixture, cucumber ribbons, sprouts, and jalapeños. Add the final layer of bread on top.
5. Frost the Top
Mix the cream cheese and Greek yogurt until smooth. Spread a soft layer over the top of the sandwich cake for a clean, frosted finish.
6. Decorate
Gently decorate with dried violet flowers and additional sprouts or herbs if desired.
7. Serve
Serve immediately while fresh, or chill briefly before serving for a firmer texture and cleaner slices.
Notes
For a softer tea-sandwich texture, lightly trim the crusts before cutting the rounds.
The pea herb cream can be made a few hours ahead and refrigerated.
Add microgreens, edible flowers, or thin radish slices for extra color and texture.


Spring Florals & slow cooked Lamb Shanks
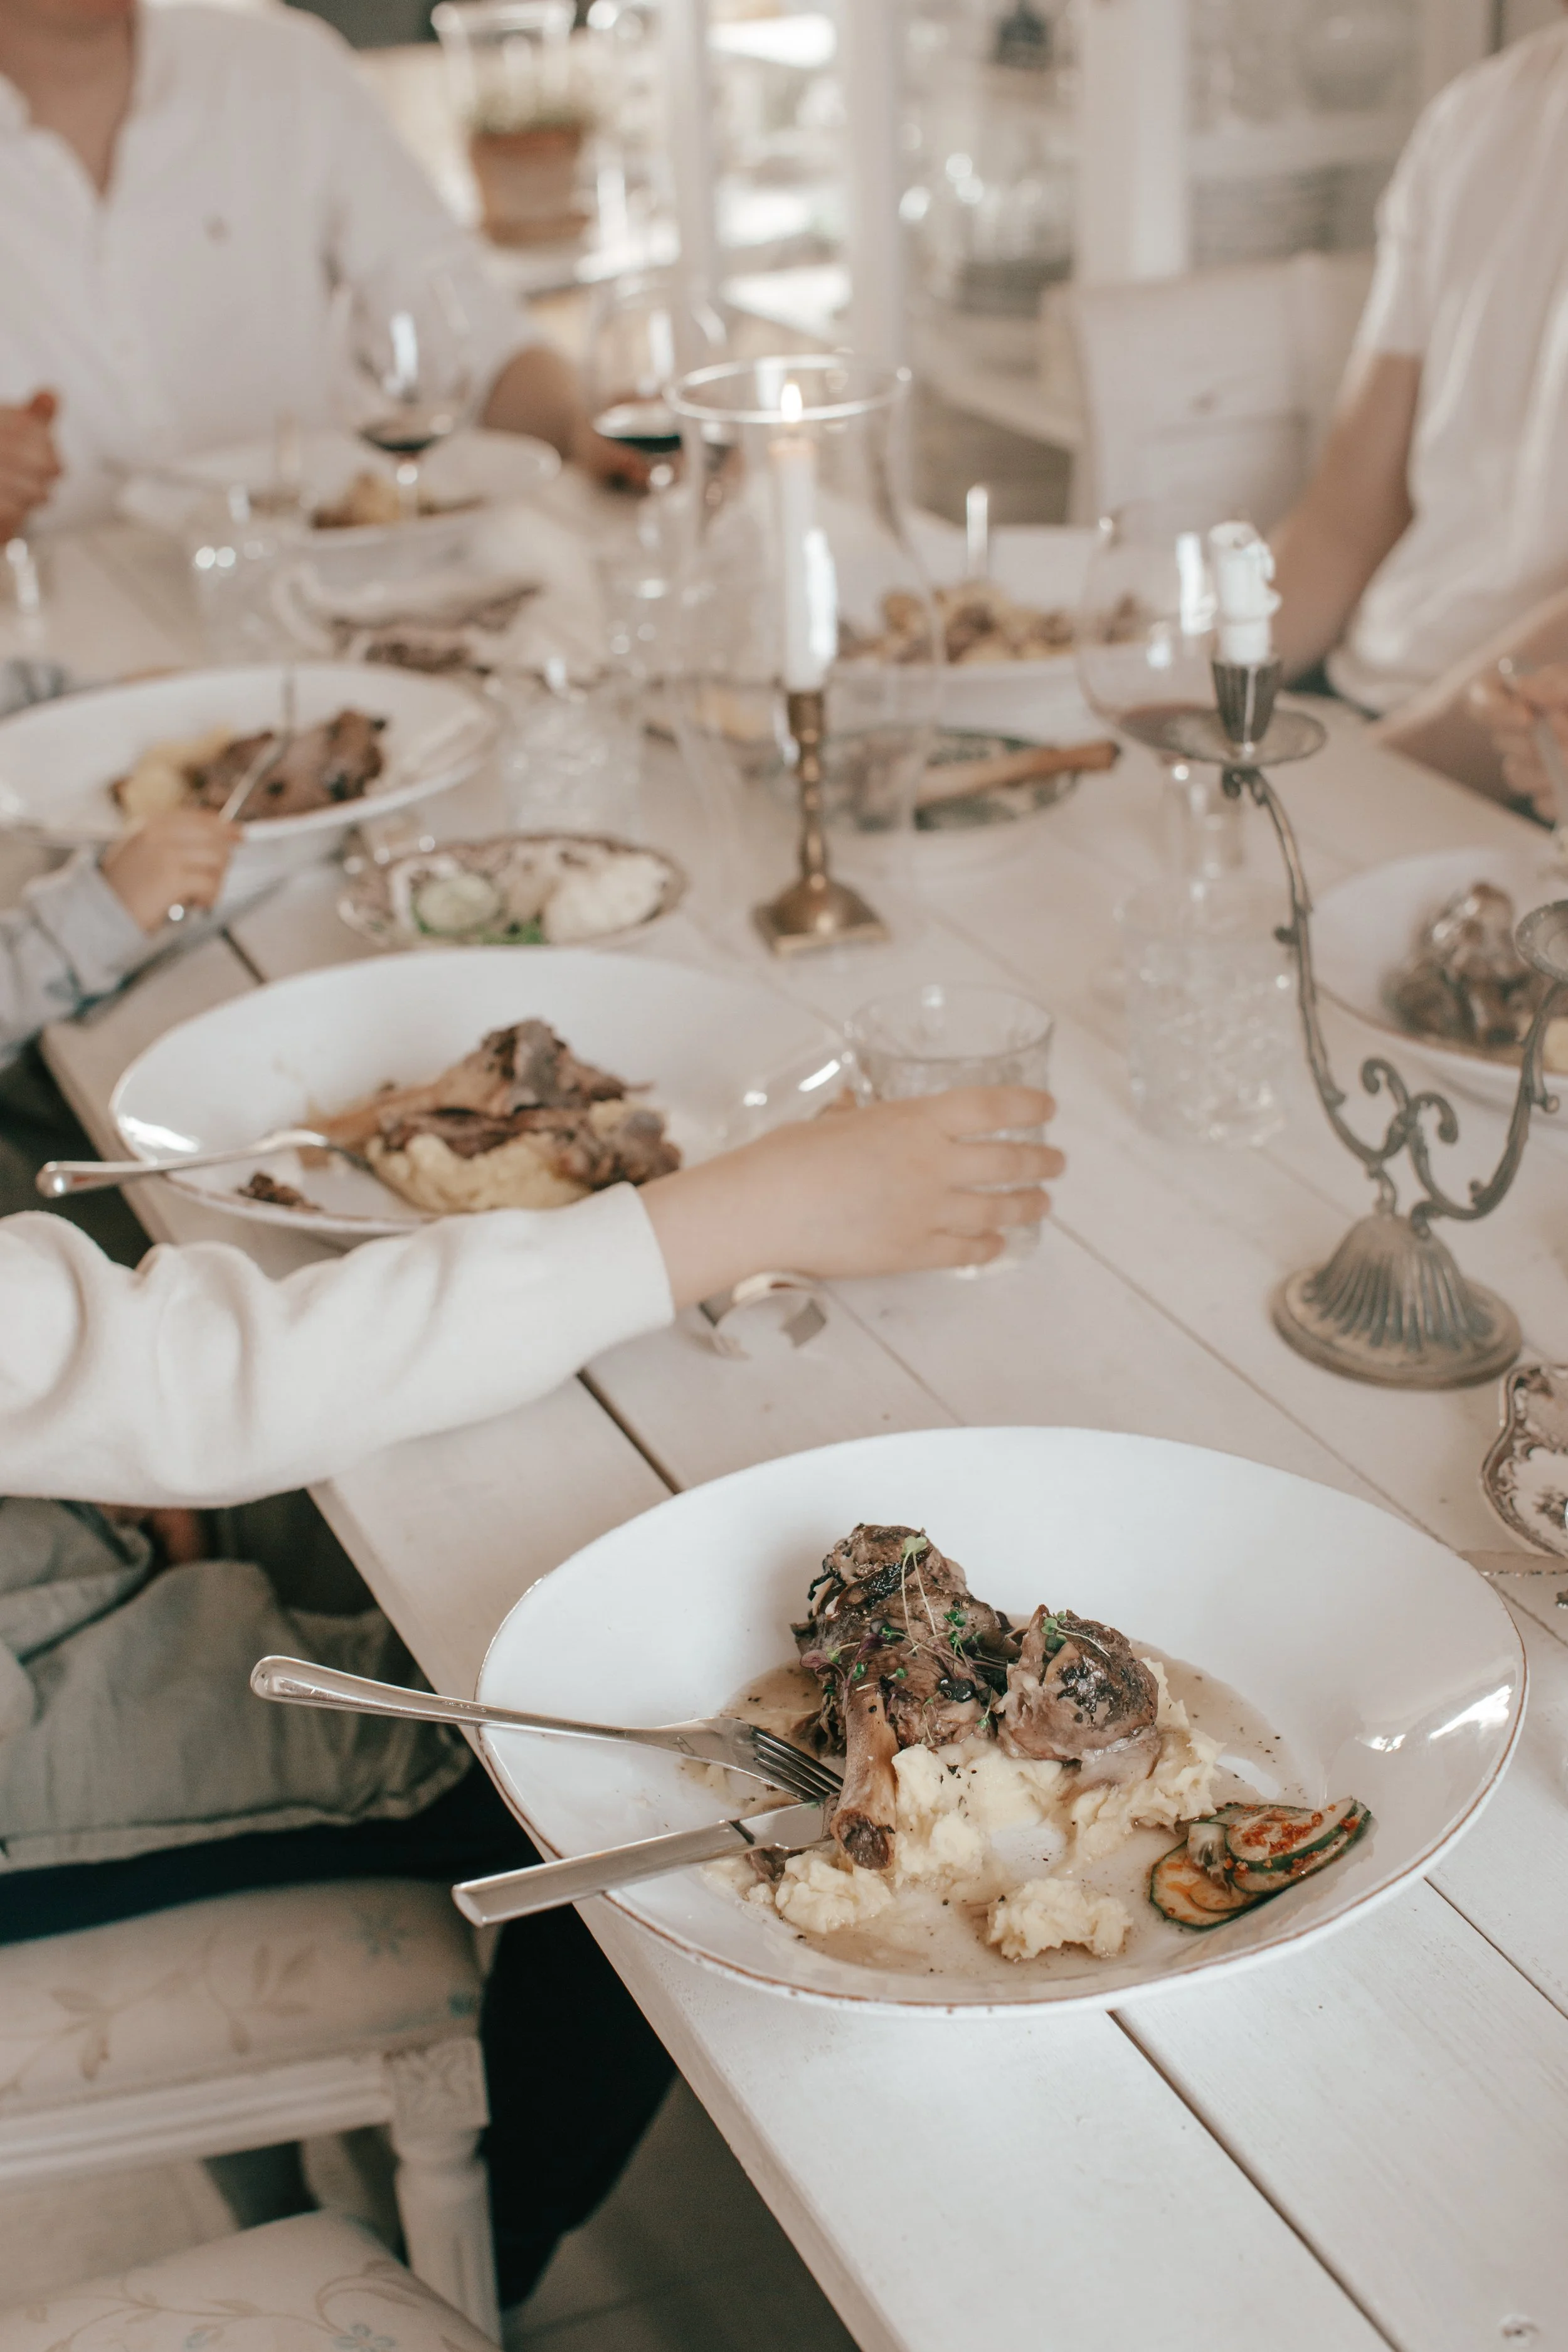
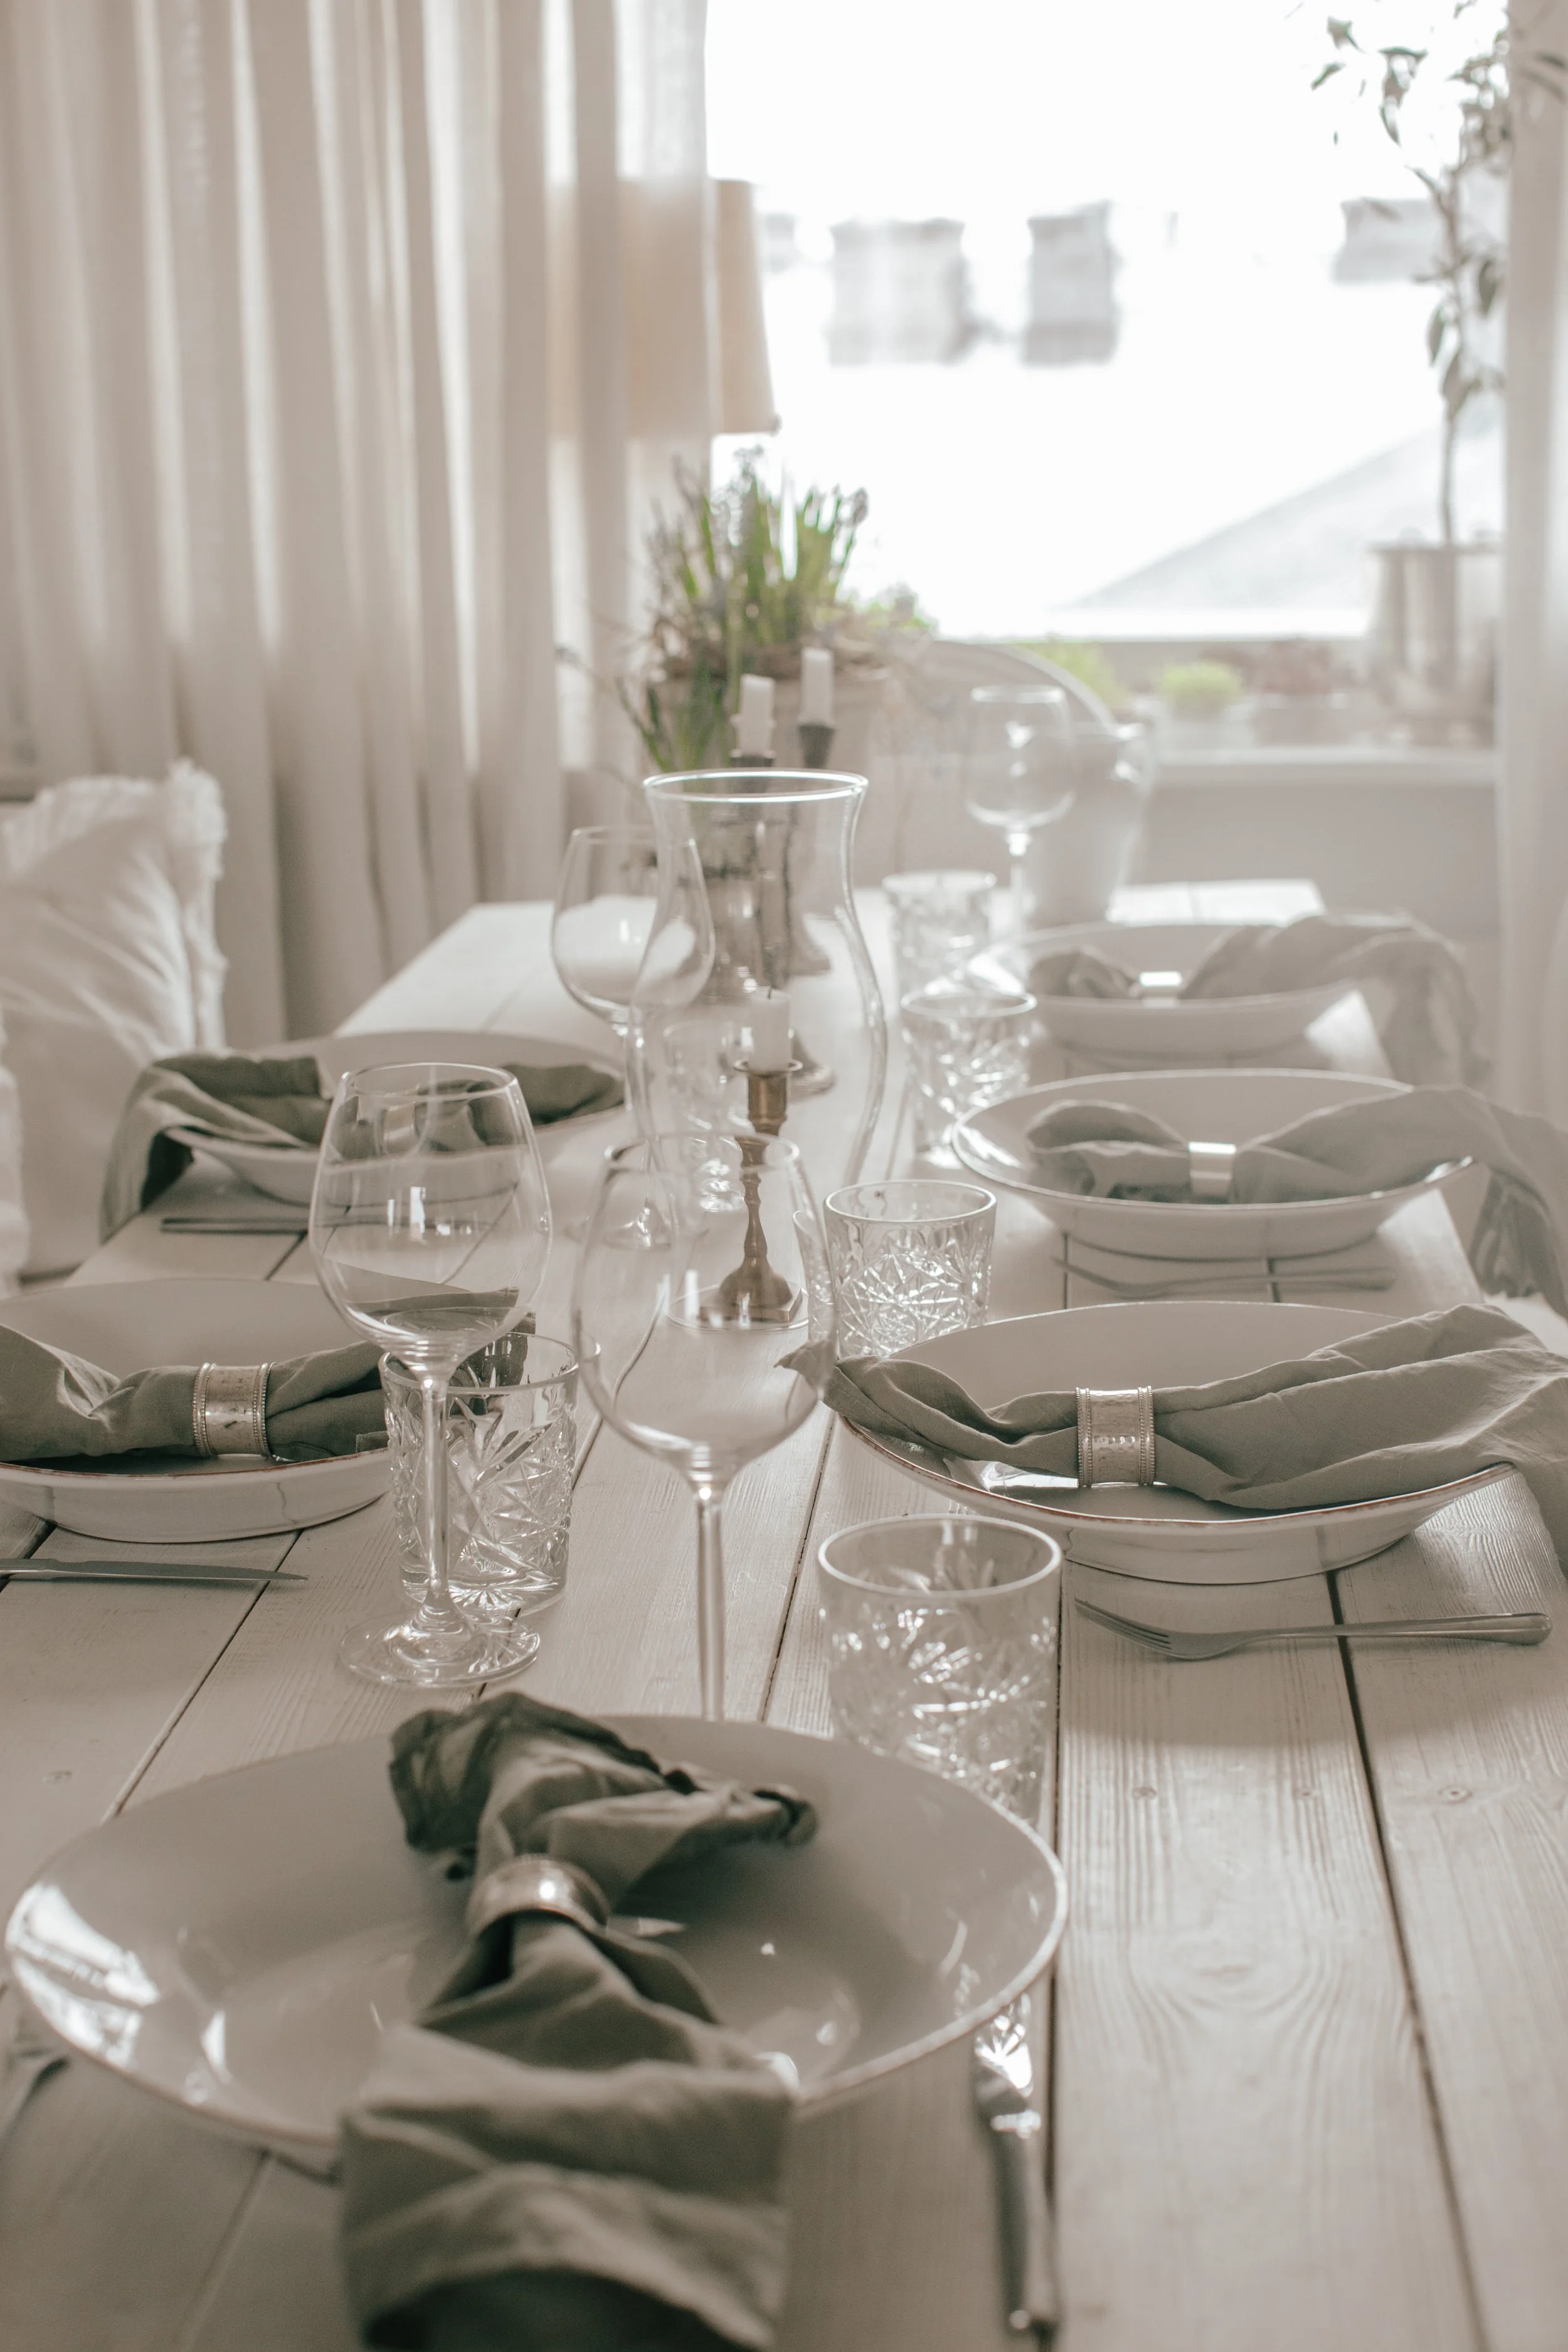
Spring is a time of renewal, where fresh flavours and soft, natural textures come together to create a sense of effortless elegance. From the kitchen to the table, it’s a season of slower moments—gathering around beautifully prepared food and surrounding yourself with light, organic details inspired by nature.
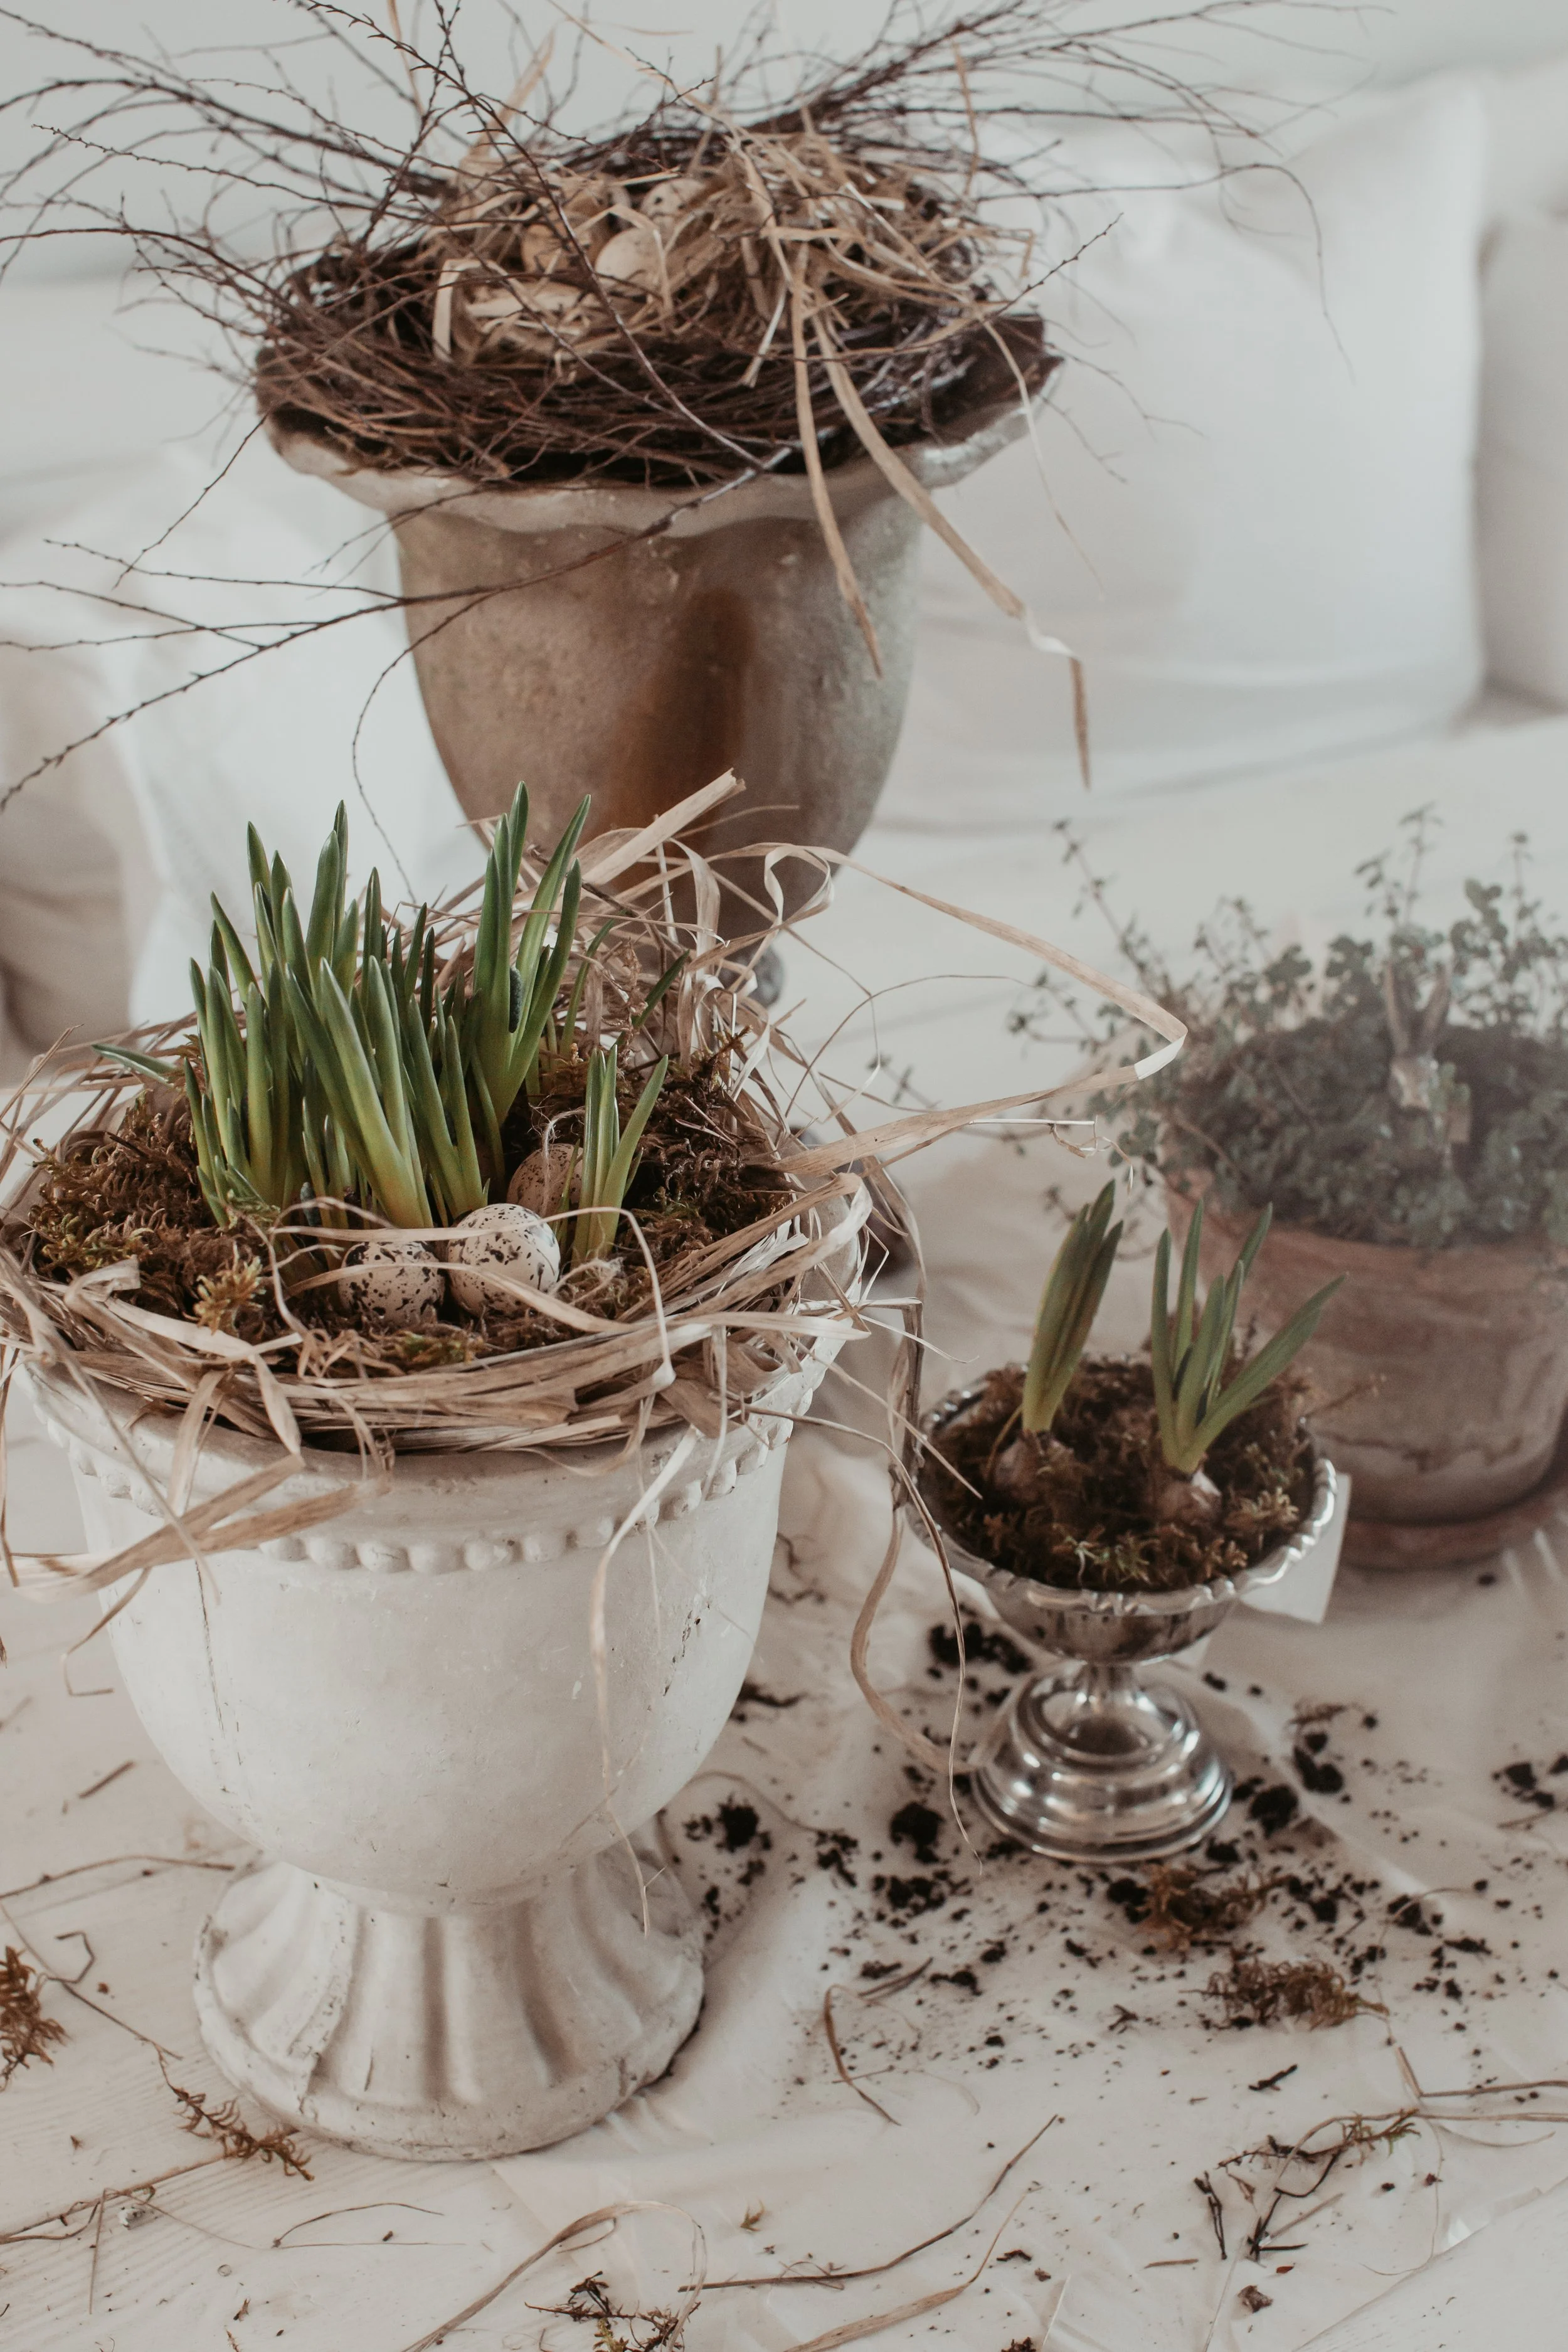
In this setting, delicate spring florals set the tone with their airy, relaxed charm, styled with rustic elements like twigs, hay, and decorative eggs for a subtle nod to Easter. Paired with this is a comforting yet refined dish of slow-braised lamb shanks, rich in flavor and perfectly suited for a long, leisurely meal.
Together, these elements create a warm and inviting spring table—where seasonal cooking and natural styling come together in a way that feels both elevated and beautifully understated.
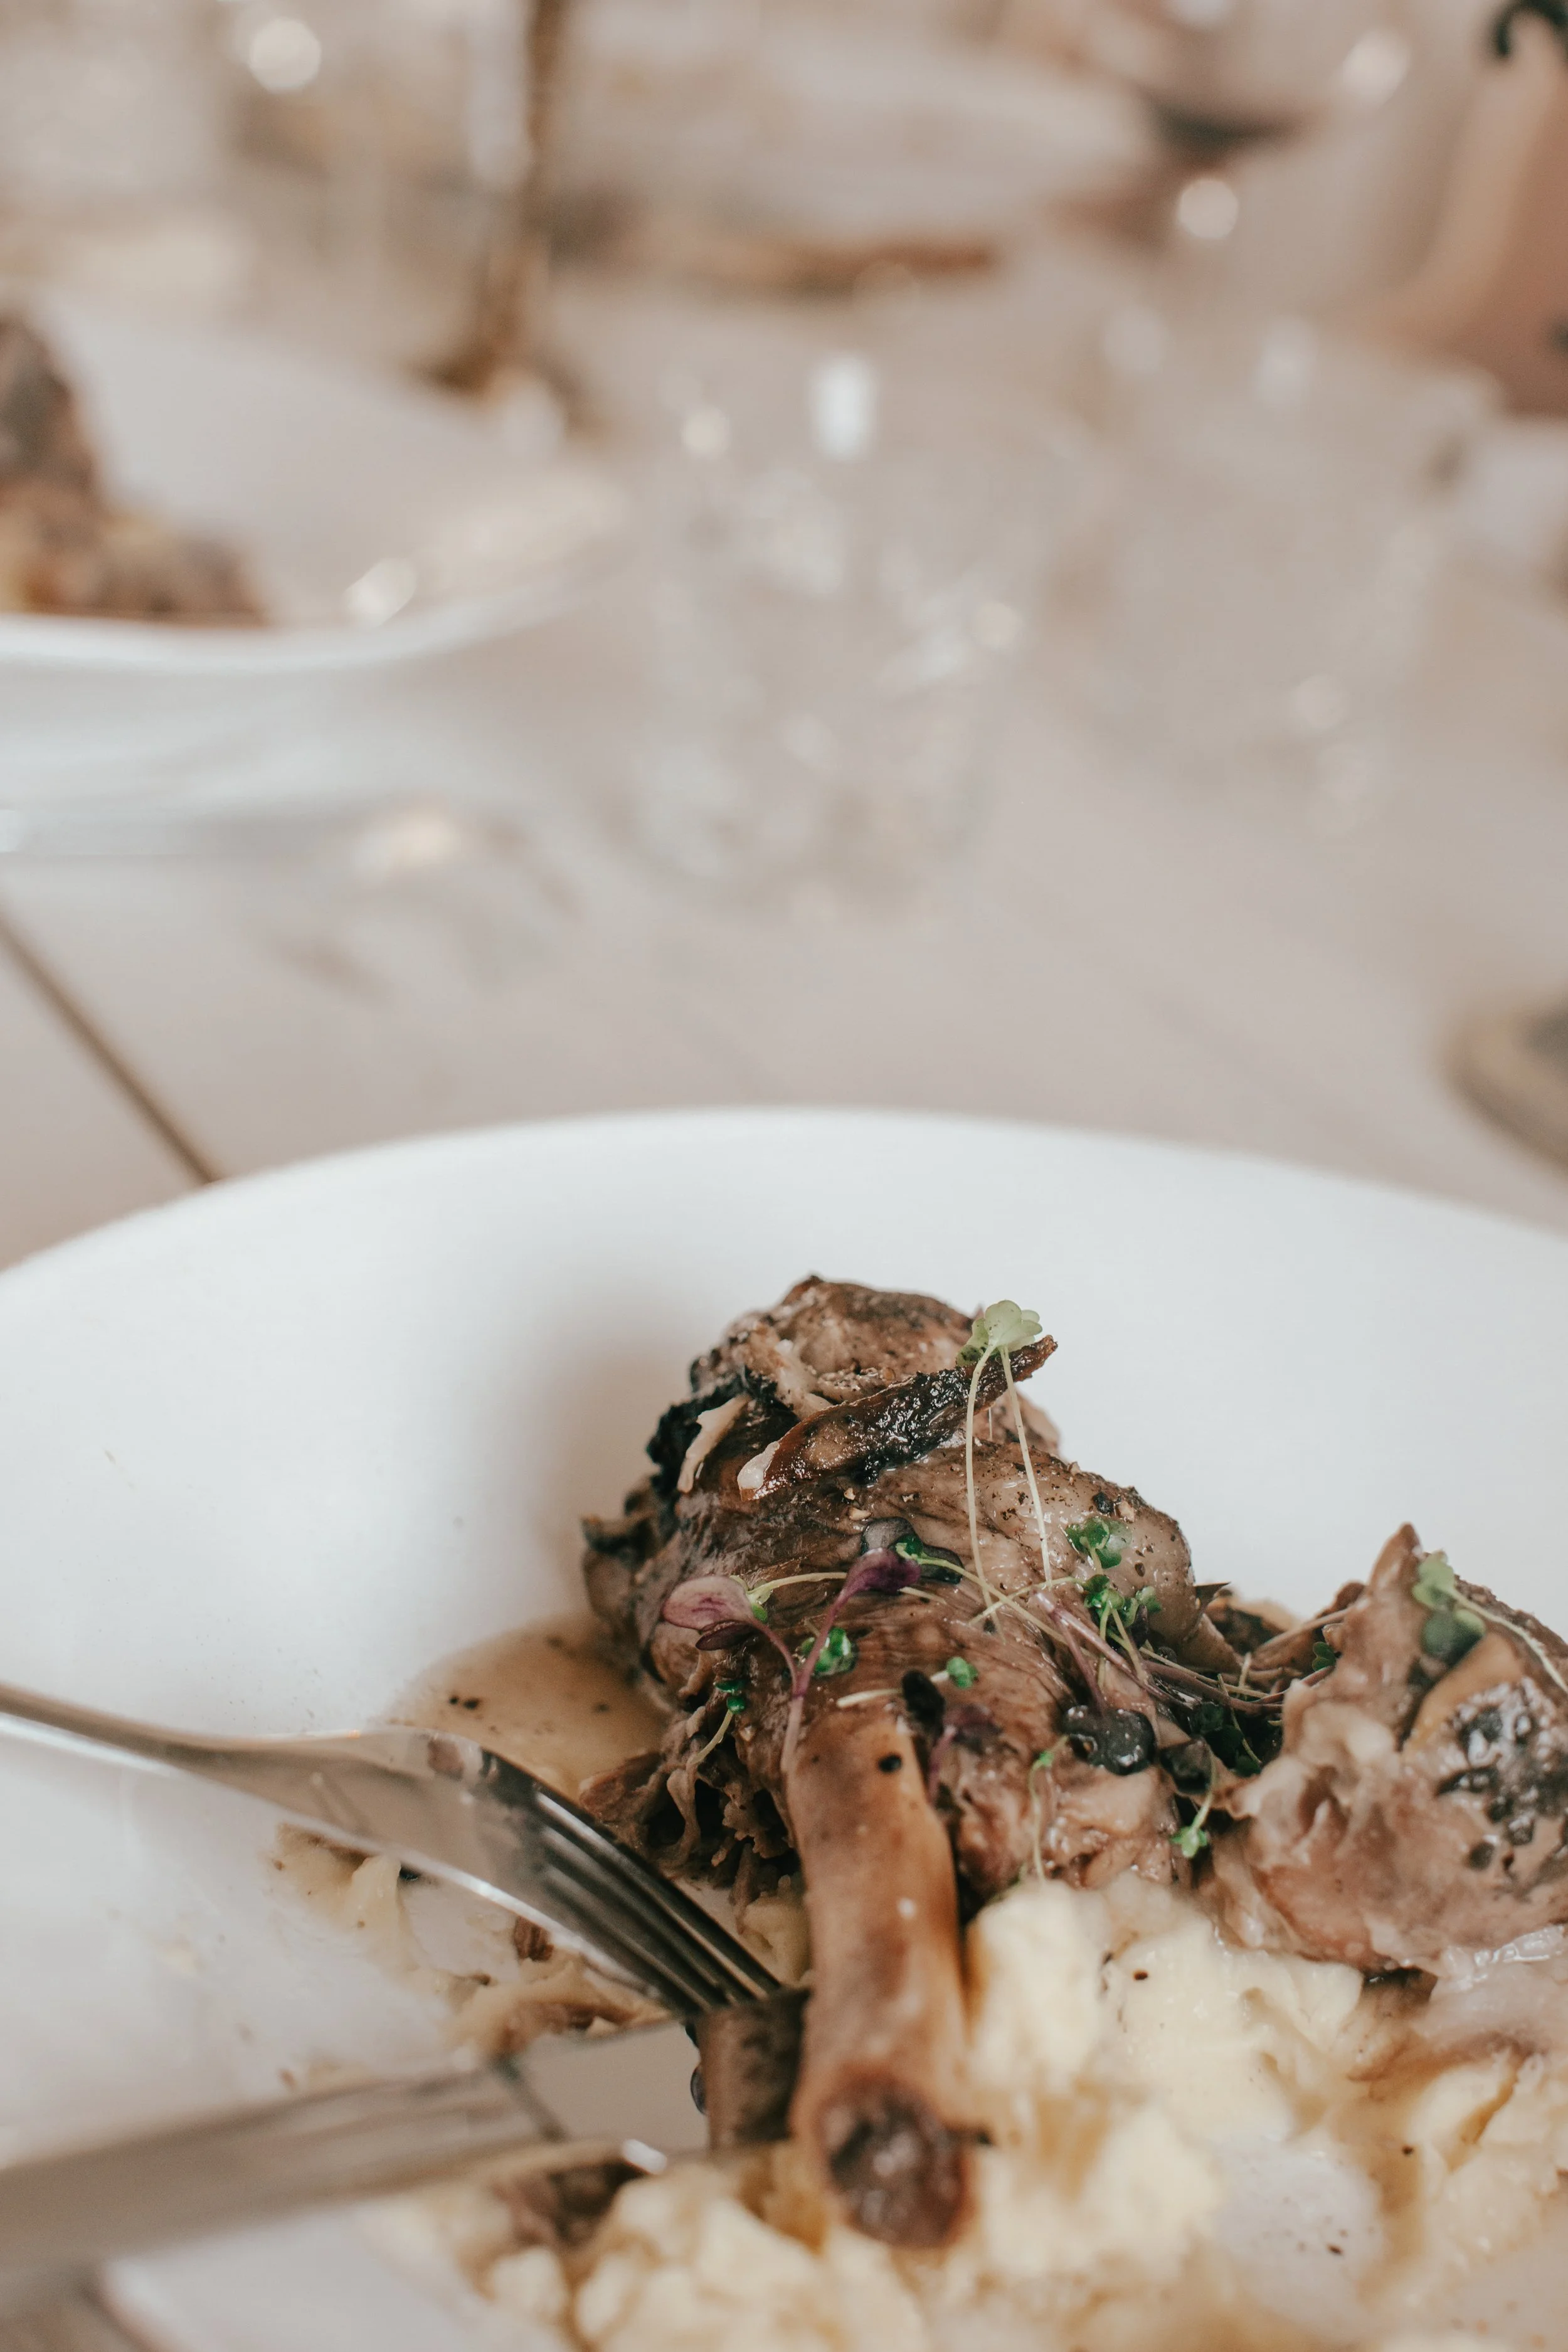
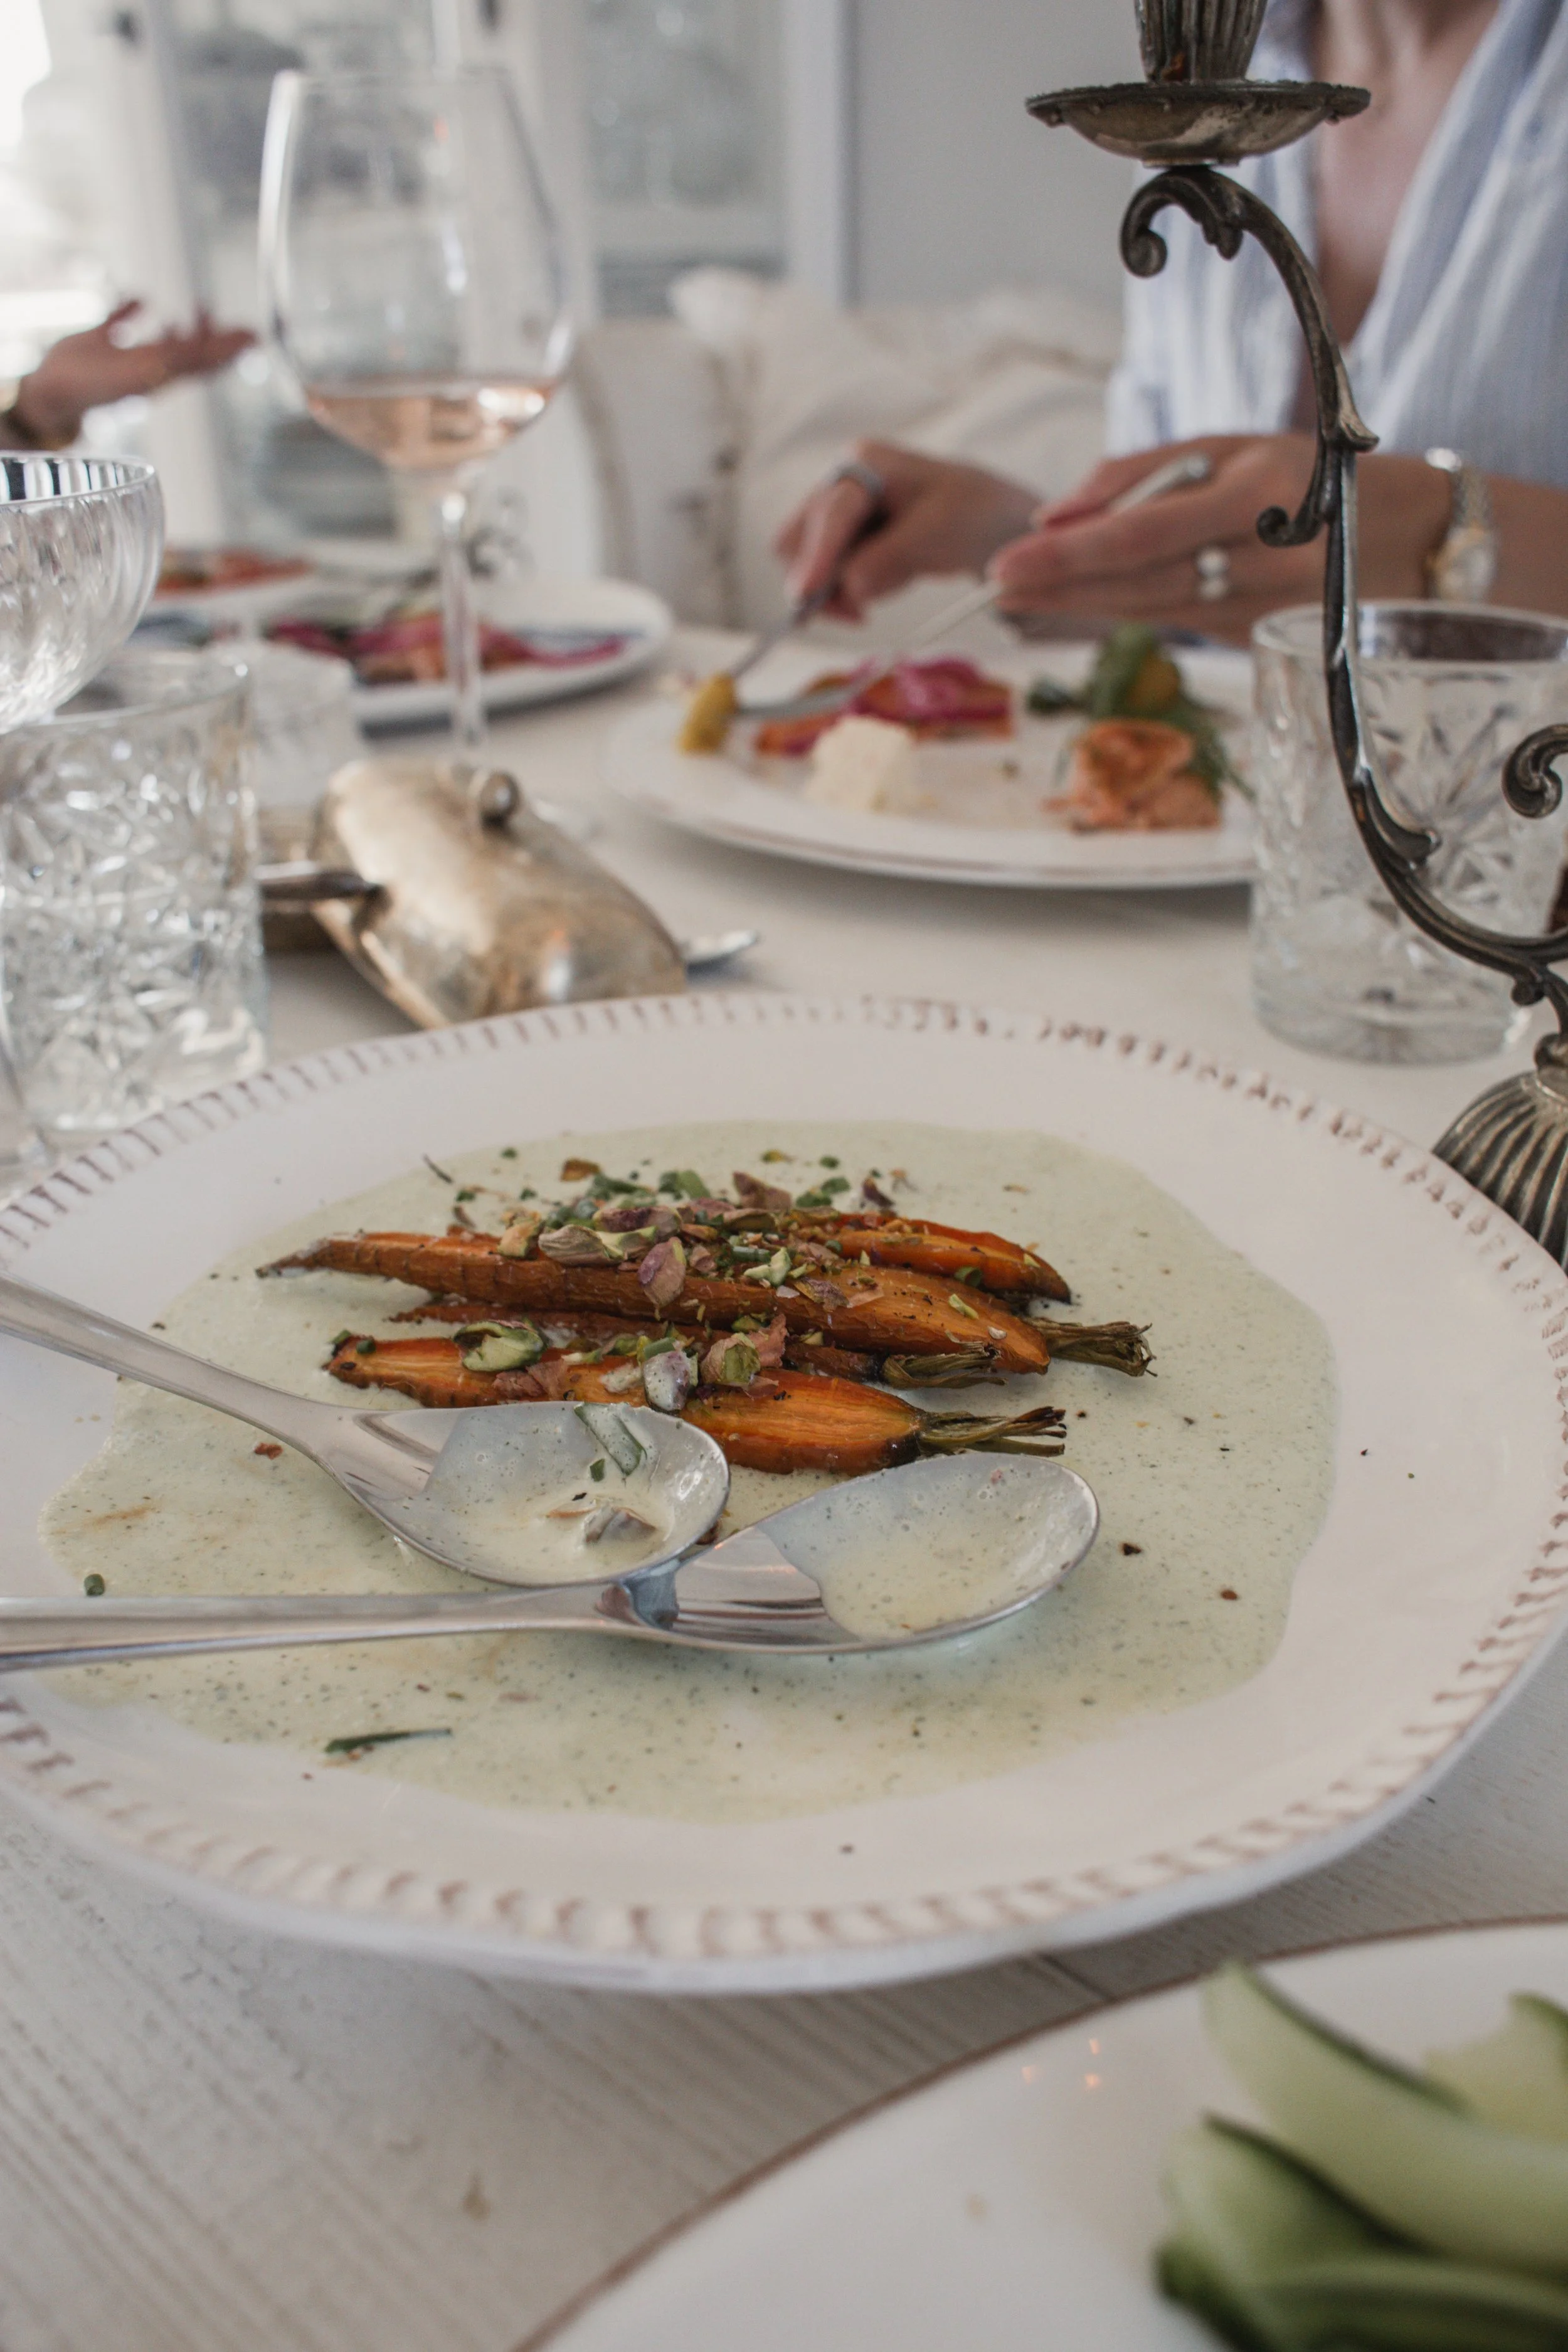
These slow-braised lamb shanks are a perfect dish for spring—hearty yet refined, with delicate, aromatic flavors that suit the season beautifully. The long, gentle cooking process results in exceptionally tender meat, while the simple combination of wine, herbs, and vegetables creates a rich, elegant jus. Ideal for a relaxed weekend meal or a special gathering, this dish pairs wonderfully with fresh garnishes and light accompaniments.
Slow cooked Lamb Shanks ( serves 6) Keep in mind you do not need to be precise about the measurements when making the lamb.
6 lamb shanks
2 large white onion or shallots
1 entire garlic bulb
1 carrot
2 celery stalks
Handful of mix of herbs ( Thyme, rosemary, chives)
2-3 litres of water
seasalt/ black peppercorns/ all spice pepper
Splash of red wine (about 1 dl)
1 cinammon stick
3 bay leaves
1 organic vegetable stock cube
Olive oil
To prepare the lamb shanks, begin by selecting a large, heavy-based pot with a tight-fitting lid. Place the pot over medium heat and add a generous amount of olive oil. Once the oil is hot, add the lamb shanks and sear them for approximately 5 minutes, turning occasionally, until they are lightly browned on all sides.
Next, add the roughly chopped vegetables. These can be simply halved, as they are intended to impart flavor rather than be served. Pour in a splash of wine, followed by enough water to fully submerge the lamb shanks. Add the desired spices, then cover the pot with the lid.
Allow the dish to simmer gently on the stovetop for 5–7 hours. Alternatively, the pot can be transferred to an oven preheated to 150°C and cooked for the same duration. The lamb is ready when the meat is tender and easily falls off the bone.
To serve, place a lamb shank over a bed of mashed potatoes. Spoon several tablespoons of the cooking jus over the top. Finish with a garnish of microgreens, freshly ground black pepper, and a light sprinkle of Maldon salt.
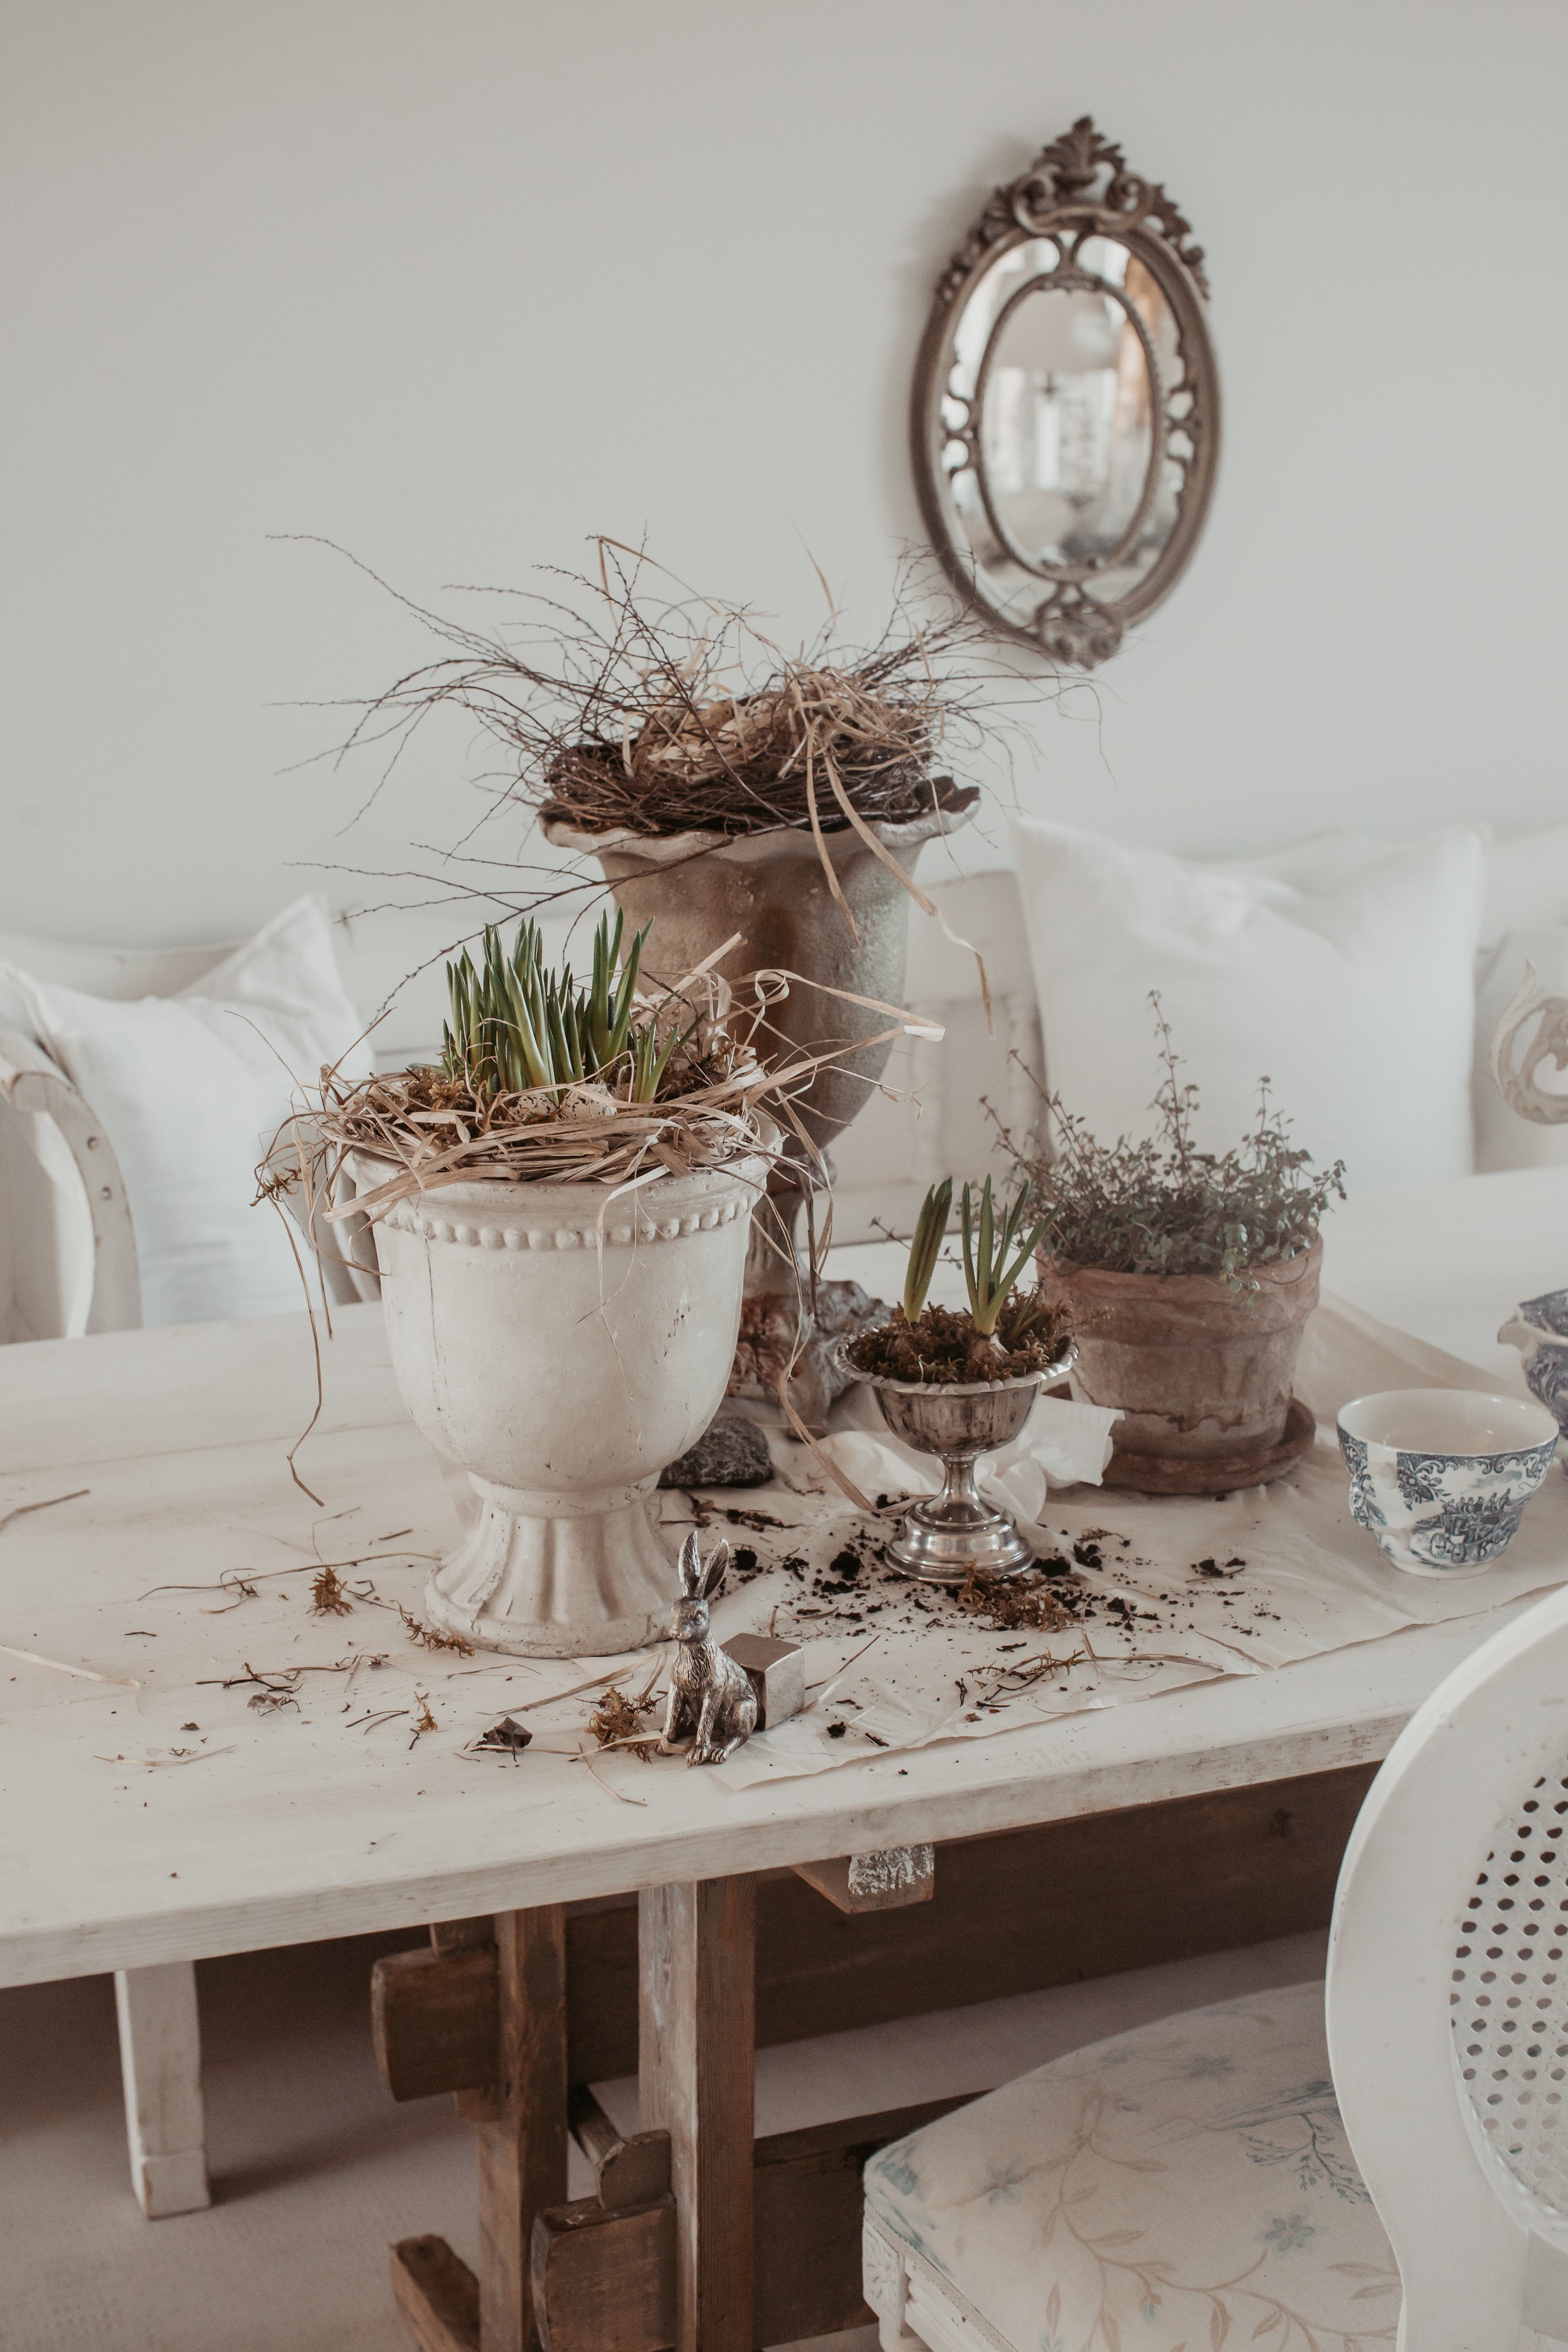
These spring arrangements capture the soft, natural beauty of the season, bringing a sense of warmth and effortless elegance into the home. Delicate blooms in gentle, creamy tones evoke the freshness of early spring, while their loose, unstructured placement keeps the overall look relaxed and organic—perfect for both everyday styling and seasonal entertaining.
For an Easter-inspired touch, the arrangements are complemented by rustic elements such as twigs and hay, thoughtfully arranged to create a nest-like composition. This layered, textural base adds depth and a subtle connection to nature, enhancing the seasonal feel without appearing overly styled. Softly tucking hay around the flowers further reinforces this relaxed aesthetic, allowing the arrangement to feel abundant yet uncontrived.
To complete the look, decorative eggs can be nestled within the arrangement, adding a charming nod to Easter traditions. Whether placed delicately among the greenery or within the twig nest, they provide a playful yet refined detail that ties the entire composition together.


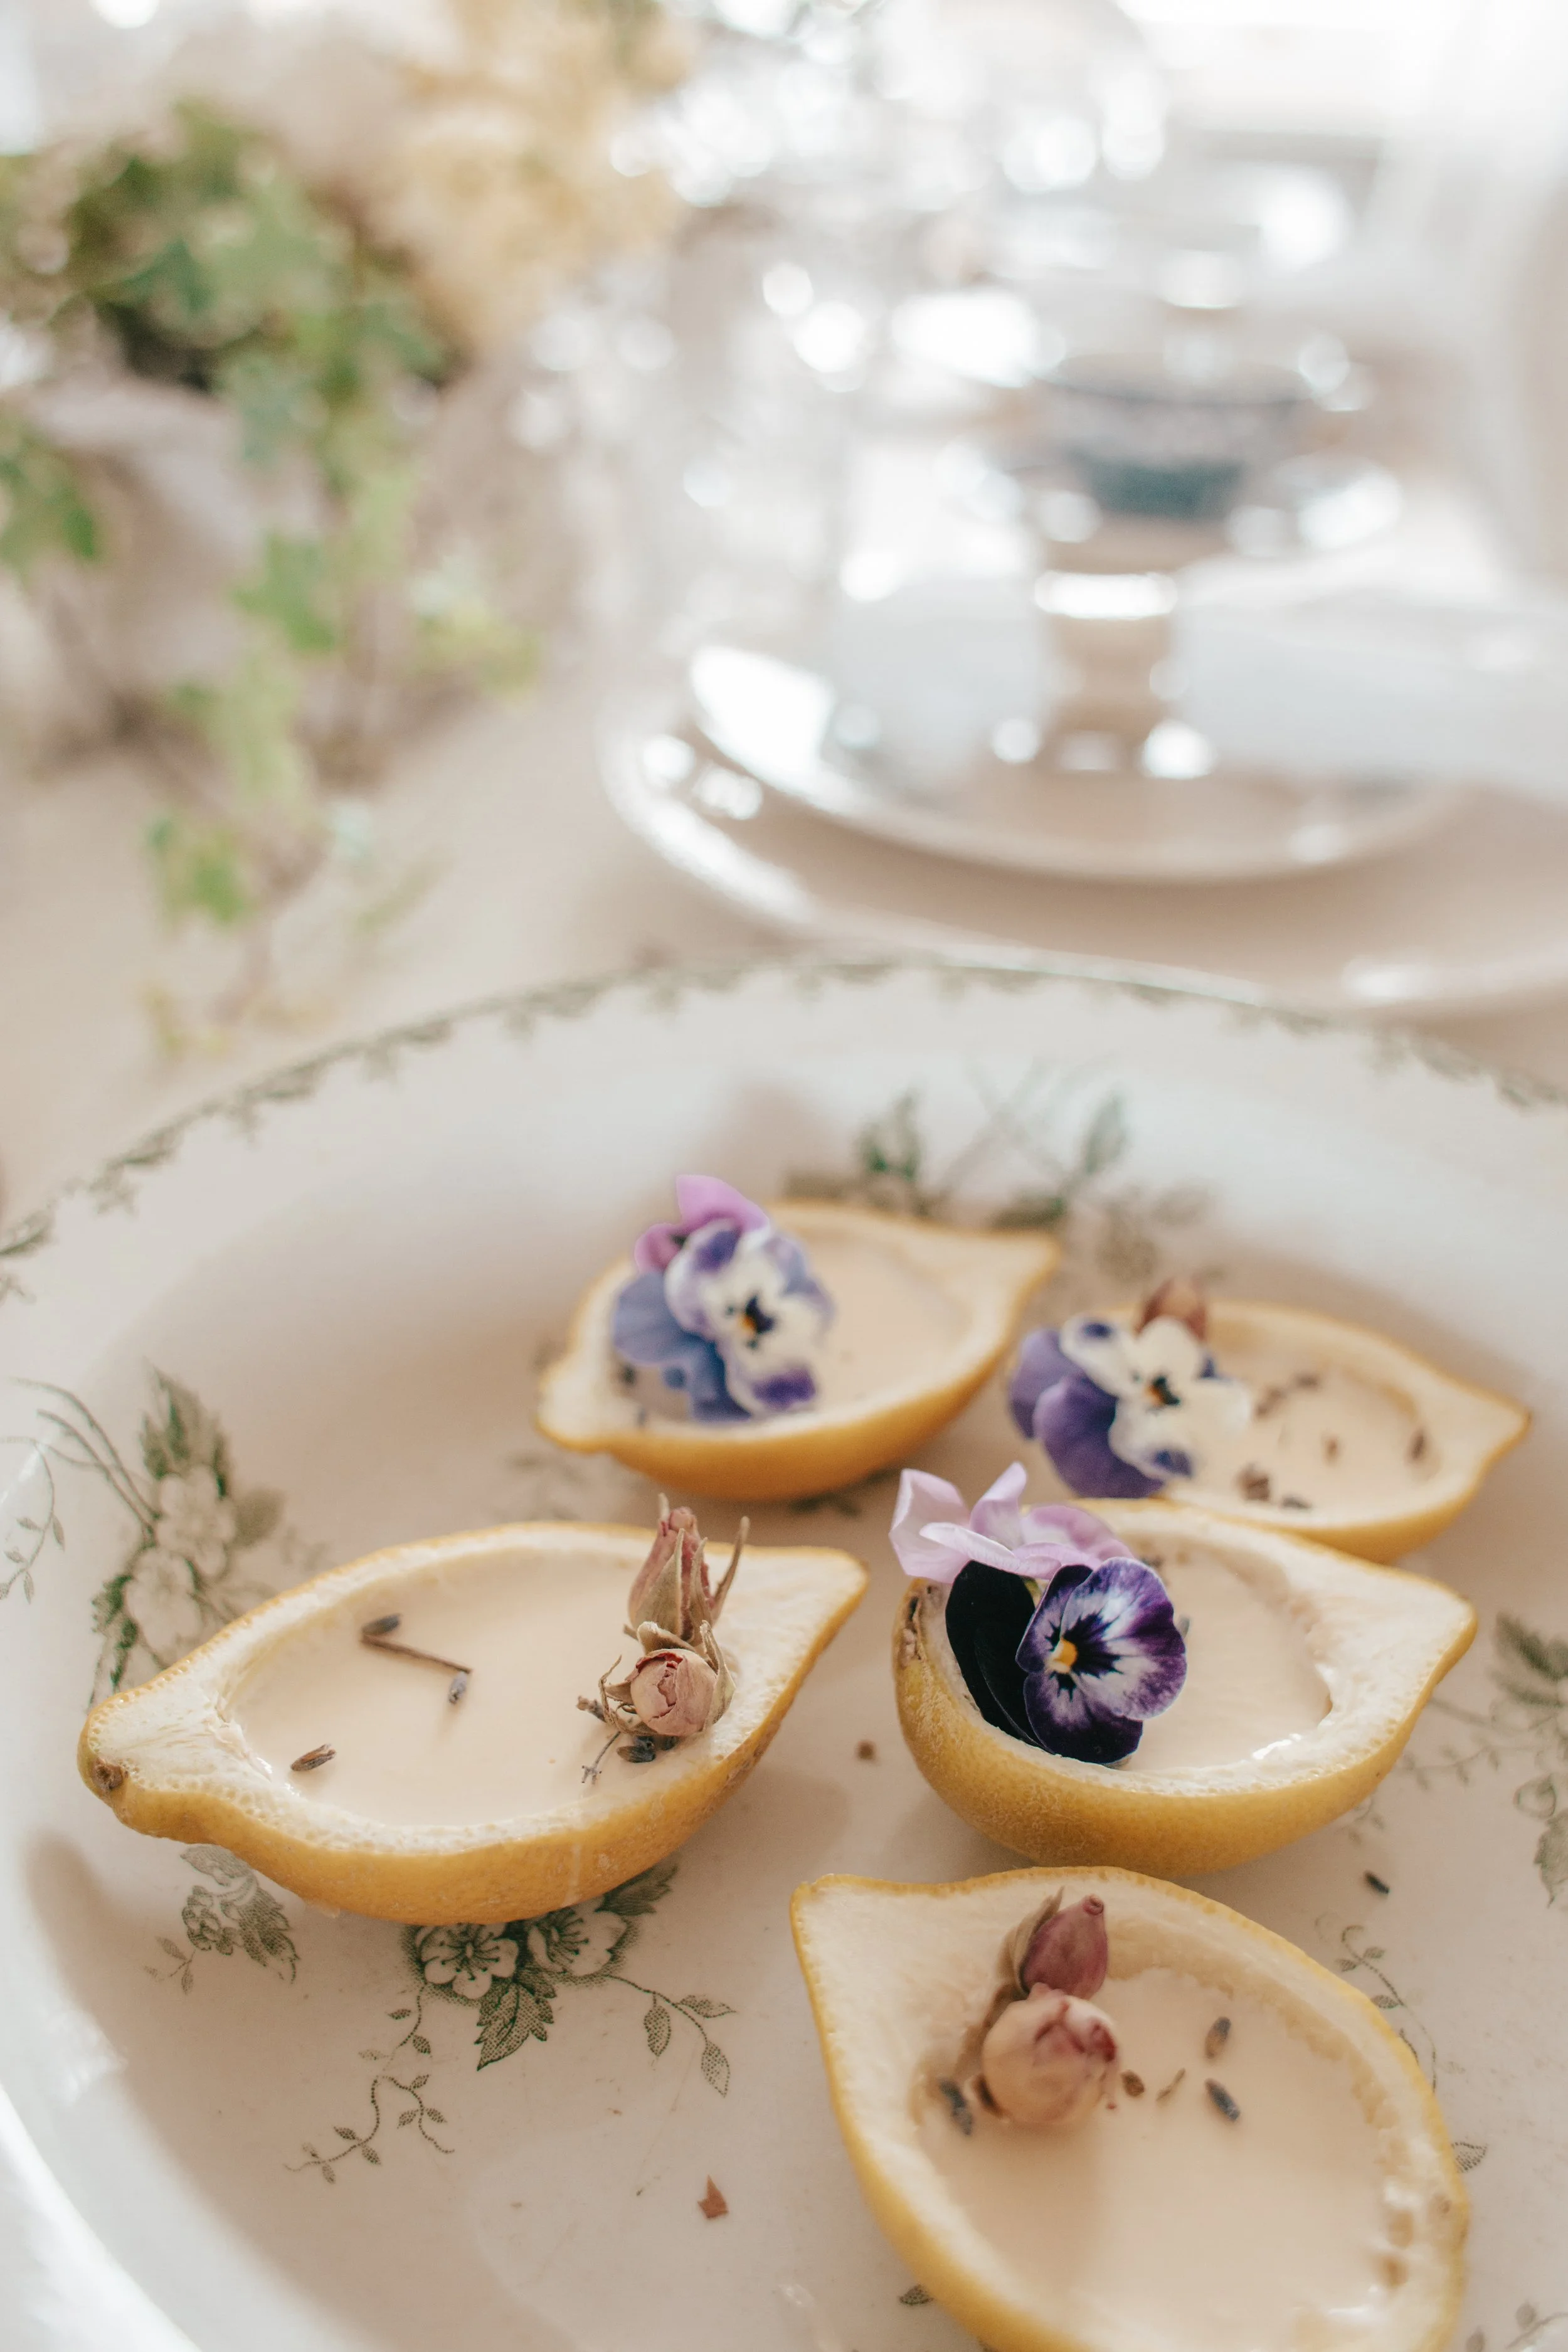
Spring Lemon Posset in Lemon Shells
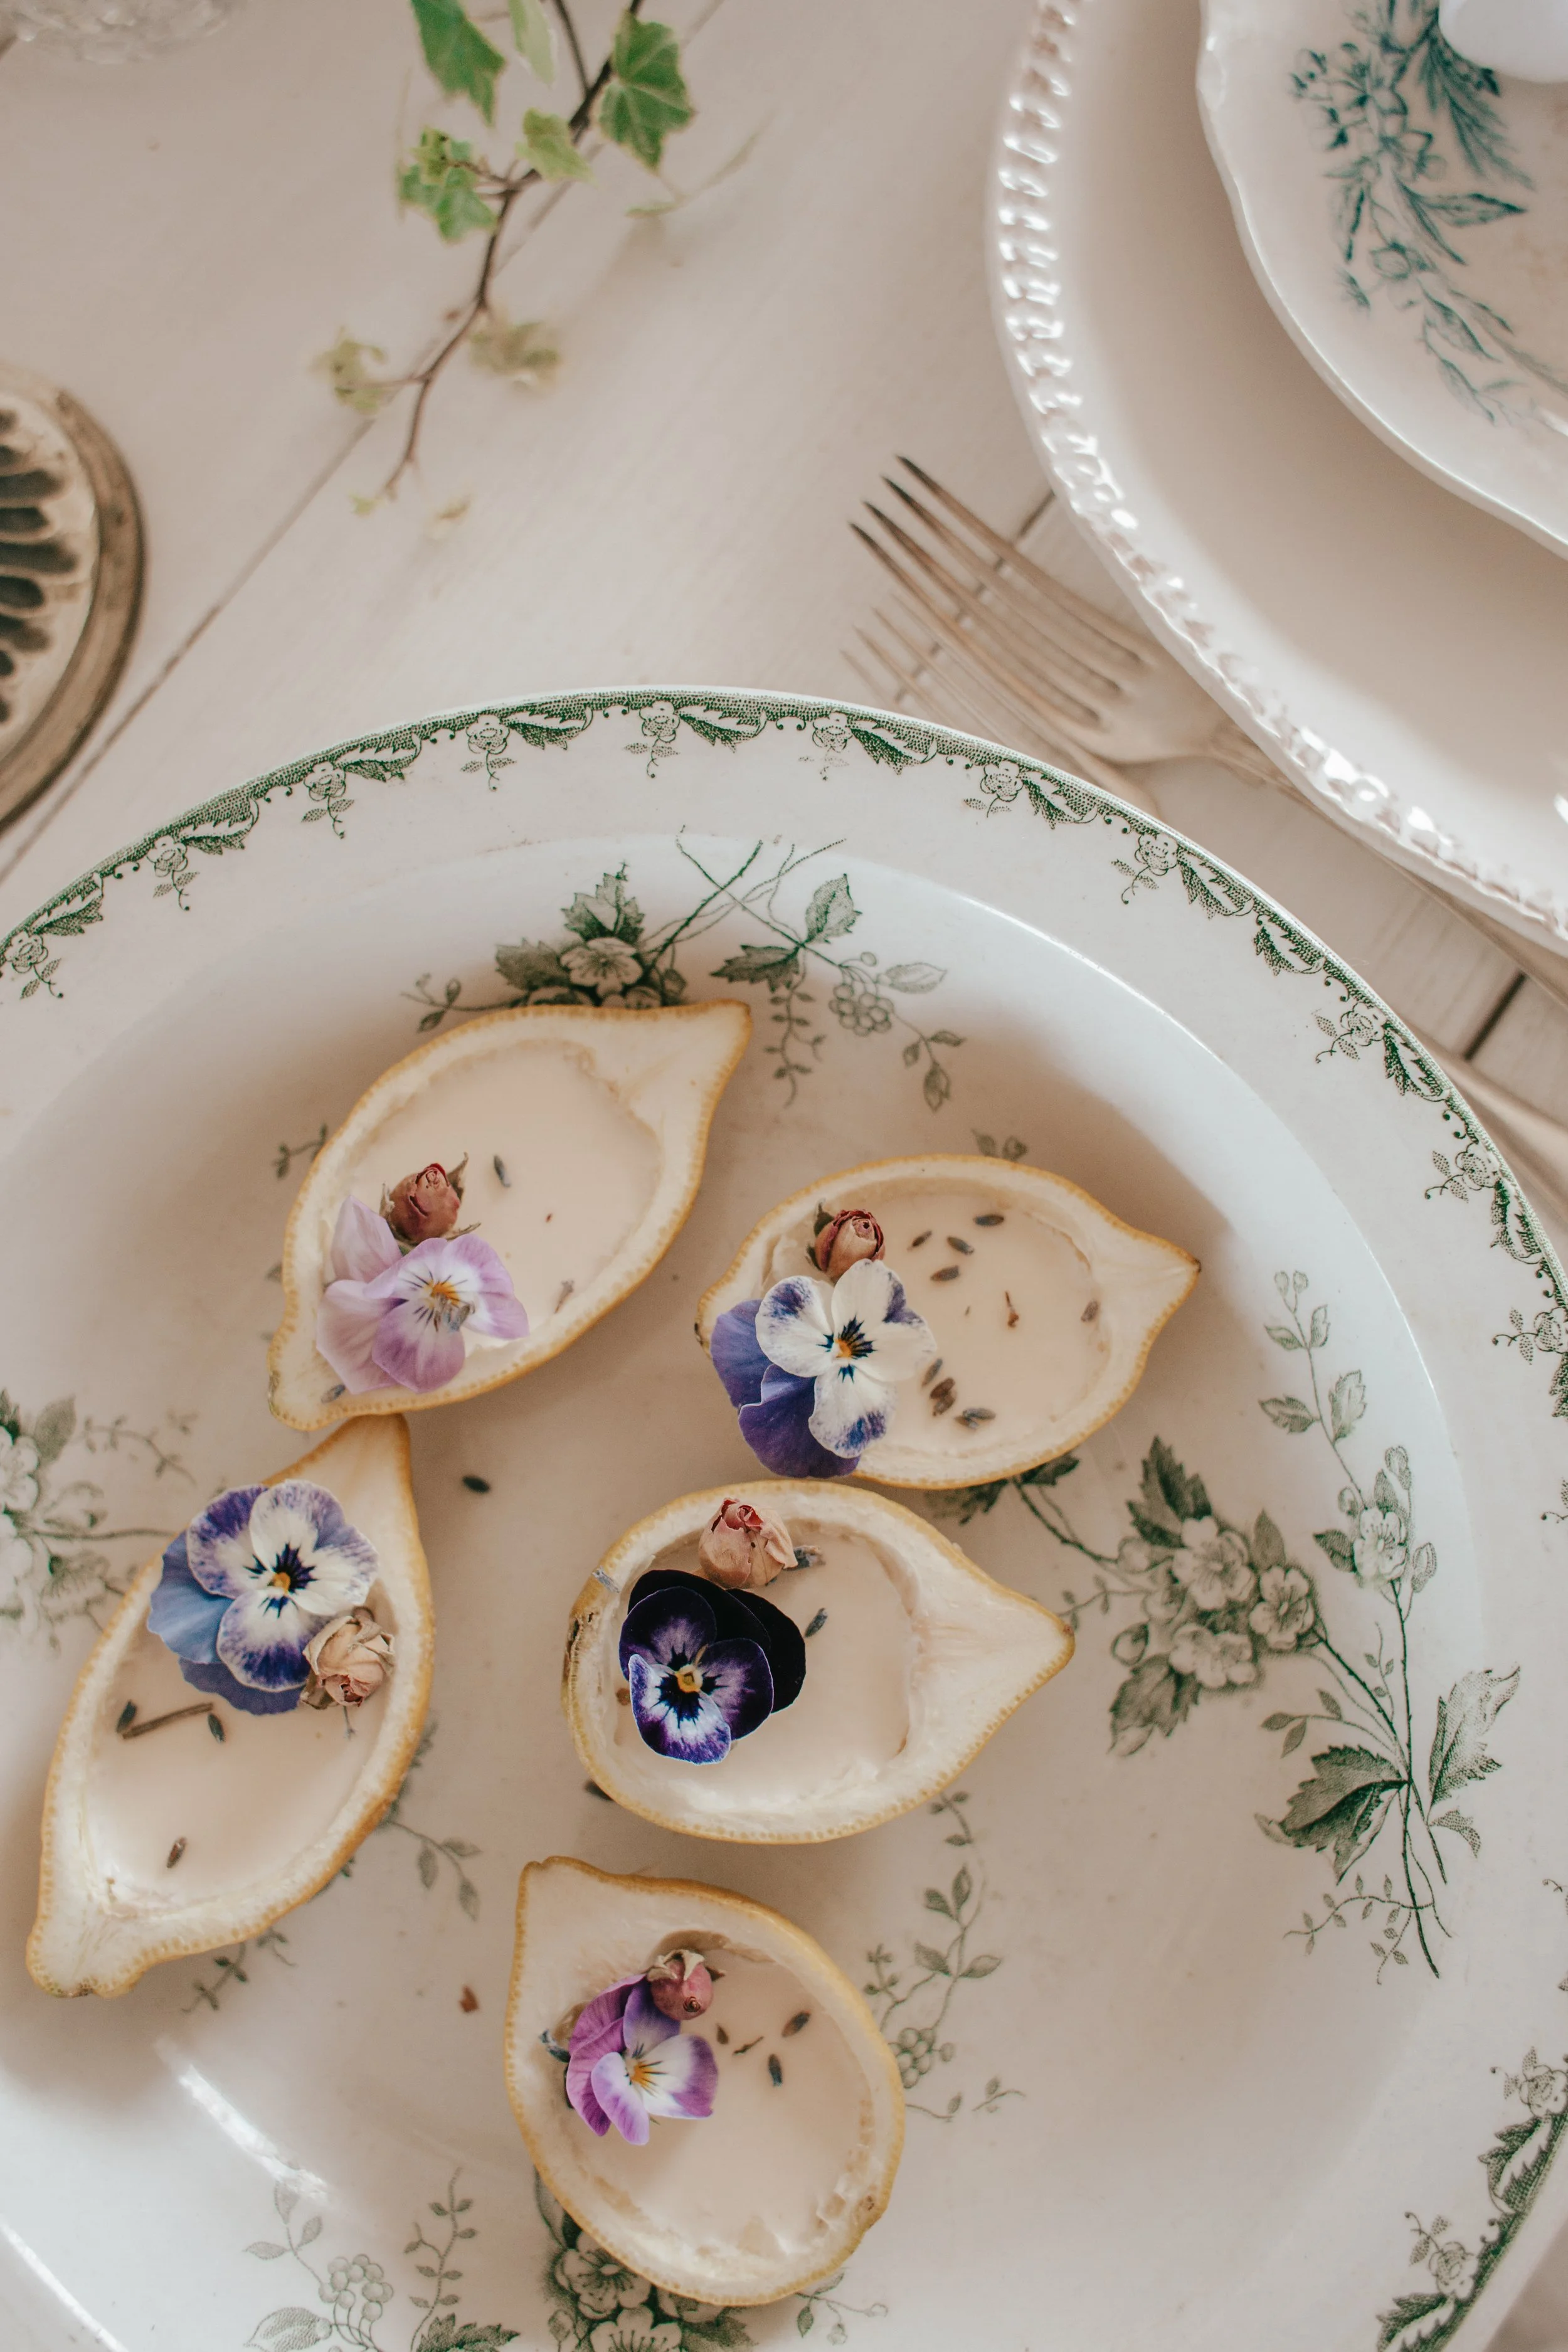
Lemon Posset in Lemon Shells (Serves 4)
Bright, creamy, and effortlessly elegant, these lemon possets served in their own shells are a simple dessert with real visual impact. The smooth, citrusy filling sets without gelatin, while the natural lemon cups add a fresh aroma and a beautiful presentation. Perfect for dinner parties or a light make-ahead treat, they’re as easy to prepare as they are impressive to serve.
Ingredients
4 large lemons
500 ml heavy cream
150 g sugar
Instructions
1. Prepare the lemon shells
Slice each lemon in half lengthwise.
Carefully scoop out the flesh with a spoon (try not to tear the peel).
Strain and reserve the juice—you’ll need about 60 ml total.
Place the hollowed lemon halves in a muffin tin or small bowls to keep them steady.
2. Make the posset
In a saucepan, heat the cream and sugar.
Bring to a gentle boil and simmer for about 3 minutes, stirring.
Remove from heat and stir in the reserved lemon juice.
3. Fill the shells
Let the mixture cool for a couple of minutes (so it’s not too hot).
Carefully pour into the lemon shells.
4. Chill
Transfer to the fridge and chill for at least 3 hours, or until fully set.
Tips
Trim a tiny slice off the bottom of each lemon half if they wobble.
Don’t overfill—leave a small gap to avoid spills.
For a cleaner look, you can strain the mixture before pouring.
To serve
Serve straight from the shells and add some edable flowers on top, like violets or dried roses
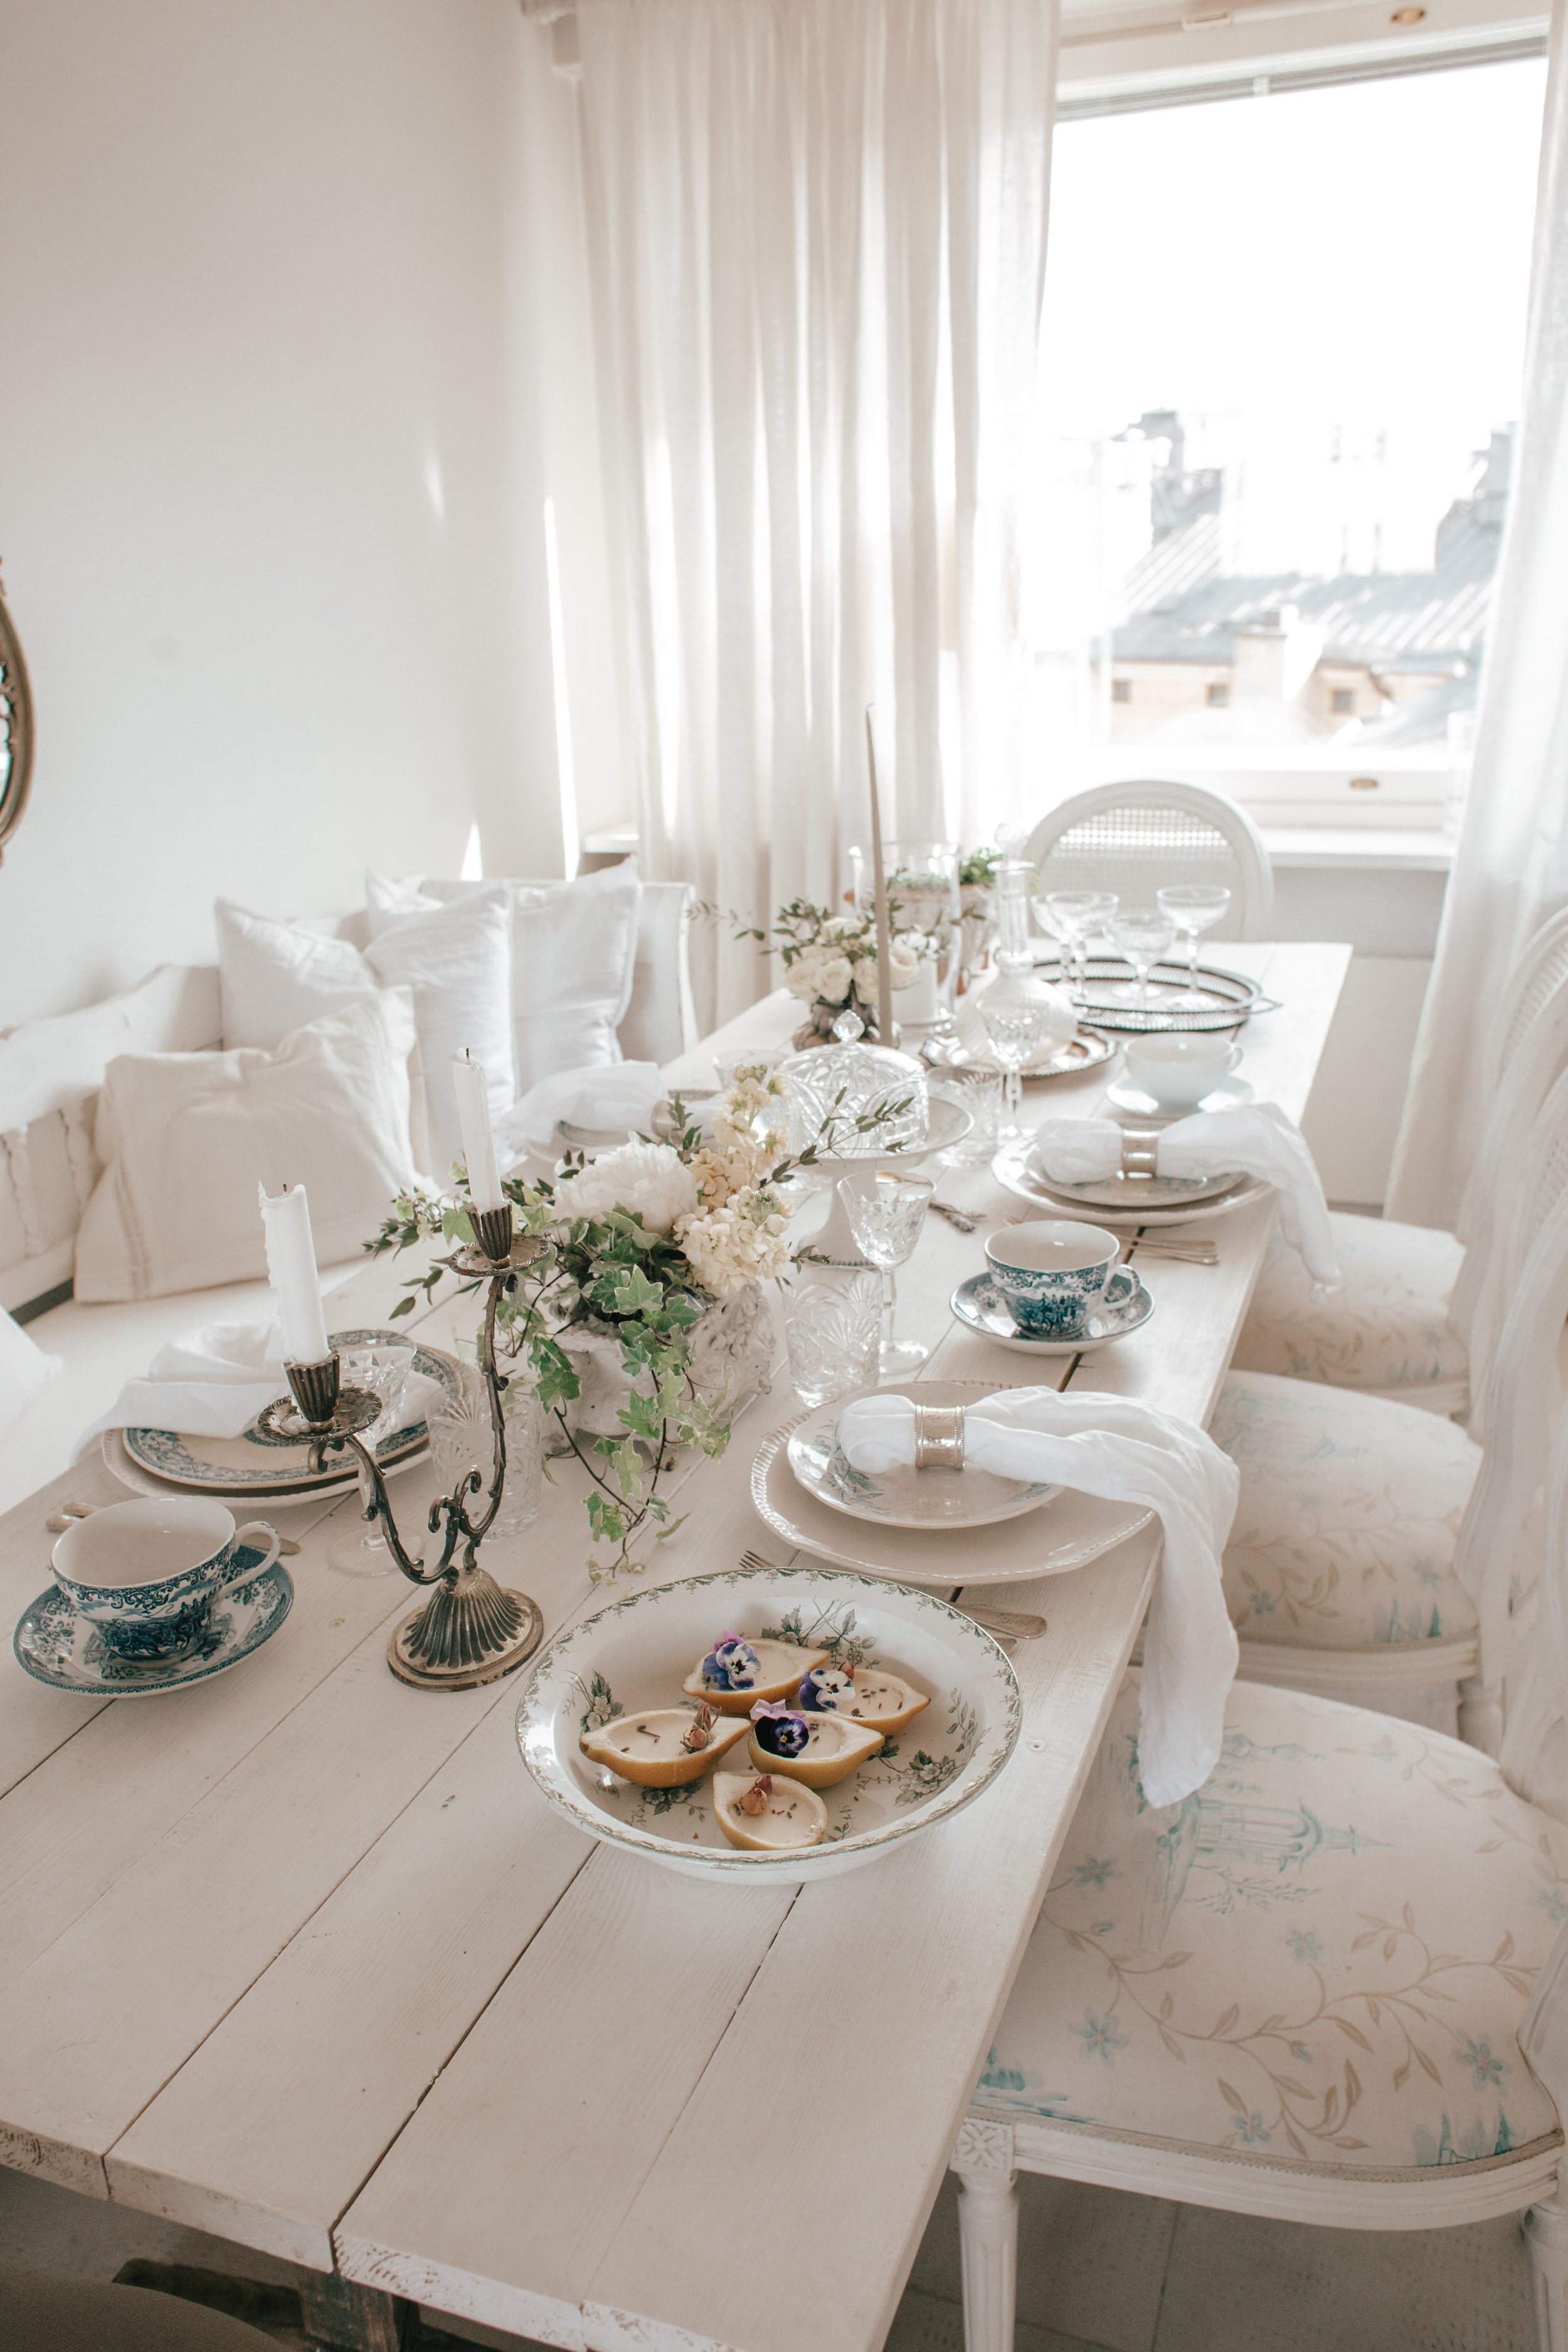
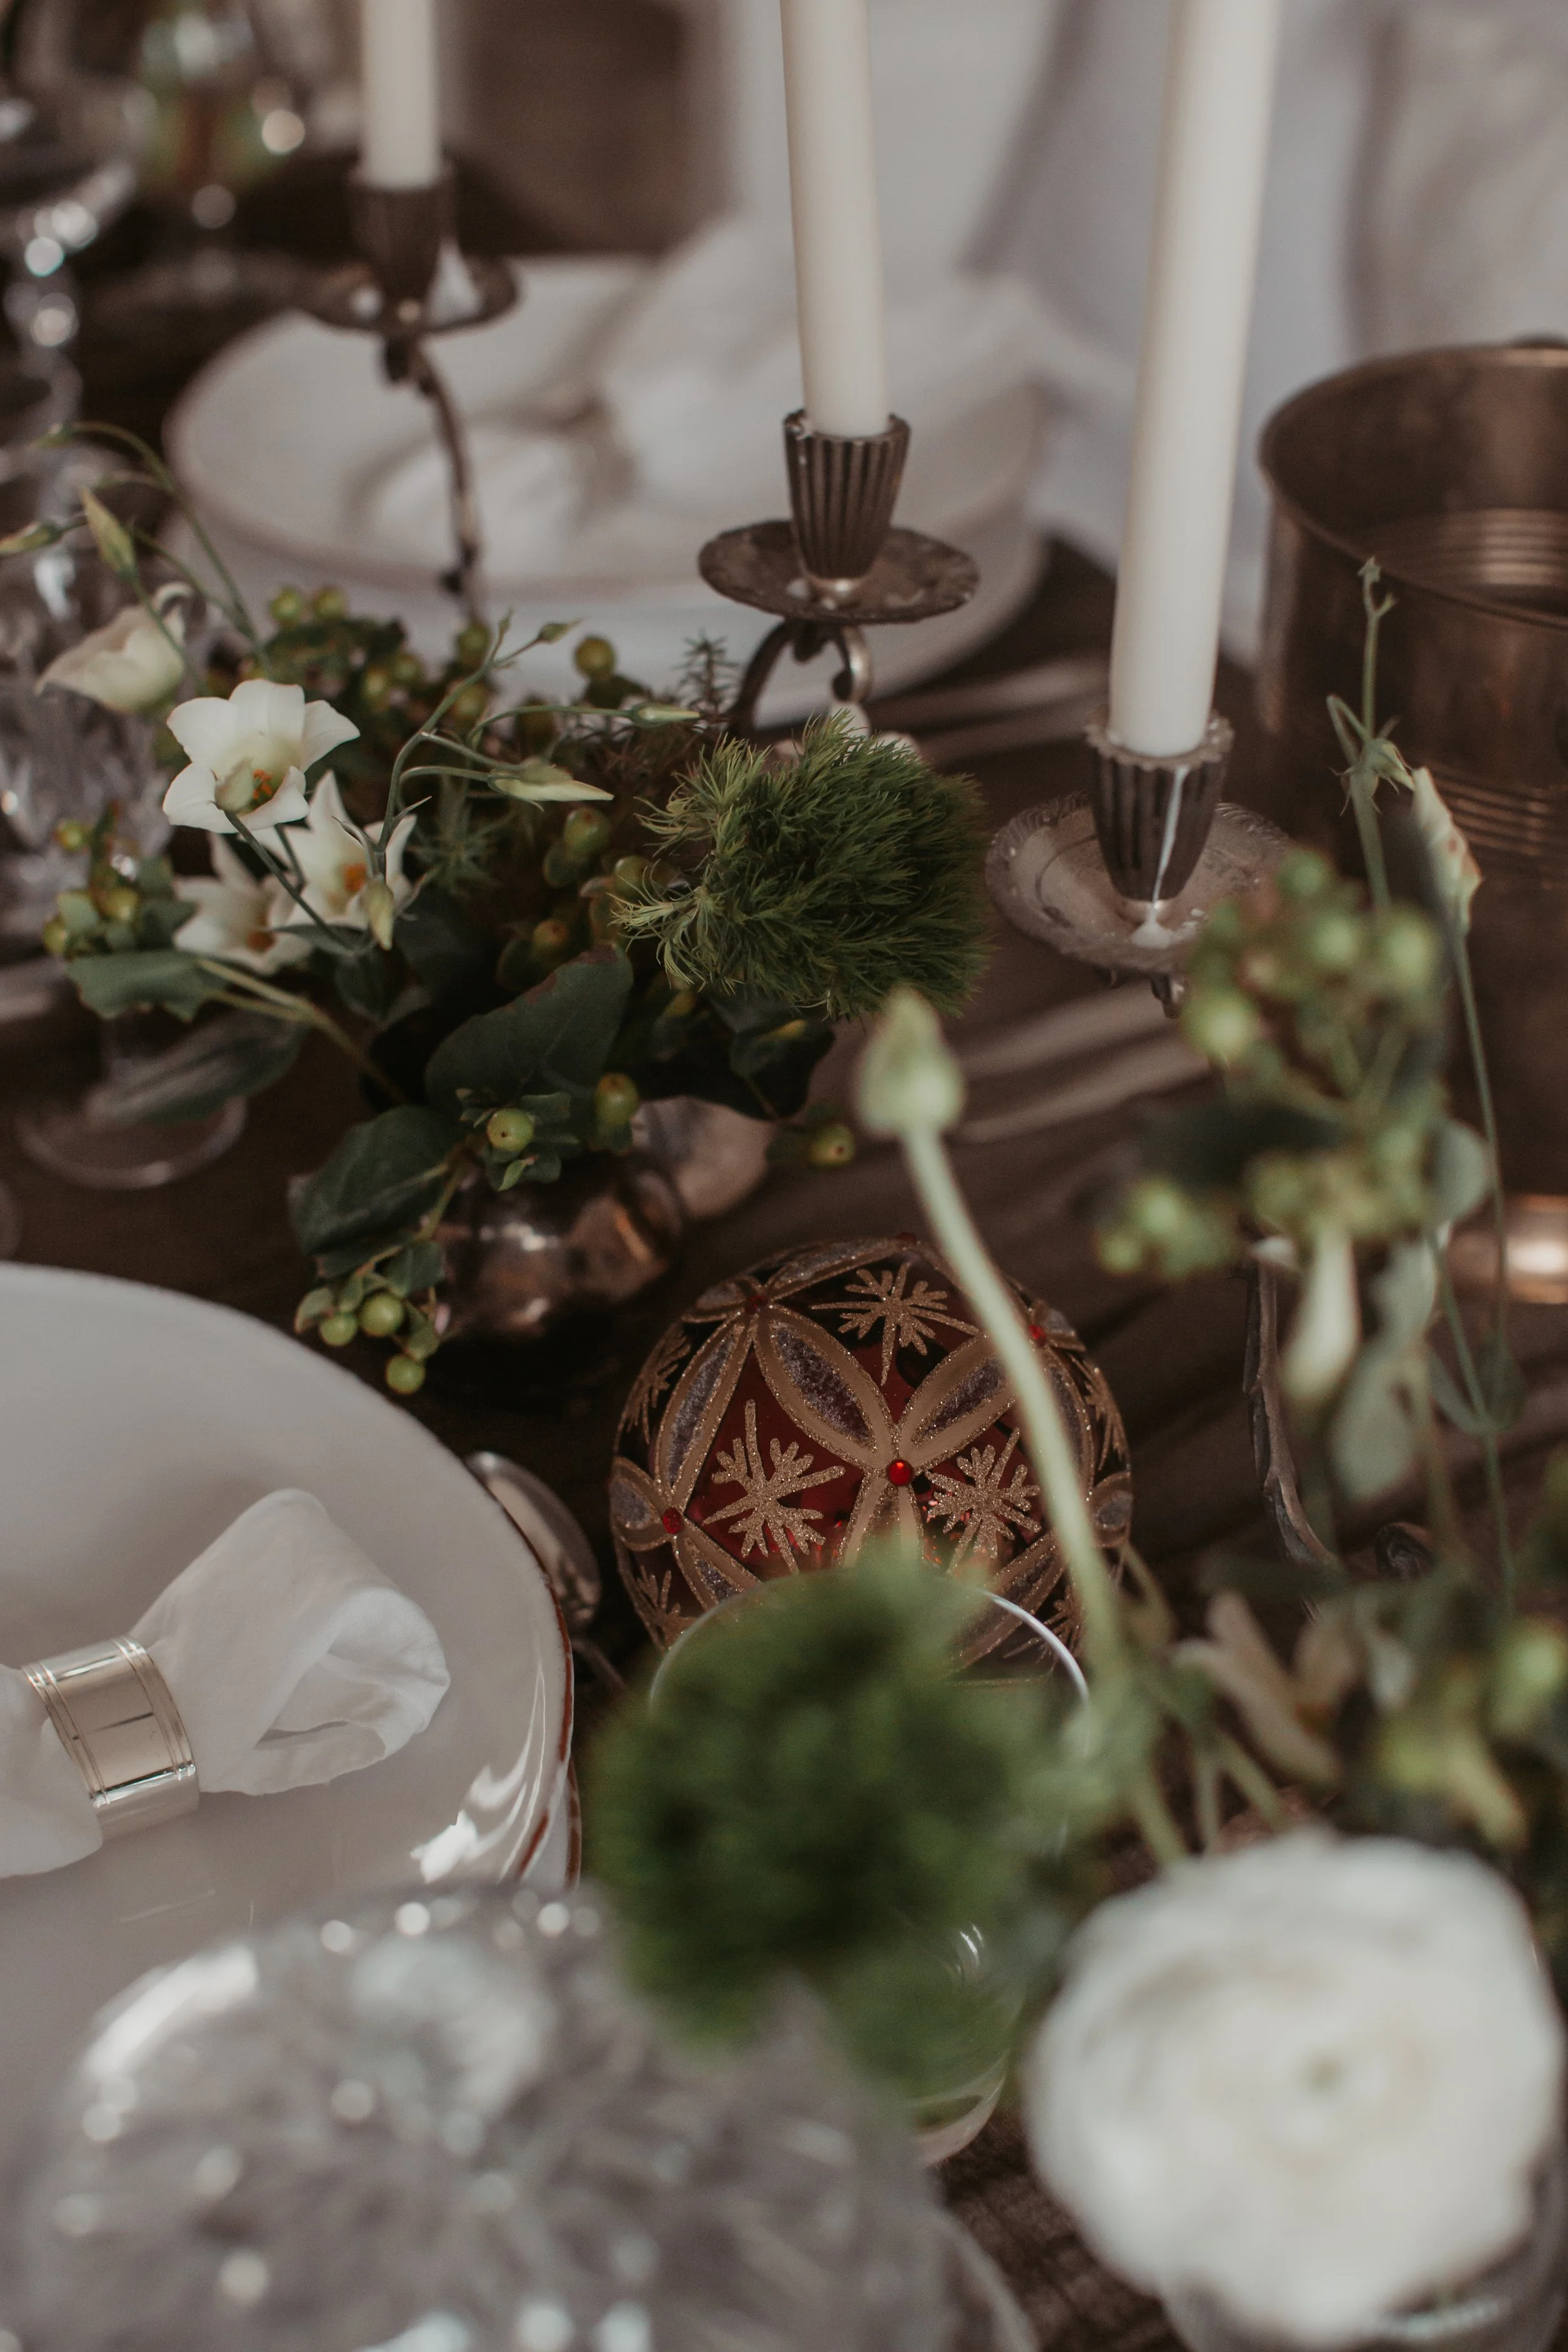
A Table Set for Stillness
A Vintage-Inspired Christmas Tablescape Rooted in Warmth, Memory, and Detail
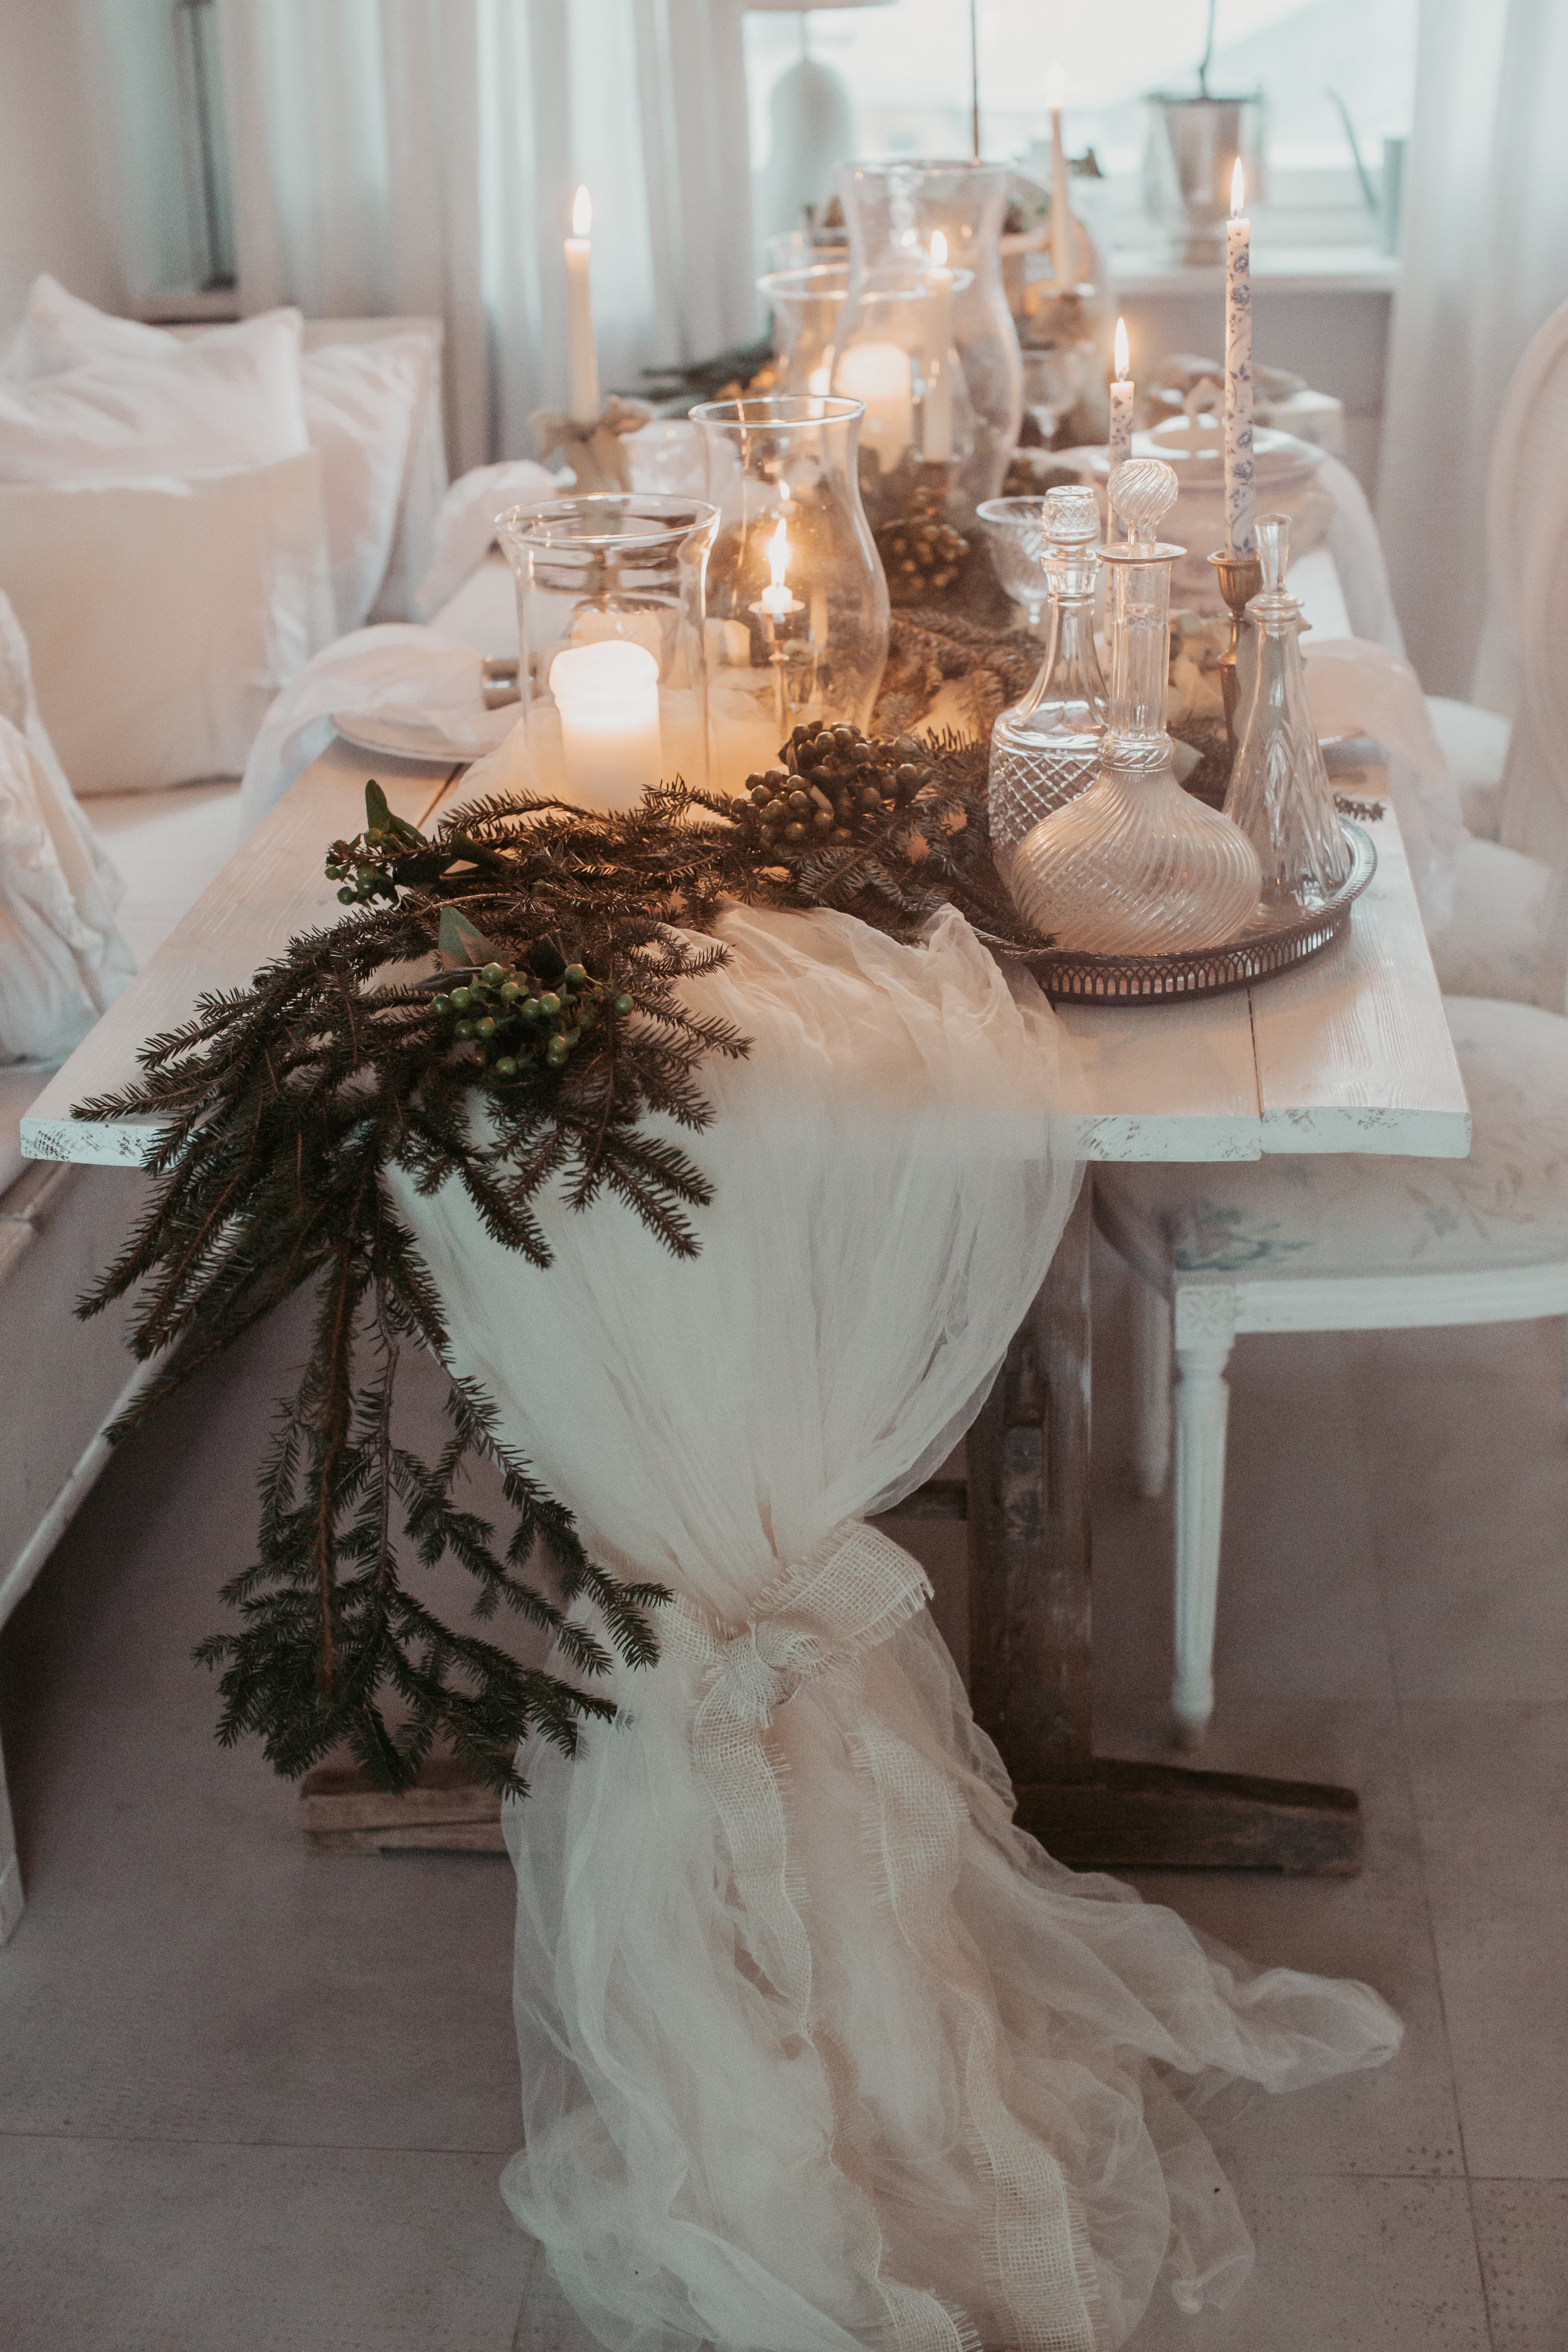
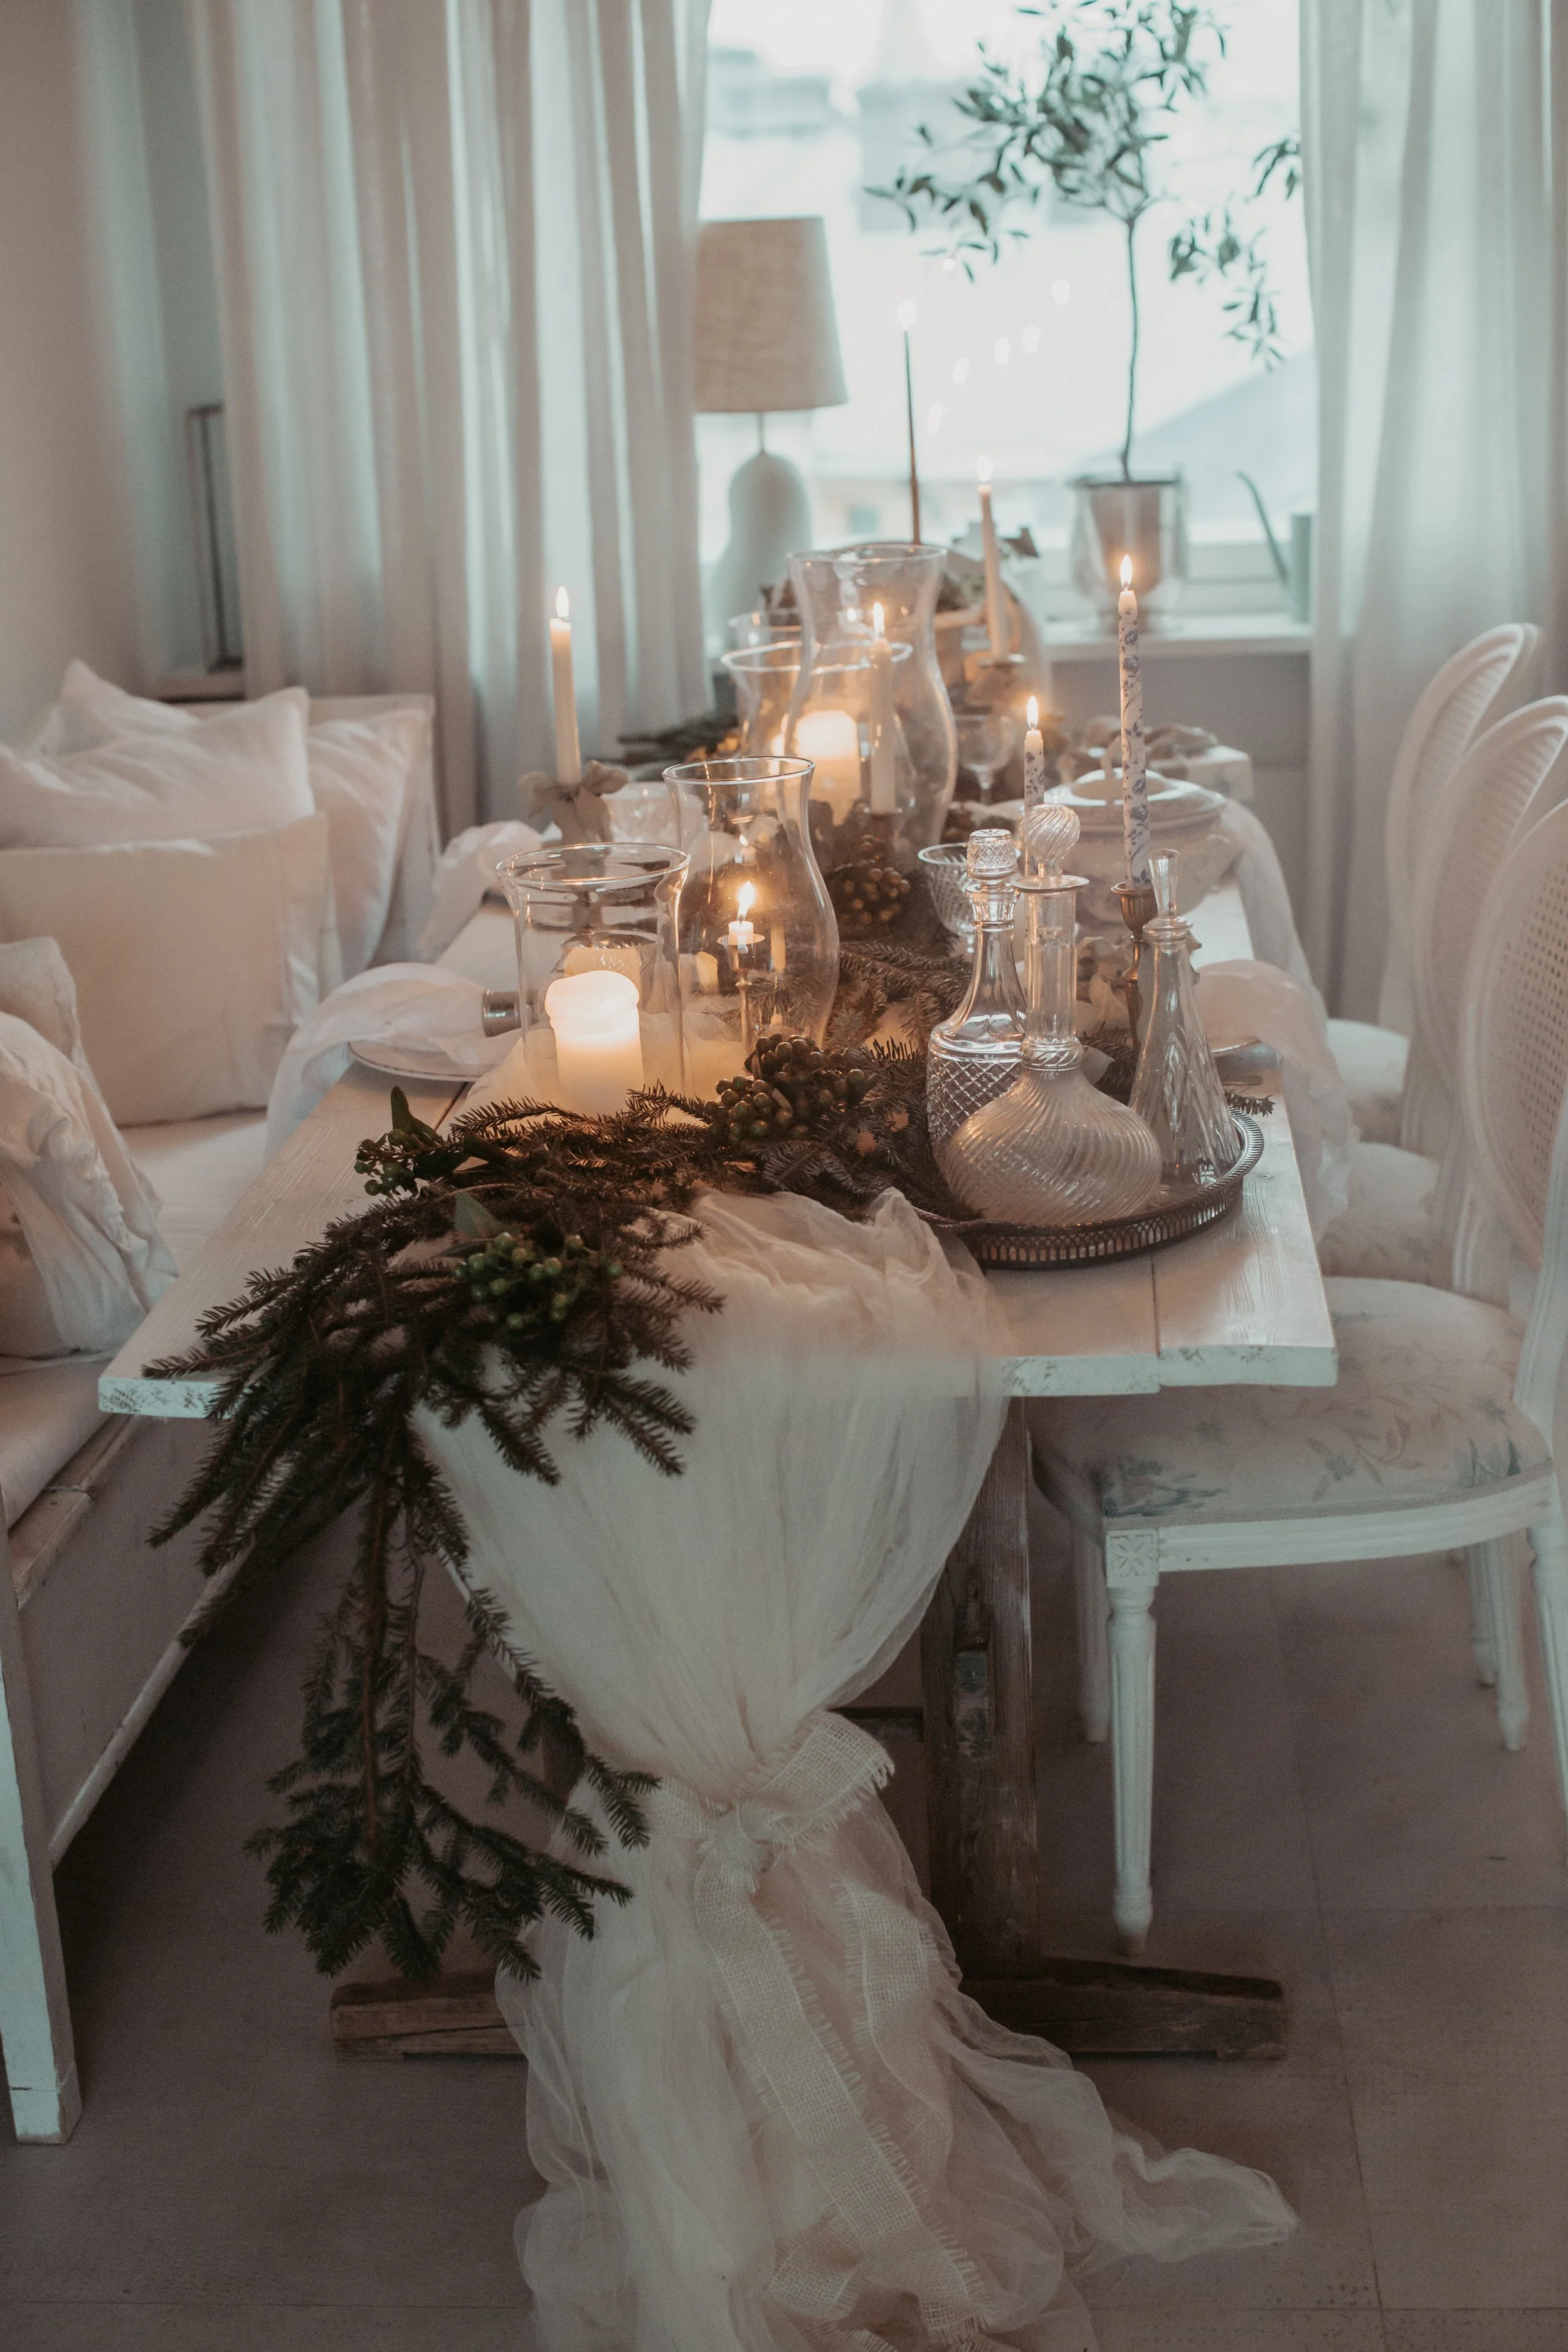
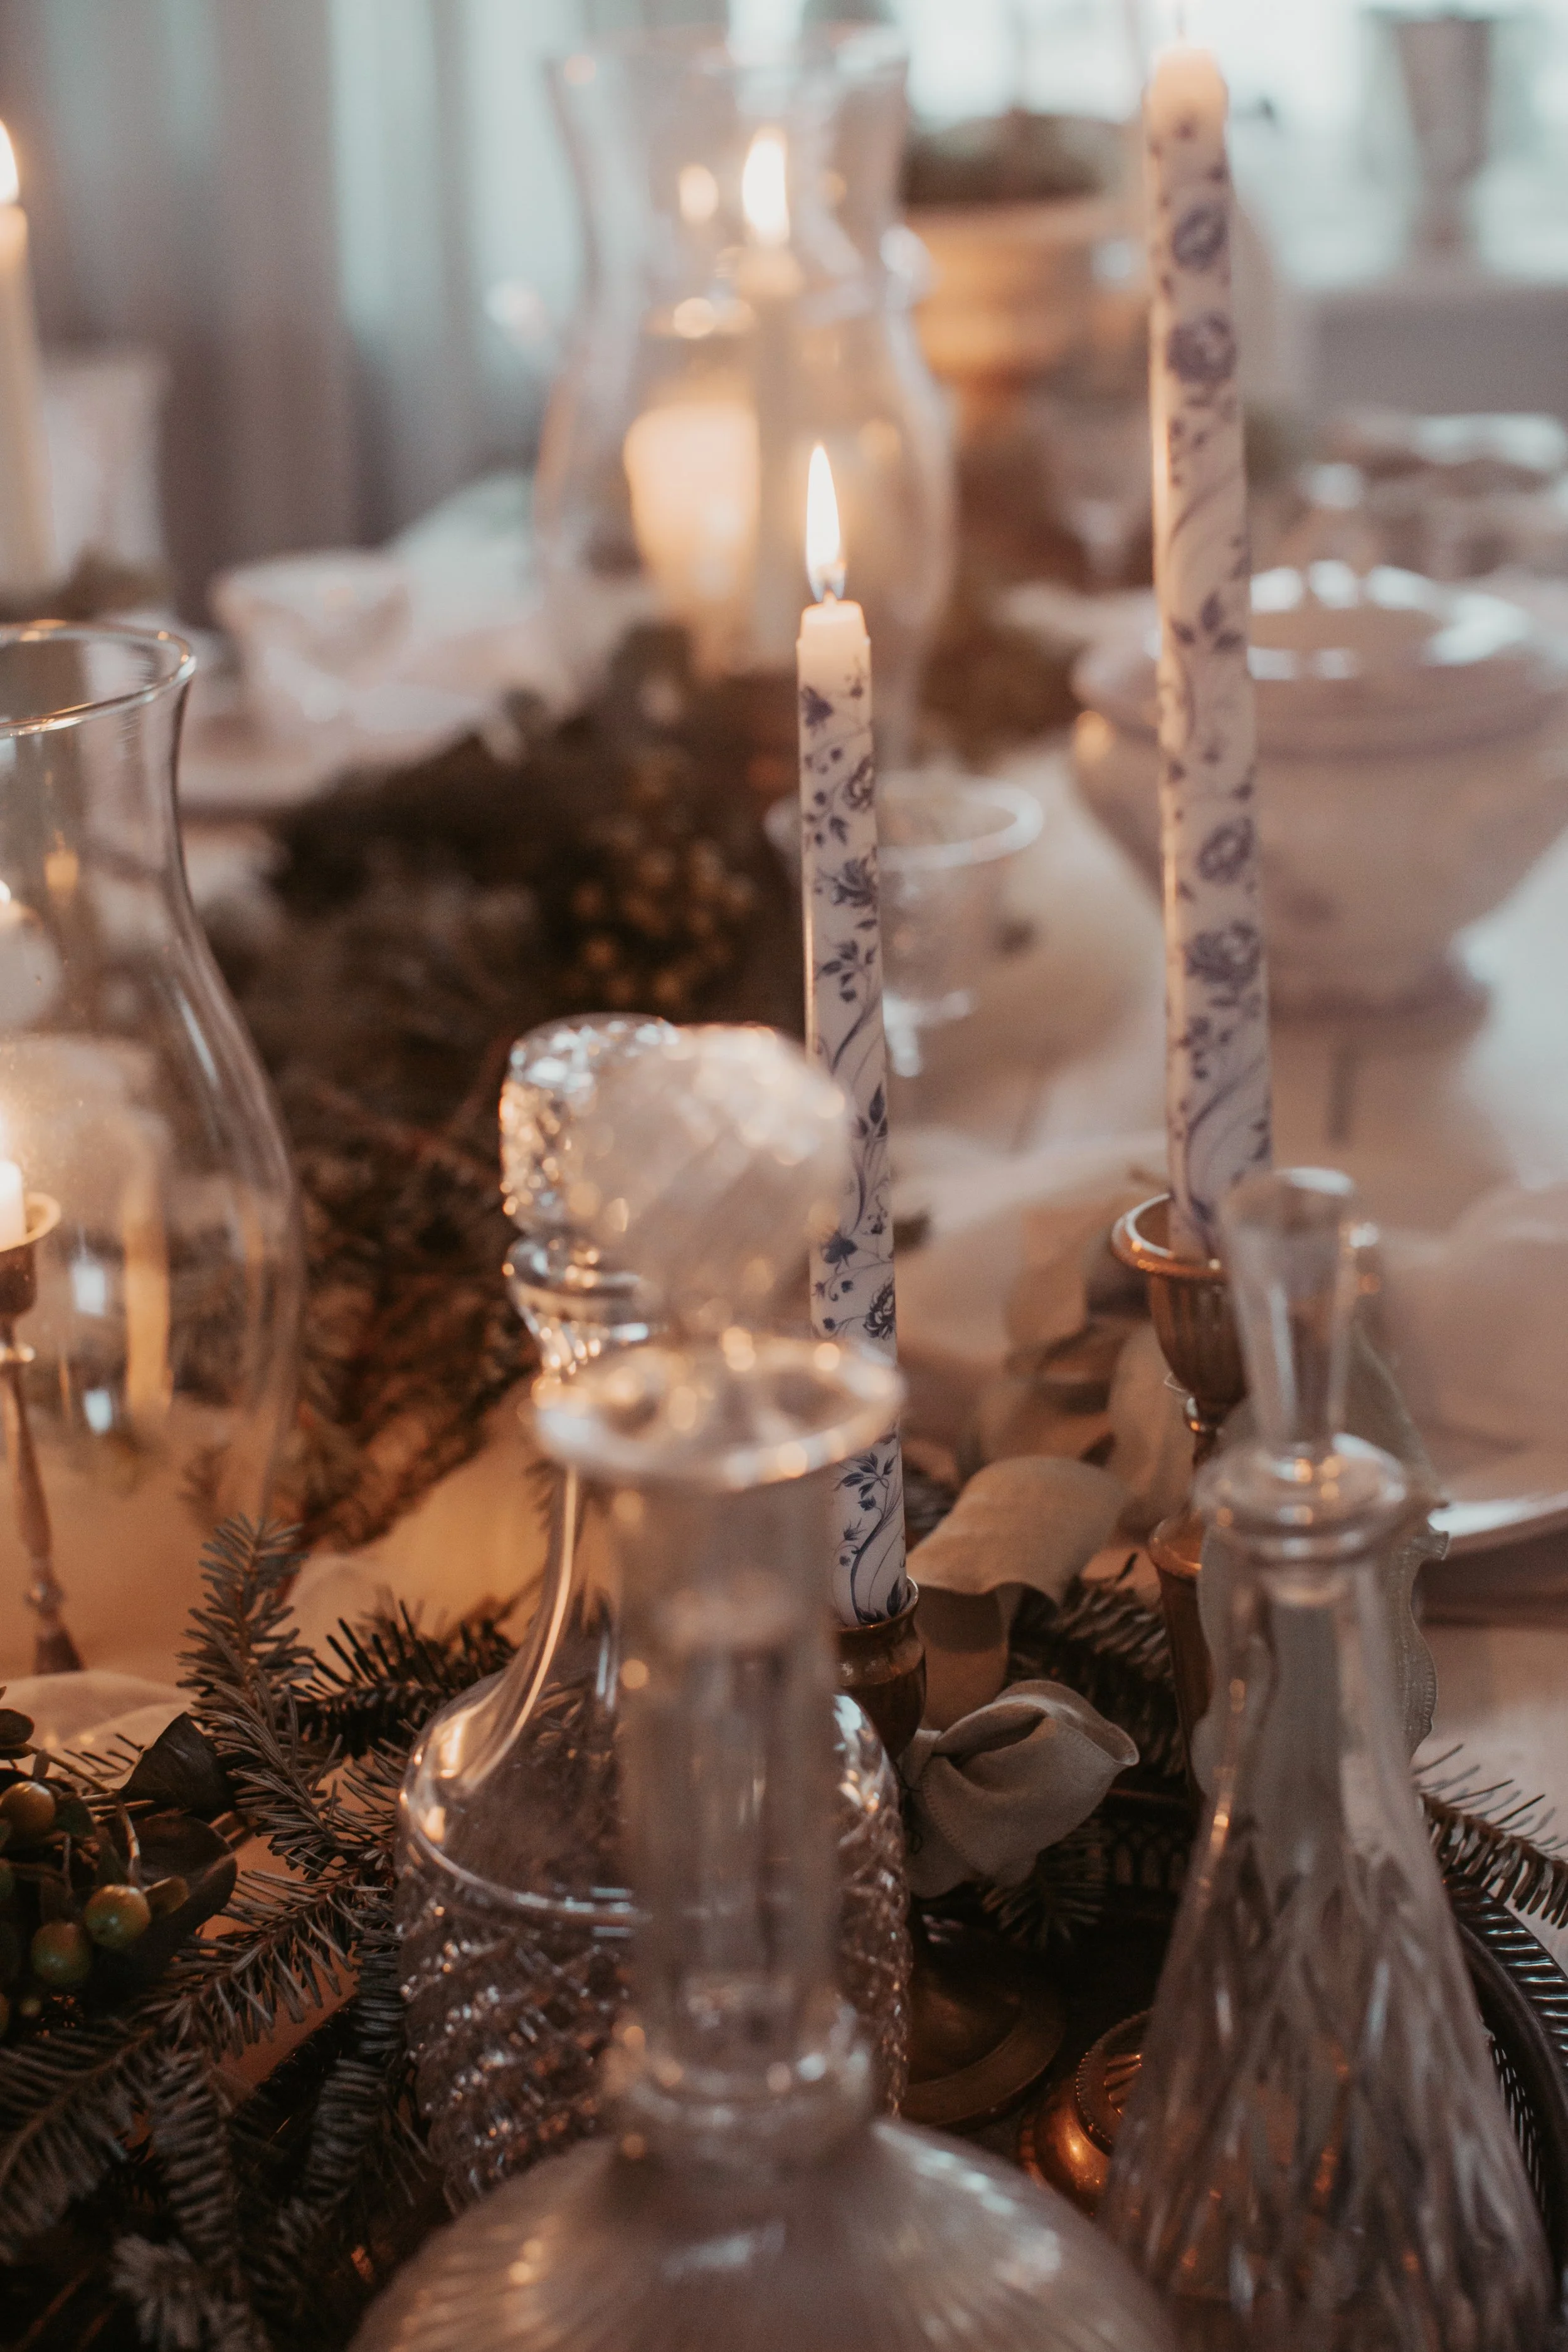
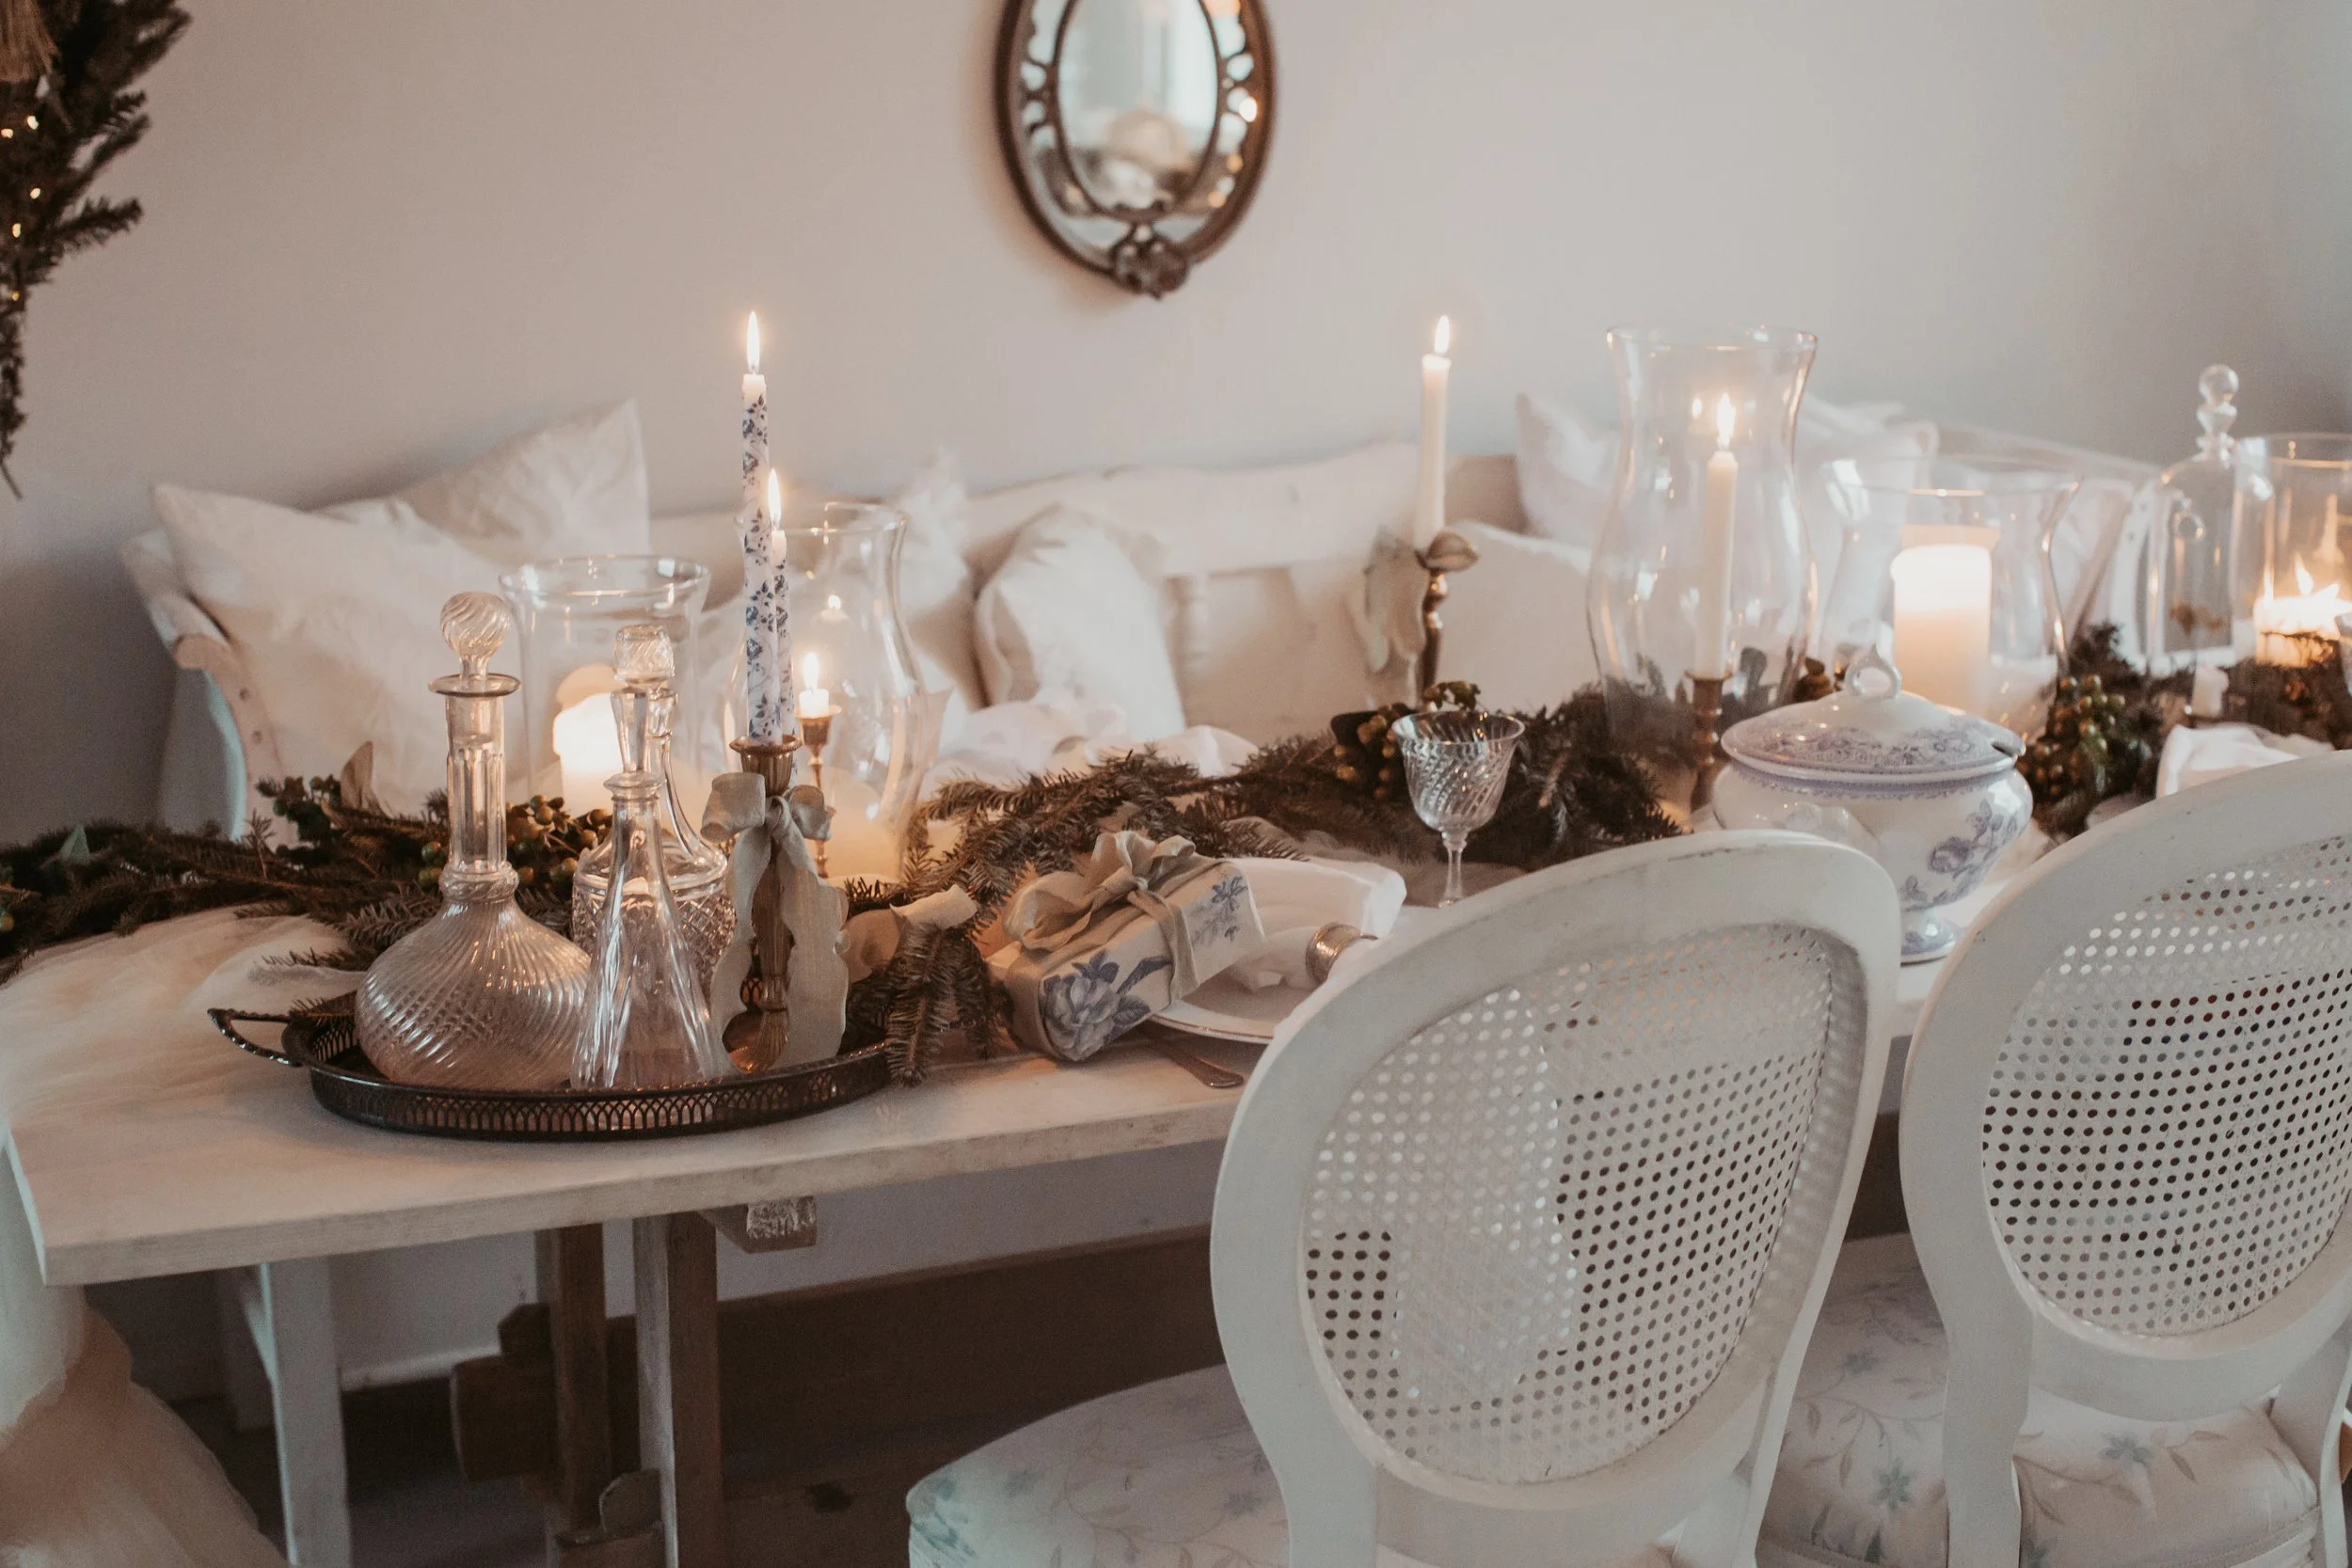
There is a certain quiet luxury in a Christmas table that does not try to impress. One that unfolds slowly, revealing itself in layers of texture, light, and scent. This vintage-inspired tablescape embraces that philosophy—where real pine, soft candlelight, and delicate repetition create an atmosphere that feels intimate, timeless, and deeply comforting.
The table begins with softness. A pale wooden surface remains visible beneath a length of sheer fabric, gently draped down the centre. Rather than lying flat, the fabric flows freely, spilling over the edge and tied loosely at the end. Its translucence catches the light, adding movement and a whisper of romance. This is a table that values ease over precision, allowing materials to behave as they naturally would.
At its heart lies a garland of fresh pine. Unstructured and organic, the greenery runs through the centre like a winter forest path, layered with pinecones and muted berries. The branches remain low and relaxed, never competing with the place settings or interrupting conversation. More than decoration, the pine brings the unmistakable scent of the season—an aroma that instantly grounds the space and evokes memories of Christmases past. Under the pine lays a thick layer of white chiffon style fabric that full drapes to the ground on both edges. It adds drama but softness with the pines on top.
Candlelight weaves through the table, transforming it as day turns to evening. Tall taper candles rise from vintage holders, their flames flickering softly, while pillar candles glow inside clear glass hurricane vases. The interplay of heights and transparencies creates depth, casting reflections across glass and crystal surfaces. As the candles burn, the room is gently illuminated—not brightly, but enough to soften edges and invite stillness.
It is in the smallest details that the table finds its soul. A handful of taper candles are wrapped in delicate vintage-style paper, all sharing the same subtle pattern. This quiet repetition brings cohesion, offering a visual thread that ties the arrangement together. It is not immediately obvious, yet unmistakably intentional—a reminder that thoughtful design often lives in restraint.
Scattered among the greenery are vintage glass bottles and crystal decanters, their shapes catching the candlelight in delicate refractions. Silver and brass accents add a muted warmth, never overpowering the natural palette. Nothing matches exactly, yet everything feels in conversation, bound by tone, texture, and age.
Place settings remain simple and serene. White plates, softly folded linen napkins, and understated details ensure that the table remains inviting rather than formal. A sprig of pine or a gently tied ribbon adds a festive gesture without excess, allowing the setting to feel personal and lived-in.
As the final candles are lit and overhead lights fade away, the table comes into its own. Shadows dance across fabric and glass, pine needles release their scent, and the space settles into calm. This is a table designed not for spectacle, but for presence—for long conversations, shared meals, and the quiet joy of being together.
In a season often defined by abundance, this tablescape offers a different kind of richness. One found in simplicity, repetition, and care. A reminder that the most memorable Christmas tables are not those filled with decoration, but those filled with feeling.
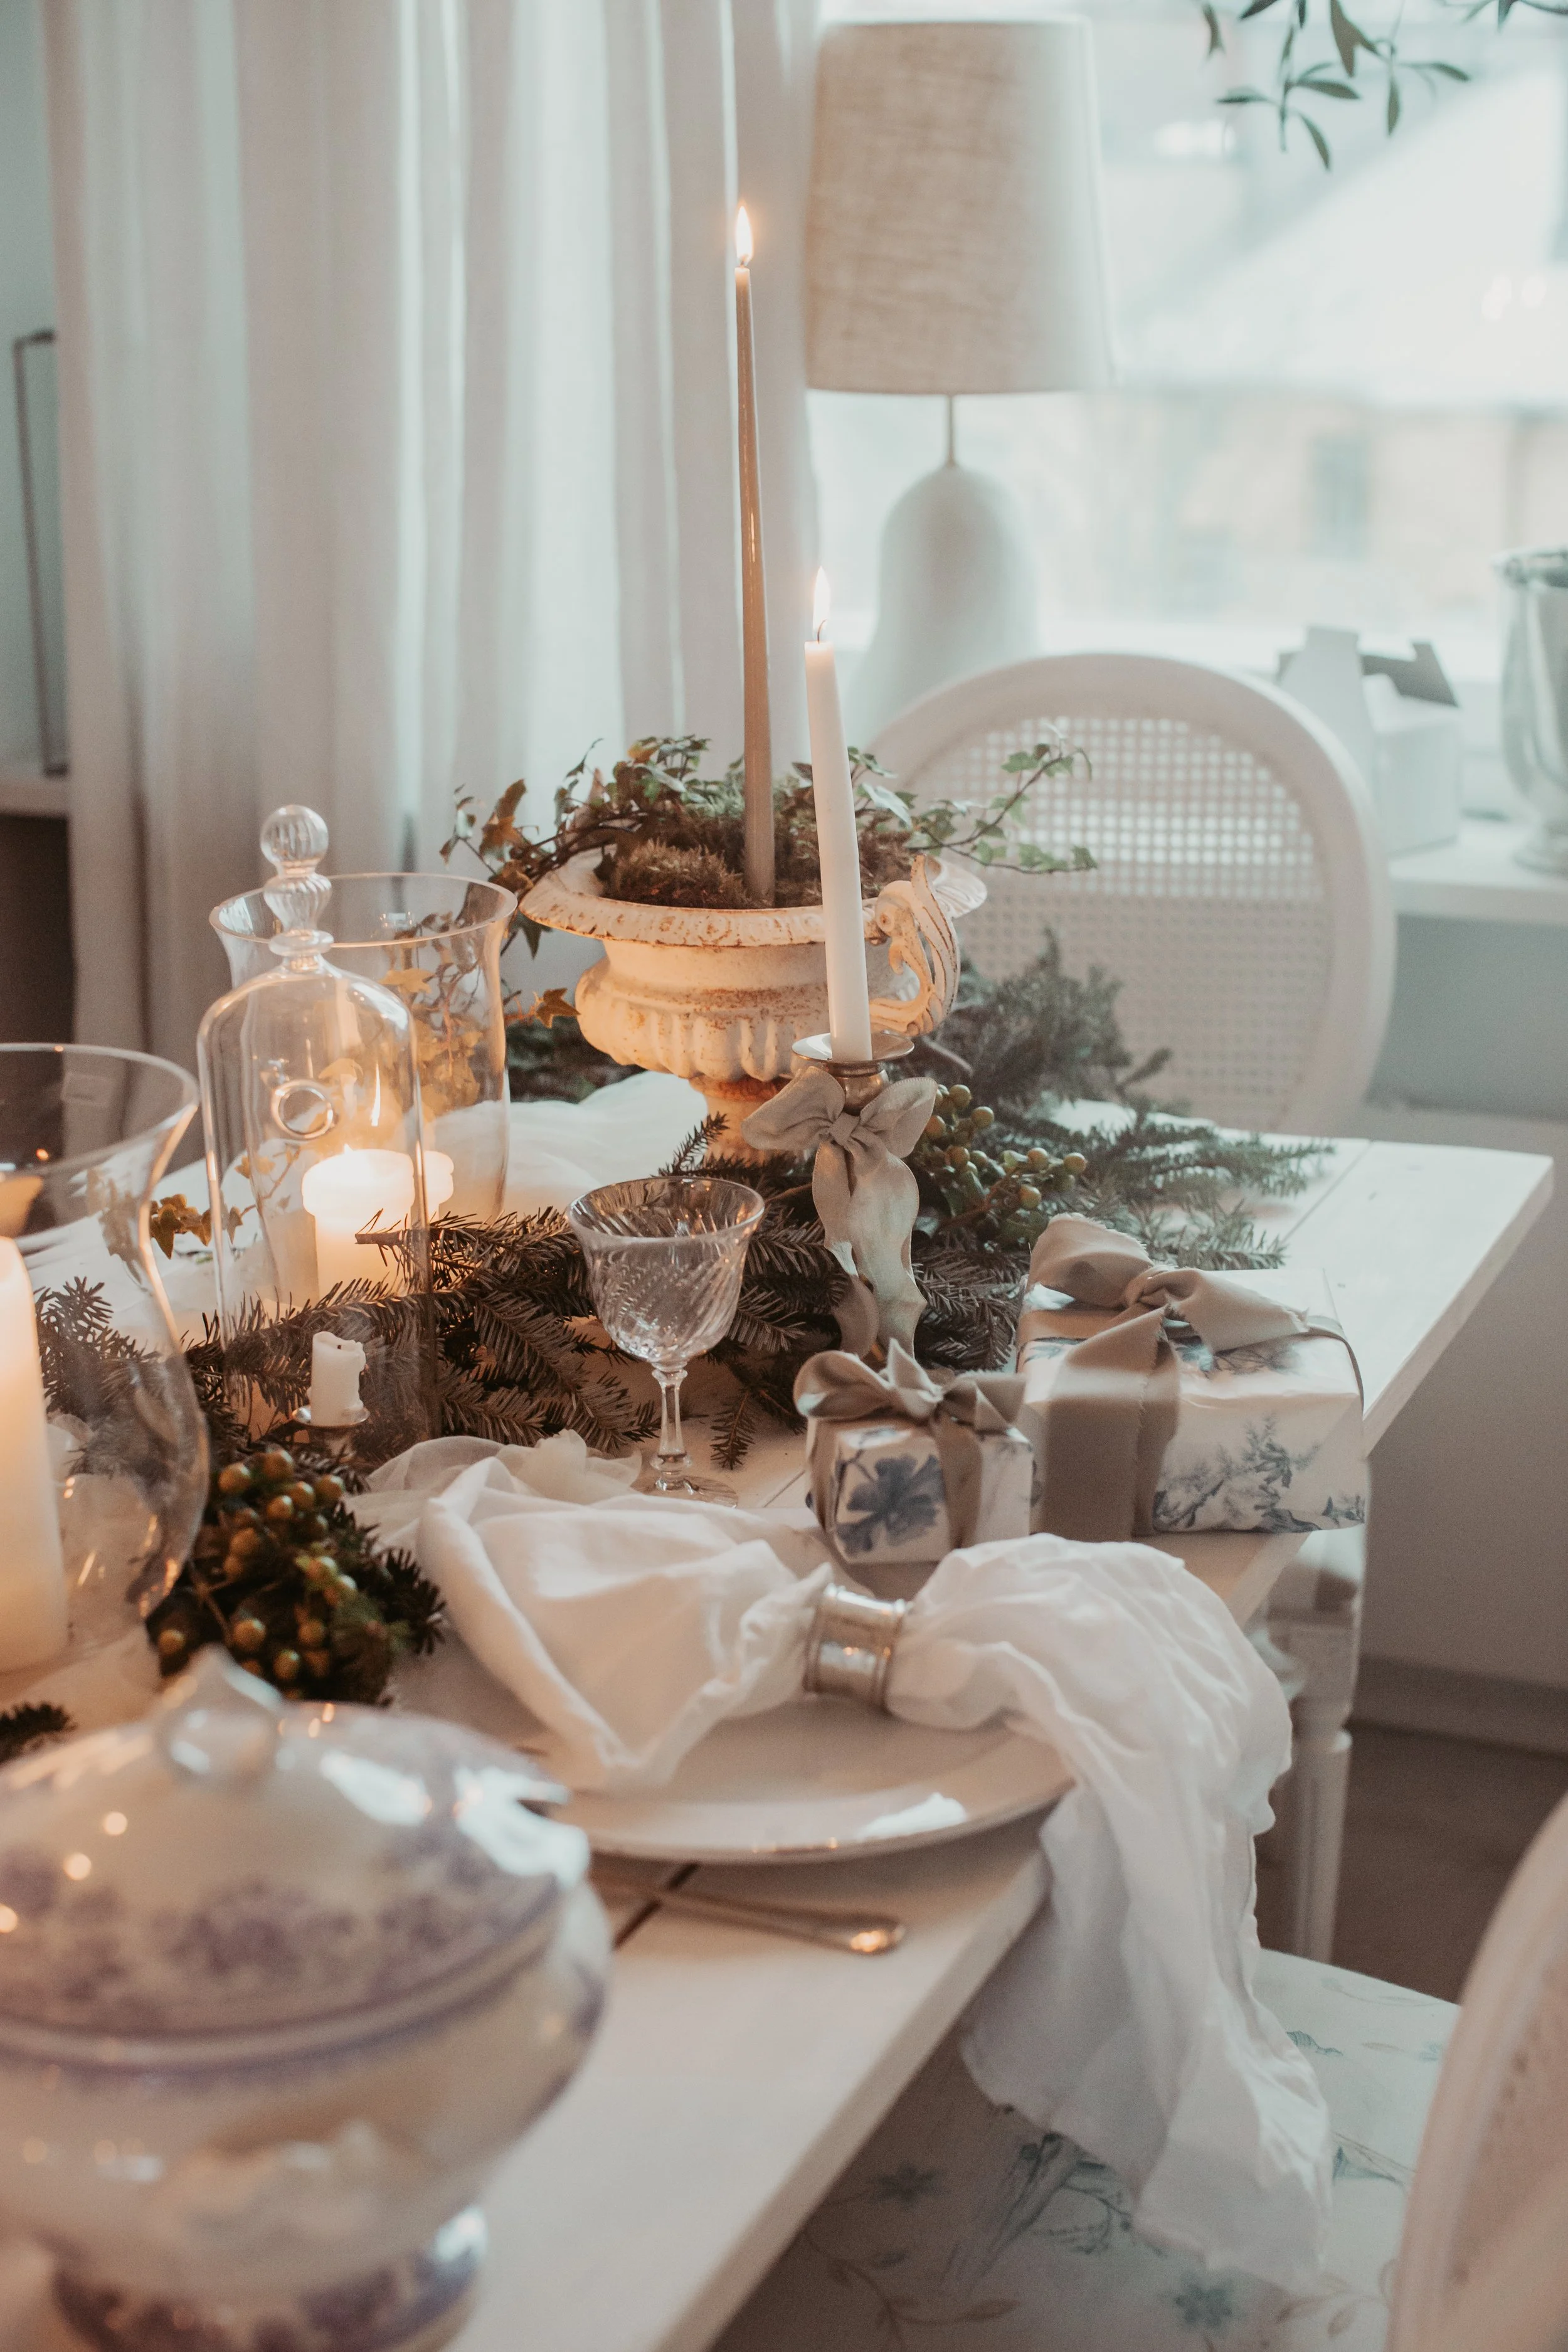


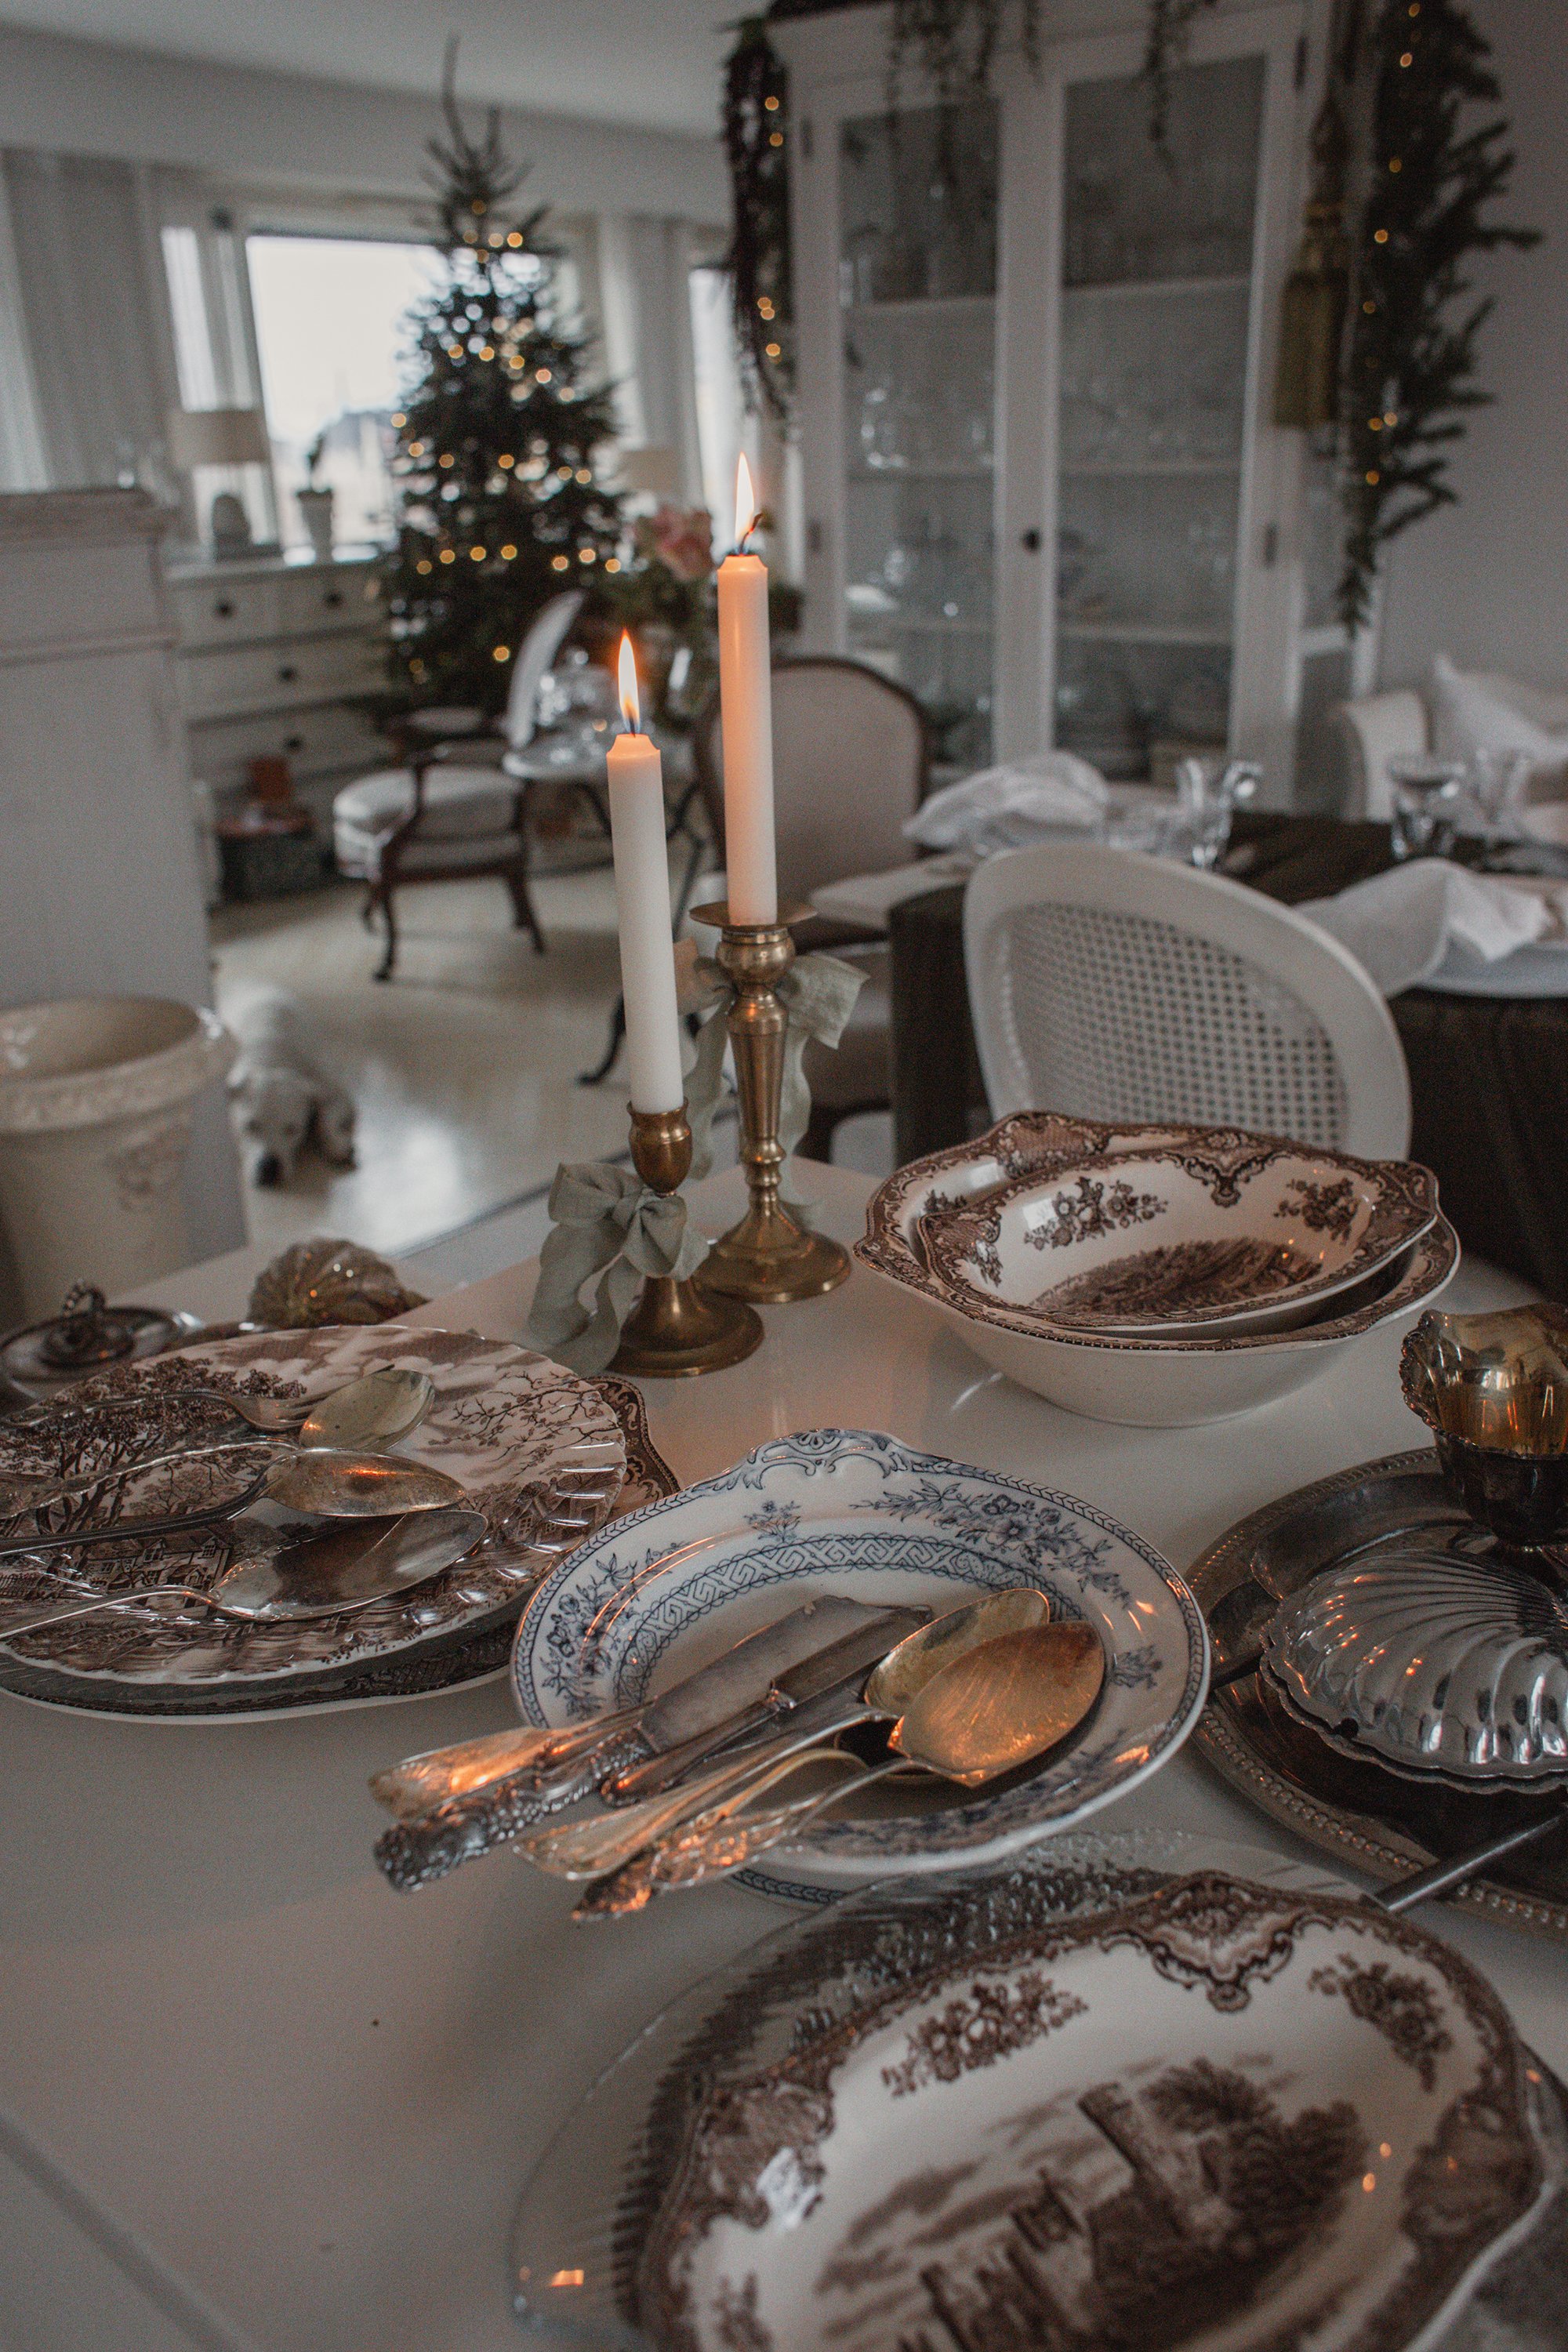
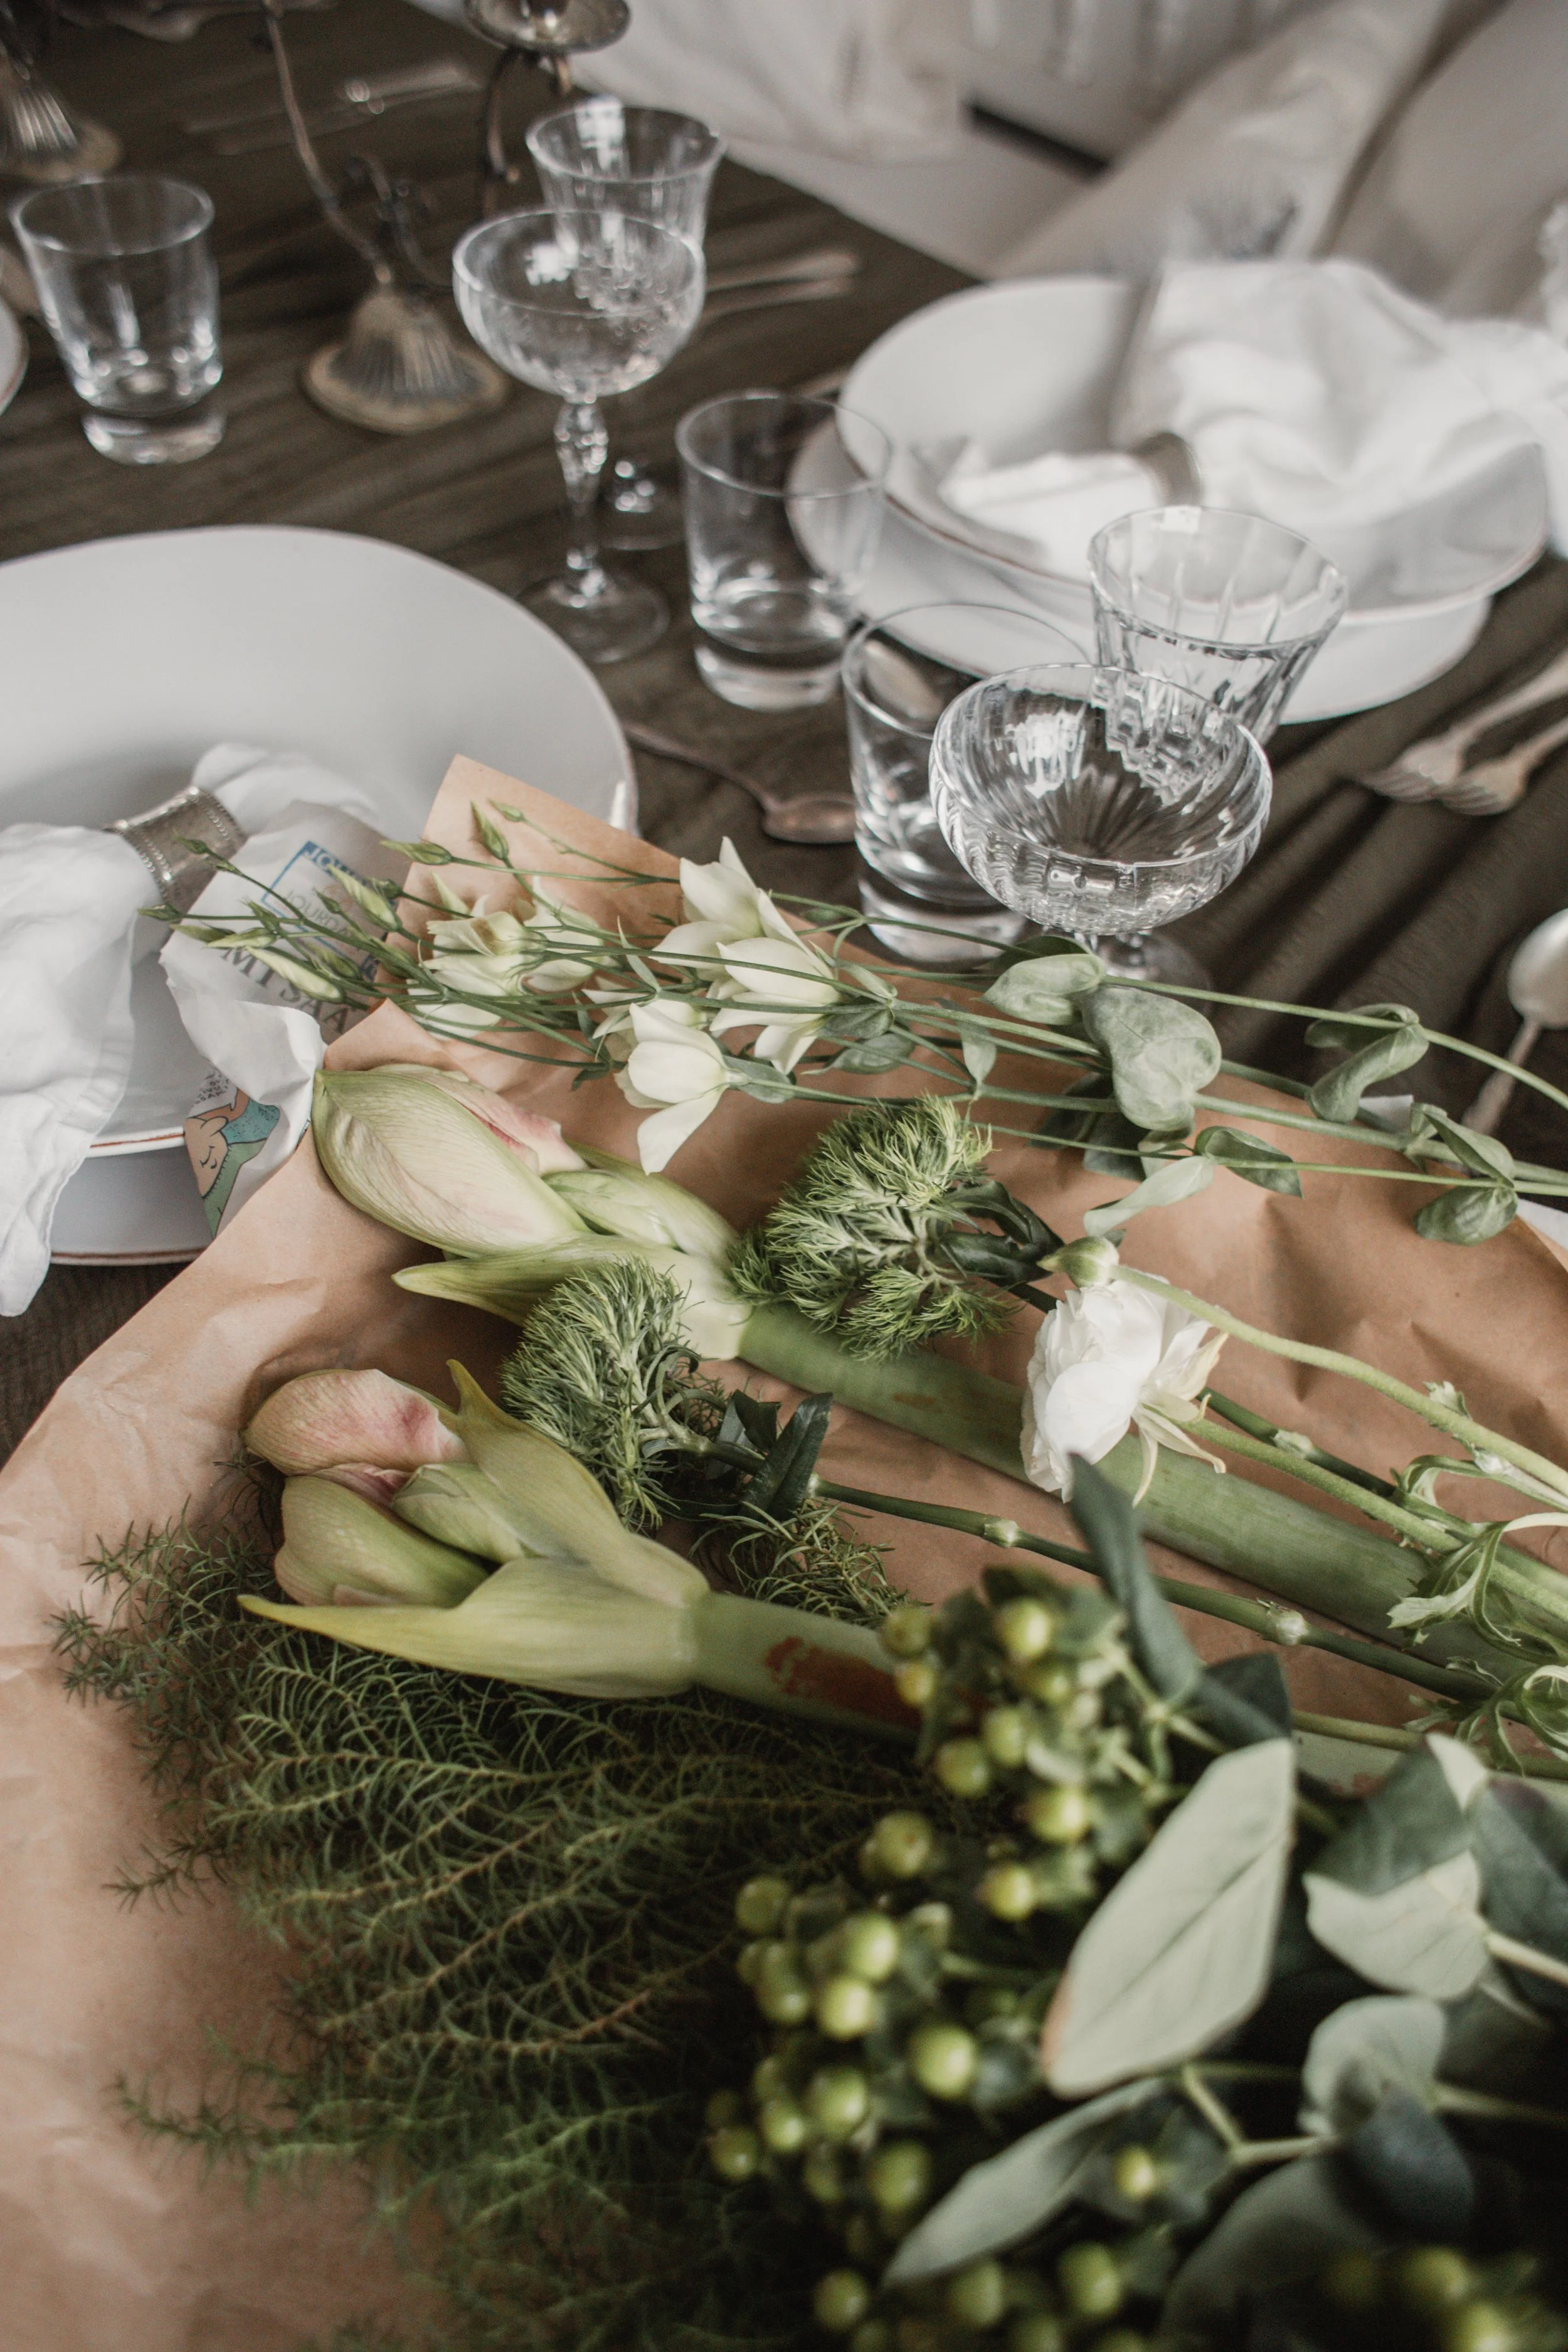
Christmas Eve flowers & Table setting

Christmas Eve table
Dressing the table for Christmas Eve is less about perfection and more about setting a mood that invites people to linger. This year, the table was grounded in calm and quiet elegance, starting with a moss-green tablecloth that instantly brought the outdoors in. Its soft, earthy tone created a backdrop that felt both festive and timeless, allowing every other element to settle naturally into place.
Running down the center, a flowing garland replaced anything too structured or symmetrical. Intertwined with antique white candles, it cast a warm, gentle light that felt intimate rather than formal. The candlelight danced across unusual cut flowers—chosen in restrained shades of white and green—adding texture and a sense of spontaneity, as if they had been gathered rather than arranged.
Everything about the table leaned into natural beauty. Large linen napkins, softly folded, introduced a tactile richness, while oversized white Italian plates anchored each place setting with quiet confidence. There was no need for excess decoration; the materials spoke for themselves. Together, they created a table that felt generous, calm, and deeply welcoming—a setting where conversation, candlelight, and the simple joy of Christmas Eve could take center stage.


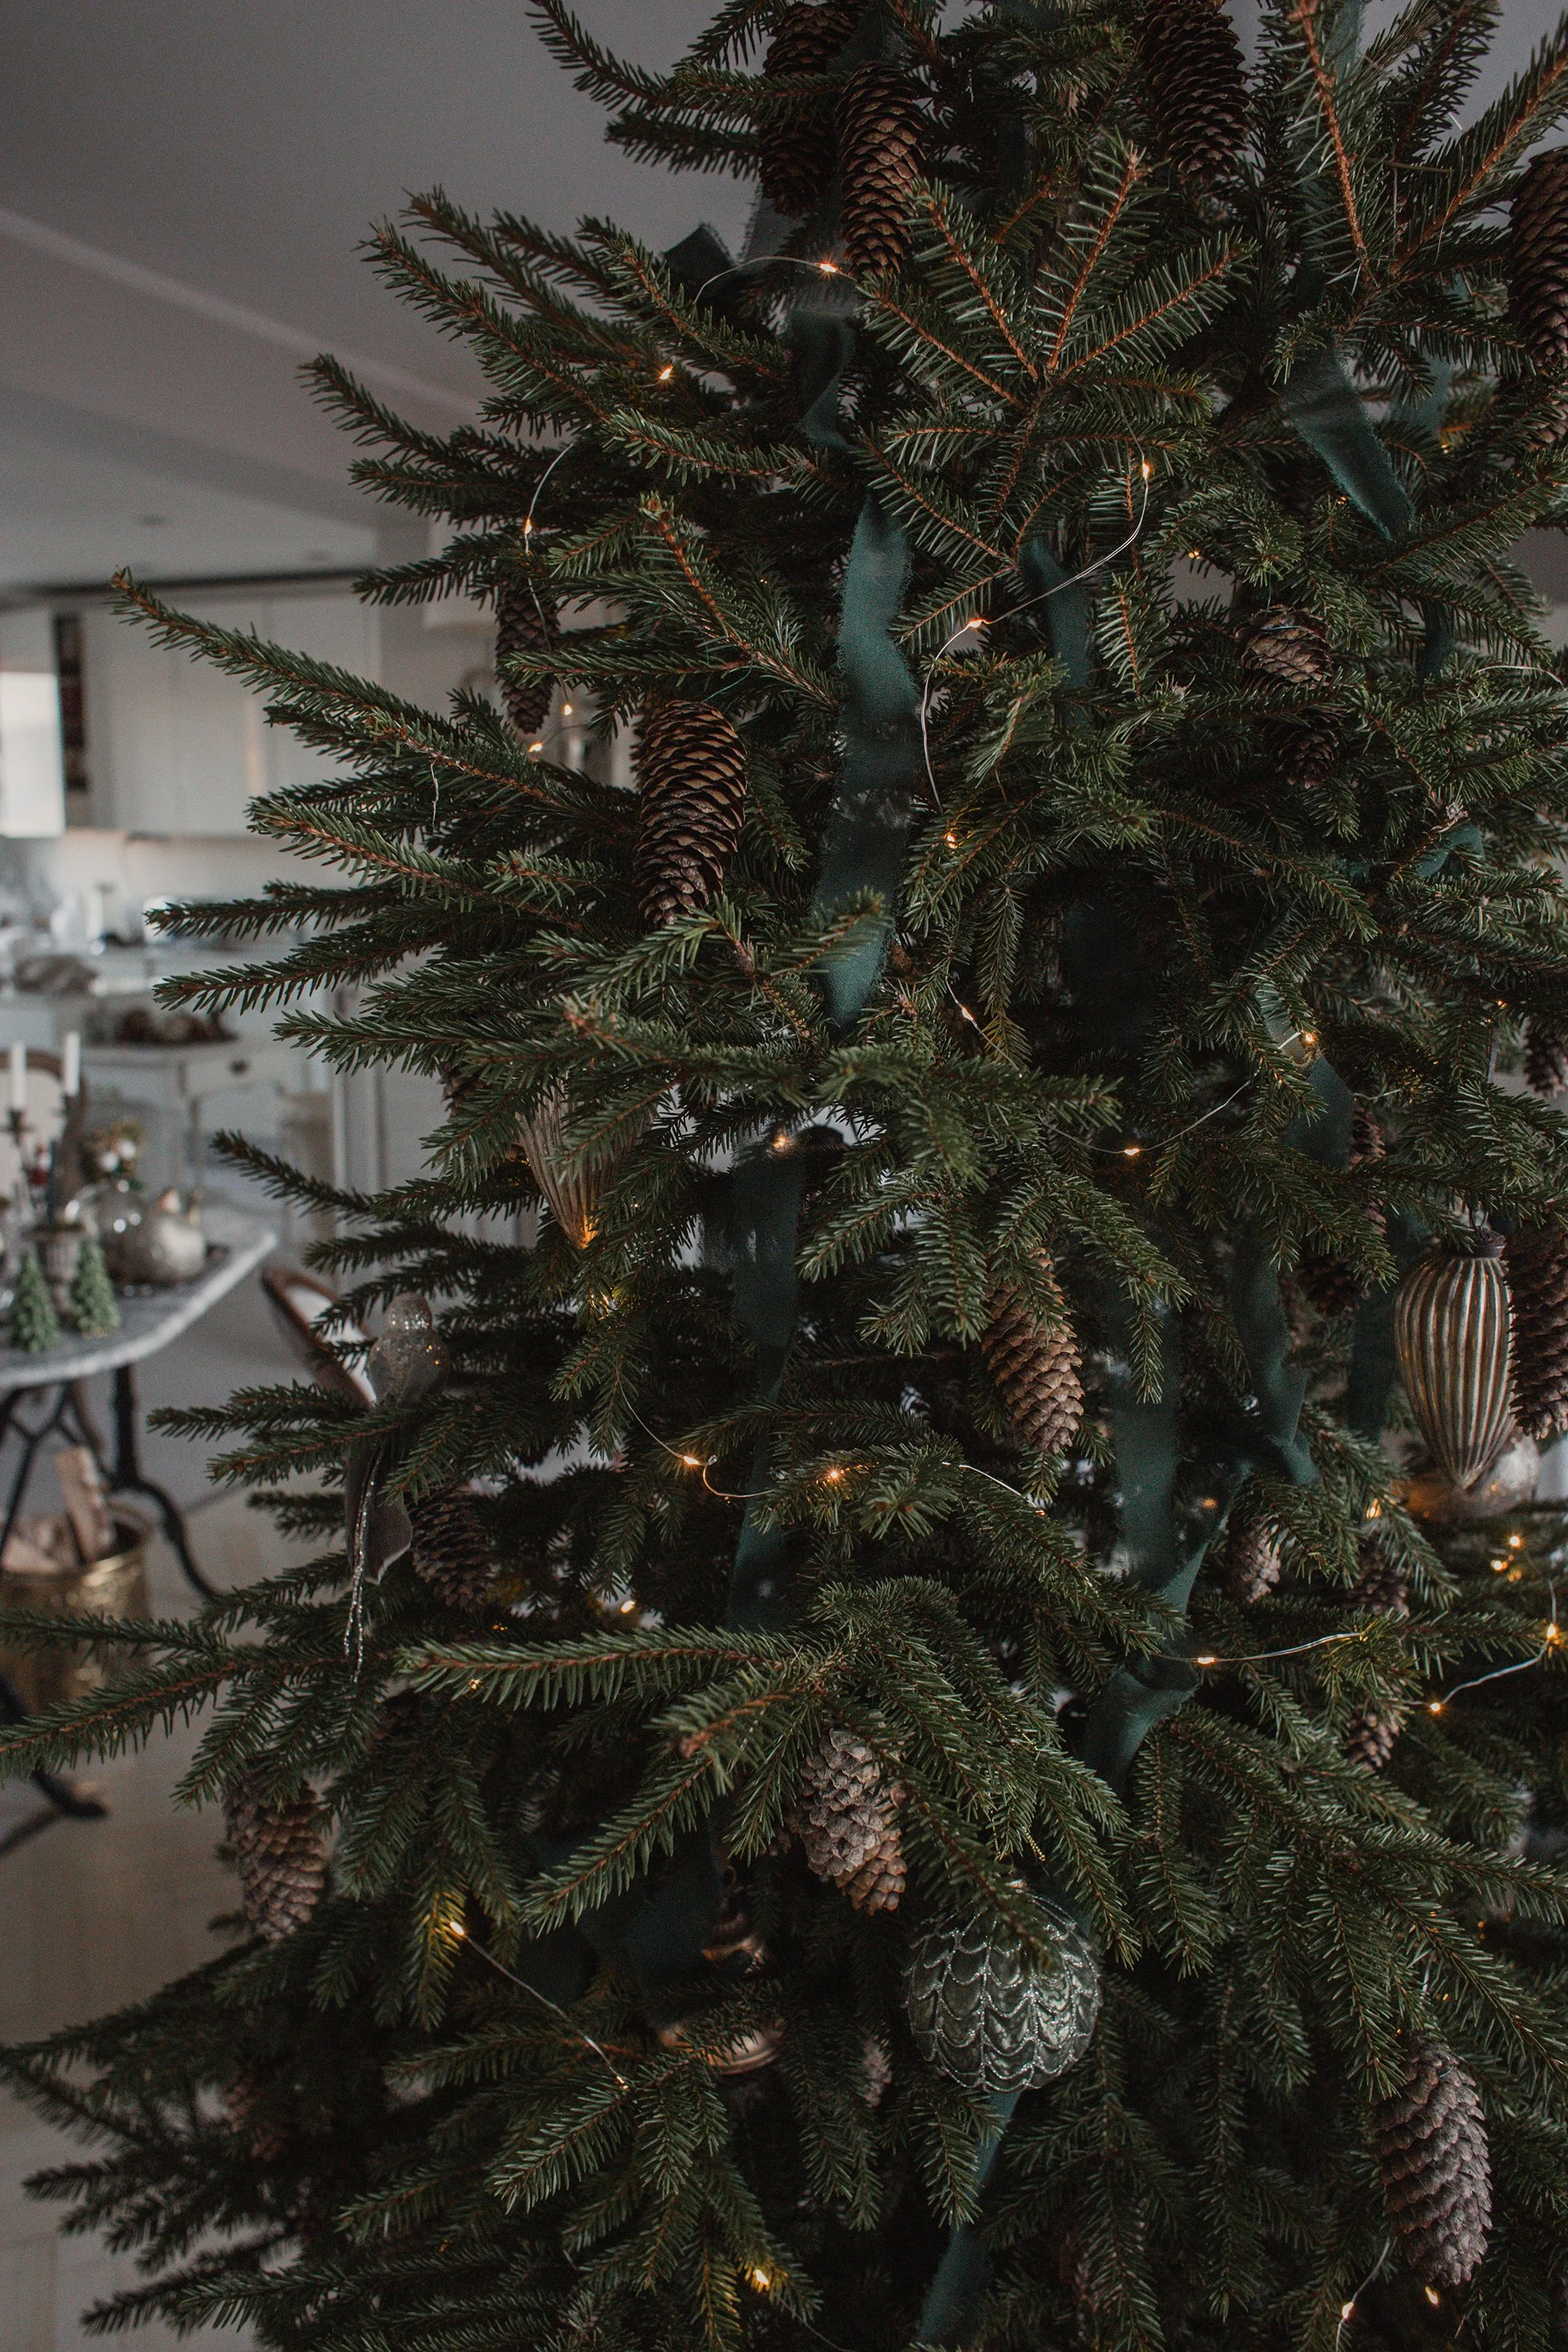
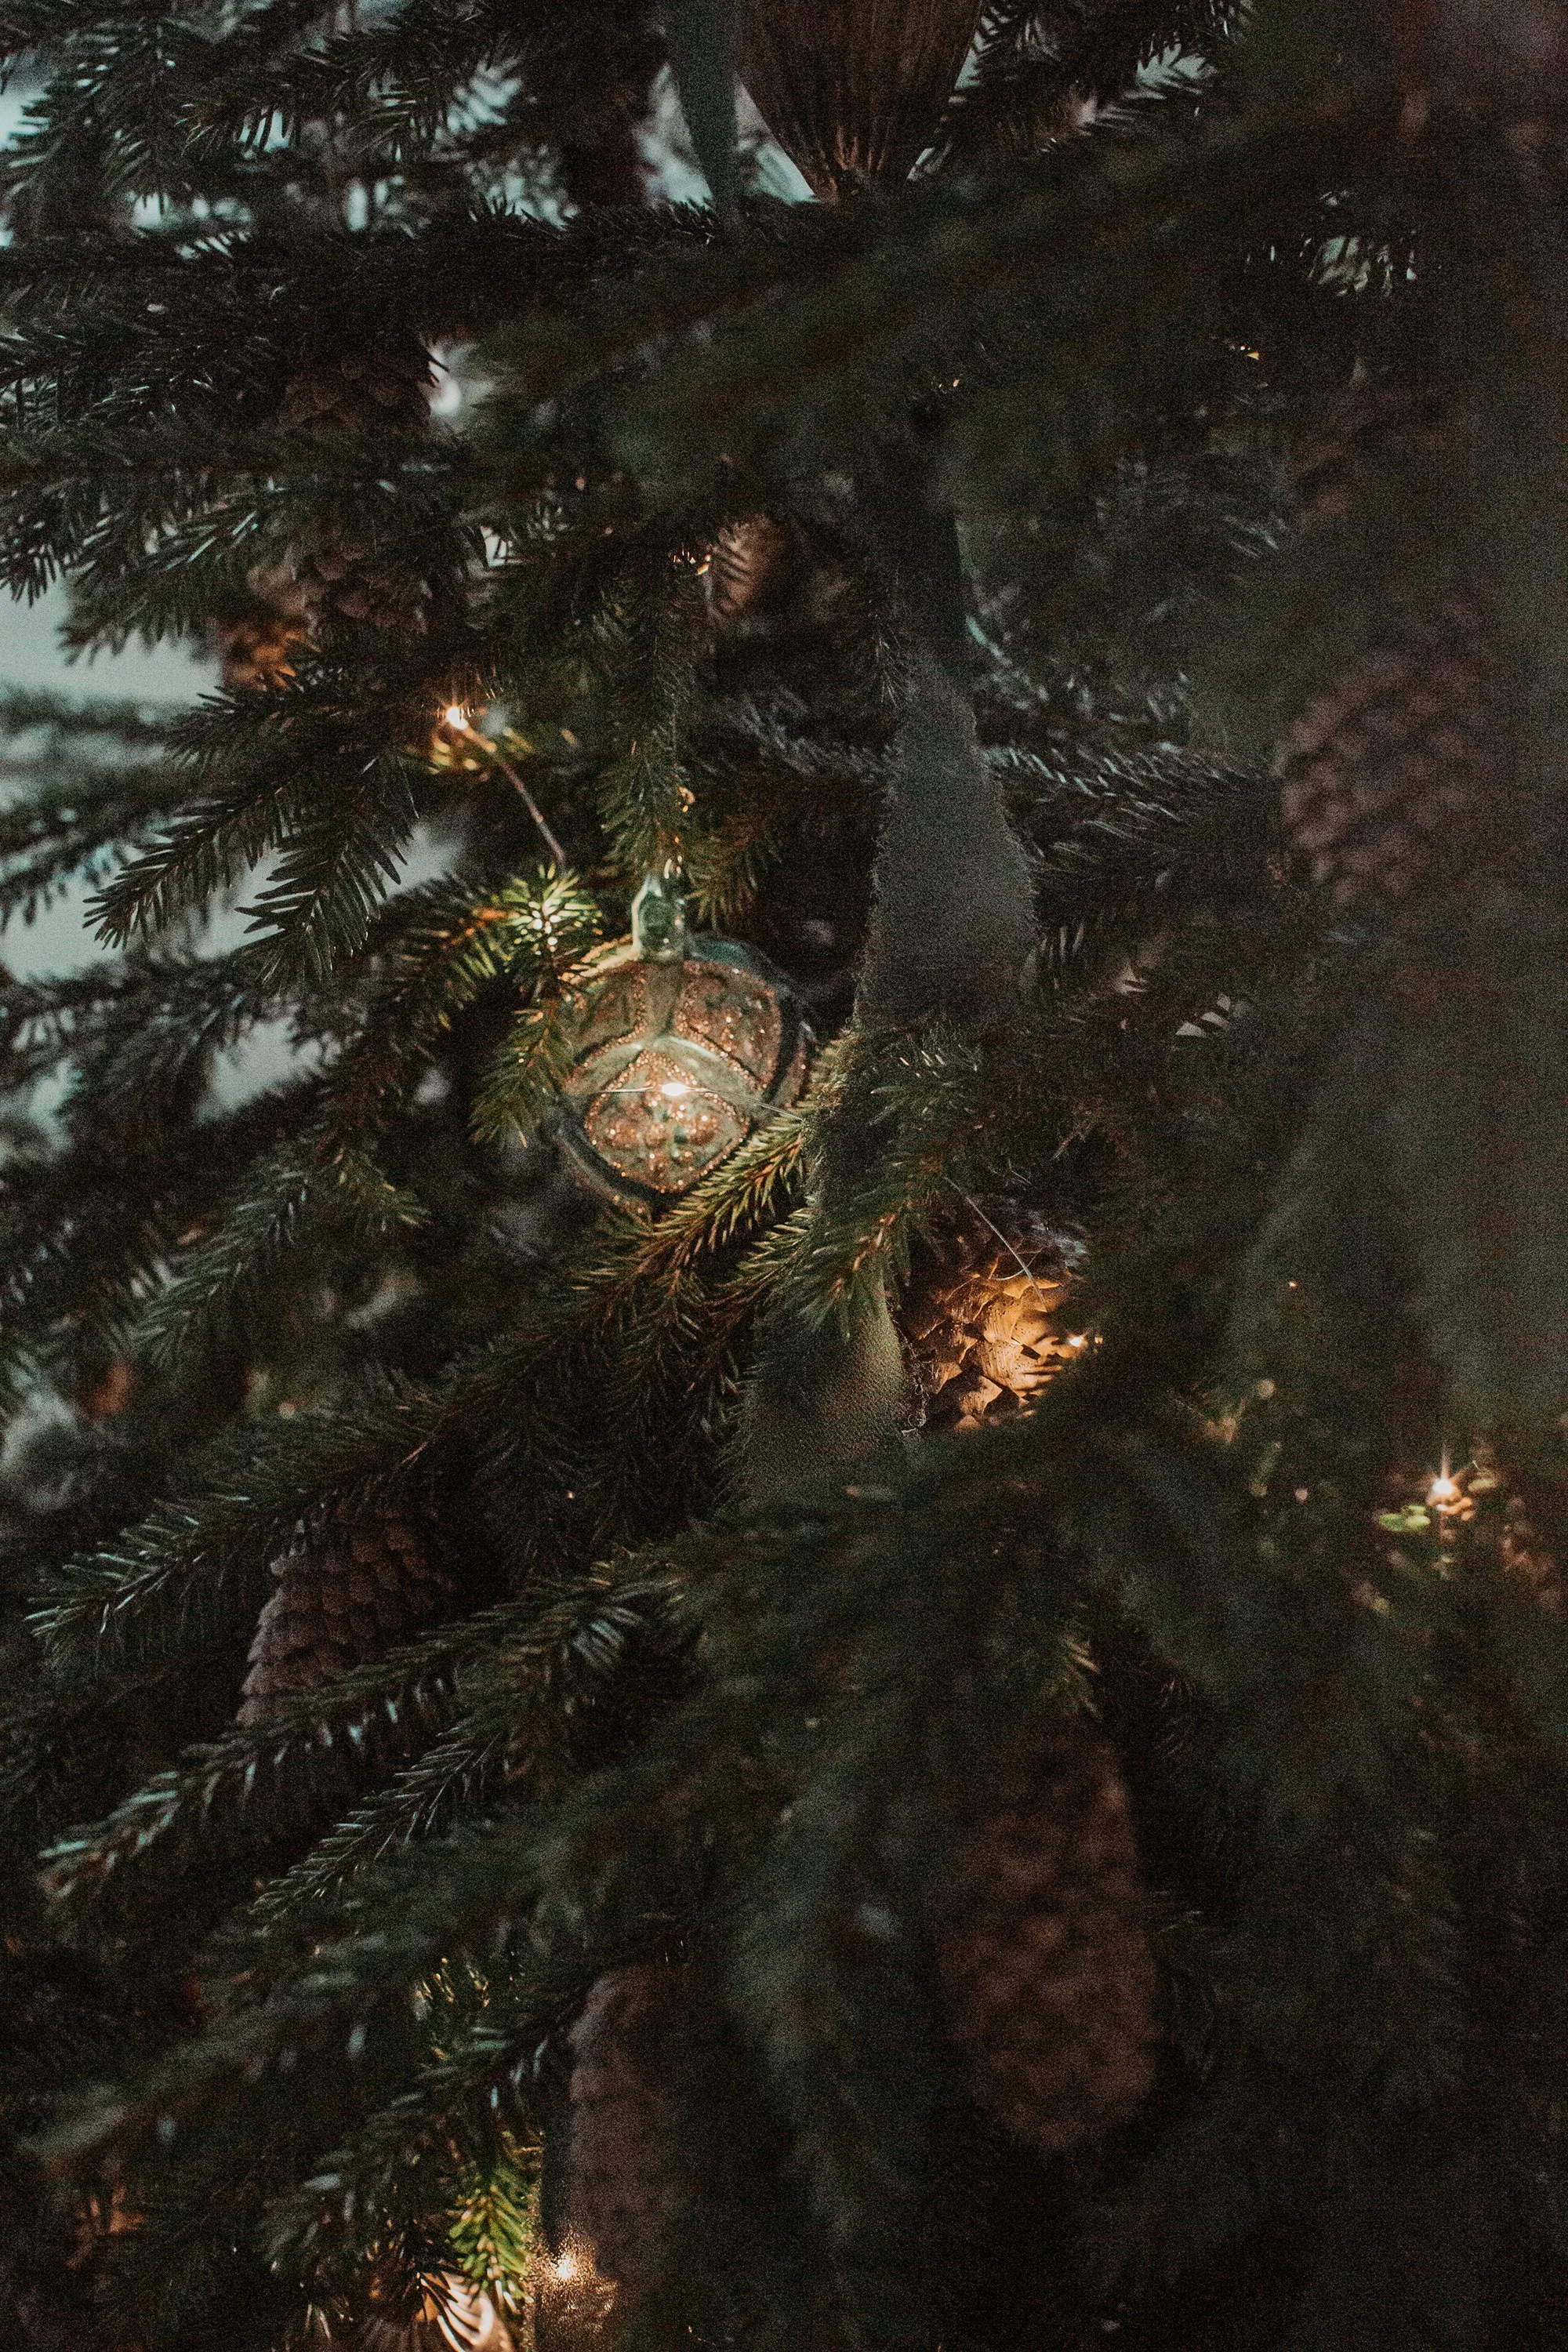
This tree feels like a walk through a winter forest brought indoors. Natural pinecones nestle among deep green branches, while soft ribbons wind gently through the needles like quiet whispers of movement. The warm glow of tiny lights doesn’t overpower—it simply lingers, catching on texture and shadow. Nothing feels rushed or overly adorned; it’s a decoration rooted in nature, calm and grounded, where simplicity becomes the most beautiful kind of luxury.

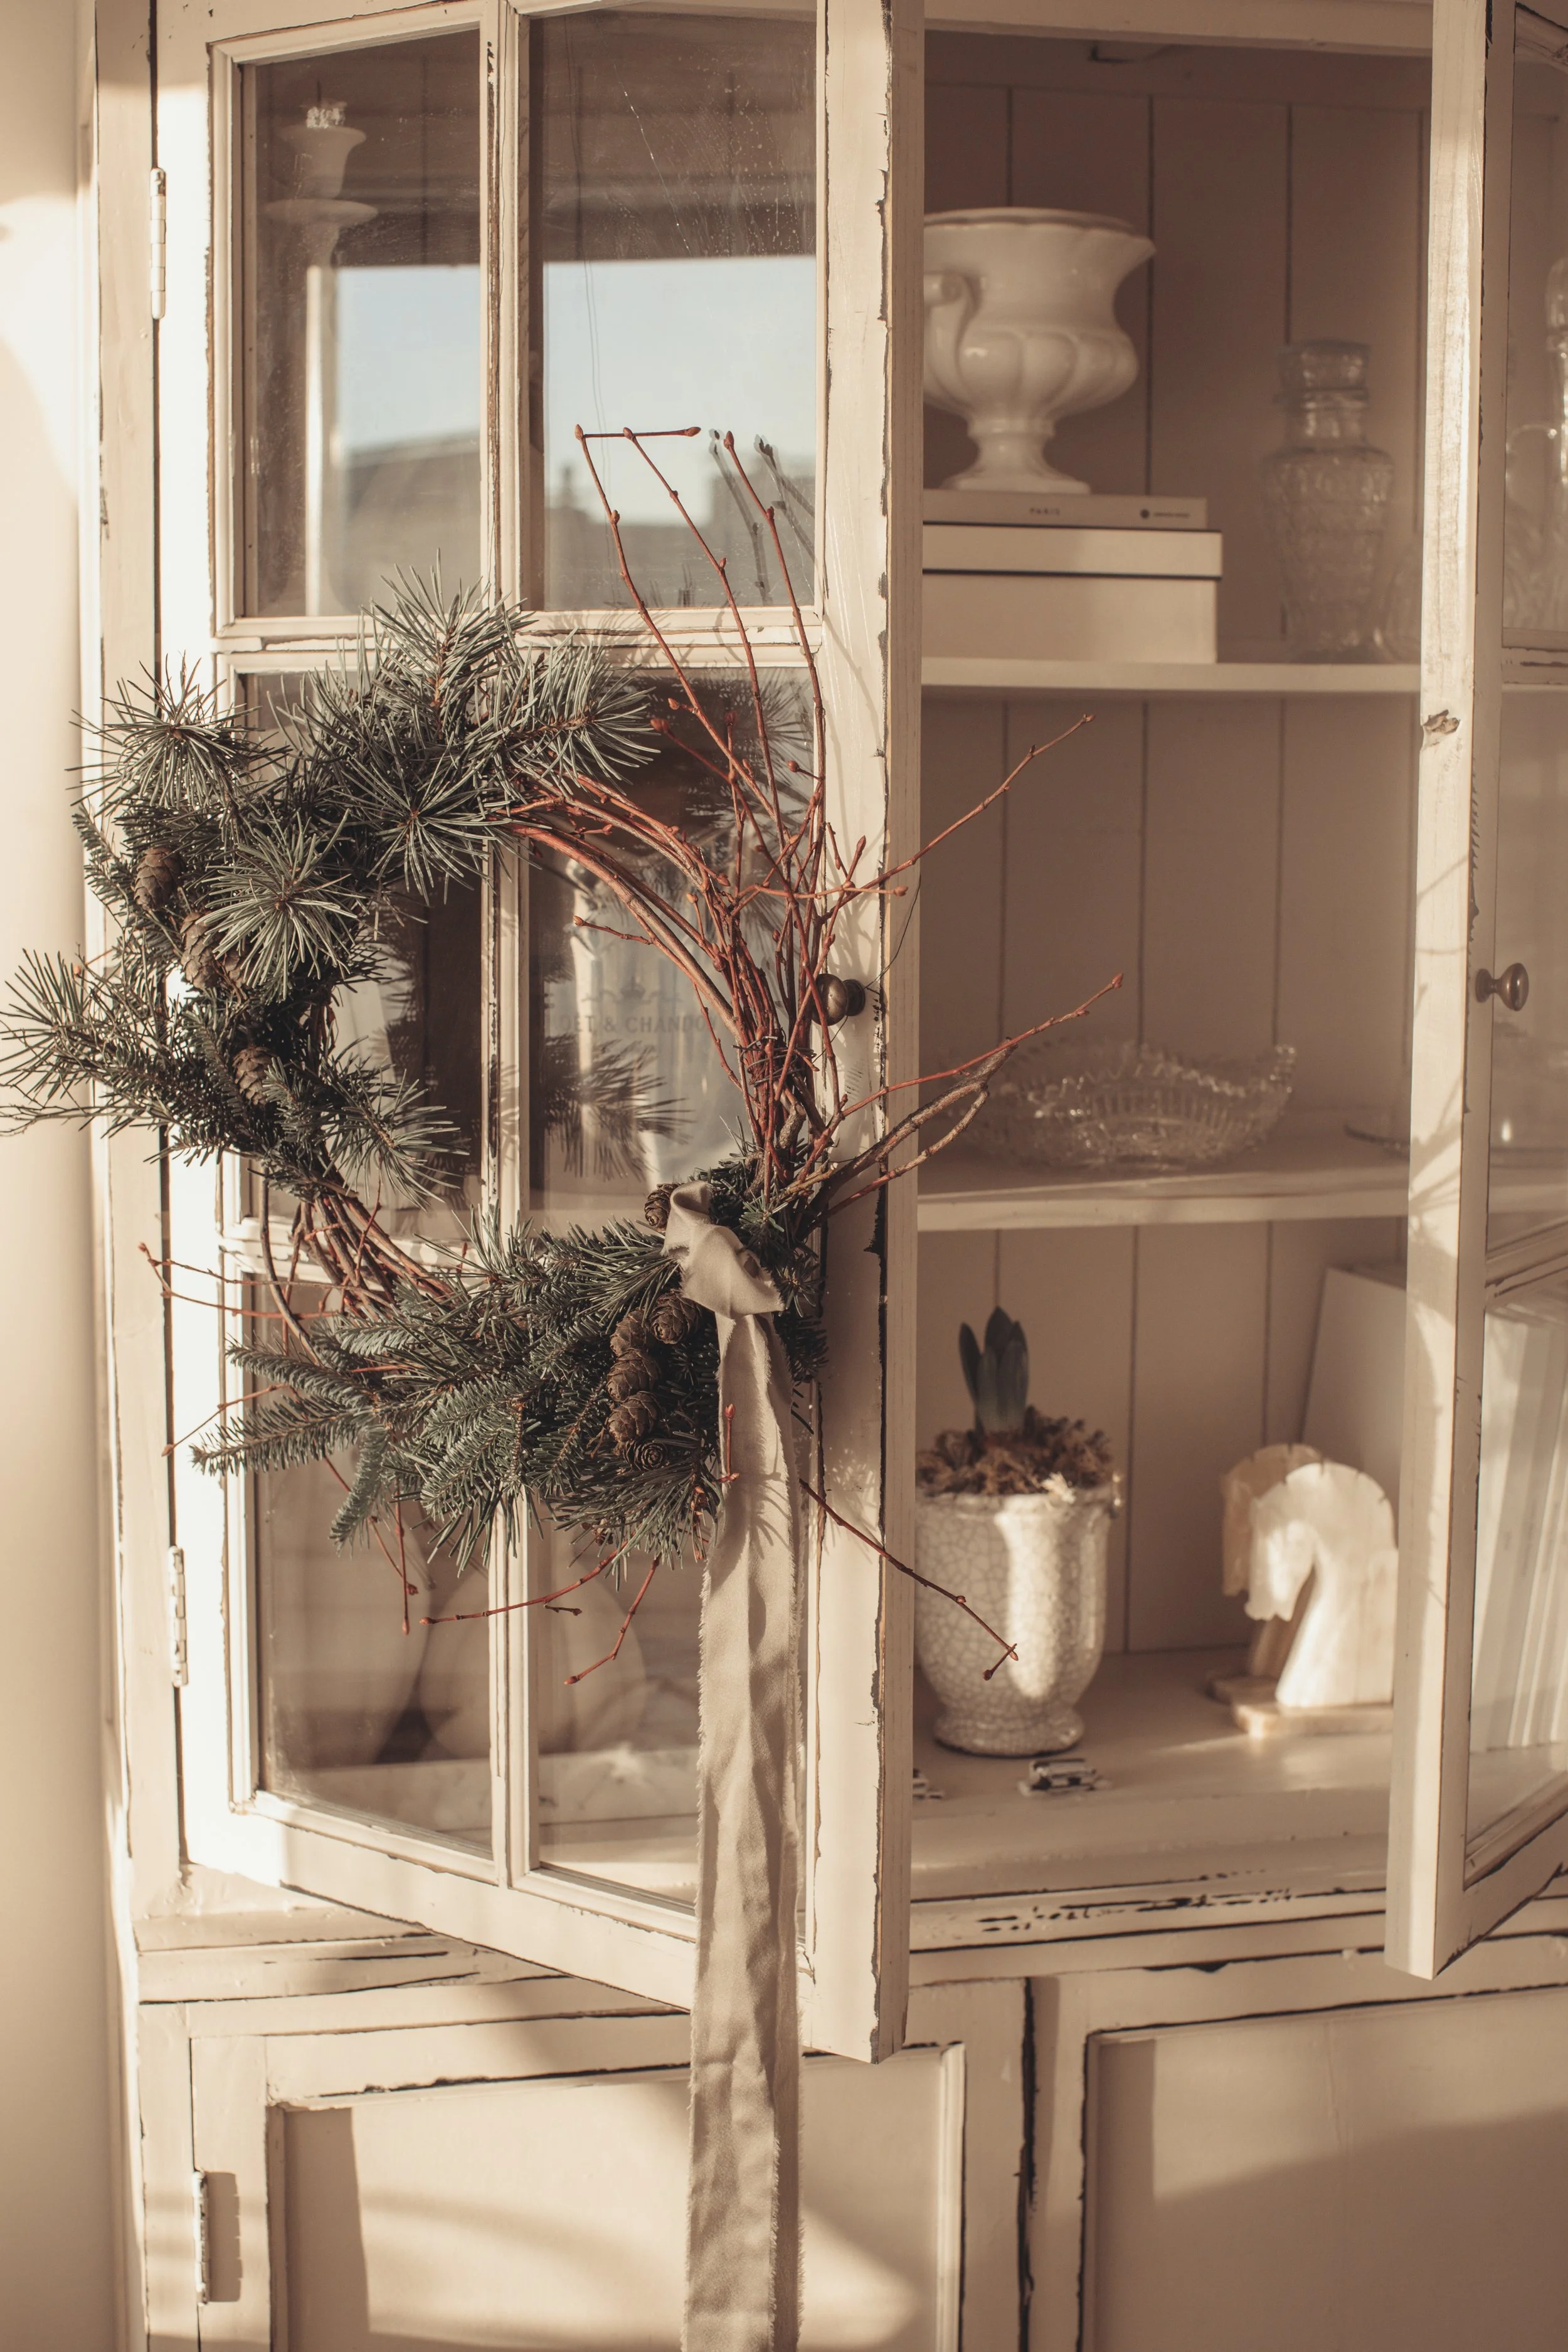
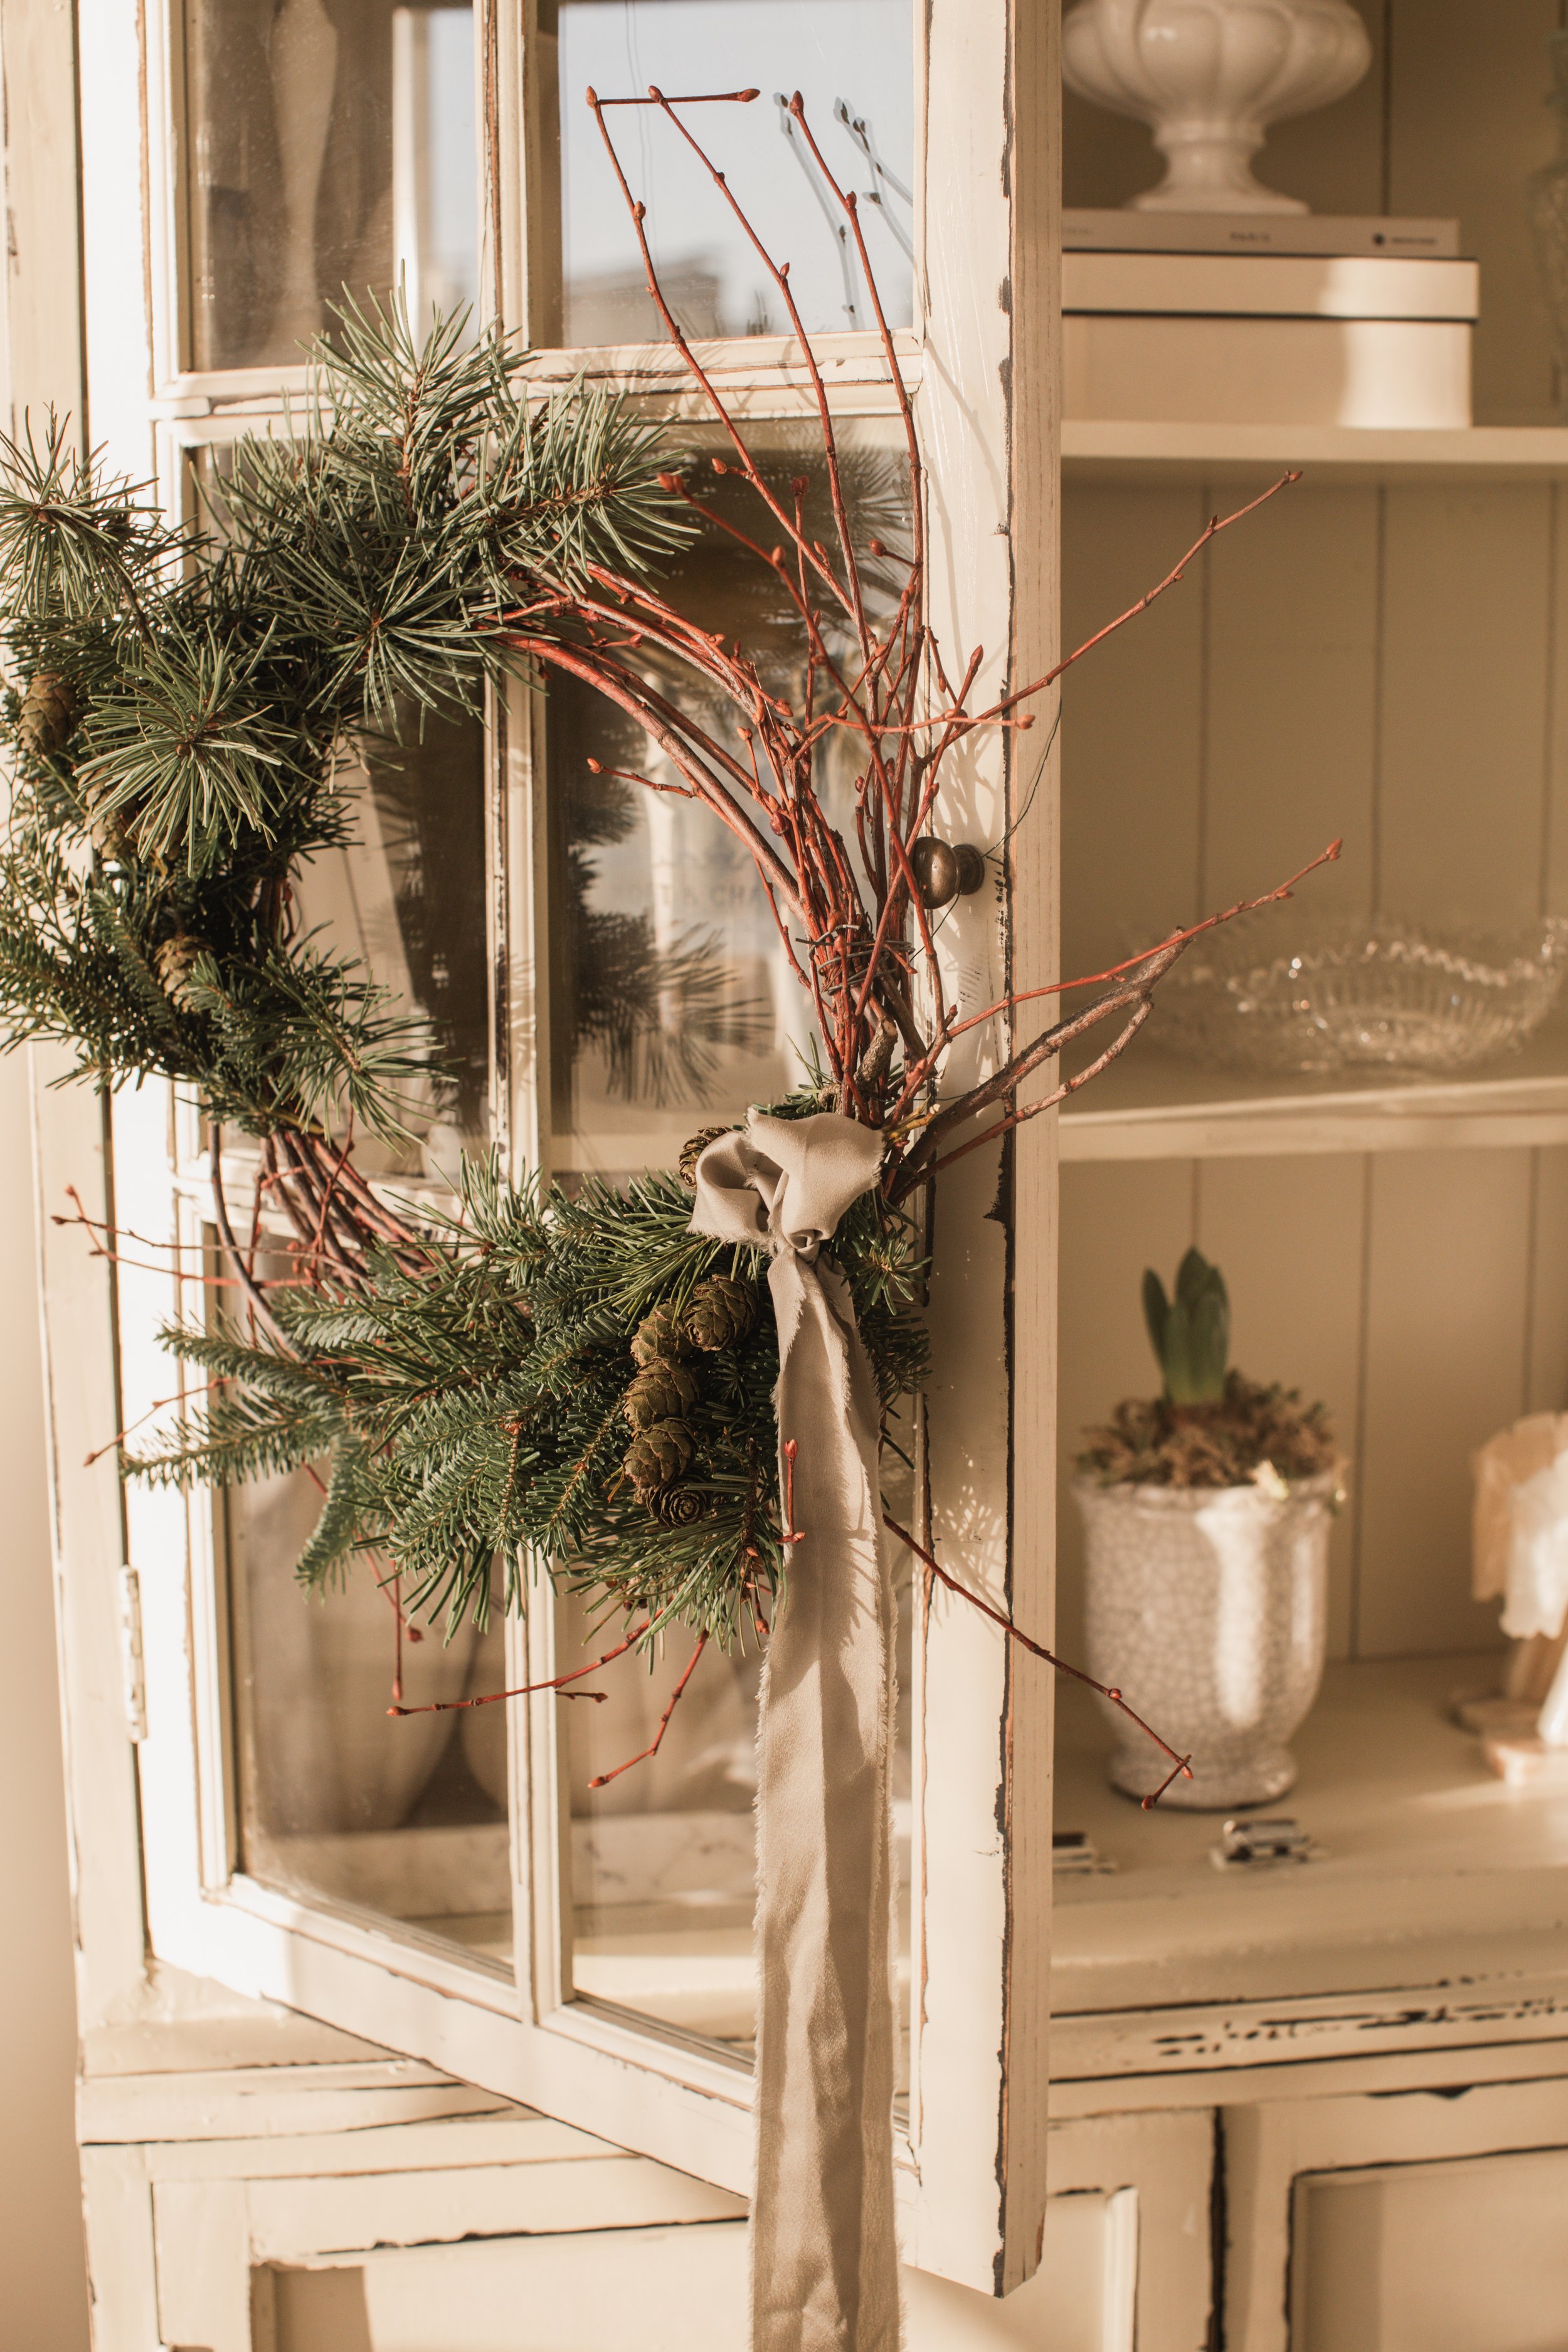
Bare Christmas Wreath

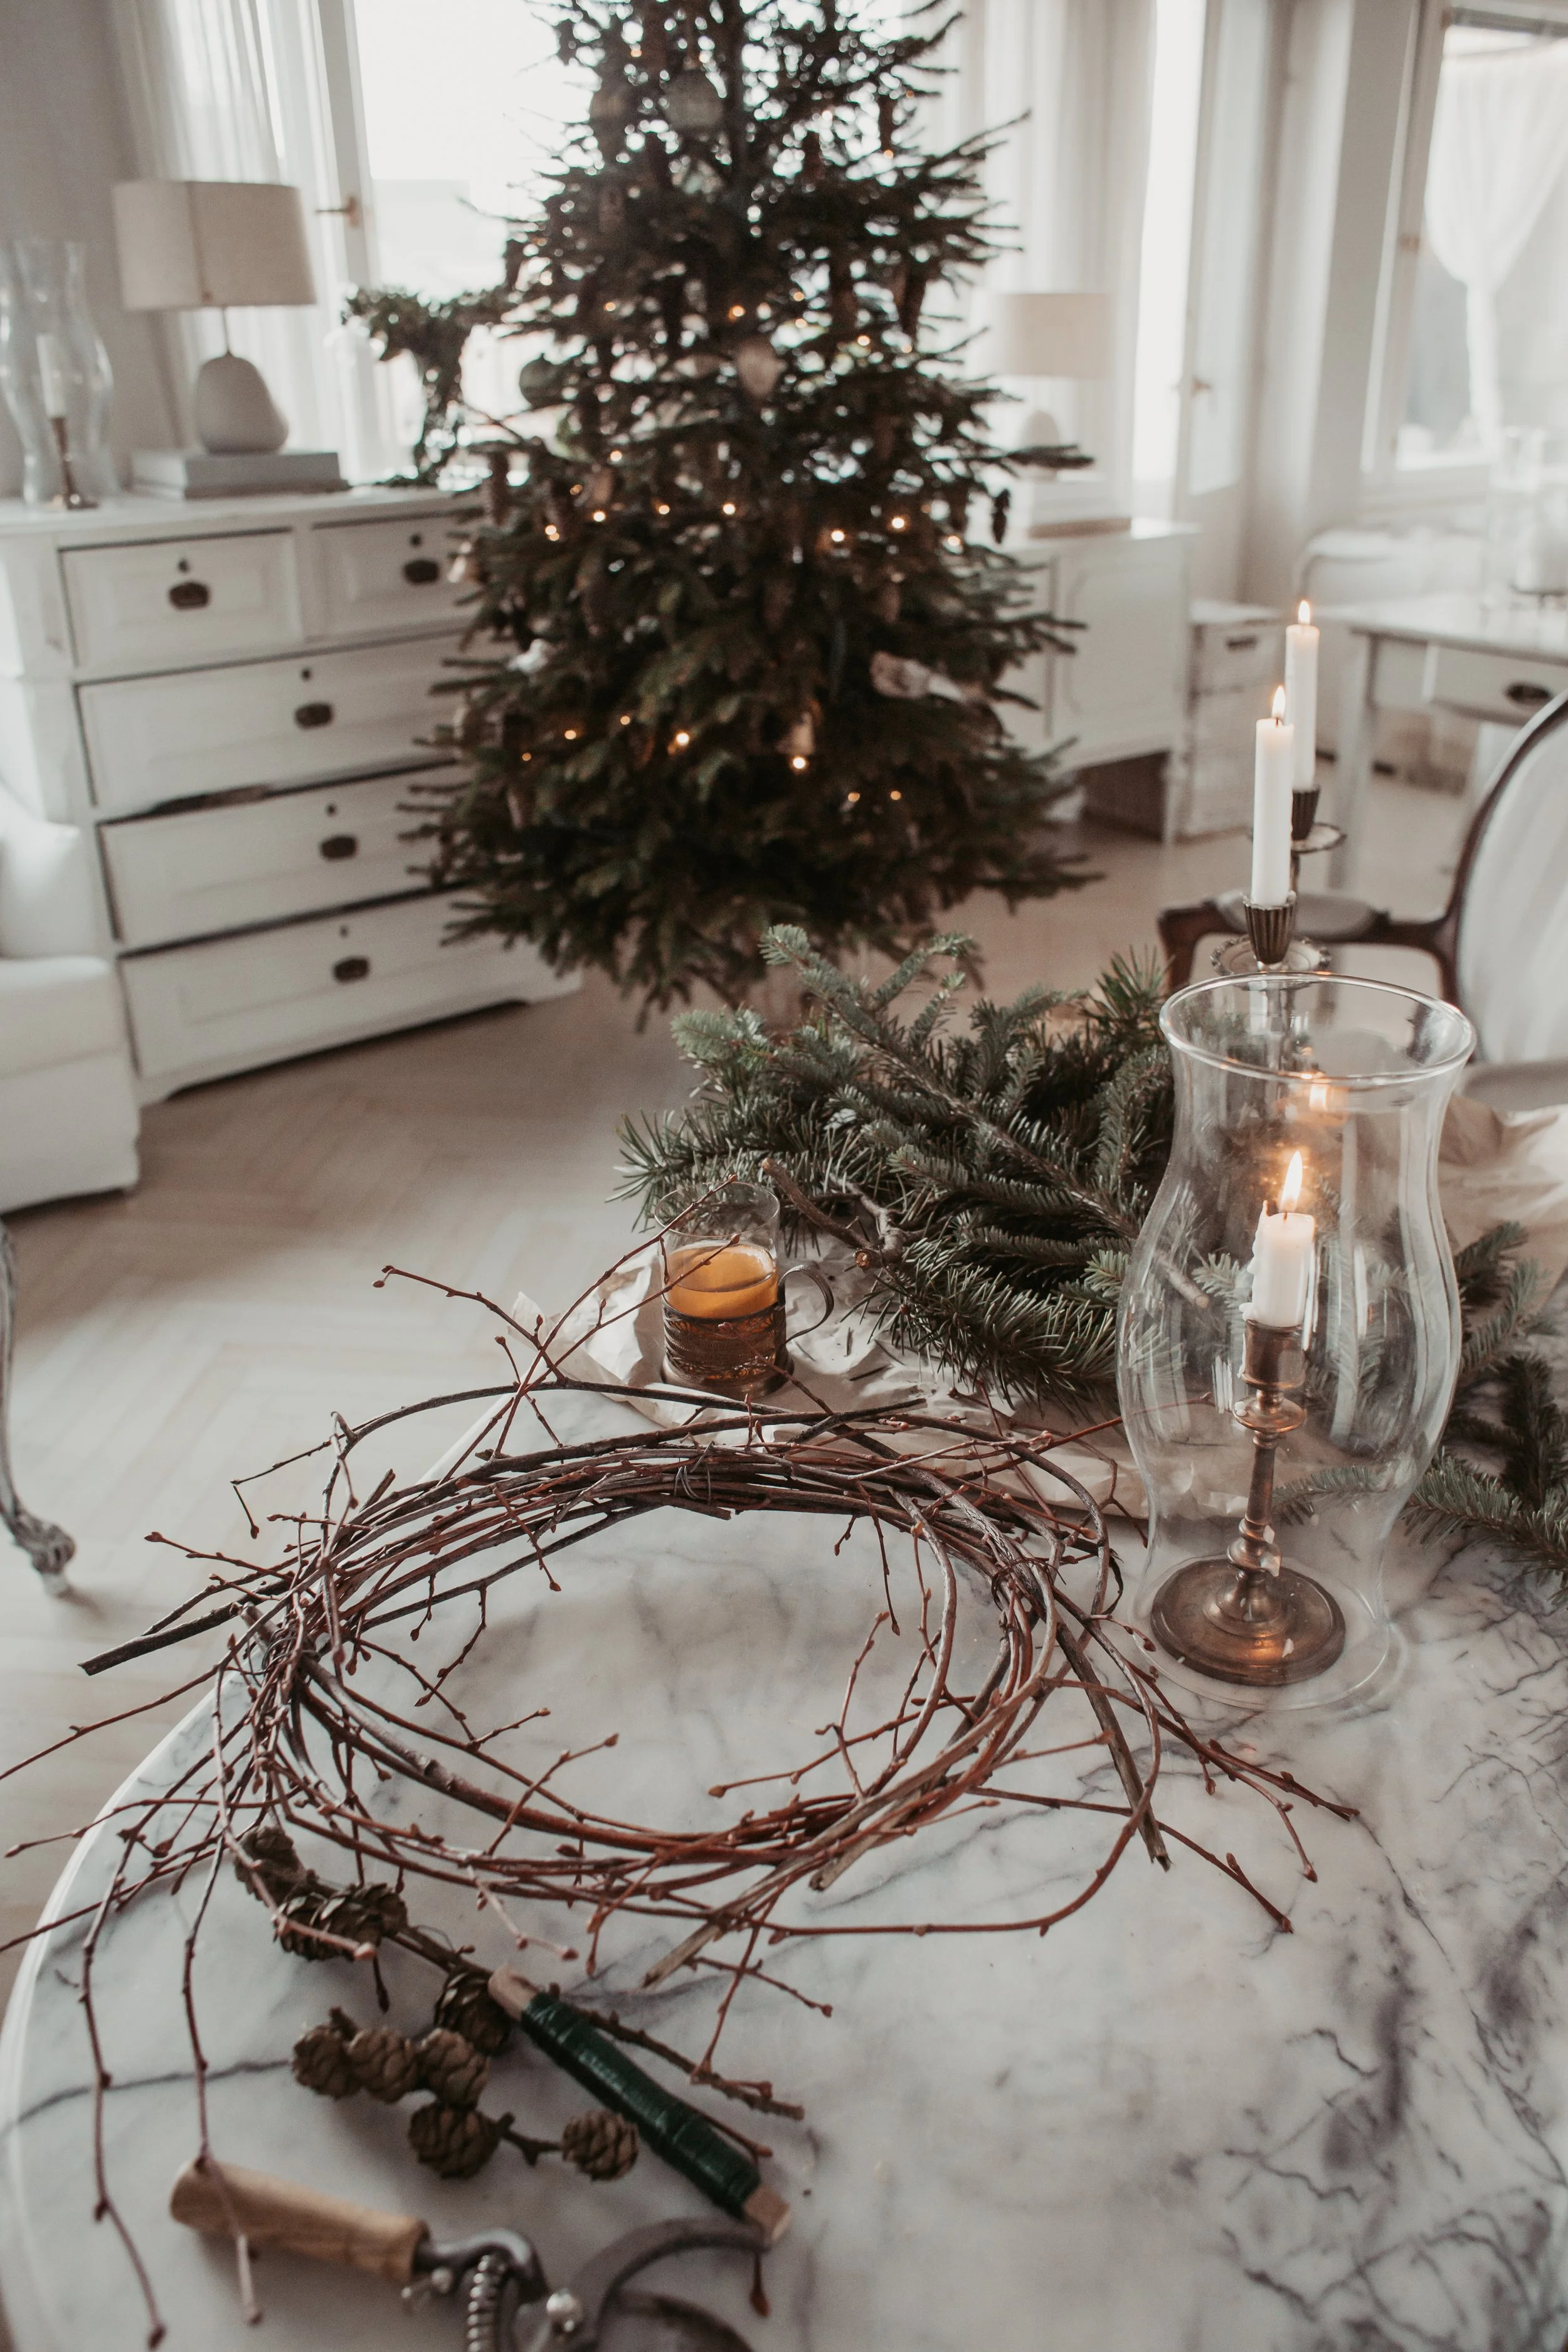
I love to leave the base rather wild as it adds a nice structure to the base
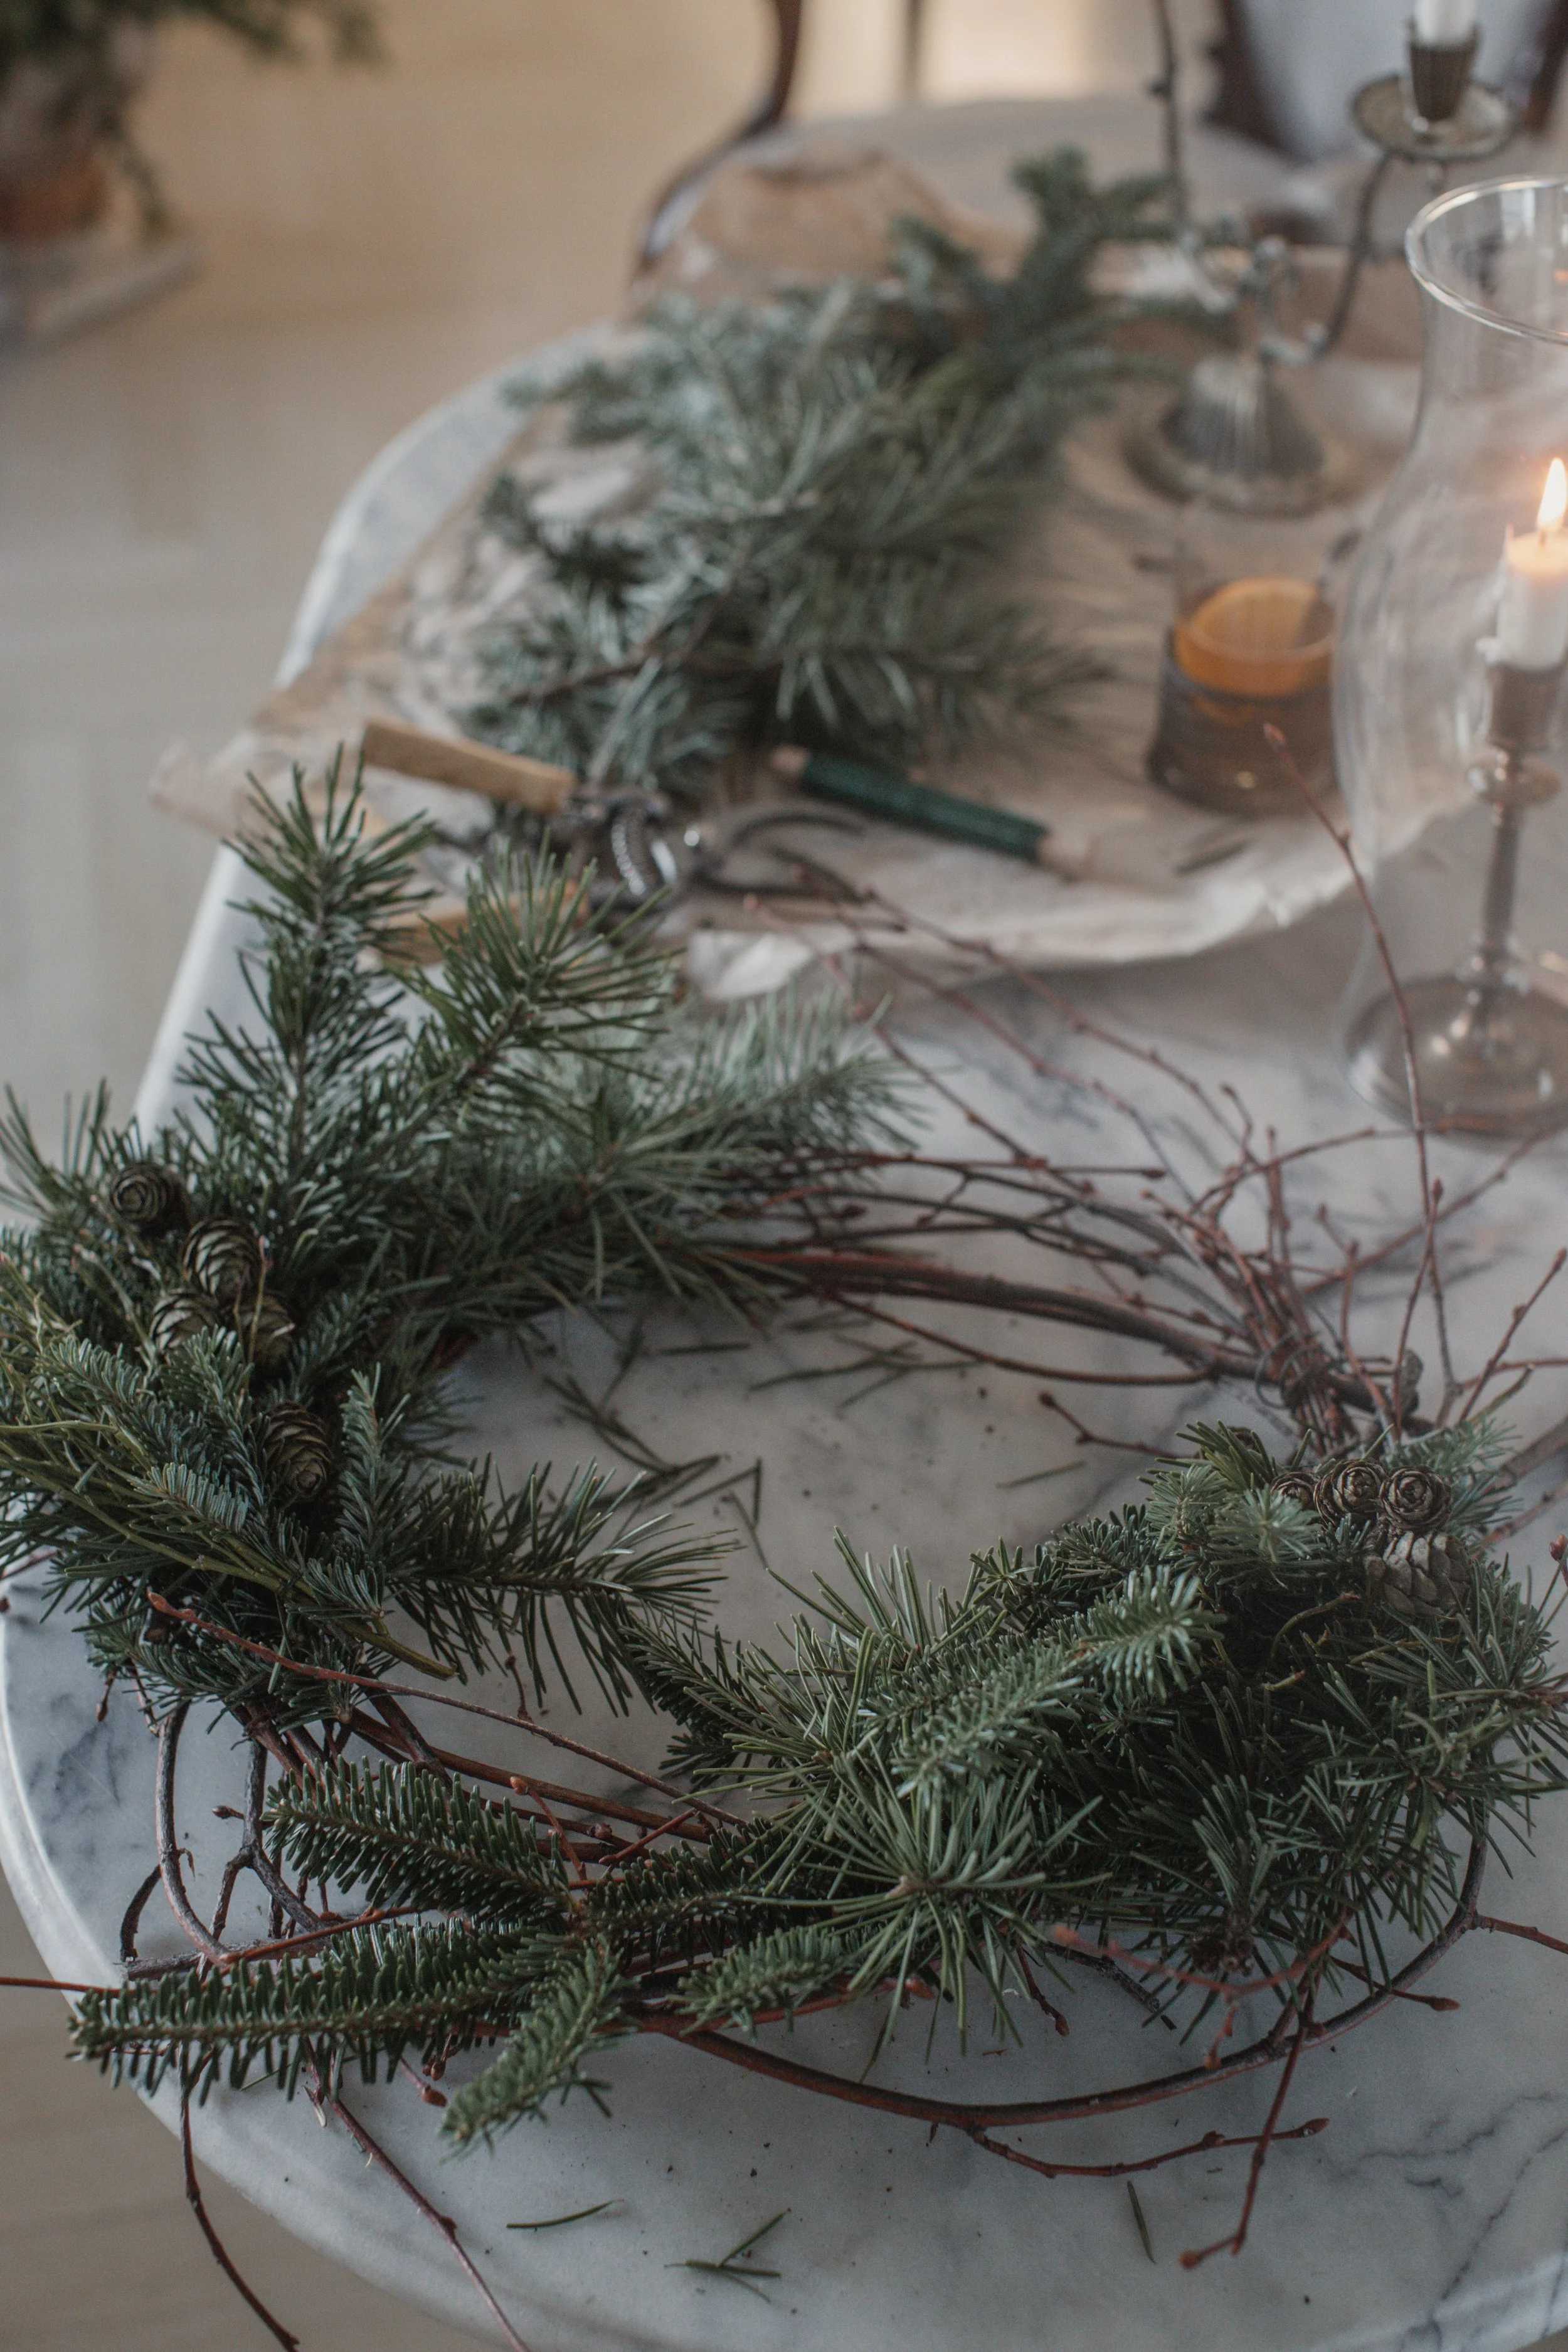
This wreath is a quiet celebration of winter—simple, natural, and timeless. Made with evergreen branches, bare twigs, and a soft ribbon, it feels as though it was gathered on a slow walk through a snowy forest. Its beauty lies in its looseness and asymmetry, letting nature lead the design rather than perfection.
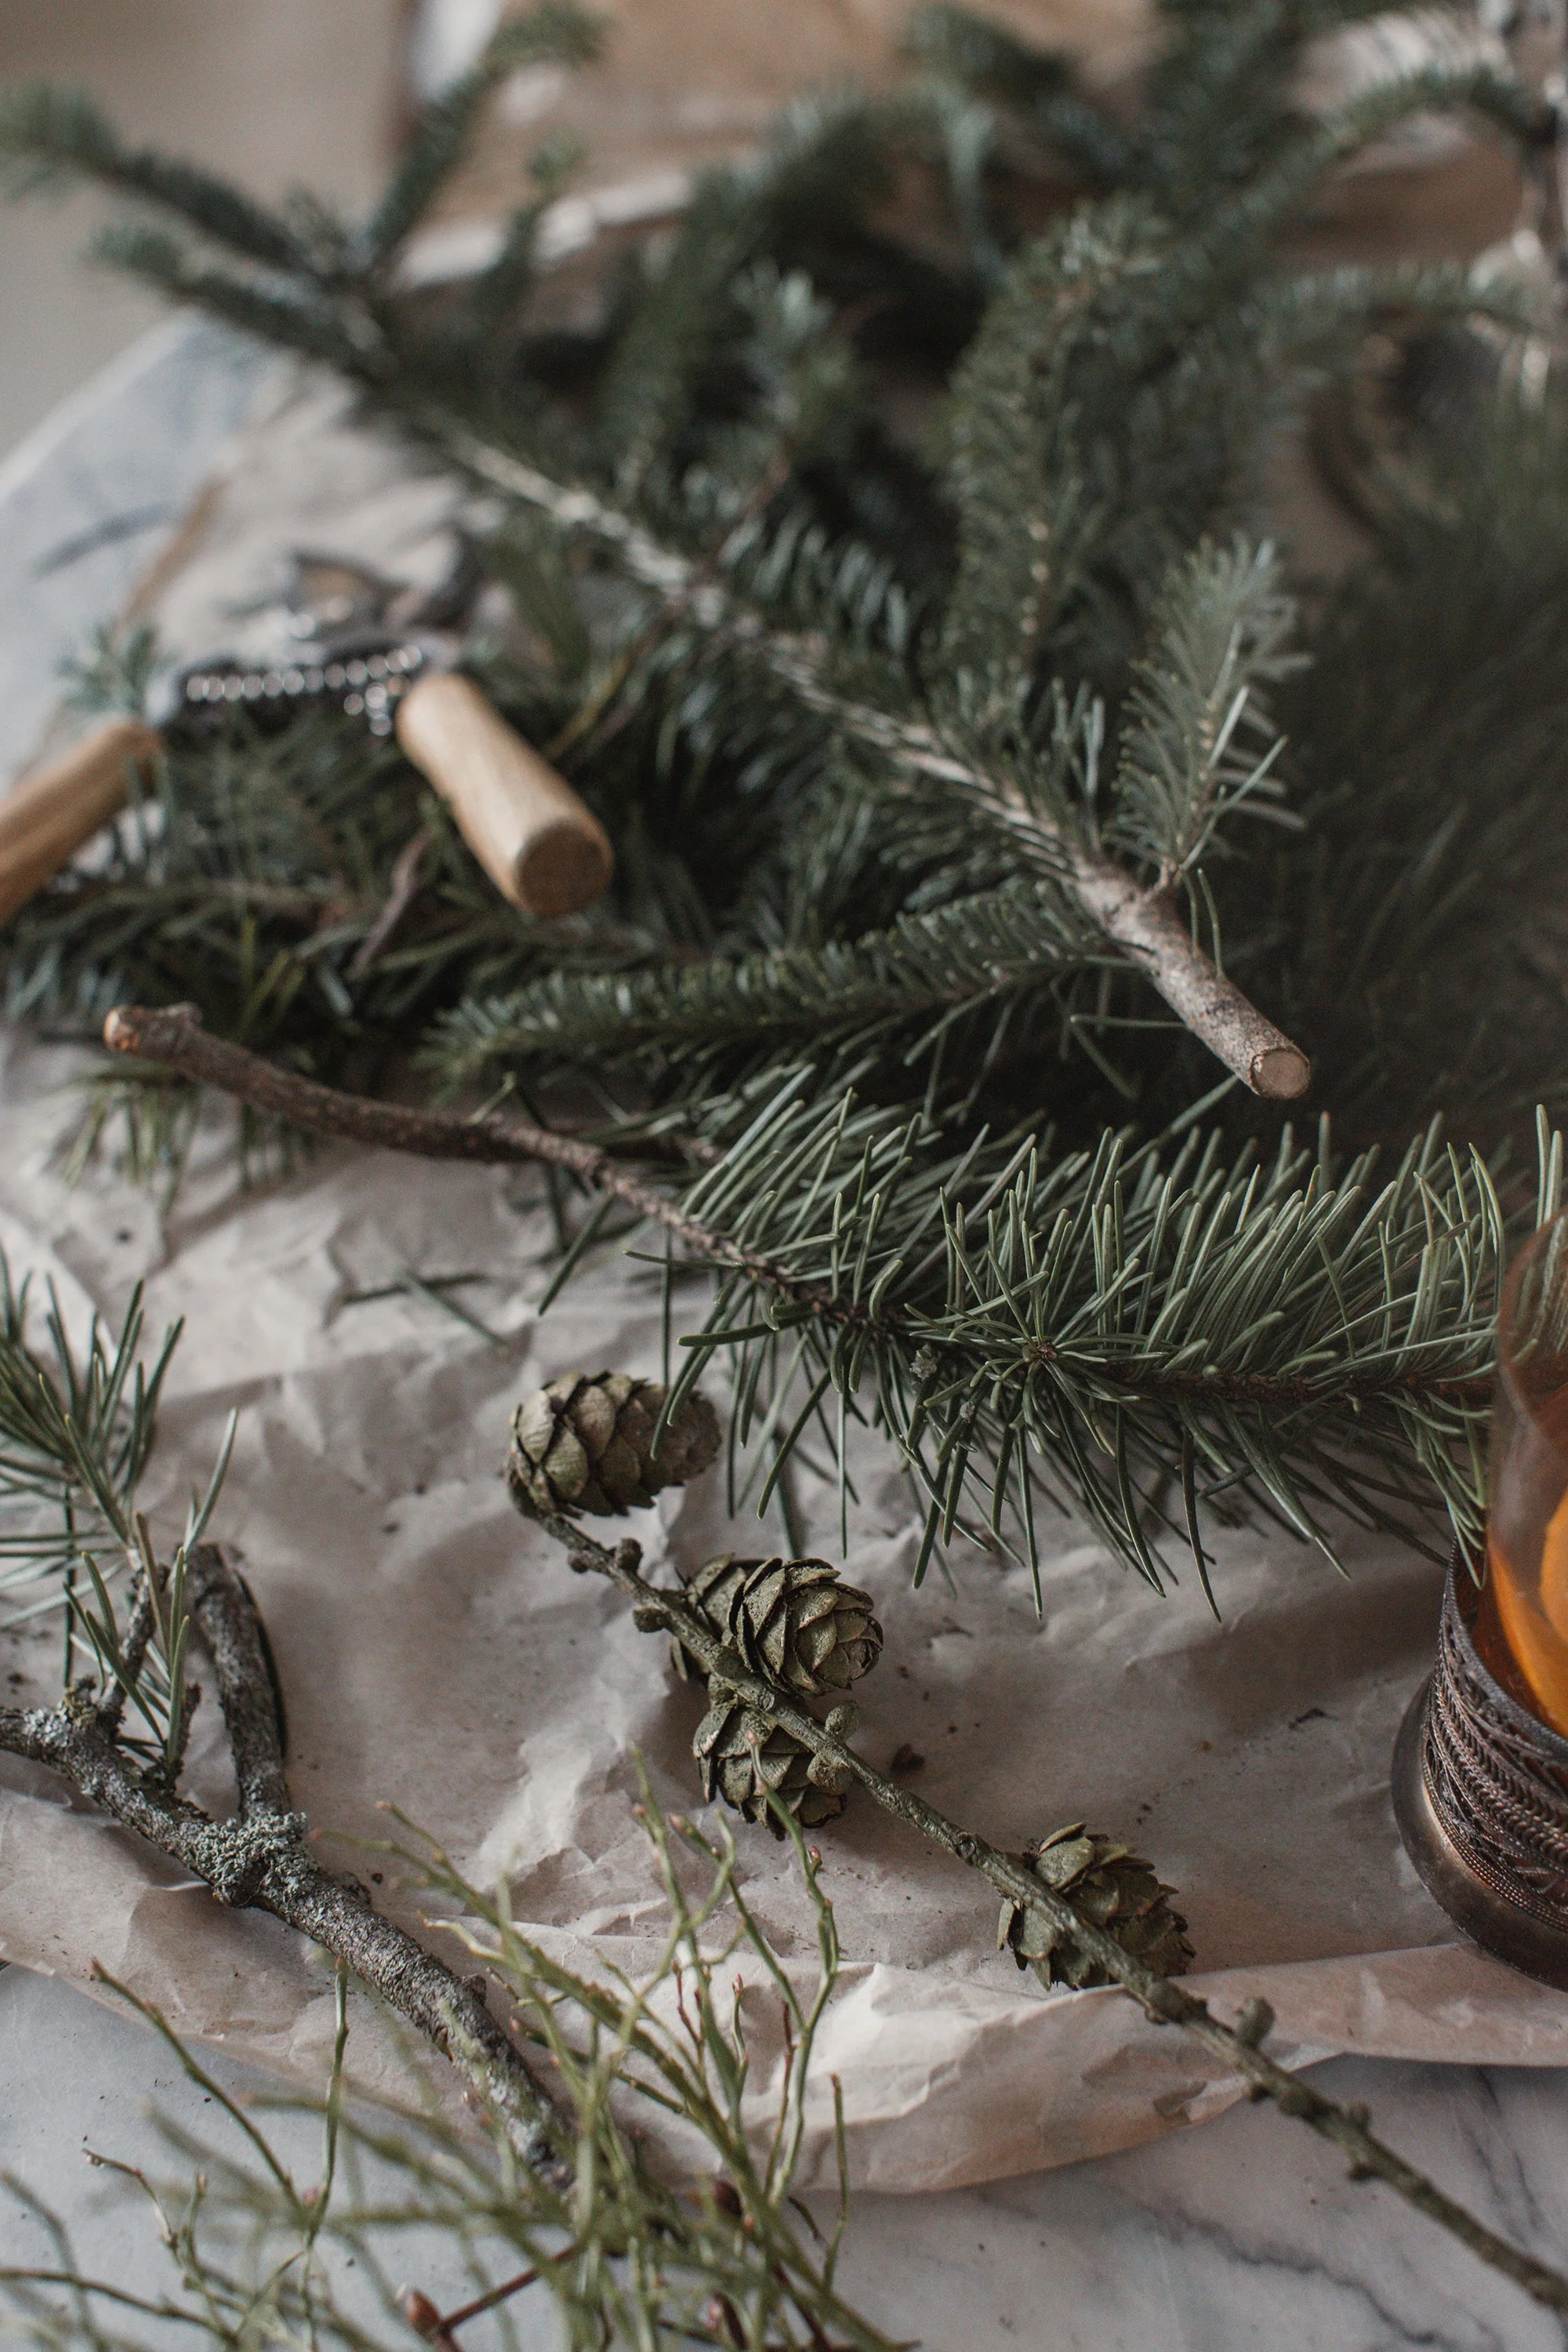
Natural Winter Christmas Wreath – Instructions
Materials
Grapevine or wire wreath base
Evergreen branches (fir, pine, or spruce)
Bare twigs or branches (such as birch or dogwood)
Small pinecones ( I spraypainted the dried pinecones with moss green spray paint)
Floral wire or thin craft wire
Pruning shears or scissors
Soft fabric ribbon or linen strip
Optional: wire cutters
Step 1: Prepare the greenery
Trim evergreen branches into smaller sprigs, about 10–15 cm long. Remove excess needles at the base so they’re easy to secure.
Step 2: Create a loose base
Lay the evergreen sprigs onto the wreath base in one direction, slightly overlapping. Keep it airy rather than dense—this wreath should feel light and organic. Secure each cluster with floral wire as you go.
Step 3: Add natural movement
Tuck bare twigs into the wreath, allowing them to extend outward freely. Let some cross over the circle and others reach upward to create height and an untamed, wintery shape.
Step 4: Place pinecones
Nestle a few small pinecones into the greenery, focusing them on one side rather than spreading them evenly. This keeps the wreath asymmetrical and visually interesting.
Step 5: Secure everything
Wrap wire around the back of the wreath to tighten any loose pieces. Gently shake it to ensure nothing shifts.
Step 6: Finish with ribbon
Tie a soft fabric ribbon where the wreath feels heaviest—usually near the pinecones. Let the ends hang naturally for an effortless, elegant finish.
Styling Tip
Hang the wreath on a window, cabinet door, or pale wall where natural light can highlight its textures. It pairs beautifully with candles, linen, and simple winter décor.


Creating that Christmas Feeling


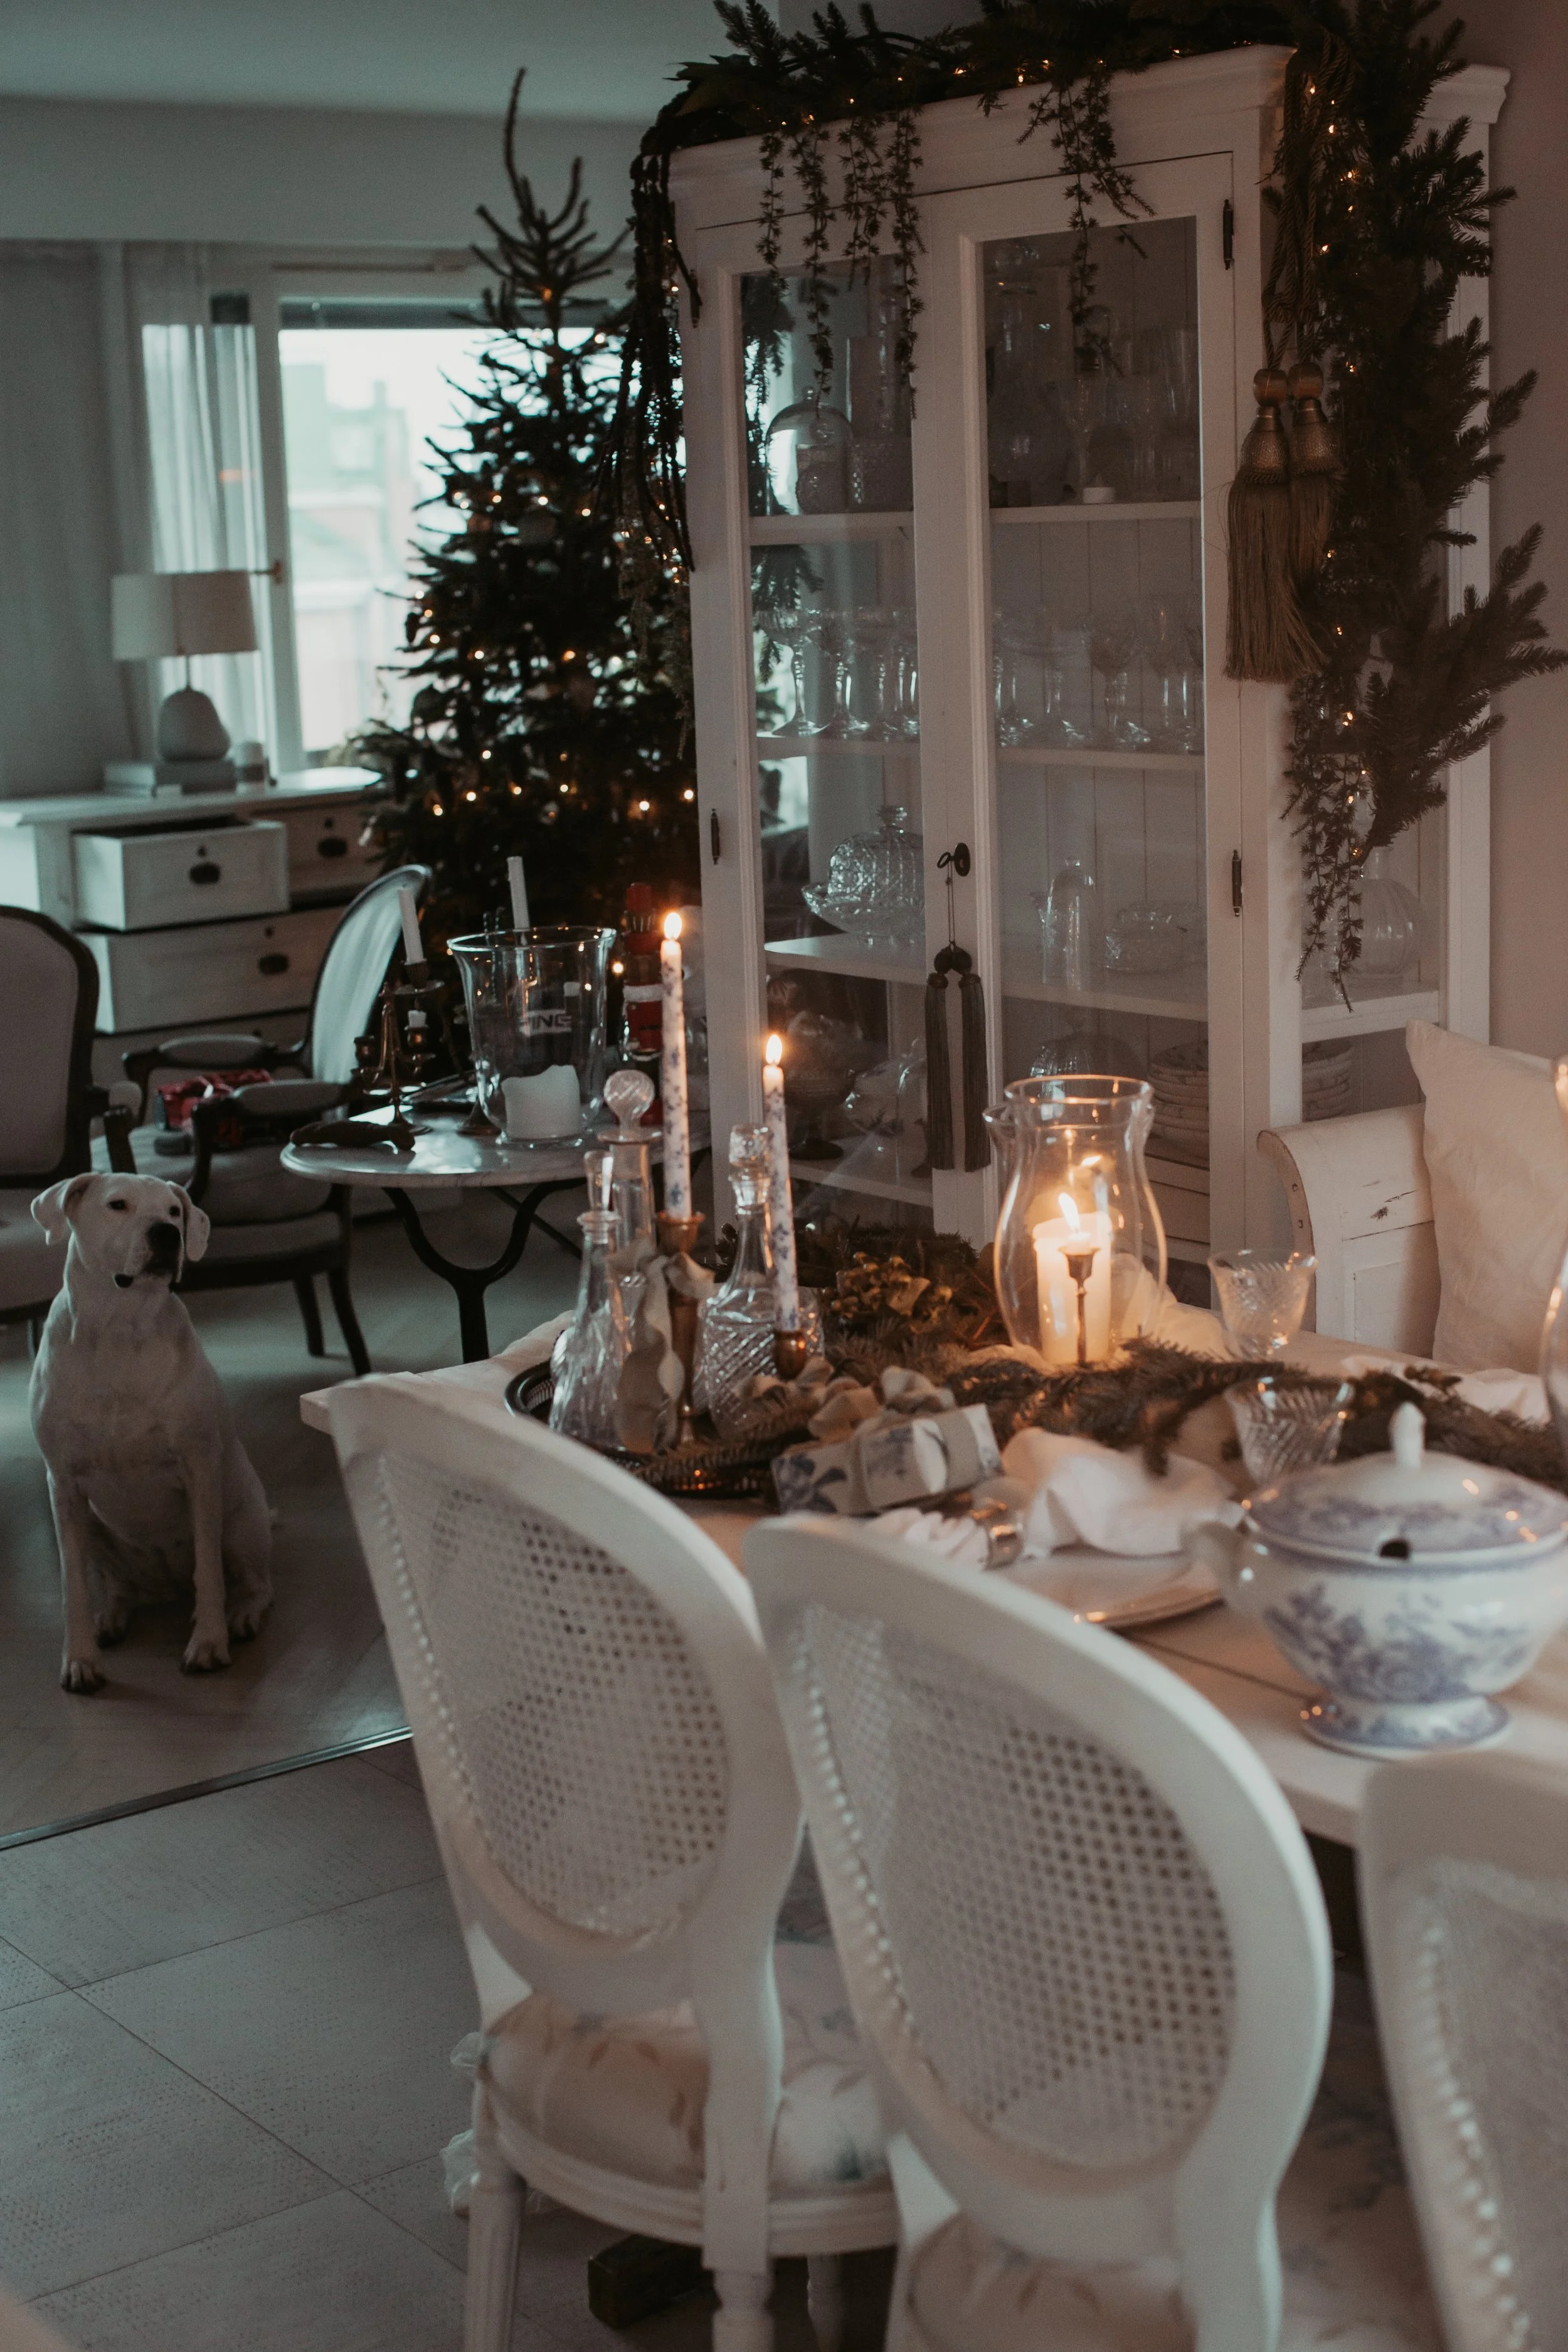
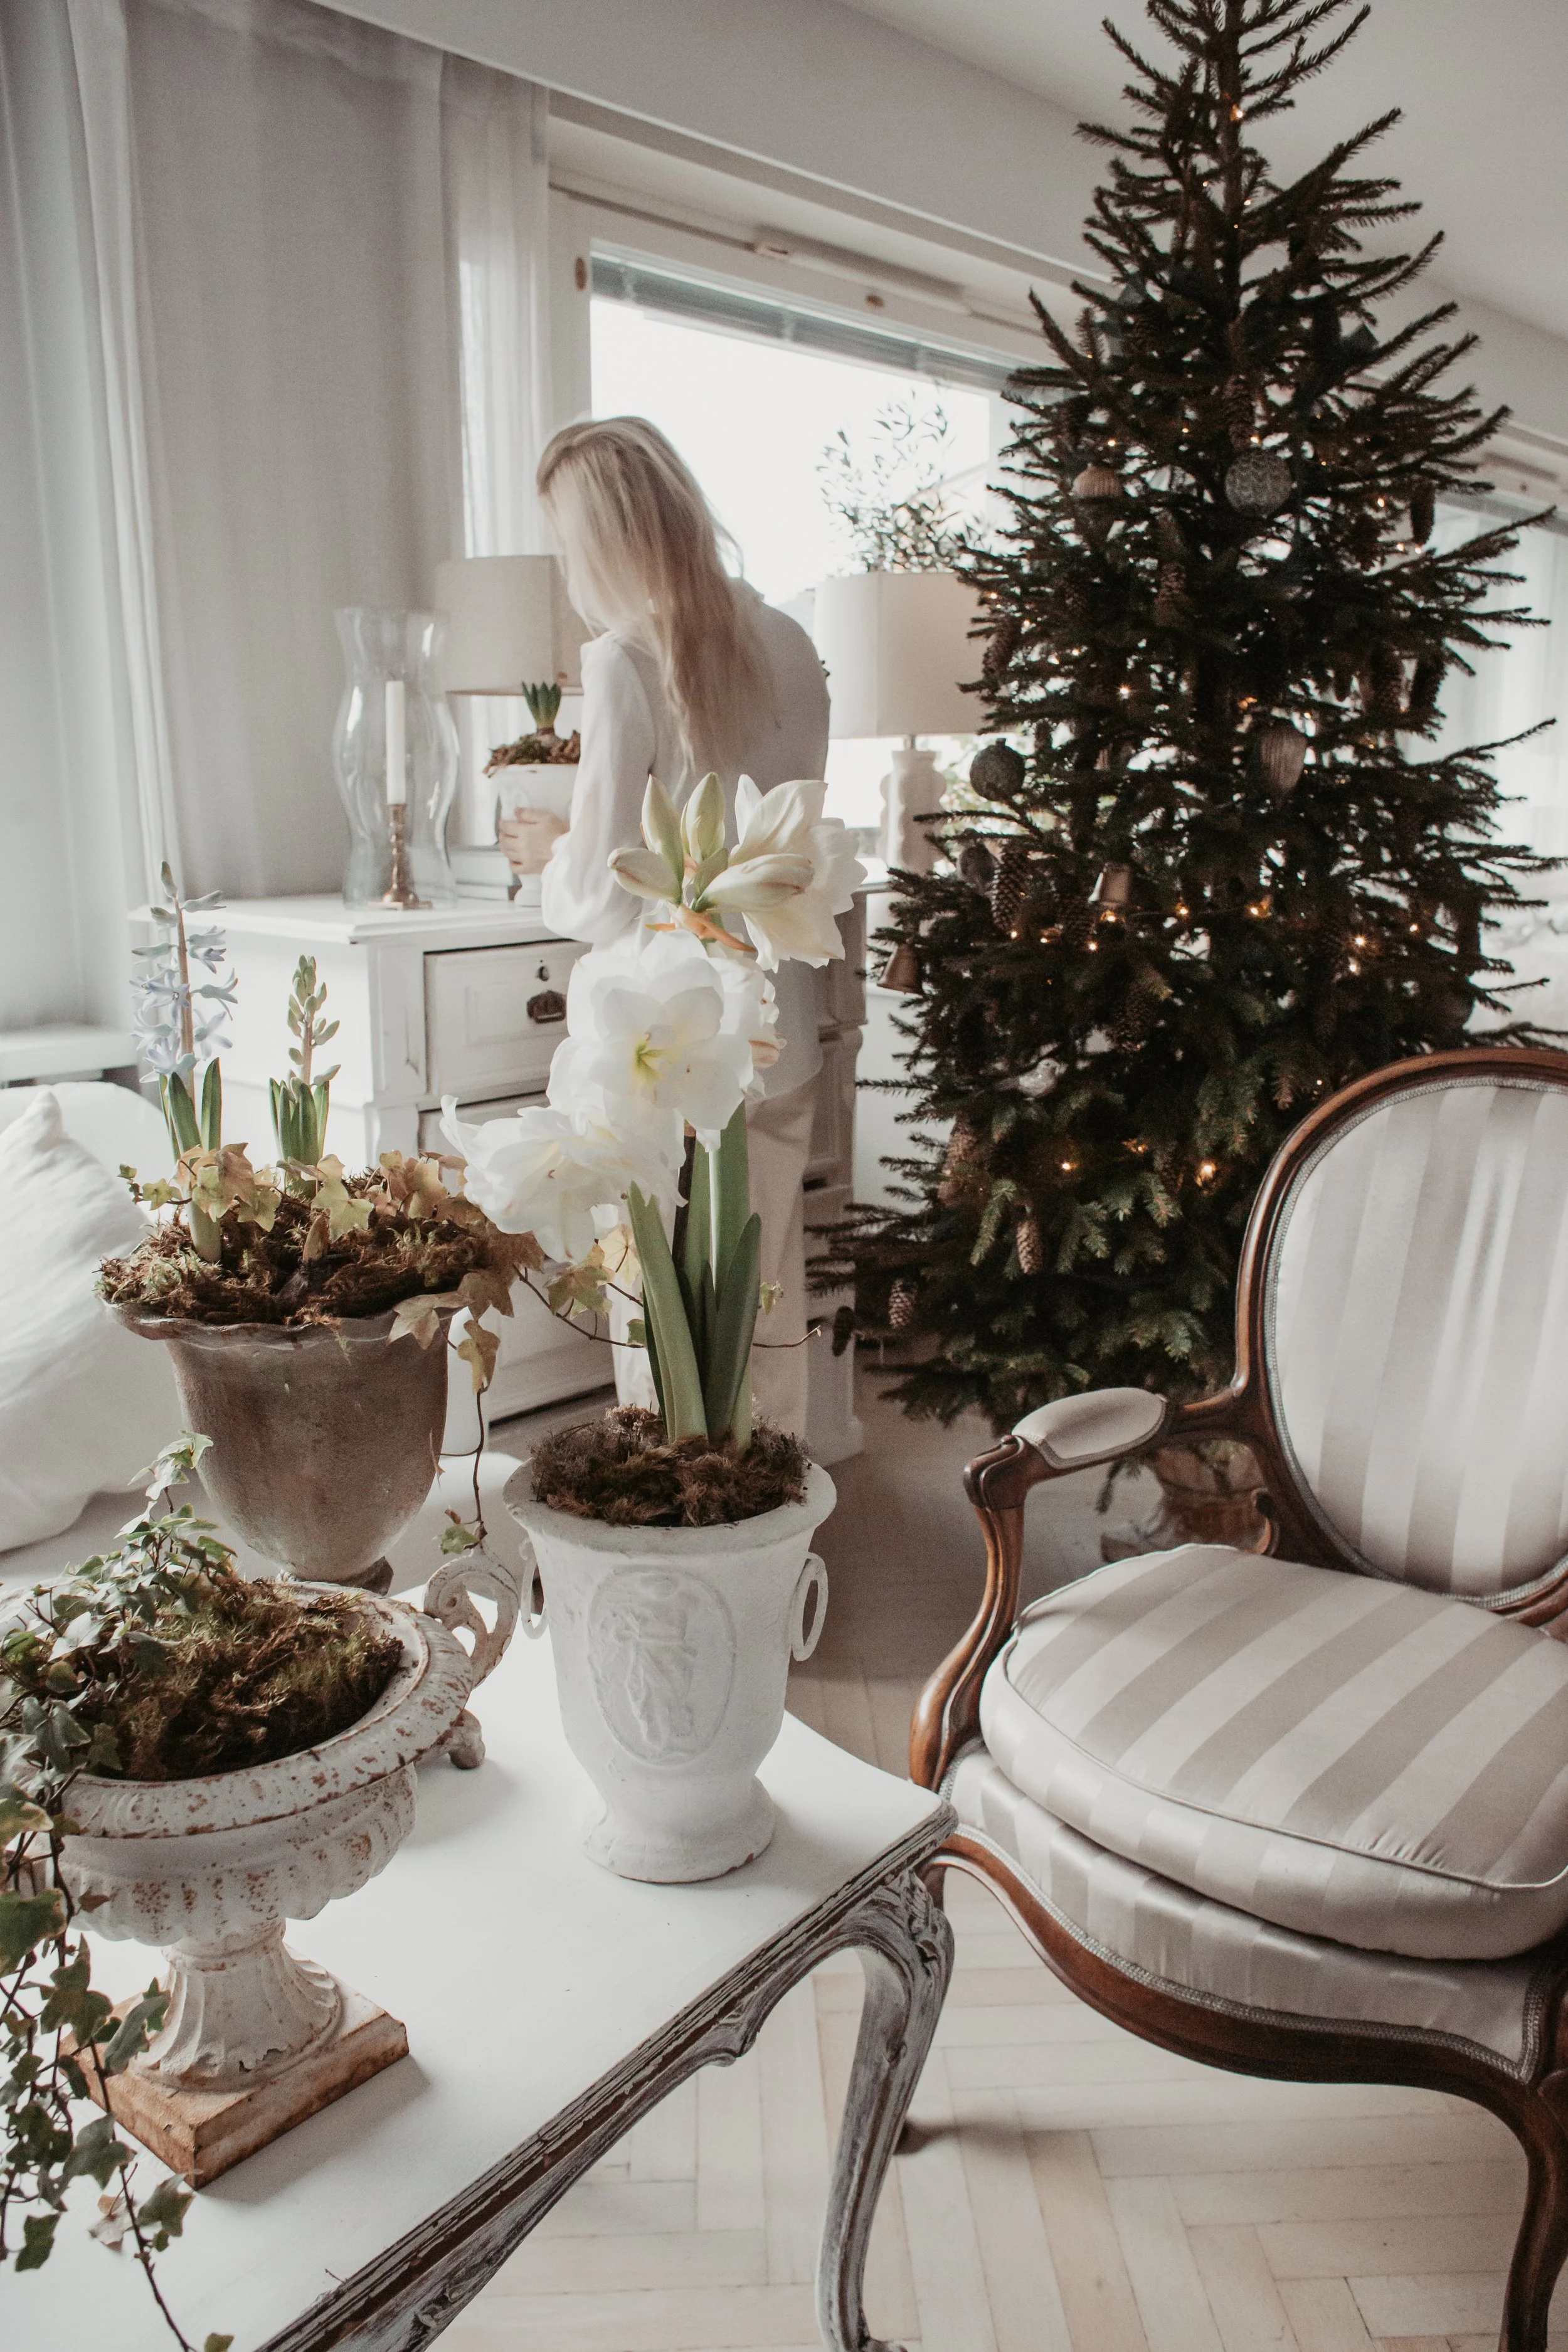
There’s a particular kind of magic that settles over a home in December—a gentle shift in light, scent, and texture that turns the everyday into something quietly enchanting. Each year I try to honour that feeling not through excess (though my husband would disagree with this), but through simple, natural beauty. This season has been no different, yet somehow more thoughtful, more intentional.
Our Christmas tree, chosen annually from a tree farm, stands at the heart of it all. Its branches are dressed with over a hundred real pine cones gathered throughout the year, their warm, woodsy tones blending seamlessly with the deep green needles. I added just a handful of antique-looking brass ornaments—softly aged balls and delicate little birds—so the tree still feels natural, almost nostalgic, but with a subtle shimmer that catches the light in all the right ways. Our tree strands tall in a large old french urn, that I simply adore.
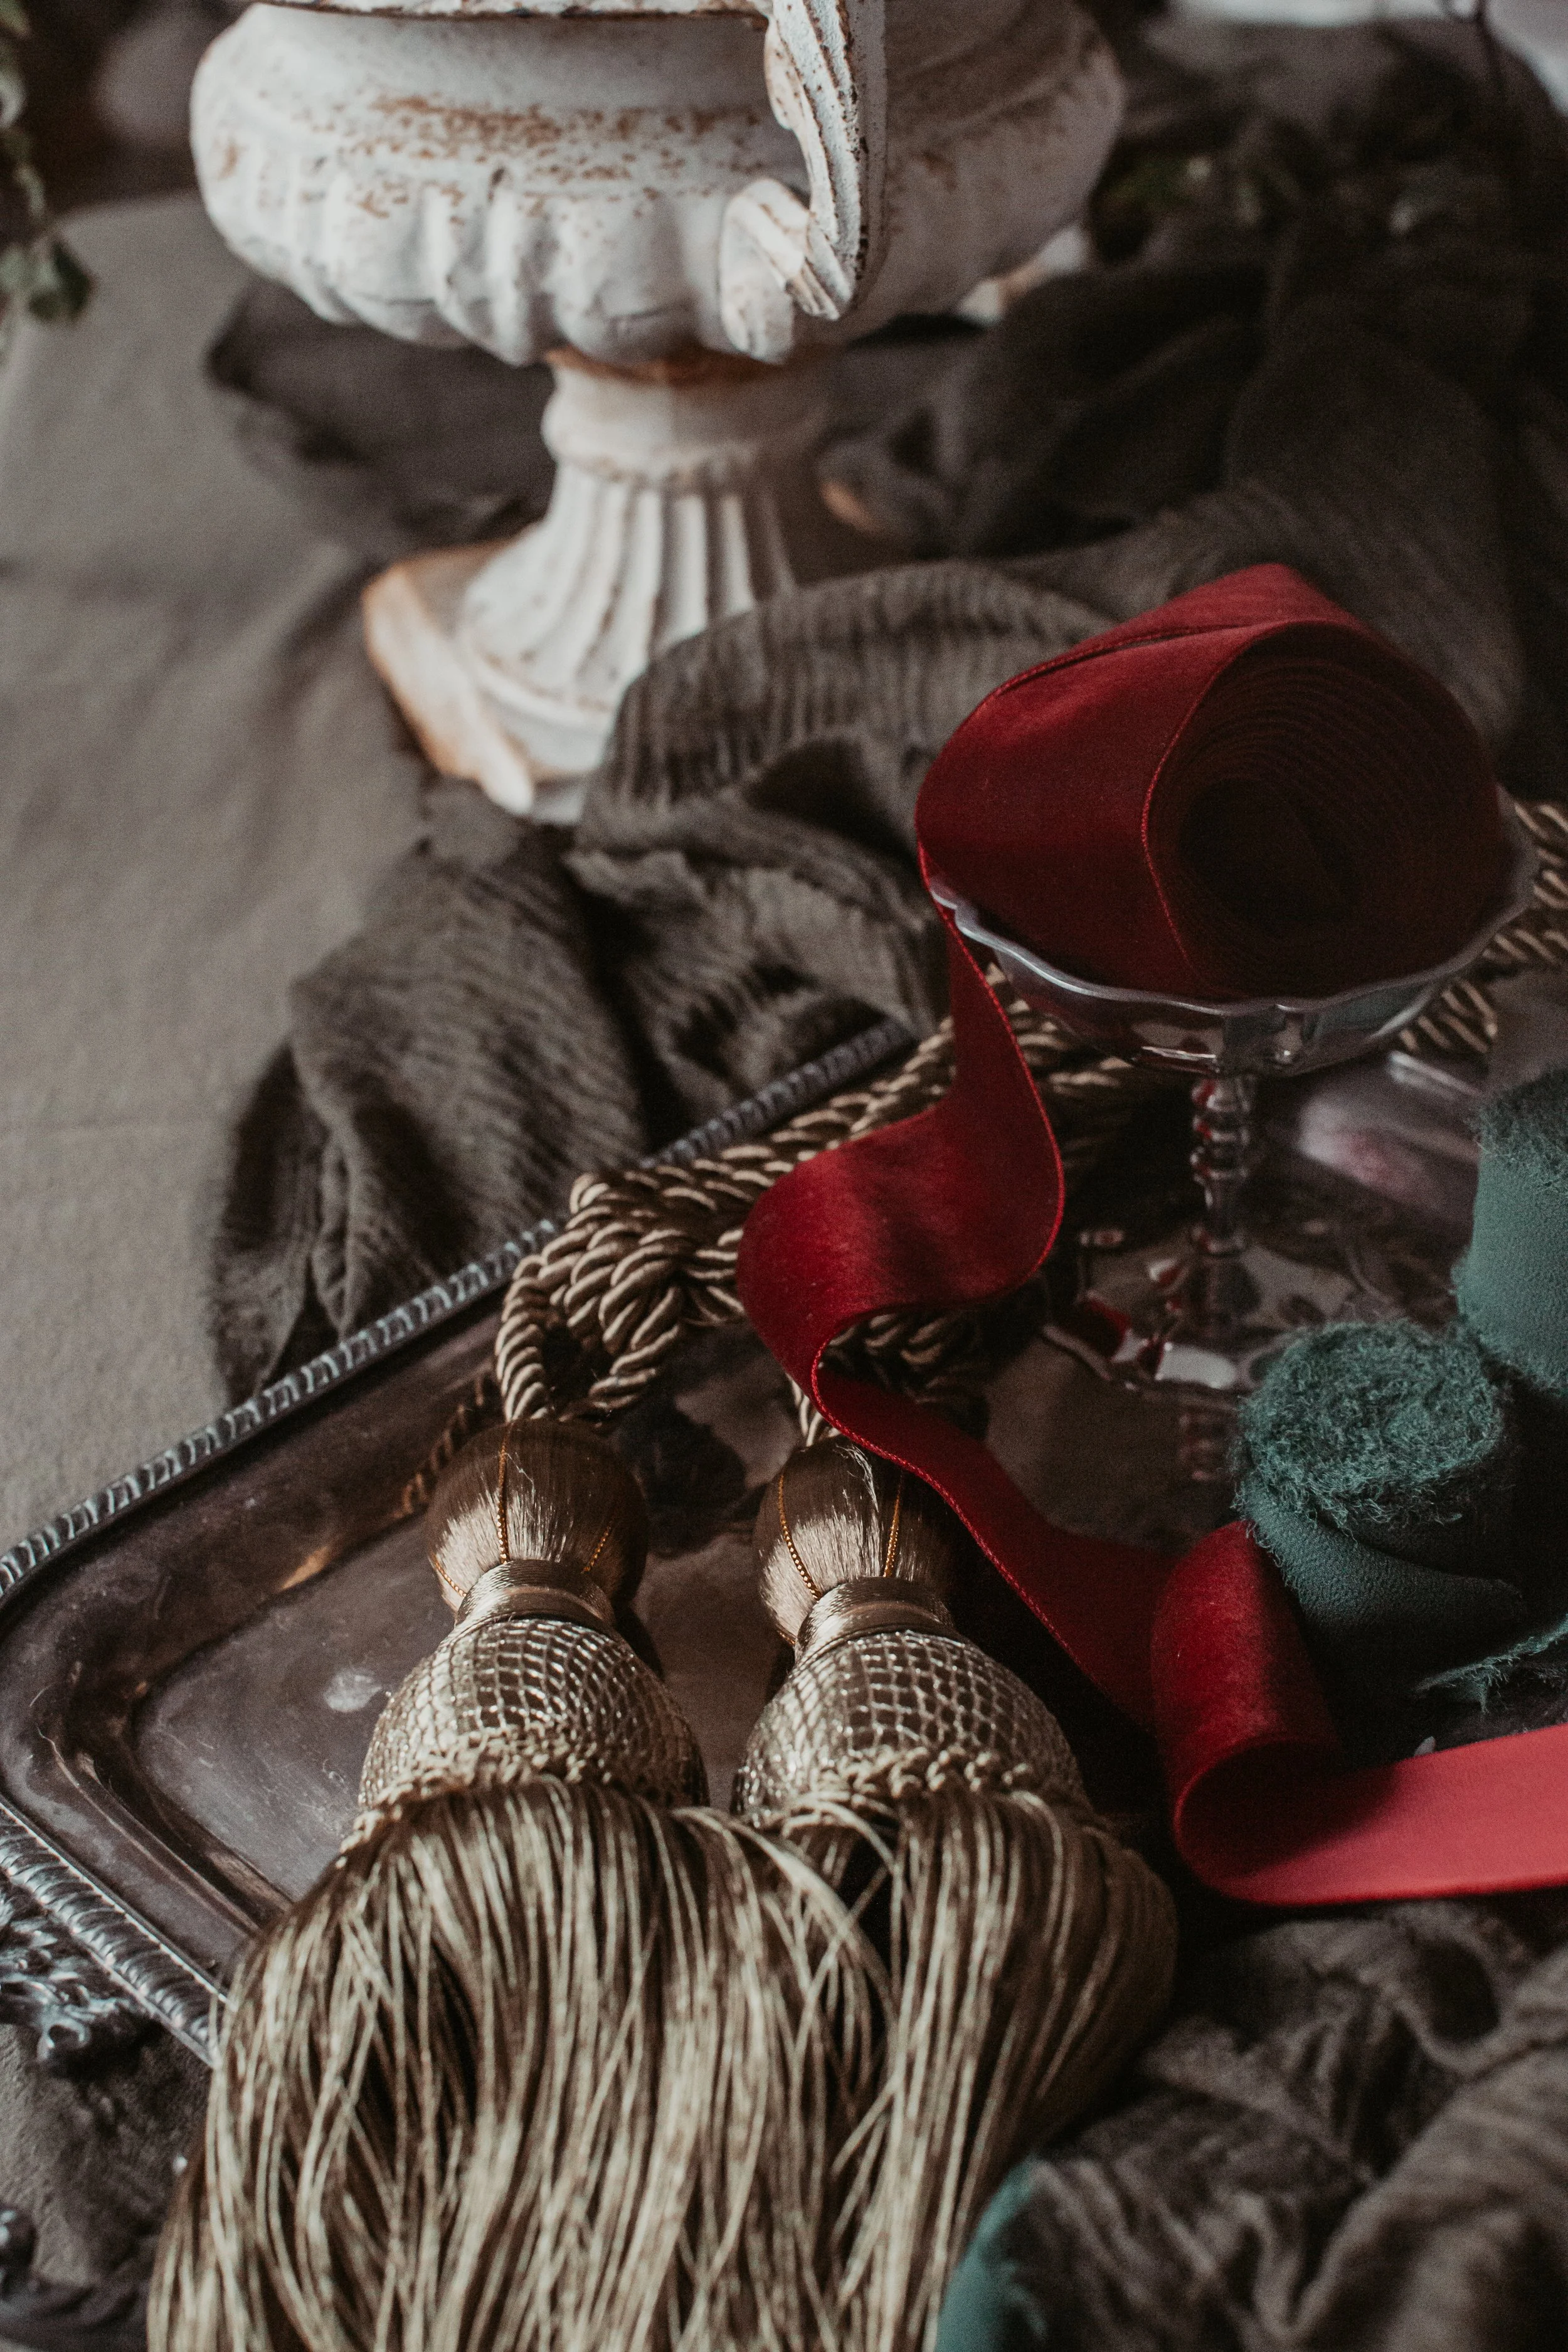
This year I also brought in texture through ribbon, ordering strands in different shades of green—from deep forest tones to muted olive—made in velvet and linen. Only one ribbon hangs from the tree, trailing gently downward. It’s barely visible, almost like a secret detail, which makes it all the more elegant.
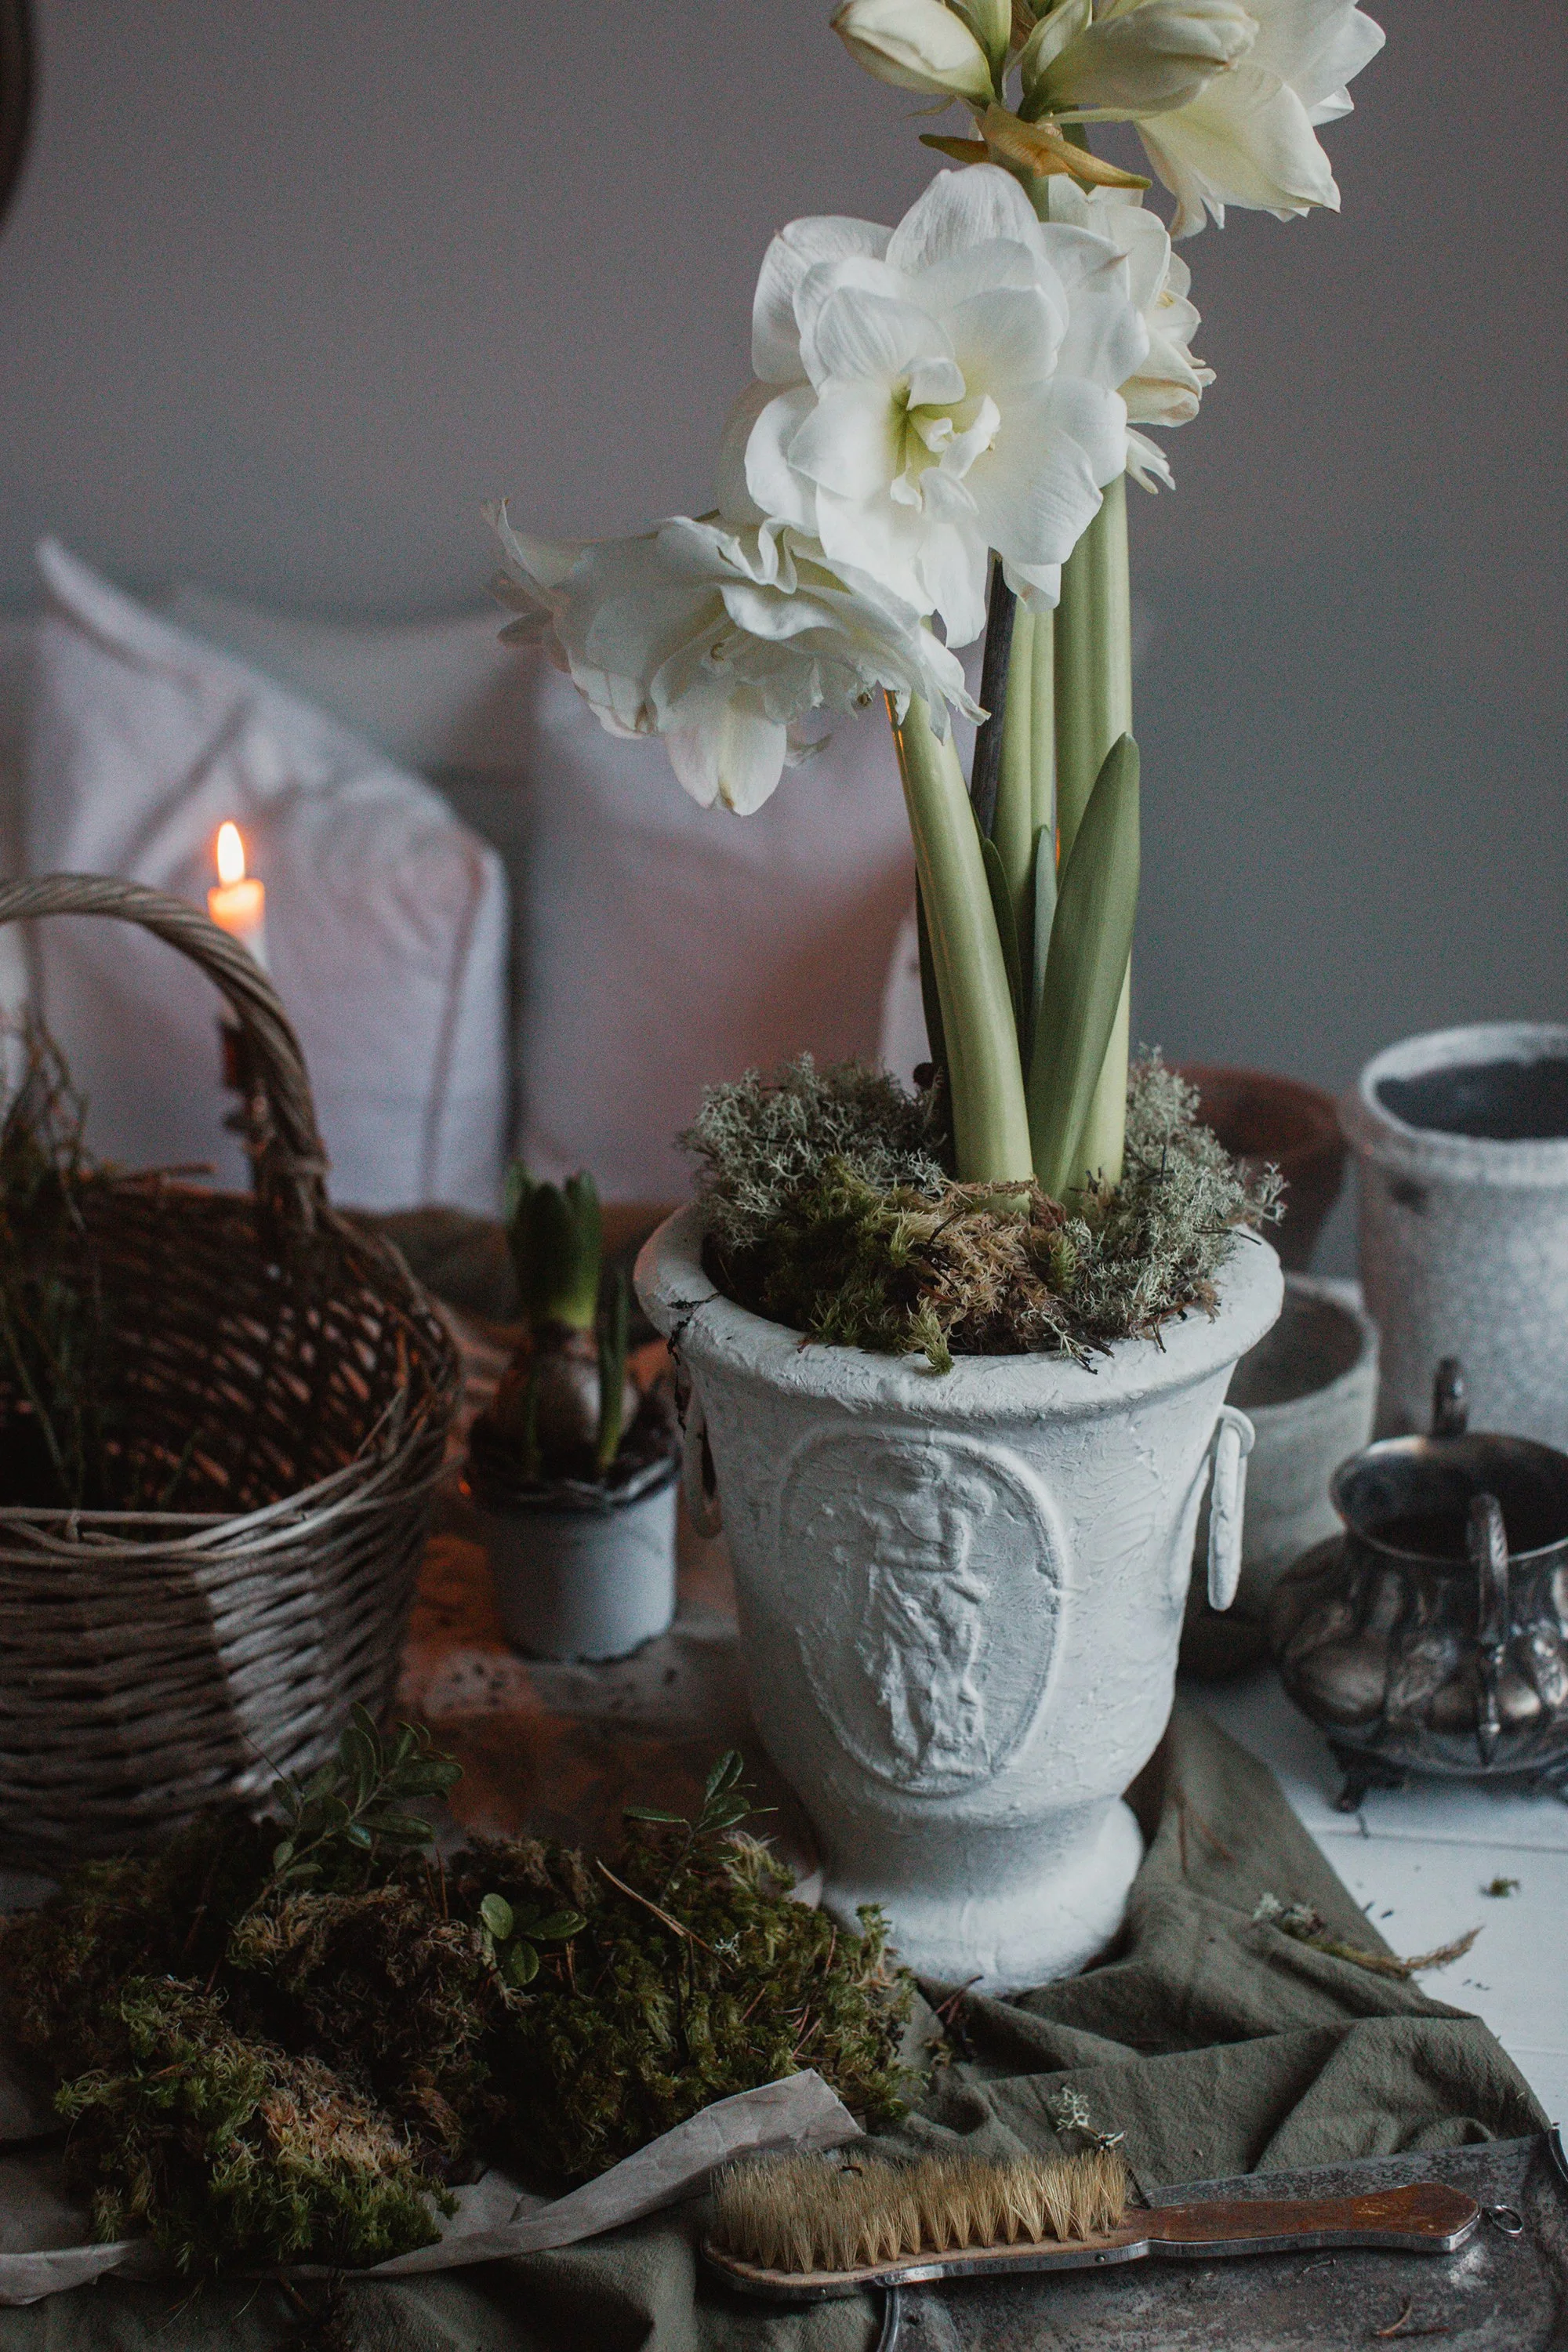
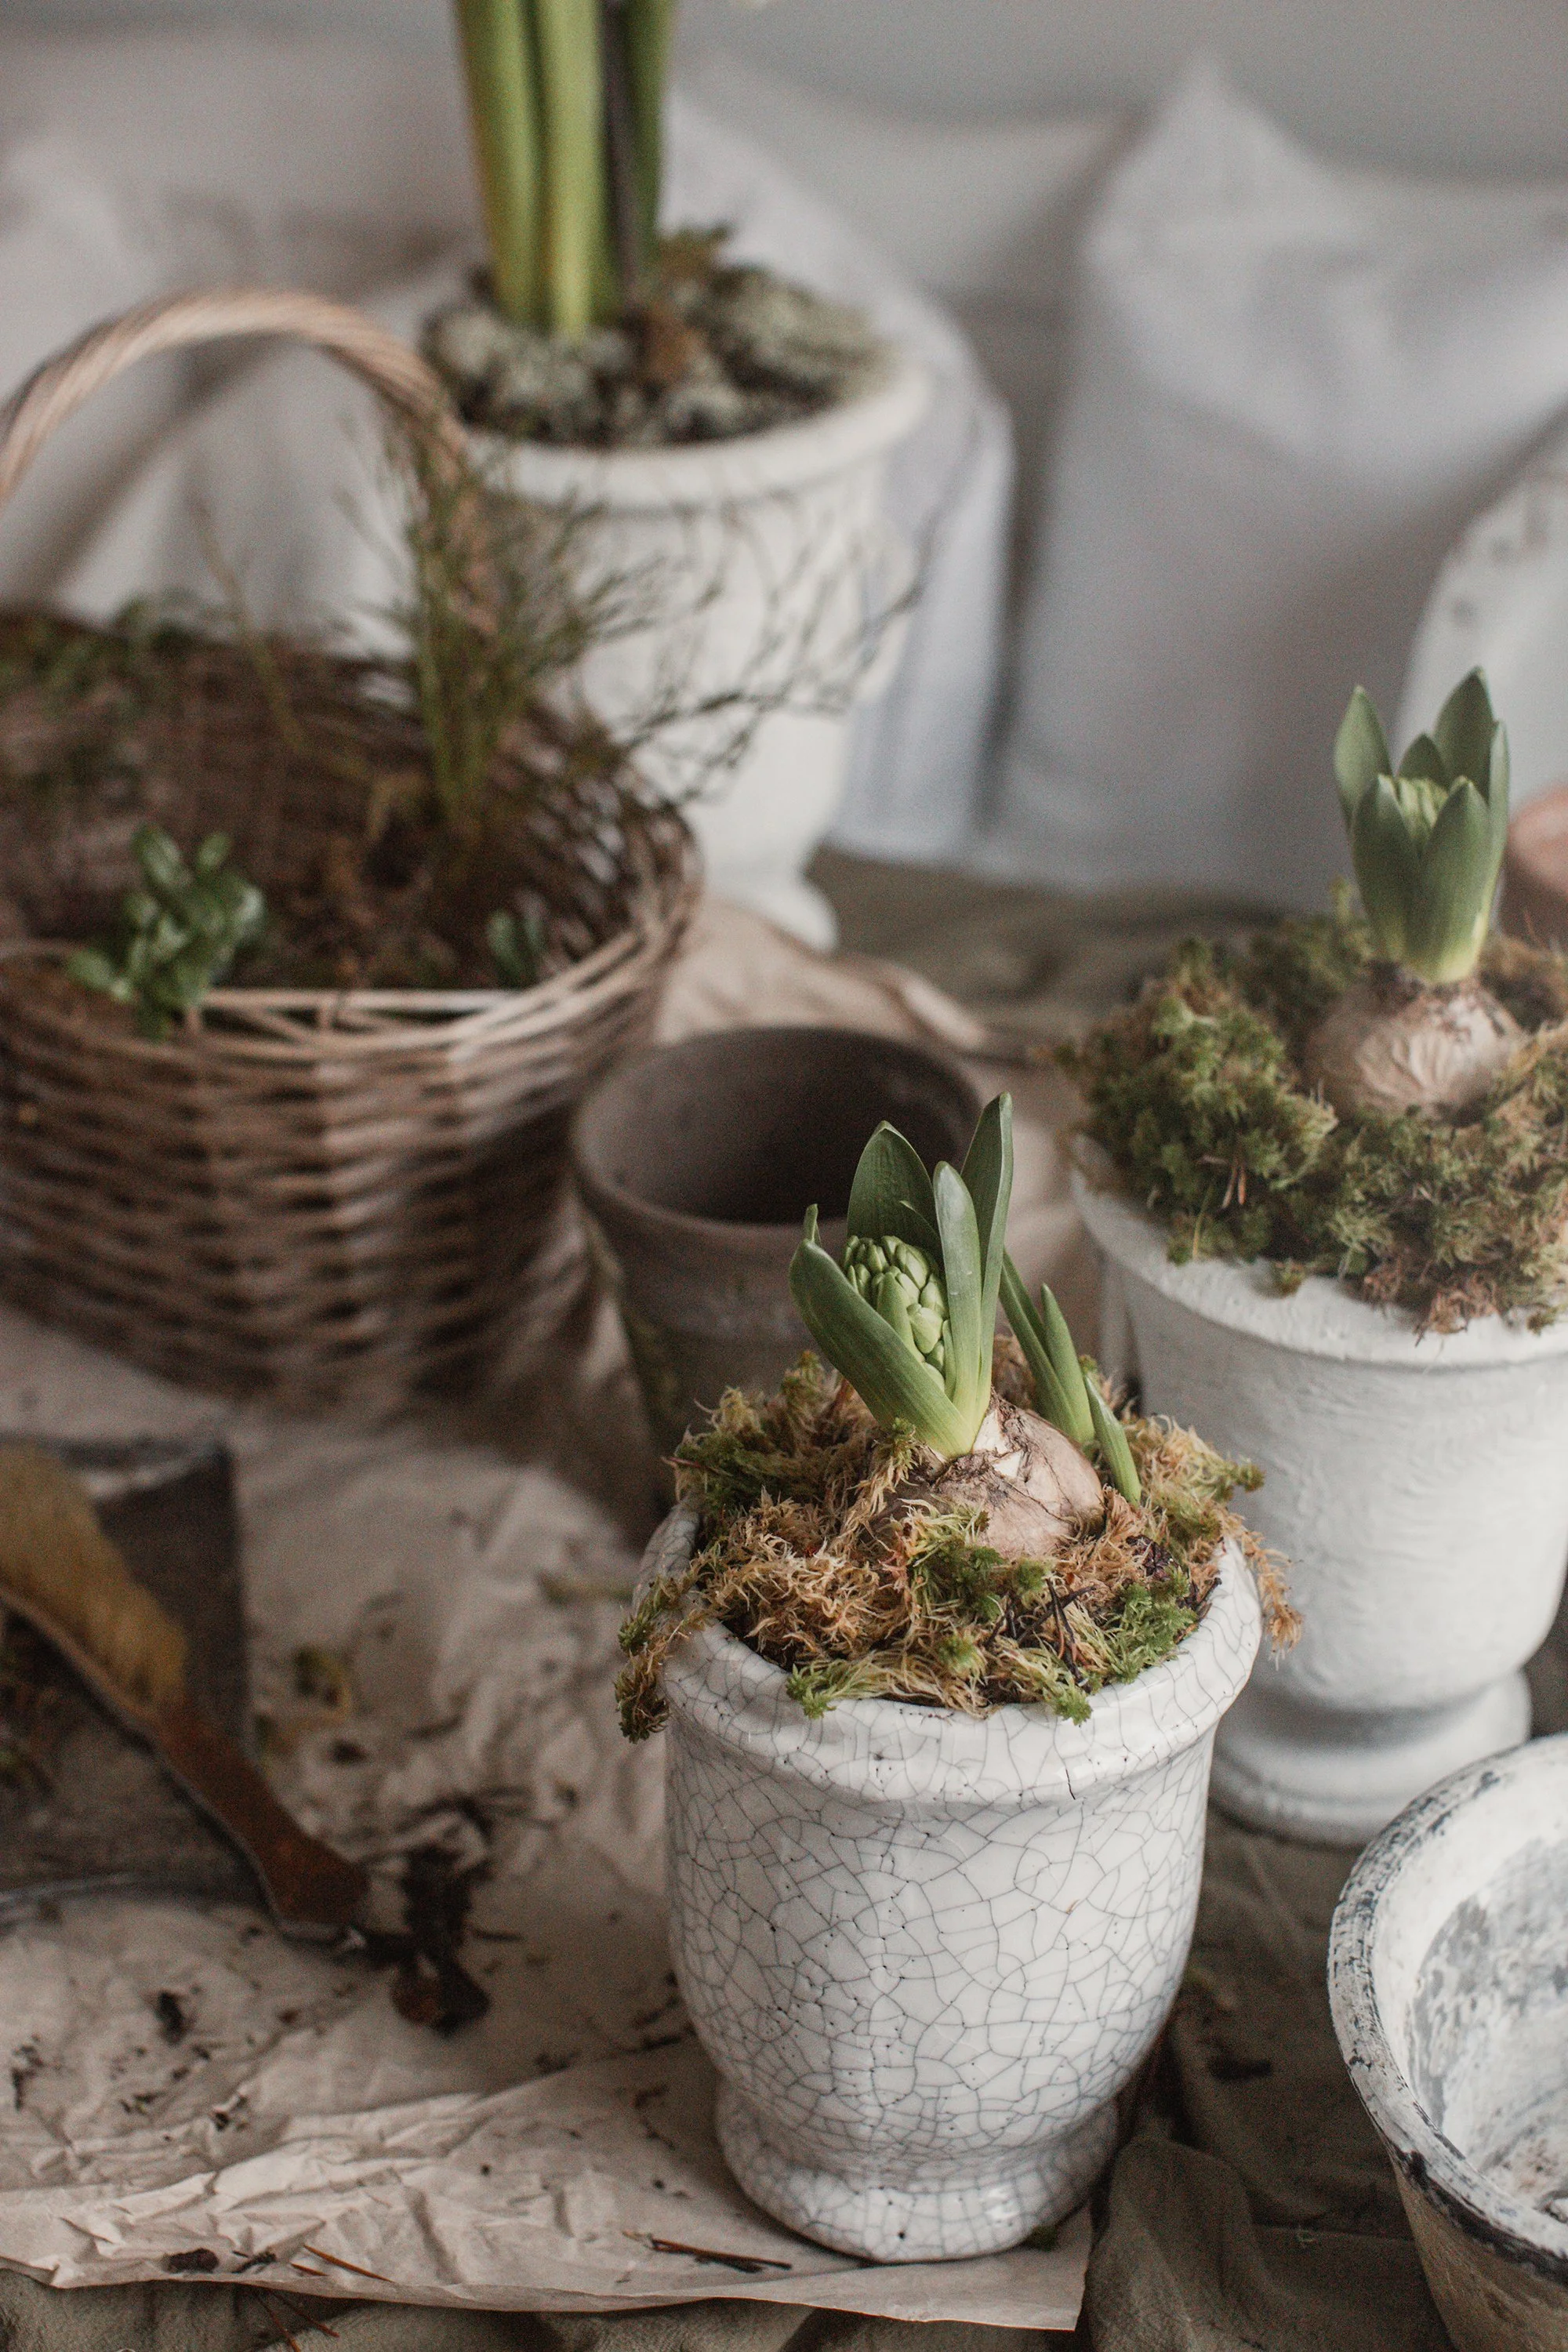
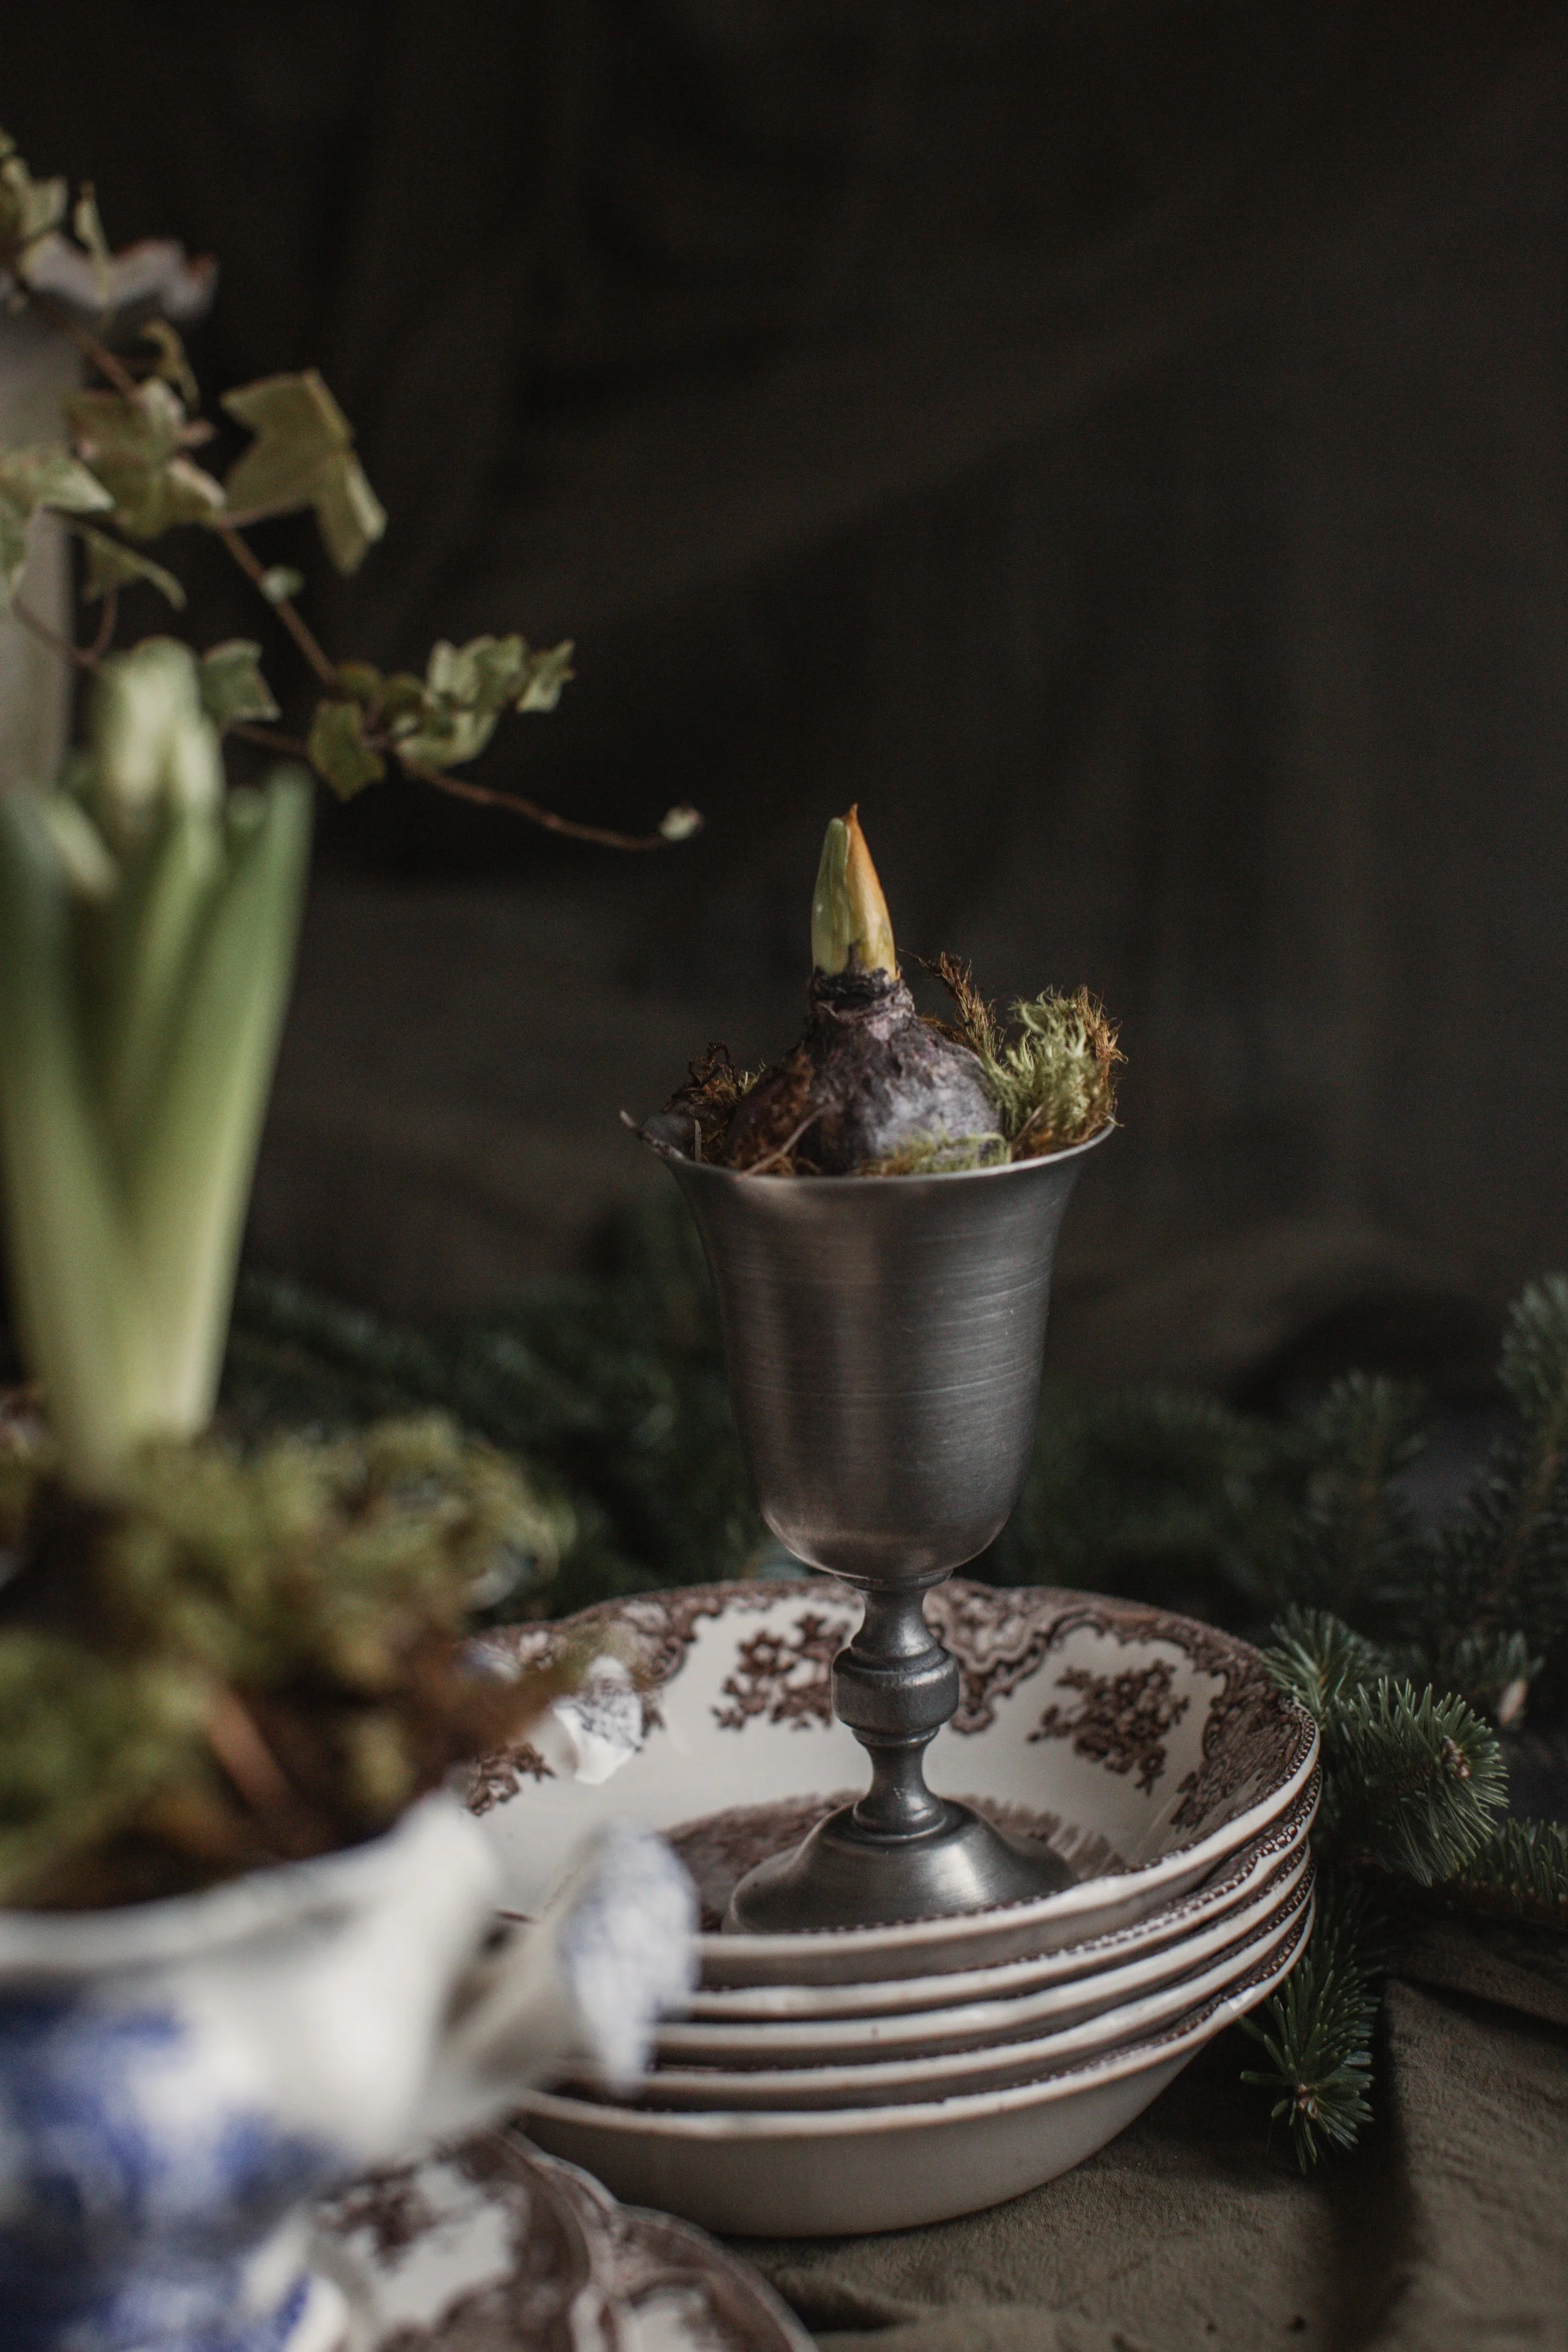
Natural materials shape the rest of the house as well. I’ve been making wreaths and arranging seasonal greenery, letting branches, berries, and winter foliage bring in that unmistakable Christmas scent. I tuck them into my old urns, whose patina and shape add presence and history on their own. Together they create a feeling that’s earthy, timeless, and wonderfully grounding. I cover hyacinths and ivy with moss and this creates a simple but beautiful arrangement.
For wrapping gifts, I ordered a vintage blue rose–printed paper that instantly reminded me of Dior’s toile de Jouy. Its soft patterns and classic charm elevate each package into a little work of art, transforming even the simplest present into something special. But perhaps the truest joy comes from the light: the subtle flicker of candles placed throughout the rooms, and the gentle, rhythmic glow of the tree. Together they create that warm, quiet atmosphere that makes winter evenings feel like a season unto themselves.
In the end, Christmas at home isn’t just about decorations—it’s about creating a feeling. Natural materials, thoughtful details, and soft, glowing light come together to make a space that feels comforting, beautiful, and full of wonder. And every year, the magic feels new again.


love the uncut edges of the ribbons

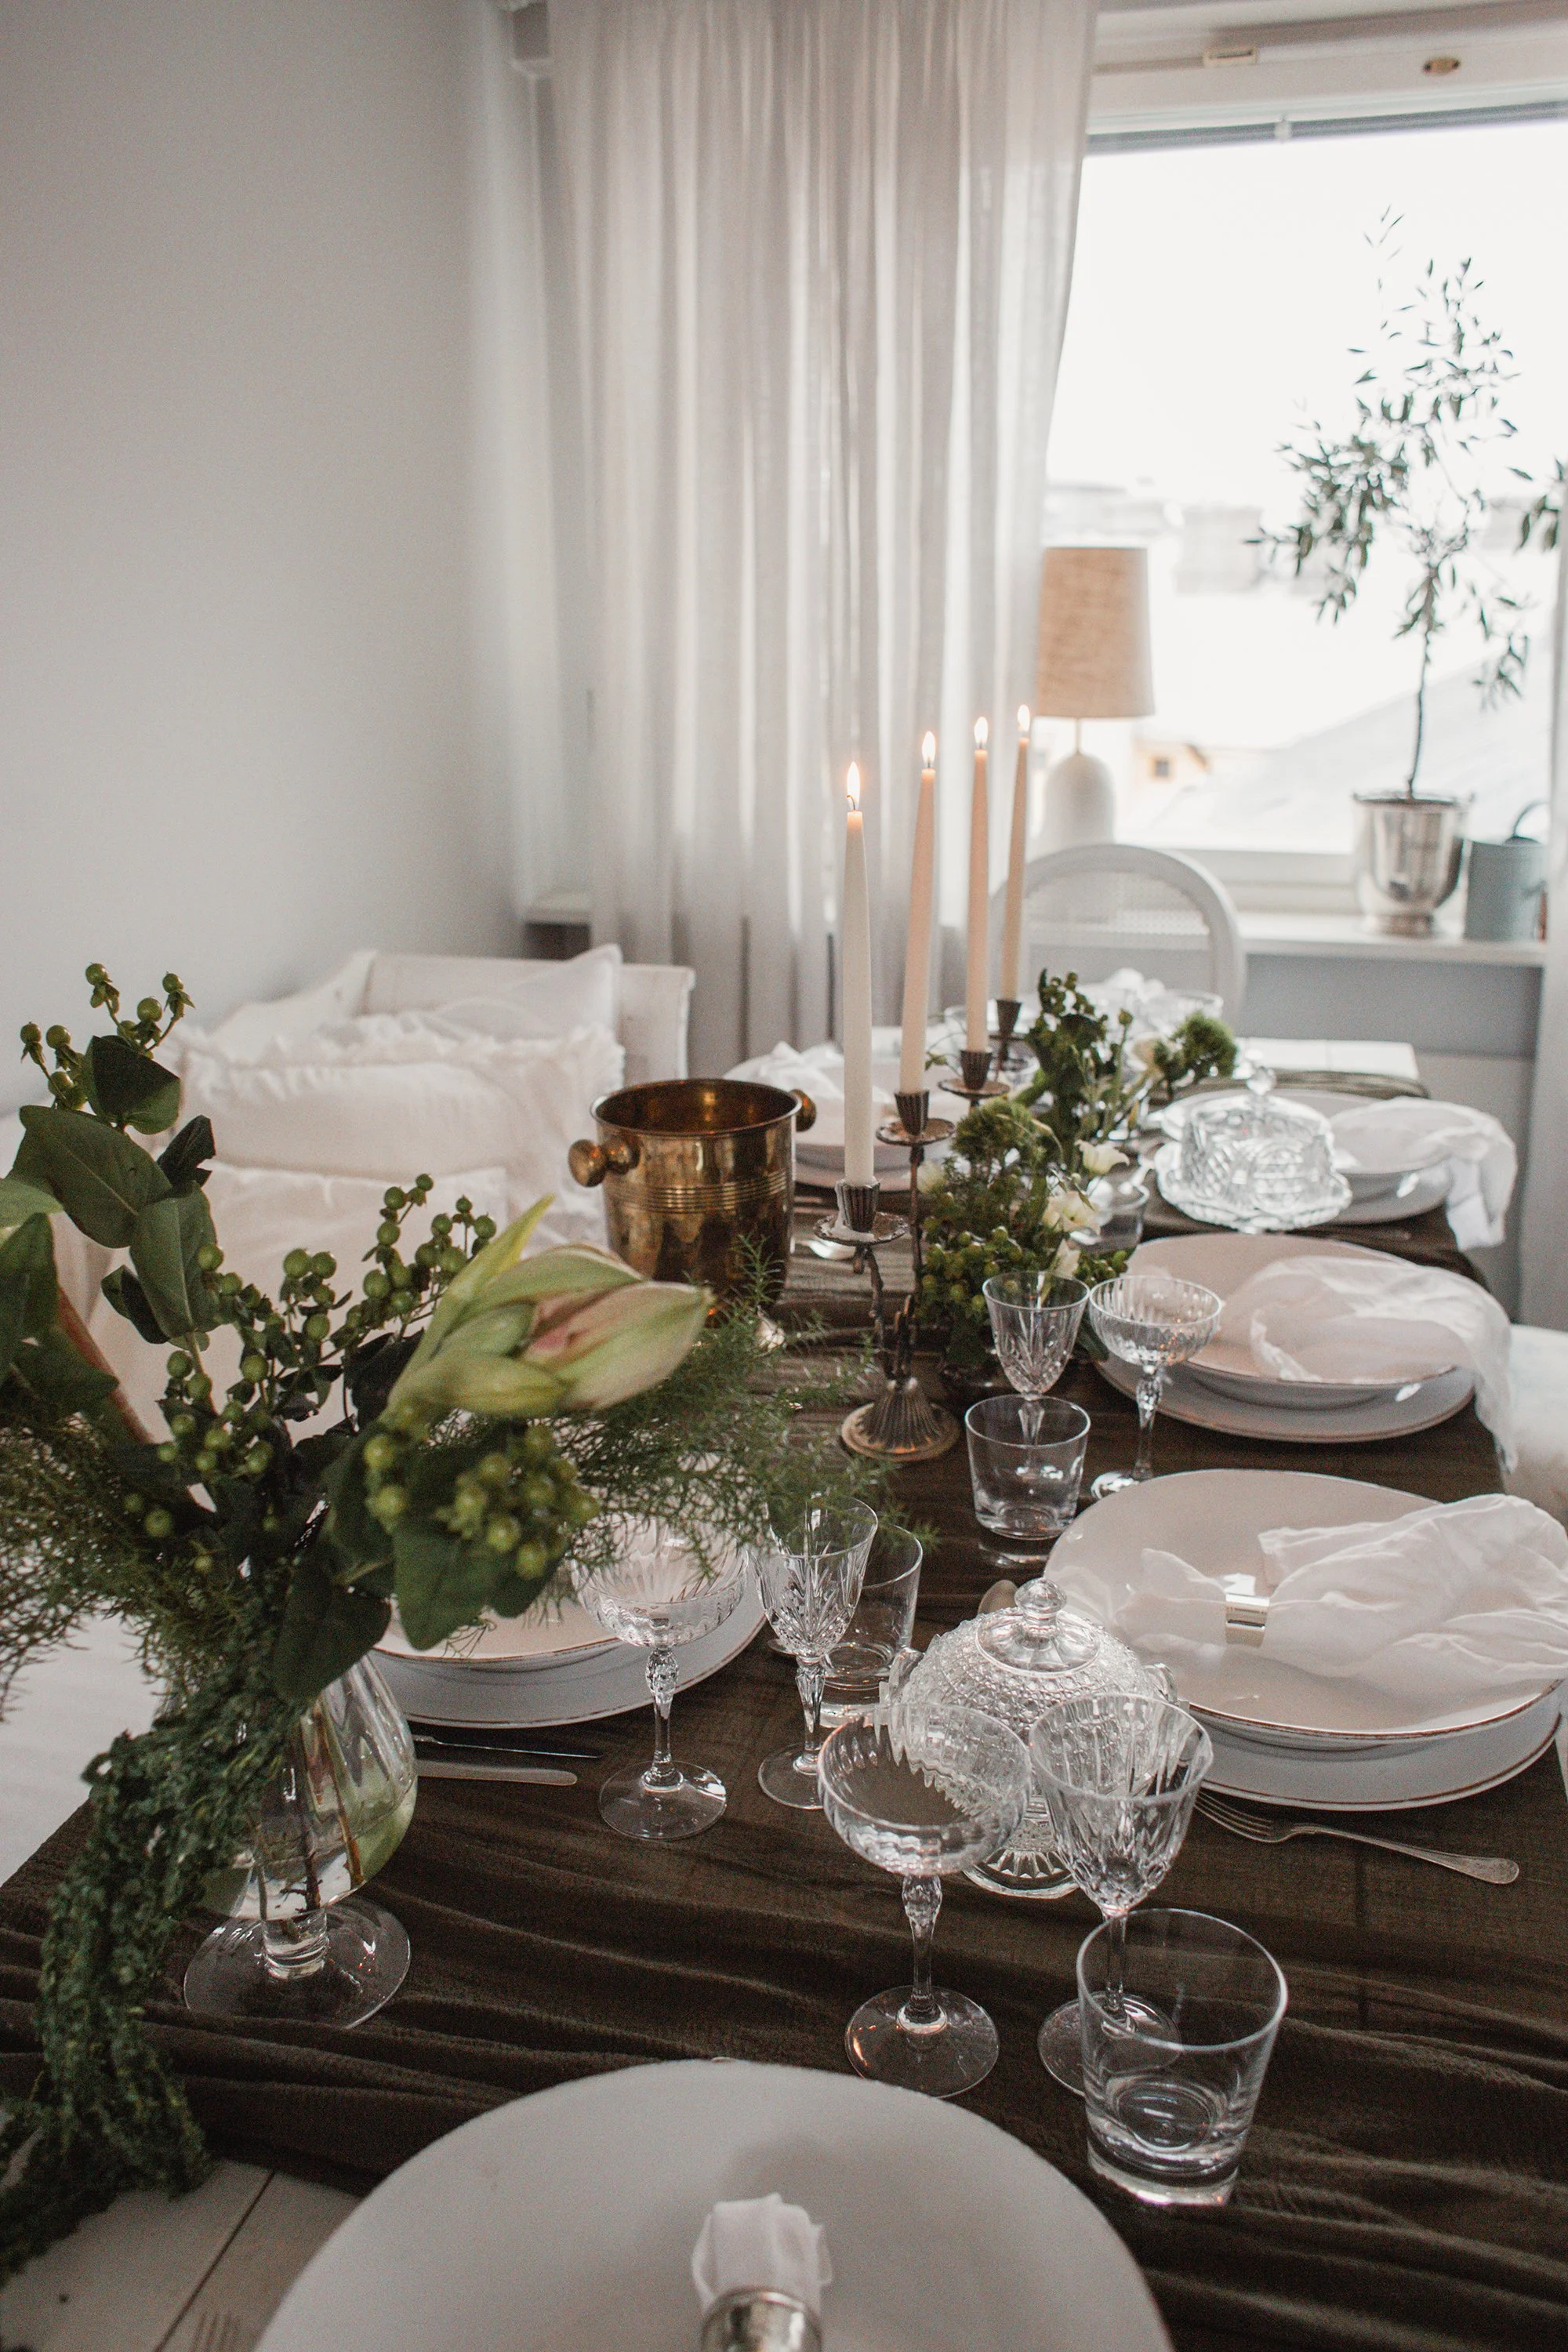
winter magic with a dramatic tablescape- lots of off white chiffon with pine and hypericum berries on top
This year, I also spent time experimenting with tablescapes, letting the dining table become its own expression of the season. I dressed it first in long, dramatic green tablecloths—deep, saturated tones that instantly grounded the room and made everything above them feel richer. Then I tried a more whimsical arrangement: a sweeping chiffon garland running down the center, airy and soft, with real pine branches and clusters of green berries layered on top. The garland extends all the way to the floor at one end, cascading like fabric in a winter tableau. It’s bold, a little theatrical, and it delivers exactly the kind of understated drama that makes a table feel truly special.


Eating breakfast around the Christmas tree on the sofa makes everything more special


Making gingerbread cookies


Sourdough Bread Recipe

I use this bread Le Creuset for my breads- but you can use a regular dutch oven or even a baking tray with a pot of water underneath.
Begin your Sourdough journey with me
I have been making sourdough for almost a year now. I learned through watching videos and just by practising. It is key to have a good starter and always bake with an active starter. I used to check if my starter was active by placing a dollop in cold water. if it floats, its active. I used to feed my starter 50g starter, 100g water, 100g flour but now I feed 30g starter, 60g water and 60g flour, just because this gives less discard. I feed my starter the evening before baking (maybe 8pm) and start baking in the morning around 7am. Sometimes I bake the bread in 1 day, it depends really how long bulk fermentation takes. After bulk fermantation (this basically means that the dough doubles in its bowl while resting in a warm place), you move the dough into the fridge for a minimum of 4 hours to cold proof. Then you can bake the bread afterwards.
All this information may seem overwhelming at first, but it really becomes easy the more you keep practising and find a rythym that works for you. If you are a beginner, use measurements from 1 recipe and keep practicing with that same one. I always use this recipe when baking and I have mastered it now without any fuss. You need a scale when baking sourdough. I keep my starter in the fridge and bake once a week. I feed it once a week, the day before baking (when I leave it at room temperature over night) so it is active the following day in the morning. Then in the morning I begin to bake and feed the starter again, I move it back to the fridge. The most my starter as gone without feeding has been 12 days in the fridge, and it was totally fine.
Sourdough Feed
30g starter
60g (boiled beforehand) room temp water
60g organic flour ( I often feed 30g rye flour and 30g all purpose flour)
What materials I use when baking
Bread baking Le Creuset
Scale
bread proofing basket
A large glass bowl/kitchen towel/ clingfilm
dough scraper/ wooden spoon


Ingredients (1 medium/large loaf)
100 g active sourdough starter
390 g room temperature filtered water
475 g all-purpose organic wheat flour
10 g salt
Instructions
1. Mix the active starter, water, and flours in a large glass bowl & leave to rest for an hour.
Mix it so that all the ingredients incorporate together but you do not need to knead. The reason why I use a glass bowl, is that you can see how it develops during bulk fermentation. A ready dough is airy, with bubbles and doubled in size that slides easily away from the bowl onto a surface.
Cover the dough with plastic wrap and a kitchen towel and let it rest at room temperature ( or slightly warmer- I place it on that bathroom floor with underground heating) for one hour. During this time, the yeasts in the dough will activate, and the dough will become more elastic.
2. Begin your stretch and folds or coil folds after the hour has passed: You do stretch and folds every 30 minutes. Repeat process 3 or 4 times. After this, leave the dough to rest and double in size.
First salt the dough: Begin the process by sprinkling the salt on top of the dough and fold the dough until it feels springy. You can either use a method of stretch and folds or coil folds, which ever suits you. It is important here that the dough does not rip once you are stretching and folding. I usually do my first round doing stretch and folds and the remaining 2 times, using the coil fold method.
How to stretch and fold: dip your fingers in water, slide them under the dough with your thumbs on top, loosen the dough from the bottom of the bowl, grab an edge, stretch it, and fold the stretched part over the top of the dough.
Rotate the bowl clockwise and repeat around the dough until it feels elastic. Do this about 3 times around the bowl. Cover with clingfilm and a cloth and place it back into a warm place. Repeat this process every 30 minutes for 3 or 4 times. You can, for example, set a timer for every 30 minutes to remind you to fold the dough.
After the stretch and folds are completed, let the dough rest and double in size at room temperature for at least four hours in total. This is called bulk fermentation. There is a fine line to see when the dough is ready and when it has risen too much. You want to make sure that the double has air bubbles in it and that it has basically doubled in size. if you let it rest too long, it becomes hard to shape. The temperature/ environment has an effect on this, so the hours can vary in different households. You will learn this naturally once you get the hang of doing sourdoughs. My bulk fermentation has been between 4-8 hours in total. You count the hours from when you begin the stretch and folds.
3. Turn the dough out onto the table after the dough as doubled in size.
There are many methods of doing this, but the genereal idea is to shape it into a ball and place it, into a basket that is then transfered into the fridge before baking. Sometimes it also depends on how easy/hard your dough is to work with. For higher hydration breads, the dough is more difficult to shape.
I generally follow this: Pour out the dough on to a floured surface. Then tighten the dough by gently shaping it (in a circle motion) from both sides with floured hands until the surface becomes more tight. Let the dough rest for 30 minutes before shaping. Gently stretch the dough with floured fingers into a rectangle as large as it will stretch without tearing. Fold it in thirds in one direction, then again in thirds in the other direction, so you get a rectangle-shaped package.
Roll the rectangle dough into a rough ball and make sure it does not ripe. You can gently roll the ball towards you in your shaping process, so it becomes more tight. (This may sound very confusing, but it is easy when you watch a couple of videos and get the hang of it)
5. Flour a proofing basket and place the dough seam side up on the towel so the smooth side is against the fabric. Stitch any of the dough together to create a tighter ball. Put the basket and dough inside a plastic bag or cloth.
6. Move the dough to the refrigerator for a cold rest until the next day or at least 4 hours. This is called cold proofing.
7. Preheat the oven to 250°C (480°F). I use a dutch oven for baking.
8. Take out the bread dough. Flip the basket upside down on top of the parchment paper so the dough falls out.
If desired, score the top of the bread with a razor blade or sharp knife.
9. Place into a oven 250°C for 15 minutes and then drop the temperature to 225°C for a remaining 25 minutes. For the last 15 minutes, bake the bread without a lid so it gets. a lovely golden colour on top.
10. Take it out of the oven to cool and let it cool completely before cutting into it.


Time to shape the dough and place into fridge after


Here is a quick recap of everything
Feed the starter the night before and leave it at room temp
In the morning, mix the active starter, flour and water together. leave for 1 hour (remember at this point to re-feed your starter in a new clean jar and move it back into the fridge)
Salt the dough and begin your stretch and folds
Repeat this process 3 or 4 times.
Leave the dough to rest and double in size
Move the dough to fridge
Bake
I HAVE MADE A REELS VIDEO ON INSTAGRAM THAT MAYBE CAN HELP YOU ALSO.


Fig Carpaccio - elegant & simple


As summer fades and the air begins to crisp, early autumn brings with it one of the season’s most delicate treasures: fresh figs. Their soft, honeyed sweetness makes them the perfect base for this elegant Fig Carpaccio with Burrata—a dish that feels indulgent yet effortless.
Velvety figs are gently pressed onto the plate, their juices mingling with creamy burrata and a drizzle of olive oil. A scattering of chives, crushed pistachios, and a whisper of thyme adds freshness and texture, while slices of warm sourdough invite you to scoop up every last bite. Play around with the flavours of the toppings, other great options are goat/gorgonzola cheese, honey, or prosciutto.
Whether served as a refined starter or a centerpiece for a leisurely lunch, this dish captures the quiet richness of autumn in every mouthful.


Fig Carpaccio with Burrata, Chives & Pistachios
Serves: 1 plate
Prep time: 10 minutes
No cooking required
Ingredients:
4-5 ripe figs (save one as a topping)
1 ball of fresh burrata
1 tablespoon chopped fresh chives
Extra virgin olive oil, to drizzle
Sea salt, to taste
Freshly ground black pepper, to taste
Small pinch of fresh or dried thyme (optional)
1 tablespoon crushed pistachios (optional)
Fresh sourdough bread, for serving
Instructions:
Prepare the figs:
Gently peel the figs. Slice them in half, then press each half down onto a serving plate to flatten slightly, creating a “carpaccio” layer. Let the juices pool naturally on the plate.Add the burrata:
Tear open the burrata and place it gently in the center of the figs, allowing the creamy interior to spread slightly.Season:
Sprinkle chopped chives evenly over the dish. Add a pinch of sea salt and a few cracks of black pepper to taste. Add a few slices of fig on top for visual effect.Garnish:
Drizzle generously with good-quality olive oil. Add a light sprinkle of thyme for a fragrant herbal note—or, for a bit of crunch, scatter over some crushed pistachios.Serve:
Bring the plate to the table with slices of fresh sourdough bread, perfect for scooping up the creamy burrata and fig juices.


August Fig Pie with a creamy ricotta filling

This savoury fig and ricotta pie is a delicate balance of creamy, salty, and subtly sweet — perfect for late summer when figs are at their peak. Made with a light ricotta base enriched with honey and egg white, and studded with whole figs that caramelize beautifully as they bake, this small pie is ideal for a solo brunch, light lunch, or a refined appetizer. Add a sprinkle of herbs or a tangy cheese topping, and you’ve got a dish that’s simple yet deeply flavorful.
Ingredients
For the crust (optional if you want a firmer base):
1/2 cup all-purpose flour
3 tbsp cold butter, cubed
Pinch of salt
1–2 tbsp cold water
For the filling:
1/2 cup ricotta cheese (full-fat preferred)
1 egg white
1 tsp honey (adjust to taste — for a more savoury pie, use less)
Pinch of salt
Pinch of black pepper
A few fresh thyme leaves or 1/4 tsp chopped rosemary (optional — for a herby twist)
3 ripe figs, halved or quartered (depending on size)
Olive oil, for drizzling
Optional toppings (after baking):
Crumbled feta or gorgonzola
Extra thyme or rosemary
A drizzle of balsamic glaze or chili oil
more fresh figs


Instructions
1. Make the optional crust: or buy ready bought from the store
In a bowl, mix flour and salt. Add butter and rub in with your fingertips until crumbly.
Add water gradually and mix until the dough comes together.
Press into a small tart tin or oven-safe ramekin (4–5 inch diameter). Prick the base with a fork.
Blind bake at 180°C (350°F) for 10 minutes while you prepare the filling.
2. Prepare the filling:
In a bowl, whisk together ricotta, egg white, honey, salt, pepper, and herbs (if using) until smooth.
Pour into the pre-baked crust or directly into a greased ramekin if going crustless.
3. Add figs:
Nestle the whole fig into the ricotta mixture, cut side up. I made little scores on top of the fig so it creates a nice shape.
Lightly drizzle figs with olive oil and sprinkle a bit more salt and pepper on top.
4. Bake:
Return to oven and bake for 25–30 minutes, or until the ricotta mixture is set and lightly golden around the edges.
5. Garnish and serve:
Let cool slightly before serving.
Top with crumbled gorgonzola cheese and fresh herbs and finely chopped toasted nuts.
Serving Suggestions
Serve warm or at room temperature with a side salad of arugula and toasted nuts.
Excellent for brunch, a light lunch, or a savory dessert for cheese lovers.


Porcini Recipes x2 -From Forest to Plate

Beautiful mushroom forest in the Finnish countryside


Deep within the mossy forests of Finland, hidden beneath spruce and pine, grows the crown jewel of the woodland: the porcini mushroom. Known locally as herkkutatti, this prized fungus thrives in the rich, damp soil of old-growth forests, particularly from late summer to early autumn. You’ll often find them nestled among fallen leaves and needles, near birch or conifer trees, their thick, brown caps rising like treasure from the forest floor. For foragers and chefs alike, the porcini is a true gift of the Nordic wilderness—earthy, nutty, and full of flavour.
Porcini Carpaccio
Last year in Tuscany, I tasted a porcini carpaccio that left a lasting impression—delicate, raw slices of porcini paired with thinly sliced pear, a celebration of simplicity and forest flavors. Inspired by that memory, I’ve reimagined the dish with a Finnish touch, gently sautéing the mushrooms to bring out their deep, buttery essence while preserving the elegant, carpaccio-style presentation. Technically, it may no longer be a true carpaccio, since the mushrooms aren’t raw, but the spirit remains: thin, beautiful slices arranged with care, letting the ingredients speak for themselves.
In our family, mushroom foraging is more than a hobby—it’s a tradition passed down from my childhood, and now my son shares in that same quiet joy of searching the forest floor. Finding a herkkutatti, or porcini, in the Finnish woods feels like striking gold. With their earthy, nutty, almost creamy flavor, these mushrooms are the undisputed treasures of the late summer forest.
This dish is a simple tribute to that flavor. Thinly sliced, lightly sautéed porcini are arranged on a plate and topped with finely chopped chives, a few slivers of red spring onion, and tart lingonberries—their sharpness beautifully balancing the rich mushroom. A scattering of crushed pistachios adds crunch, thyme flowers bring a gentle floral note, and a generous twist of black pepper along with a flake or two of Maldon salt finishes the plate. It’s an ideal appetizer or side dish for late August, as the light begins to soften and summer quietly turns toward autumn. If you do not have lingonberry in your country, you can simplify the entire dish by just adding pickled red onions (for some acidity) on top of the mushrooms along with black pepper and pistachios.

Ingredients
2 Porcini cleaned and thinly sliced diagonally
1 red spring onion
handful of pistachios, roughly chopped
blackpepper/ maldon salt
thyme flowers
tablespoon of lingonberry
olive oil
Directions
Gently sauté the sliced porcini mushrooms in a generous amount of olive oil for about 3-5 minutes on each side, so that they become slightly golden. While they are cooking add a pinch of maldon salt on them. Once ready, arrange on a plate. On top, add some thinly sliced red spring onion, a bit of lingonberry, roughly chopped pistachios and the little purple flowers from thyme. If needed, add a little bit more salt and ground black pepper. Enjoy immediately.


Porchini Spaghettini - From Forest to Plate


Porcini Spaghettini
A delicate pasta dish that highlights the buttery, nutty flavor of fresh porcini mushrooms.
Serves: 2–3
Cook Time: 20 minutes
Ingredients:
250g spaghettini (or thin spaghetti)
250g fresh porcini mushrooms, cleaned and sliced thinly
2 tbsp extra virgin olive oil
1 tbsp unsalted butter
1 shallot, finely chopped
1 garlic clove, finely sliced
1 small splash of dry white wine (optional)
Salt and freshly ground black pepper, to taste
A few sprigs of fresh thyme (leaves only)
Fresh parsley, finely chopped (for garnish)
Parmesan or Pecorino cheese, finely grated (optional)
Lemon zest (optional, for brightness)

Instructions:
Bring a large pot of salted water to a boil.
Cook the spaghettini until just al dente according to package instructions. Reserve ½ cup of the pasta cooking water before draining.While the pasta cooks, prepare the mushrooms.
Heat the olive oil and butter in a large skillet over medium heat. Add the shallot and garlic, and sauté gently until softened and fragrant, about 2 minutes.Add the sliced porcini mushrooms.
Cook for 5–7 minutes, stirring occasionally, until the mushrooms release their moisture and start to turn golden. Avoid overcrowding the pan—let them caramelize slightly for the best flavor. I also saved an extra mushroom that I cut diagonally into thin slices, that I in the end sauté in butter to add on top of each serving plate for a visual effect.Deglaze (optional):
Add a small splash of dry white wine to lift the fond from the pan. Let it simmer for 1 minute until mostly evaporated.Season and finish the sauce.
Add thyme leaves, a pinch of salt, and plenty of freshly cracked black pepper. Taste and adjust seasoning as needed.Combine with pasta.
Add the drained spaghettini to the pan with the mushrooms. Pour in a splash of the reserved pasta water and toss everything together over low heat until the sauce lightly coats the pasta. Add more water if needed to loosen.Serve:
Plate the pasta and garnish with chopped parsley, extra black pepper, and a sprinkling of grated Parmesan or Pecorino if you like. A touch of lemon zest can be added at the end for freshness.


August at the countryside


We took a spontaneous holiday to the countryside last week. We got to enjoy another round of crayfish, which was just heavenly. It was also just us three at the countryside, so it was very calming and lovely. Our three year old enjoyed the crayfish too for the first time, which made me extra happy. We had our own little party by the lake, dressed the table with wild flowers and enjoyed the warmth of August on our faces. We swam and had a sauna every single day, picked mushrooms and berries and made delicious food. You could feel that autumn in the air already, mornings and late evenings were colder and nature seems to be slowly transitioning. Trees had large red rowan berries, we found lots of porcini mushrooms, sunflower fields are blooming and apples are ripening on trees. Lingonberry and heather appear on grounds and there is a lovely freshness in the air. Our countryside is so inspirational, I really relax here by the beautiful lakes and nature far away from the city.


August Meadow Flowers & chive butter

In the soft golden light of a summer afternoon, wandering through a flower meadow feels like stepping into a quiet dream. The field sways gently with cosmos, morning glory, Iris, poppies, cornflowers, and buttercups, their colours dancing in the breeze like nature’s own watercolors. Picking flowers here is more than a simple act—it's a calming ritual, a moment of presence where the mind slows and the senses awaken. The rustle of tall grasses, the hum of bees, and the warmth of the sun all combine to soothe the soul. Back home, the joy continues: you can create a wild, abundant bouquet—an armful of tangled beauty spilling from a weathered ceramic jug—or place individual, delicate blooms into old crystal bottles and antique vases, each one a quiet reminder of the meadow's peace and poetry.
This beautiful meadow/sunflower fields is just a 30 minute drive from Helsinki. The exact address is Porkkalantie 274. I was alone on the meadow and got to enjoy all this beauty to myself.
Chive Flower butter
I made a beautiful chive flower butter using the delicate pink blossoms from countryside chive plants from my mother in laws garden, and it turned out to be one of the simplest, most flavourful ways to elevate plain butter. The process is easy and satisfying: just pick the petals from the chive flowers, chop a small handful of fresh green chives, and mix both into softened butter. The floral, slightly garlicky flavor of the blossoms pairs wonderfully with the sharpness of the chives. Once everything is mixed, shape the butter into a log using parchment paper and let it chill. The result is both rustic and elegant—perfect spread over a slice of my homemade sourdough. The subtle lavender hue from the petals makes it as pretty as it is delicious. Next, I think I’ll try making my own butter from scratch—it’s said to be simple, and I love the idea of taking one more step toward fully handmade kitchen staples.


Meadow Flower Bouquet


Seaside Scallops


Let’s make simple seaside scallops
Ingredients
2 scallops/person
marinade: grated garlic, melted butter, olive oil, parsley, dill, salt, pepper, bread crumbs
Finely chopped chili
grated Parmesan
Begin by drying each scallop with kitchen paper. Then make a marinade for them. In a bowl, add melted butter, grated garlic, olive oil, bread crumbs, chopped parsley and dill, salt and pepper. Roll the scallops in the marinade and place each individual scallop onto a small oven proof dish (I used a scallop shell). Pour the rest of the marinade on top of each scallop. On top of each scallop, add finely chopped chili and grated parmesan. Place into an oven 200 Celsius degrees for 10 minutes. Serve piping hot with a lemon slice and fresh bread that you can use to scrape all the delicious juices.
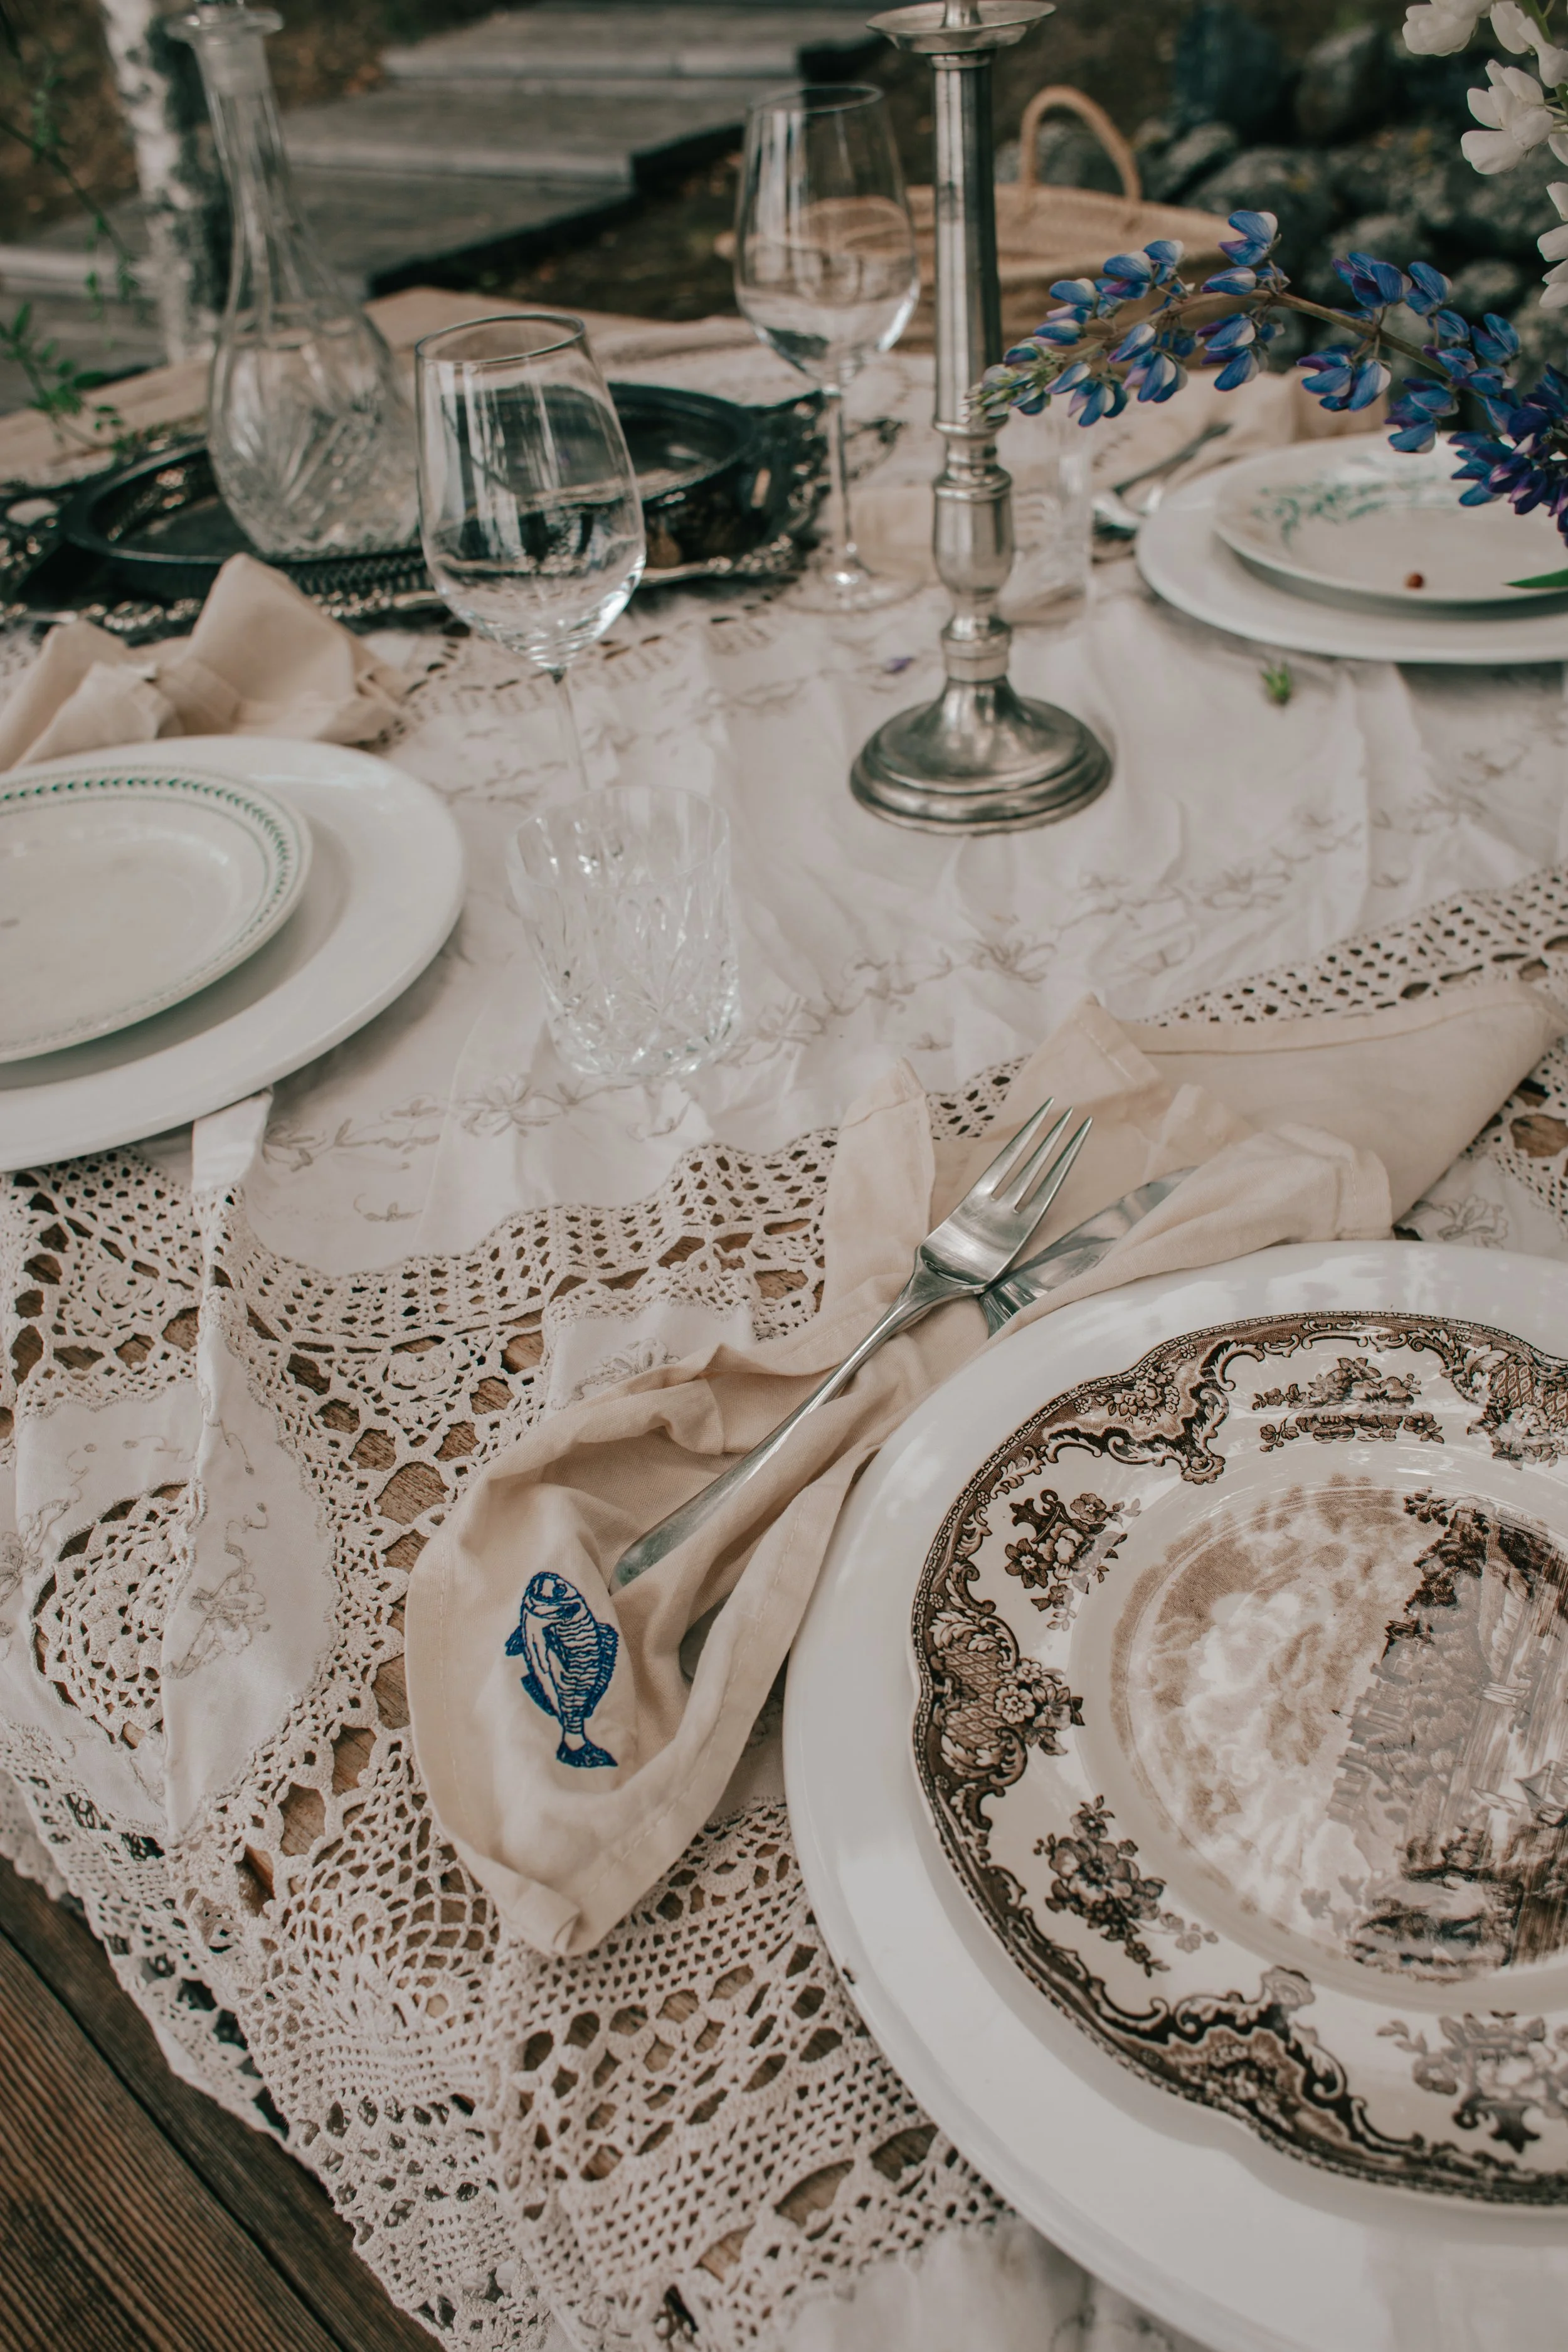
We took a lovely day trip to Hanko, a lovely seaside summer city outside of Helsinki. We had lunch, icecream, did some shopping and relaxed on the long sandy beaches enjoying the sunshine. When we came home, we wanted to cook something delicious but easy so had some scallops for starters. I always serve scallops on their own shells as I think they are beautiful like that, and I love this hand painted lobster plate from Grottaglie, Italy. I picked some fresh draping flowers for our table setting, put some candles on and cooked together as a family.


2x easy summer salads


Summer salads are light, refreshing dishes perfect for hot weather. Seasonal salads are a lovely way to incorporate vegetables into your diet with variety to flavour and colour on your plate. I have a balcony where I grow herbs and peas that I often add to my dishes. Even though my gardening is very limited on the balcony, it is greatly satisfying to eat (even if it is just herbs), something you have self cultivated. Salads do not need to be boring and only leaf based, these two dishes are filled with vegetable and an abundance of texture.
1) Summer carrot salad
Ingredients for dressing
greek yogurt
lemon juice
garlic
salt/pepper
Ingredients for toppings
3-4 summer carrots
chopped feta
toasted pine nuts
Edible flowers : violet and mint flowers
chopped mint
grated black pepper
spring onions
As a base, begin by making a greek yogurt dressing. It can be as simple as you like it to be or add twists of your own to suit your palette. Take a bowl, mix in ( 1/2 cup or so), greek yogurt, grate in a garlic clove, add a splash of lemon juice, salt and black pepper. mix well. This is the dressing, you can of course add any chopped herb to it or spices such as paprika or tahini/honey. Spread this on the bottom of your plate when it is time to serve.
For the main ingredient, take three or four summer carrots. Wash them, peel gently, remove the tips (leave a bit of green on the ends for visual effect) and cut in half. In a pan, add a dollop of butter, a few twigs of thyme and olive oil. Place the carrots on the pan and gently cook with a lid covered until they are slightly soft. This may take about 7-10 minutes. If you prefer a bit of sweetness, midway through cooking, add a bit of honey into the pan. Gently salt the carrots. Once ready, add them on top of the greek yogurt dressing.
Add the rest of the toppings on the carrots -
Sprinkle some feta cheese on top, edible flowers like violet/mint flowers, chopped mint, spring onions, toasted pine nuts, grated black pepper.


Pickled chanterelle & New potato summer salad
mushroom season is here and we have been a few times to pick chanterelle mushrooms from the forrest. It has barely rained the entire July, so mushroom picking has been slow this summer. There is a chanterelle mushroom pickling trend going on at the moment and decided to try it myself too. It is a very easy and a lovely way of eating the mushrooms, however if this intimidates you, you certainly can sauté the mushrooms for this salad too. If you are interested in pickling the mushrooms, see the recipe below.
For this salad you need
Chopped watermelon
Chopped Cooked Beetroot
Crumbled feta chese
Boiled New potatoes halved
Pickled chanterelle mushrooms
summer peas
violet flowers
thyme
toasted almonds
olive oil/ salt/pepper
begin by preparing the beetroot and new potatoes. Boil them both separately until cooked. Let them cool and chop into smaller pieces. To make the salad, combine together chopped watermelon, feta, the cooled boiled potatoes and beetroots, summer peas and pickeld chanterelle mushrooms. Make sure not to toss the salad around too much as the beet tends to colour everything purple. Add good quality olive oil on top and a pinch of salt and pepper to taste. Sprinkle some thyme and violet flowers on top. Lastly, add toasted almonds to your salad.


Here's a simple and easy recipe to pickle chanterelle mushrooms — perfect for preserving their earthy flavour and adding a tangy twist:
Easy Pickled Chanterelle Mushrooms
Ingredients:
2 cups fresh chanterelle mushrooms, cleaned and trimmed
1 cup water
1 cup white vinegar (or apple cider vinegar for a milder flavor)
1 tsp salt
1 tsp sugar
2 cloves garlic, sliced
1–2 sprigs fresh thyme or dill (optional)
1/2 tsp black peppercorns
1 bay leaf
Optional: 1 small chili pepper for heat
Instructions:
Clean the mushrooms
Gently brush off any dirt with a soft brush or cloth. Trim stems and rinse briefly if needed, then pat dry.Blanch the chanterelles
Bring a pot of salted water to a boil. Add the mushrooms and boil for 5 minutes. Drain and set aside.Prepare the pickling brine
In a small saucepan, combine:Water
Vinegar
Salt
Sugar
Garlic
Peppercorns
Bay leaf
(plus herbs or chili if using)
Bring to a gentle boil, then reduce heat and simmer for 2–3 minutes.
Pack and pour
Place the blanched mushrooms into a clean jar. Pour the hot brine over them, making sure they’re fully submerged.Cool and store
Let the jar cool to room temperature, then seal and refrigerate.
Let them sit at least 24 hours before eating for best flavor — they’ll last about 2–3 weeks in the fridge.


Summer smoked salmon cake

A refreshing, Nordic-inspired no-bake cake ideal for Midsummer lunches.
This elegant yet effortless savory cake captures the essence of easy summer days. With a buttery cracker base and a creamy, herb-laced filling of smetana and smoked salmon, it’s the kind of dish that feels both refreshing and indulgent. Perfectly suited for garden lunches or casual gatherings, it pairs beautifully with a crisp, acidic salad—or, surprisingly, even with a strong cup of coffee for an unconventional savory snack.
Best enjoyed outdoors, under blooming lilac trees, this cake brings a touch of Scandinavian charm to your table. Whether you're hosting a Midsummer celebration or simply seeking a no-fuss meal to share with friends, this chilled delight is sure to become a seasonal favorite.


Ingredients
Base
150g (about 5 oz) salty crackers (e.g. Ritz or tuc tuc crackers)
75g (5 tbsp) unsalted butter, melted
handful of mint leaves
Filling
2 x 200g jars smetana (or substitute with crème fraîche or even cream cheese if needed)
100g cold-smoked salmon, finely chopped
100g hot-smoked salmon, flaked
2 tbsp fresh chives, chopped
1 red onion, finely chopped
2 tbsp fresh dill, chopped (or other herbs of choice)
Juice of 1 lime
Freshly ground black pepper, to taste
3 sheets gelatine
2 tbsp lime juice (for soaking gelatine)
To Garnish
Fresh herbs (e.g. dill, chives, microgreens)
Thin lime slices or zest


Instructions
1. Prepare the Base
Crush the salty crackers into fine crumbs (a food processor works best). Add in the mint leaves and blitz them with the crakers. Mix with the melted butter until evenly coated. Press the mixture firmly into the base of a springform cake tin (approx. 20 cm). Refrigerate for at least 30 minutes while preparing the filling.
2. Make the Filling
In a large bowl, mix the smetana with the chopped herbs, both types of salmon, lime juice, and black pepper. Soak the gelatine sheets in cold water for 5–10 minutes until soft. Gently heat 2 tbsp lime juice in a small pan. Remove the softened gelatine sheets from water, squeeze out excess liquid, then dissolve them into the warm lime juice. Stir the gelatine-lime mixture into the salmon filling, mixing thoroughly to combine.
3. Assemble the Cake
Pour the salmon and smetana filling over the chilled cracker base. Smooth the top with a spatula and refrigerate for at least 3 hours, or until set.
4. Garnish and Serve
Before serving, decorate with fresh herbs and lime slices or zest.
Serve chilled as a savoury lunch or light dinner centerpiece.
Tips
This cake is best served cold and can be made a day in advance.
Pair it with new potatoes or an acidic vinaigrette salad for a perfect summer meal.


3 course Midsummer Menu


Midsummer in Finland is a magical celebration of light, nature, and slowing down. Whether you’re spending it by a quiet lake at the countryside or enjoying the long, golden evening in town, it’s a day to pause and soak in the beauty of summer. People gather with friends and family, eat simple but delicious seasonal food, and take time to connect with nature. It’s traditional to pick wildflowers and weave them into flower crowns, a joyful nod to Finnish folklore and the spirit of the season. Bonfires are lit, saunas are heated, and the midnight sun casts a soft glow over a night that never fully darkens. As midsummer is just around the corner, I wanted to share this summer menu based on nordic flavours rounded with a buttercream summer cake. The starter is a creamy shrimp spread that's typically served on toasted bread or in small tartlets topped with vendace roe. As a main course, is a simple grilled white fish that is stuffed with fresh herbs and lemon. Often at the countryside, the fish is caught from our lake and it is cooked on an open-fire style barbecue. This can be done with whatever fish you like and if you do not have a grill, it can be done in an oven too. The fish is accompanied with a few larger grilled prawns on the side and some boiled new potatoes that are shaped like a wreath on a plate. On top of the potatoes you can add boiled halved eggs, pickled herring, onion or simply fresh herbs and summer peas. As for dessert, this summer buttercream layer cake is rich and creamy filled with summer berries. It can be made a day in advance which helps with preparations if you are having guests over. It can be garnished as over or understated as you like; possibly with wild strawberries, mint leaves or any kind of berries that remind you of summer.
Midsummer menu
Skagen with vendace roe
Grilled whole fish & prawns served with a new potato wreath
Berry summer cake with buttercream

Classic Skagenröra (Shrimp Salad)
Ingredients (serves 2–4):
200g cooked shrimp (peeled) - I always purchase whole shrimp that you peel yourself as these are more flavourful
2 tbsp mayonnaise
2 tbsp sour cream (or crème fraîche)
1 tbsp finely chopped red onion
1 tbsp finely chopped fresh dill (plus extra for garnish)
1 tsp lemon juice
Salt and freshly ground black pepper, to taste
Garnish: dill and optional fish roe (vendace roe)
To Serve:
Toasted white bread (like brioche or sourdough)
Instructions:
Peel the shrimp and coarsely chop them if they’re large. In a bowl, combine mayonnaise, sour cream, red onion, dill, and lemon juice. Add a pinch of salt and pepper. Gently fold in the shrimp until evenly coated. Taste and adjust seasoning if needed. For best flavor, refrigerate the mixture for about 30 minutes. Spoon the “Skagenröra” onto buttered, toasted bread. I shaped the white bread for a pretty look and then gently fried in butter. Garnish with a sprig of dill, lots of black pepper, and a generous spoonful of vendace roe if desired.
Grilled whole fish & prawns with a side of new potatoes

Grilled Whole White Fish with Lemon and Herbs
Ingredients:
1 whole white fish (like sea bass, bream, or pike), cleaned and scaled — about 800g–1.2kg
1 lemon, thinly sliced
A handful of fresh herbs (e.g. dill, parsley, thyme, or rosemary)
2–3 garlic cloves, smashed
Olive oil
Salt and pepper
Optional: twine or toothpicks to secure the cavity
Grill Setup:
A hot grill with a clean, oiled grate
Or an open fire with a grilling grate over embers (not high flames)
Instructions:
Pat the fish dry. Rub the skin and inside the cavity with olive oil. Season generously with salt and pepper. Place lemon slices, herbs, and garlic inside the cavity. Use butcher’s twine or toothpicks to close the fish so the stuffing doesn’t fall out when flipping.
Grill the fish: Place the fish directly on a well-oiled grill over medium-high heat. Grill for about 6–8 minutes per side, depending on thickness. Don’t move it too much — wait until the skin is crisp and releases easily. Flip gently using two spatulas or a fish basket. The flesh should be opaque and flake easily with a fork. The skin should be golden and crisp. Transfer to a wooden board or platter. Place it in the center of the table with lemon wedges, a drizzle of olive oil, and extra herbs.
Grilled Large Prawns with Garlic and Chili
Ingredients:
8–12 large prawns or langoustines, shell-on (head-on if possible)
3 tbsp olive oil
2 garlic cloves, minced
1 small red chili, finely chopped (or a pinch of chili flakes)
Juice of ½ lemon
Salt and pepper
Fresh parsley for garnish
Instructions:
Prepare the Prawns: Rinse and pat dry. If desired, butterfly the prawns by cutting along the back to remove the vein, keeping the shell on. Make the Marinade: Mix olive oil, garlic, chili, lemon juice, salt, and pepper. Toss the prawns in the marinade and let sit for 15–30 minutes. Grill: Place prawns directly on the hot grill. Grill about 2–3 minutes per side, until shells are pink and slightly charred. Serve hot with a squeeze of lemon and a sprinkle of fresh parsley. Perfect with crusty bread or alongside the grilled fish.
These dishes are ideal for long summer evenings, meant to be eaten slowly and together, with fingers and laughter. Let me know if you want a side dish or dipping sauce to go with it!
New potato Wreath
Ingredients (serves 4–6):
800g small new potatoes, boiled until tender and slightly cooled
2–3 hard-boiled eggs, halved or quartered
150g pickled herring (classic, mustard, or onion variety), cut into bite-sized pieces
1 small bunch spring onions, finely sliced
A few sprigs fresh dill
Edible violets or other seasonal edible flowers (optional, but beautiful)
Freshly ground black pepper
100ml sour cream or smetana (or crème fraîche)
Optional: a drizzle of good cold-pressed olive oil
Instructions:
Boil the Potatoes: Scrub and boil new potatoes in salted water until just tender (about 15–20 min). Drain and let cool slightly so they’re warm but not hot.
Shape the Wreath:
On a large round serving plate or platter, arrange the potatoes in a circle to form a wreath shape. Leave the center empty for a clean, decorative look.
Add Toppings:
Nestle halved boiled eggs, pieces of pickled herring, and sliced spring onion around and on top of the potatoes.
Add small dollops of sour cream around the wreath.
Sprinkle with chopped or torn fresh dill, a generous grind of black pepper, and scatter edible violets for color.
Serve
Bring to the table as a centerpiece. Guests can spoon from the wreath or you can pre-plate smaller versions.


I love a peaceful evening swim in the summer as the sun slowly drops into the horizon. During midsummer it is also lovely to dress the table and add florals to everything. Sometimes I add a small bouquet to antique glasses for a delicate look.
Summer berry buttercream cake
This three-layer berry jam cake with buttercream frosting is a simple yet stunning dessert, perfect for summer gatherings. Soft, buttery sponge layers are filled with sweet berry jam and creamy vanilla buttercream, creating a beautiful balance of richness and brightness. It’s easy to make, easy to decorate, and even easier to love—especially when topped with fresh berries or edible flowers.

Simple Layer Cake with Berry Jam & Buttercream
For the Cake (makes three 20 cm / 8-inch layers):
300g sugar (about 1 ½ cups)
300g all-purpose flour (about 2 ½ cups)
2 tsp baking powder
¼ tsp salt
300g unsalted butter, softened (about 1 ¼ cups)
6 eggs
2 tsp vanilla extract
3–4 tbsp milk, as needed
For the Filling:
200g berry jam (about ¾ cup – raspberry, strawberry, or lingonberry work well)
For the Buttercream:
250g unsalted butter, room temp (about 1 cup + 2 tbsp)
350–400g powdered sugar, sifted (about 3 cups)
1–2 tbsp milk or cream
1 tsp vanilla extract
Pinch of salt
Instructions:
1. Bake the Cake Layers
Preheat oven to 175°C (350°F). Grease and line three 20 cm (8-inch) cake pans (or bake in batches).
Cream butter and sugar together until pale and fluffy.
Add eggs one at a time, beating well after each, then add vanilla.
In a separate bowl, whisk flour, baking powder, and salt.
Gradually add the dry ingredients to the butter mixture. Add milk if the batter is too thick—it should be smooth but not runny.
Divide the batter evenly between the three pans.
Bake for 20–25 minutes, or until golden and a toothpick comes out clean.
Let cool completely before frosting.
2. Make the Buttercream
Beat butter until smooth and creamy.
Gradually beat in sifted powdered sugar.
Add vanilla, salt, and milk to reach a soft, spreadable texture.
3. Assemble the Cake
Place the first cake layer on a plate or cake stand. Spread a layer of berry jam, then a layer of buttercream.
Repeat with the second layer.
Top with the third cake layer and frost the top and sides of the cake with the remaining buttercream.
You can go for a semi-naked look by scraping off some of the frosting on the sides, or go full coverage for a more polished finish.
4. Decorate (Optional)
Add fresh berries, edible flowers, or a few mint leaves on top.


Timeless table setting & home decor


timeless elegance
As the seasons shift into the softer light and longer evenings of spring and summer, there’s a quiet joy in creating a table that feels both timeless and alive. My approach to seasonal entertaining begins with a deep love for pieces that carry history—antique plates collected over time, many from the charming markets and brocantes of France, and old crystal glassware that sparkles effortlessly in the sunlight. These heirloom elements, with their patina and delicate imperfections, lend an “old world” spirit that never feels out of place, even when paired with newer finds, like the linen napkins.
What makes this mix so seamless is tone—soft, neutral hues dominate, allowing the details of each plate, glass, or candlestick to shine without overwhelming the table. Rather than aiming for a perfectly matched set, I lean into the charm of contrast. A plate with a faded floral rim from Provence sits comfortably next to a hand-thrown bowl with a modern glaze. The conversation between old and new creates a kind of quiet elegance.
Candles—especially in antique holders—bring warmth and height, while terra cotta pots spilling with ivy or filled with seasonal blooms like peonies breathe life into the tablescape. I love to tuck in foraged elements too—branches of soft green leaves, trailing vines, even a bit of moss for texture. These found pieces blur the lines between the indoors and out, grounding the table in the season.
The result is a table that feels lived-in and layered—welcoming, not staged. It tells a story of places visited, flowers gathered, and meals shared. And while each element has its own voice, together they create a setting that feels enduringly beautiful. A table not just for a moment, but for memories.


Spring pound cake


Mother’s day weekend is here and I wanted to bake a spring pound cake that we can enjoy with coffee over the weekend. Magnolia trees and cherry blossoms are in full bloom in Helsinki, so I wanted the cake to reflect the delicate beauty of spring flowers, with hints of lemon and vanilla. This light and flavorful spring pound cake is the perfect treat to welcome the season. With a touch of cardamom, it’s both refreshing and comforting—ideal for afternoon coffee or a simple dessert.
Easy and Delicious Pound Cake
For a 1-liter or 1.2-liter loaf pan.
Baking temperature: +190 °C (375 °F)
Ingredients:
2 eggs
2 dl (200 ml) fine sugar
150 g butter, melted
4.5 dl (450 ml) all-purpose flour
2 tsp baking powder
1 vanilla pod
A pinch (about the tip of a teaspoon) of ground cardamom
1 dl (100 ml) milk
3 tbsp lemon juice
2 tbsp lemon zest
Preheat the oven. Melt the butter. Measure the dry ingredients (except for the sugar) into a separate bowl. Crack the eggs into another bowl and mix in the sugar. Do not whisk—just stir. This cake batter should only be mixed gently, as it rises easily and could overflow or crack if overmixed.
Add the flour mixture and melted butter alternately to the egg-sugar mixture. Finally, stir in the milk, seeds from the vanilla pod and lemon juice and zest. Just mix until the batter is smooth—don’t overmix.
Grease a metal loaf pan, for example with butter. (If you’re using an old-fashioned tin pan, also coat it with flour.) Pour the batter evenly into the pan and smooth the surface with a spoon or spatula.
Place the pan on the lowest rack in the oven and bake at 190 °C (375 °F) for 30–35 minutes. You can check doneness with a cocktail stick—if it comes out with batter, bake a bit longer.