
Fig Carpaccio - elegant & simple


As summer fades and the air begins to crisp, early autumn brings with it one of the season’s most delicate treasures: fresh figs. Their soft, honeyed sweetness makes them the perfect base for this elegant Fig Carpaccio with Burrata—a dish that feels indulgent yet effortless.
Velvety figs are gently pressed onto the plate, their juices mingling with creamy burrata and a drizzle of olive oil. A scattering of chives, crushed pistachios, and a whisper of thyme adds freshness and texture, while slices of warm sourdough invite you to scoop up every last bite. Play around with the flavours of the toppings, other great options are goat/gorgonzola cheese, honey, or prosciutto.
Whether served as a refined starter or a centerpiece for a leisurely lunch, this dish captures the quiet richness of autumn in every mouthful.


Fig Carpaccio with Burrata, Chives & Pistachios
Serves: 1 plate
Prep time: 10 minutes
No cooking required
Ingredients:
4-5 ripe figs (save one as a topping)
1 ball of fresh burrata
1 tablespoon chopped fresh chives
Extra virgin olive oil, to drizzle
Sea salt, to taste
Freshly ground black pepper, to taste
Small pinch of fresh or dried thyme (optional)
1 tablespoon crushed pistachios (optional)
Fresh sourdough bread, for serving
Instructions:
Prepare the figs:
Gently peel the figs. Slice them in half, then press each half down onto a serving plate to flatten slightly, creating a “carpaccio” layer. Let the juices pool naturally on the plate.Add the burrata:
Tear open the burrata and place it gently in the center of the figs, allowing the creamy interior to spread slightly.Season:
Sprinkle chopped chives evenly over the dish. Add a pinch of sea salt and a few cracks of black pepper to taste. Add a few slices of fig on top for visual effect.Garnish:
Drizzle generously with good-quality olive oil. Add a light sprinkle of thyme for a fragrant herbal note—or, for a bit of crunch, scatter over some crushed pistachios.Serve:
Bring the plate to the table with slices of fresh sourdough bread, perfect for scooping up the creamy burrata and fig juices.


August Fig Pie with a creamy ricotta filling

This savoury fig and ricotta pie is a delicate balance of creamy, salty, and subtly sweet — perfect for late summer when figs are at their peak. Made with a light ricotta base enriched with honey and egg white, and studded with whole figs that caramelize beautifully as they bake, this small pie is ideal for a solo brunch, light lunch, or a refined appetizer. Add a sprinkle of herbs or a tangy cheese topping, and you’ve got a dish that’s simple yet deeply flavorful.
Ingredients
For the crust (optional if you want a firmer base):
1/2 cup all-purpose flour
3 tbsp cold butter, cubed
Pinch of salt
1–2 tbsp cold water
For the filling:
1/2 cup ricotta cheese (full-fat preferred)
1 egg white
1 tsp honey (adjust to taste — for a more savoury pie, use less)
Pinch of salt
Pinch of black pepper
A few fresh thyme leaves or 1/4 tsp chopped rosemary (optional — for a herby twist)
3 ripe figs, halved or quartered (depending on size)
Olive oil, for drizzling
Optional toppings (after baking):
Crumbled feta or gorgonzola
Extra thyme or rosemary
A drizzle of balsamic glaze or chili oil
more fresh figs


Instructions
1. Make the optional crust: or buy ready bought from the store
In a bowl, mix flour and salt. Add butter and rub in with your fingertips until crumbly.
Add water gradually and mix until the dough comes together.
Press into a small tart tin or oven-safe ramekin (4–5 inch diameter). Prick the base with a fork.
Blind bake at 180°C (350°F) for 10 minutes while you prepare the filling.
2. Prepare the filling:
In a bowl, whisk together ricotta, egg white, honey, salt, pepper, and herbs (if using) until smooth.
Pour into the pre-baked crust or directly into a greased ramekin if going crustless.
3. Add figs:
Nestle the whole fig into the ricotta mixture, cut side up. I made little scores on top of the fig so it creates a nice shape.
Lightly drizzle figs with olive oil and sprinkle a bit more salt and pepper on top.
4. Bake:
Return to oven and bake for 25–30 minutes, or until the ricotta mixture is set and lightly golden around the edges.
5. Garnish and serve:
Let cool slightly before serving.
Top with crumbled gorgonzola cheese and fresh herbs and finely chopped toasted nuts.
Serving Suggestions
Serve warm or at room temperature with a side salad of arugula and toasted nuts.
Excellent for brunch, a light lunch, or a savory dessert for cheese lovers.


Porcini Recipes x2 -From Forest to Plate

Beautiful mushroom forest in the Finnish countryside


Deep within the mossy forests of Finland, hidden beneath spruce and pine, grows the crown jewel of the woodland: the porcini mushroom. Known locally as herkkutatti, this prized fungus thrives in the rich, damp soil of old-growth forests, particularly from late summer to early autumn. You’ll often find them nestled among fallen leaves and needles, near birch or conifer trees, their thick, brown caps rising like treasure from the forest floor. For foragers and chefs alike, the porcini is a true gift of the Nordic wilderness—earthy, nutty, and full of flavour.
Porcini Carpaccio
Last year in Tuscany, I tasted a porcini carpaccio that left a lasting impression—delicate, raw slices of porcini paired with thinly sliced pear, a celebration of simplicity and forest flavors. Inspired by that memory, I’ve reimagined the dish with a Finnish touch, gently sautéing the mushrooms to bring out their deep, buttery essence while preserving the elegant, carpaccio-style presentation. Technically, it may no longer be a true carpaccio, since the mushrooms aren’t raw, but the spirit remains: thin, beautiful slices arranged with care, letting the ingredients speak for themselves.
In our family, mushroom foraging is more than a hobby—it’s a tradition passed down from my childhood, and now my son shares in that same quiet joy of searching the forest floor. Finding a herkkutatti, or porcini, in the Finnish woods feels like striking gold. With their earthy, nutty, almost creamy flavor, these mushrooms are the undisputed treasures of the late summer forest.
This dish is a simple tribute to that flavor. Thinly sliced, lightly sautéed porcini are arranged on a plate and topped with finely chopped chives, a few slivers of red spring onion, and tart lingonberries—their sharpness beautifully balancing the rich mushroom. A scattering of crushed pistachios adds crunch, thyme flowers bring a gentle floral note, and a generous twist of black pepper along with a flake or two of Maldon salt finishes the plate. It’s an ideal appetizer or side dish for late August, as the light begins to soften and summer quietly turns toward autumn. If you do not have lingonberry in your country, you can simplify the entire dish by just adding pickled red onions (for some acidity) on top of the mushrooms along with black pepper and pistachios.

Ingredients
2 Porcini cleaned and thinly sliced diagonally
1 red spring onion
handful of pistachios, roughly chopped
blackpepper/ maldon salt
thyme flowers
tablespoon of lingonberry
olive oil
Directions
Gently sauté the sliced porcini mushrooms in a generous amount of olive oil for about 3-5 minutes on each side, so that they become slightly golden. While they are cooking add a pinch of maldon salt on them. Once ready, arrange on a plate. On top, add some thinly sliced red spring onion, a bit of lingonberry, roughly chopped pistachios and the little purple flowers from thyme. If needed, add a little bit more salt and ground black pepper. Enjoy immediately.


Porchini Spaghettini - From Forest to Plate


Porcini Spaghettini
A delicate pasta dish that highlights the buttery, nutty flavor of fresh porcini mushrooms.
Serves: 2–3
Cook Time: 20 minutes
Ingredients:
250g spaghettini (or thin spaghetti)
250g fresh porcini mushrooms, cleaned and sliced thinly
2 tbsp extra virgin olive oil
1 tbsp unsalted butter
1 shallot, finely chopped
1 garlic clove, finely sliced
1 small splash of dry white wine (optional)
Salt and freshly ground black pepper, to taste
A few sprigs of fresh thyme (leaves only)
Fresh parsley, finely chopped (for garnish)
Parmesan or Pecorino cheese, finely grated (optional)
Lemon zest (optional, for brightness)

Instructions:
Bring a large pot of salted water to a boil.
Cook the spaghettini until just al dente according to package instructions. Reserve ½ cup of the pasta cooking water before draining.While the pasta cooks, prepare the mushrooms.
Heat the olive oil and butter in a large skillet over medium heat. Add the shallot and garlic, and sauté gently until softened and fragrant, about 2 minutes.Add the sliced porcini mushrooms.
Cook for 5–7 minutes, stirring occasionally, until the mushrooms release their moisture and start to turn golden. Avoid overcrowding the pan—let them caramelize slightly for the best flavor. I also saved an extra mushroom that I cut diagonally into thin slices, that I in the end sauté in butter to add on top of each serving plate for a visual effect.Deglaze (optional):
Add a small splash of dry white wine to lift the fond from the pan. Let it simmer for 1 minute until mostly evaporated.Season and finish the sauce.
Add thyme leaves, a pinch of salt, and plenty of freshly cracked black pepper. Taste and adjust seasoning as needed.Combine with pasta.
Add the drained spaghettini to the pan with the mushrooms. Pour in a splash of the reserved pasta water and toss everything together over low heat until the sauce lightly coats the pasta. Add more water if needed to loosen.Serve:
Plate the pasta and garnish with chopped parsley, extra black pepper, and a sprinkling of grated Parmesan or Pecorino if you like. A touch of lemon zest can be added at the end for freshness.


August at the countryside


We took a spontaneous holiday to the countryside last week. We got to enjoy another round of crayfish, which was just heavenly. It was also just us three at the countryside, so it was very calming and lovely. Our three year old enjoyed the crayfish too for the first time, which made me extra happy. We had our own little party by the lake, dressed the table with wild flowers and enjoyed the warmth of August on our faces. We swam and had a sauna every single day, picked mushrooms and berries and made delicious food. You could feel that autumn in the air already, mornings and late evenings were colder and nature seems to be slowly transitioning. Trees had large red rowan berries, we found lots of porcini mushrooms, sunflower fields are blooming and apples are ripening on trees. Lingonberry and heather appear on grounds and there is a lovely freshness in the air. Our countryside is so inspirational, I really relax here by the beautiful lakes and nature far away from the city.


August Meadow Flowers & chive butter

In the soft golden light of a summer afternoon, wandering through a flower meadow feels like stepping into a quiet dream. The field sways gently with cosmos, morning glory, Iris, poppies, cornflowers, and buttercups, their colours dancing in the breeze like nature’s own watercolors. Picking flowers here is more than a simple act—it's a calming ritual, a moment of presence where the mind slows and the senses awaken. The rustle of tall grasses, the hum of bees, and the warmth of the sun all combine to soothe the soul. Back home, the joy continues: you can create a wild, abundant bouquet—an armful of tangled beauty spilling from a weathered ceramic jug—or place individual, delicate blooms into old crystal bottles and antique vases, each one a quiet reminder of the meadow's peace and poetry.
This beautiful meadow/sunflower fields is just a 30 minute drive from Helsinki. The exact address is Porkkalantie 274. I was alone on the meadow and got to enjoy all this beauty to myself.
Chive Flower butter
I made a beautiful chive flower butter using the delicate pink blossoms from countryside chive plants from my mother in laws garden, and it turned out to be one of the simplest, most flavourful ways to elevate plain butter. The process is easy and satisfying: just pick the petals from the chive flowers, chop a small handful of fresh green chives, and mix both into softened butter. The floral, slightly garlicky flavor of the blossoms pairs wonderfully with the sharpness of the chives. Once everything is mixed, shape the butter into a log using parchment paper and let it chill. The result is both rustic and elegant—perfect spread over a slice of my homemade sourdough. The subtle lavender hue from the petals makes it as pretty as it is delicious. Next, I think I’ll try making my own butter from scratch—it’s said to be simple, and I love the idea of taking one more step toward fully handmade kitchen staples.


Meadow Flower Bouquet


Seaside Scallops


Let’s make simple seaside scallops
Ingredients
2 scallops/person
marinade: grated garlic, melted butter, olive oil, parsley, dill, salt, pepper, bread crumbs
Finely chopped chili
grated Parmesan
Begin by drying each scallop with kitchen paper. Then make a marinade for them. In a bowl, add melted butter, grated garlic, olive oil, bread crumbs, chopped parsley and dill, salt and pepper. Roll the scallops in the marinade and place each individual scallop onto a small oven proof dish (I used a scallop shell). Pour the rest of the marinade on top of each scallop. On top of each scallop, add finely chopped chili and grated parmesan. Place into an oven 200 Celsius degrees for 10 minutes. Serve piping hot with a lemon slice and fresh bread that you can use to scrape all the delicious juices.
We took a lovely day trip to Hanko, a lovely seaside summer city outside of Helsinki. We had lunch, icecream, did some shopping and relaxed on the long sandy beaches enjoying the sunshine. When we came home, we wanted to cook something delicious but easy so had some scallops for starters. I always serve scallops on their own shells as I think they are beautiful like that, and I love this hand painted lobster plate from Grottaglie, Italy. I picked some fresh draping flowers for our table setting, put some candles on and cooked together as a family.


2x easy summer salads


Summer salads are light, refreshing dishes perfect for hot weather. Seasonal salads are a lovely way to incorporate vegetables into your diet with variety to flavour and colour on your plate. I have a balcony where I grow herbs and peas that I often add to my dishes. Even though my gardening is very limited on the balcony, it is greatly satisfying to eat (even if it is just herbs), something you have self cultivated. Salads do not need to be boring and only leaf based, these two dishes are filled with vegetable and an abundance of texture.
1) Summer carrot salad
Ingredients for dressing
greek yogurt
lemon juice
garlic
salt/pepper
Ingredients for toppings
3-4 summer carrots
chopped feta
toasted pine nuts
Edible flowers : violet and mint flowers
chopped mint
grated black pepper
spring onions
As a base, begin by making a greek yogurt dressing. It can be as simple as you like it to be or add twists of your own to suit your palette. Take a bowl, mix in ( 1/2 cup or so), greek yogurt, grate in a garlic clove, add a splash of lemon juice, salt and black pepper. mix well. This is the dressing, you can of course add any chopped herb to it or spices such as paprika or tahini/honey. Spread this on the bottom of your plate when it is time to serve.
For the main ingredient, take three or four summer carrots. Wash them, peel gently, remove the tips (leave a bit of green on the ends for visual effect) and cut in half. In a pan, add a dollop of butter, a few twigs of thyme and olive oil. Place the carrots on the pan and gently cook with a lid covered until they are slightly soft. This may take about 7-10 minutes. If you prefer a bit of sweetness, midway through cooking, add a bit of honey into the pan. Gently salt the carrots. Once ready, add them on top of the greek yogurt dressing.
Add the rest of the toppings on the carrots -
Sprinkle some feta cheese on top, edible flowers like violet/mint flowers, chopped mint, spring onions, toasted pine nuts, grated black pepper.


Pickled chanterelle & New potato summer salad
mushroom season is here and we have been a few times to pick chanterelle mushrooms from the forrest. It has barely rained the entire July, so mushroom picking has been slow this summer. There is a chanterelle mushroom pickling trend going on at the moment and decided to try it myself too. It is a very easy and a lovely way of eating the mushrooms, however if this intimidates you, you certainly can sauté the mushrooms for this salad too. If you are interested in pickling the mushrooms, see the recipe below.
For this salad you need
Chopped watermelon
Chopped Cooked Beetroot
Crumbled feta chese
Boiled New potatoes halved
Pickled chanterelle mushrooms
summer peas
violet flowers
thyme
toasted almonds
olive oil/ salt/pepper
begin by preparing the beetroot and new potatoes. Boil them both separately until cooked. Let them cool and chop into smaller pieces. To make the salad, combine together chopped watermelon, feta, the cooled boiled potatoes and beetroots, summer peas and pickeld chanterelle mushrooms. Make sure not to toss the salad around too much as the beet tends to colour everything purple. Add good quality olive oil on top and a pinch of salt and pepper to taste. Sprinkle some thyme and violet flowers on top. Lastly, add toasted almonds to your salad.


Here's a simple and easy recipe to pickle chanterelle mushrooms — perfect for preserving their earthy flavour and adding a tangy twist:
Easy Pickled Chanterelle Mushrooms
Ingredients:
2 cups fresh chanterelle mushrooms, cleaned and trimmed
1 cup water
1 cup white vinegar (or apple cider vinegar for a milder flavor)
1 tsp salt
1 tsp sugar
2 cloves garlic, sliced
1–2 sprigs fresh thyme or dill (optional)
1/2 tsp black peppercorns
1 bay leaf
Optional: 1 small chili pepper for heat
Instructions:
Clean the mushrooms
Gently brush off any dirt with a soft brush or cloth. Trim stems and rinse briefly if needed, then pat dry.Blanch the chanterelles
Bring a pot of salted water to a boil. Add the mushrooms and boil for 5 minutes. Drain and set aside.Prepare the pickling brine
In a small saucepan, combine:Water
Vinegar
Salt
Sugar
Garlic
Peppercorns
Bay leaf
(plus herbs or chili if using)
Bring to a gentle boil, then reduce heat and simmer for 2–3 minutes.
Pack and pour
Place the blanched mushrooms into a clean jar. Pour the hot brine over them, making sure they’re fully submerged.Cool and store
Let the jar cool to room temperature, then seal and refrigerate.
Let them sit at least 24 hours before eating for best flavor — they’ll last about 2–3 weeks in the fridge.


Summer smoked salmon cake

A refreshing, Nordic-inspired no-bake cake ideal for Midsummer lunches.
This elegant yet effortless savory cake captures the essence of easy summer days. With a buttery cracker base and a creamy, herb-laced filling of smetana and smoked salmon, it’s the kind of dish that feels both refreshing and indulgent. Perfectly suited for garden lunches or casual gatherings, it pairs beautifully with a crisp, acidic salad—or, surprisingly, even with a strong cup of coffee for an unconventional savory snack.
Best enjoyed outdoors, under blooming lilac trees, this cake brings a touch of Scandinavian charm to your table. Whether you're hosting a Midsummer celebration or simply seeking a no-fuss meal to share with friends, this chilled delight is sure to become a seasonal favorite.


Ingredients
Base
150g (about 5 oz) salty crackers (e.g. Ritz or tuc tuc crackers)
75g (5 tbsp) unsalted butter, melted
handful of mint leaves
Filling
2 x 200g jars smetana (or substitute with crème fraîche or even cream cheese if needed)
100g cold-smoked salmon, finely chopped
100g hot-smoked salmon, flaked
2 tbsp fresh chives, chopped
1 red onion, finely chopped
2 tbsp fresh dill, chopped (or other herbs of choice)
Juice of 1 lime
Freshly ground black pepper, to taste
3 sheets gelatine
2 tbsp lime juice (for soaking gelatine)
To Garnish
Fresh herbs (e.g. dill, chives, microgreens)
Thin lime slices or zest


Instructions
1. Prepare the Base
Crush the salty crackers into fine crumbs (a food processor works best). Add in the mint leaves and blitz them with the crakers. Mix with the melted butter until evenly coated. Press the mixture firmly into the base of a springform cake tin (approx. 20 cm). Refrigerate for at least 30 minutes while preparing the filling.
2. Make the Filling
In a large bowl, mix the smetana with the chopped herbs, both types of salmon, lime juice, and black pepper. Soak the gelatine sheets in cold water for 5–10 minutes until soft. Gently heat 2 tbsp lime juice in a small pan. Remove the softened gelatine sheets from water, squeeze out excess liquid, then dissolve them into the warm lime juice. Stir the gelatine-lime mixture into the salmon filling, mixing thoroughly to combine.
3. Assemble the Cake
Pour the salmon and smetana filling over the chilled cracker base. Smooth the top with a spatula and refrigerate for at least 3 hours, or until set.
4. Garnish and Serve
Before serving, decorate with fresh herbs and lime slices or zest.
Serve chilled as a savoury lunch or light dinner centerpiece.
Tips
This cake is best served cold and can be made a day in advance.
Pair it with new potatoes or an acidic vinaigrette salad for a perfect summer meal.


3 course Midsummer Menu


Midsummer in Finland is a magical celebration of light, nature, and slowing down. Whether you’re spending it by a quiet lake at the countryside or enjoying the long, golden evening in town, it’s a day to pause and soak in the beauty of summer. People gather with friends and family, eat simple but delicious seasonal food, and take time to connect with nature. It’s traditional to pick wildflowers and weave them into flower crowns, a joyful nod to Finnish folklore and the spirit of the season. Bonfires are lit, saunas are heated, and the midnight sun casts a soft glow over a night that never fully darkens. As midsummer is just around the corner, I wanted to share this summer menu based on nordic flavours rounded with a buttercream summer cake. The starter is a creamy shrimp spread that's typically served on toasted bread or in small tartlets topped with vendace roe. As a main course, is a simple grilled white fish that is stuffed with fresh herbs and lemon. Often at the countryside, the fish is caught from our lake and it is cooked on an open-fire style barbecue. This can be done with whatever fish you like and if you do not have a grill, it can be done in an oven too. The fish is accompanied with a few larger grilled prawns on the side and some boiled new potatoes that are shaped like a wreath on a plate. On top of the potatoes you can add boiled halved eggs, pickled herring, onion or simply fresh herbs and summer peas. As for dessert, this summer buttercream layer cake is rich and creamy filled with summer berries. It can be made a day in advance which helps with preparations if you are having guests over. It can be garnished as over or understated as you like; possibly with wild strawberries, mint leaves or any kind of berries that remind you of summer.
Midsummer menu
Skagen with vendace roe
Grilled whole fish & prawns served with a new potato wreath
Berry summer cake with buttercream

Classic Skagenröra (Shrimp Salad)
Ingredients (serves 2–4):
200g cooked shrimp (peeled) - I always purchase whole shrimp that you peel yourself as these are more flavourful
2 tbsp mayonnaise
2 tbsp sour cream (or crème fraîche)
1 tbsp finely chopped red onion
1 tbsp finely chopped fresh dill (plus extra for garnish)
1 tsp lemon juice
Salt and freshly ground black pepper, to taste
Garnish: dill and optional fish roe (vendace roe)
To Serve:
Toasted white bread (like brioche or sourdough)
Instructions:
Peel the shrimp and coarsely chop them if they’re large. In a bowl, combine mayonnaise, sour cream, red onion, dill, and lemon juice. Add a pinch of salt and pepper. Gently fold in the shrimp until evenly coated. Taste and adjust seasoning if needed. For best flavor, refrigerate the mixture for about 30 minutes. Spoon the “Skagenröra” onto buttered, toasted bread. I shaped the white bread for a pretty look and then gently fried in butter. Garnish with a sprig of dill, lots of black pepper, and a generous spoonful of vendace roe if desired.
Grilled whole fish & prawns with a side of new potatoes

Grilled Whole White Fish with Lemon and Herbs
Ingredients:
1 whole white fish (like sea bass, bream, or pike), cleaned and scaled — about 800g–1.2kg
1 lemon, thinly sliced
A handful of fresh herbs (e.g. dill, parsley, thyme, or rosemary)
2–3 garlic cloves, smashed
Olive oil
Salt and pepper
Optional: twine or toothpicks to secure the cavity
Grill Setup:
A hot grill with a clean, oiled grate
Or an open fire with a grilling grate over embers (not high flames)
Instructions:
Pat the fish dry. Rub the skin and inside the cavity with olive oil. Season generously with salt and pepper. Place lemon slices, herbs, and garlic inside the cavity. Use butcher’s twine or toothpicks to close the fish so the stuffing doesn’t fall out when flipping.
Grill the fish: Place the fish directly on a well-oiled grill over medium-high heat. Grill for about 6–8 minutes per side, depending on thickness. Don’t move it too much — wait until the skin is crisp and releases easily. Flip gently using two spatulas or a fish basket. The flesh should be opaque and flake easily with a fork. The skin should be golden and crisp. Transfer to a wooden board or platter. Place it in the center of the table with lemon wedges, a drizzle of olive oil, and extra herbs.
Grilled Large Prawns with Garlic and Chili
Ingredients:
8–12 large prawns or langoustines, shell-on (head-on if possible)
3 tbsp olive oil
2 garlic cloves, minced
1 small red chili, finely chopped (or a pinch of chili flakes)
Juice of ½ lemon
Salt and pepper
Fresh parsley for garnish
Instructions:
Prepare the Prawns: Rinse and pat dry. If desired, butterfly the prawns by cutting along the back to remove the vein, keeping the shell on. Make the Marinade: Mix olive oil, garlic, chili, lemon juice, salt, and pepper. Toss the prawns in the marinade and let sit for 15–30 minutes. Grill: Place prawns directly on the hot grill. Grill about 2–3 minutes per side, until shells are pink and slightly charred. Serve hot with a squeeze of lemon and a sprinkle of fresh parsley. Perfect with crusty bread or alongside the grilled fish.
These dishes are ideal for long summer evenings, meant to be eaten slowly and together, with fingers and laughter. Let me know if you want a side dish or dipping sauce to go with it!
New potato Wreath
Ingredients (serves 4–6):
800g small new potatoes, boiled until tender and slightly cooled
2–3 hard-boiled eggs, halved or quartered
150g pickled herring (classic, mustard, or onion variety), cut into bite-sized pieces
1 small bunch spring onions, finely sliced
A few sprigs fresh dill
Edible violets or other seasonal edible flowers (optional, but beautiful)
Freshly ground black pepper
100ml sour cream or smetana (or crème fraîche)
Optional: a drizzle of good cold-pressed olive oil
Instructions:
Boil the Potatoes: Scrub and boil new potatoes in salted water until just tender (about 15–20 min). Drain and let cool slightly so they’re warm but not hot.
Shape the Wreath:
On a large round serving plate or platter, arrange the potatoes in a circle to form a wreath shape. Leave the center empty for a clean, decorative look.
Add Toppings:
Nestle halved boiled eggs, pieces of pickled herring, and sliced spring onion around and on top of the potatoes.
Add small dollops of sour cream around the wreath.
Sprinkle with chopped or torn fresh dill, a generous grind of black pepper, and scatter edible violets for color.
Serve
Bring to the table as a centerpiece. Guests can spoon from the wreath or you can pre-plate smaller versions.


I love a peaceful evening swim in the summer as the sun slowly drops into the horizon. During midsummer it is also lovely to dress the table and add florals to everything. Sometimes I add a small bouquet to antique glasses for a delicate look.
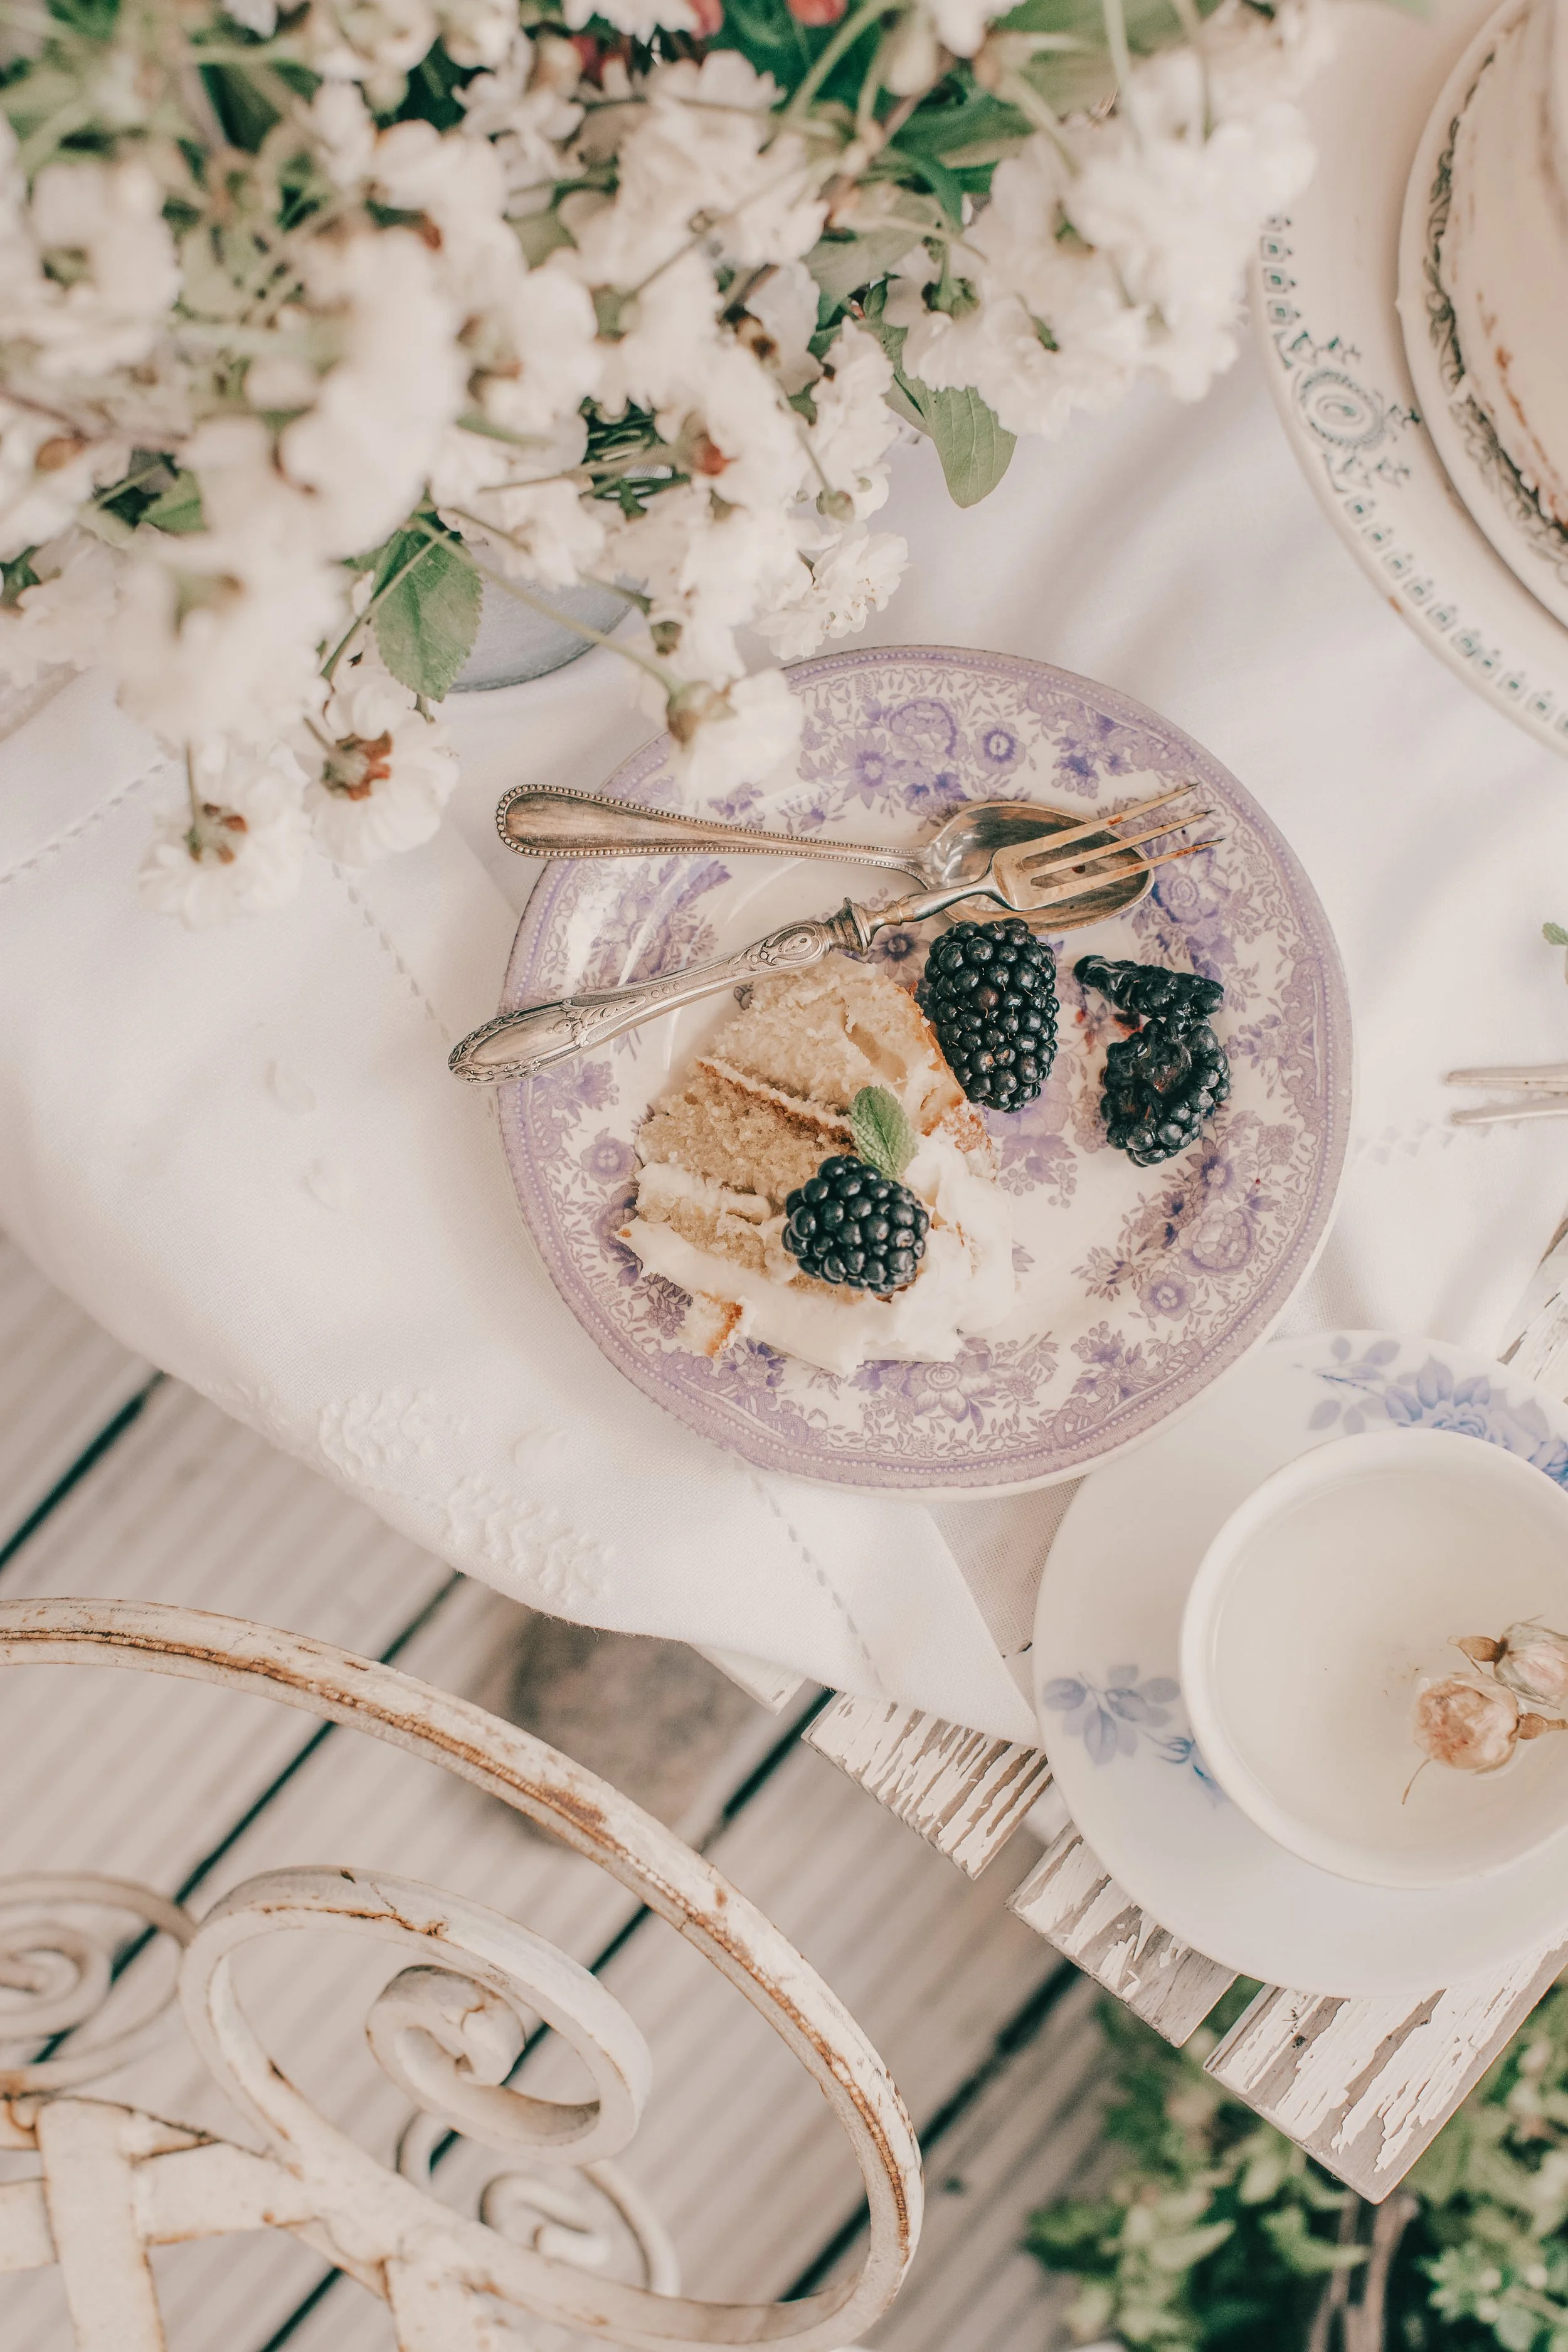
Summer berry buttercream cake
This three-layer berry jam cake with buttercream frosting is a simple yet stunning dessert, perfect for summer gatherings. Soft, buttery sponge layers are filled with sweet berry jam and creamy vanilla buttercream, creating a beautiful balance of richness and brightness. It’s easy to make, easy to decorate, and even easier to love—especially when topped with fresh berries or edible flowers.

Simple Layer Cake with Berry Jam & Buttercream
For the Cake (makes three 20 cm / 8-inch layers):
300g sugar (about 1 ½ cups)
300g all-purpose flour (about 2 ½ cups)
2 tsp baking powder
¼ tsp salt
300g unsalted butter, softened (about 1 ¼ cups)
6 eggs
2 tsp vanilla extract
3–4 tbsp milk, as needed
For the Filling:
200g berry jam (about ¾ cup – raspberry, strawberry, or lingonberry work well)
For the Buttercream:
250g unsalted butter, room temp (about 1 cup + 2 tbsp)
350–400g powdered sugar, sifted (about 3 cups)
1–2 tbsp milk or cream
1 tsp vanilla extract
Pinch of salt
Instructions:
1. Bake the Cake Layers
Preheat oven to 175°C (350°F). Grease and line three 20 cm (8-inch) cake pans (or bake in batches).
Cream butter and sugar together until pale and fluffy.
Add eggs one at a time, beating well after each, then add vanilla.
In a separate bowl, whisk flour, baking powder, and salt.
Gradually add the dry ingredients to the butter mixture. Add milk if the batter is too thick—it should be smooth but not runny.
Divide the batter evenly between the three pans.
Bake for 20–25 minutes, or until golden and a toothpick comes out clean.
Let cool completely before frosting.
2. Make the Buttercream
Beat butter until smooth and creamy.
Gradually beat in sifted powdered sugar.
Add vanilla, salt, and milk to reach a soft, spreadable texture.
3. Assemble the Cake
Place the first cake layer on a plate or cake stand. Spread a layer of berry jam, then a layer of buttercream.
Repeat with the second layer.
Top with the third cake layer and frost the top and sides of the cake with the remaining buttercream.
You can go for a semi-naked look by scraping off some of the frosting on the sides, or go full coverage for a more polished finish.
4. Decorate (Optional)
Add fresh berries, edible flowers, or a few mint leaves on top.


Spring pound cake


Mother’s day weekend is here and I wanted to bake a spring pound cake that we can enjoy with coffee over the weekend. Magnolia trees and cherry blossoms are in full bloom in Helsinki, so I wanted the cake to reflect the delicate beauty of spring flowers, with hints of lemon and vanilla. This light and flavorful spring pound cake is the perfect treat to welcome the season. With a touch of cardamom, it’s both refreshing and comforting—ideal for afternoon coffee or a simple dessert.
Easy and Delicious Pound Cake
For a 1-liter or 1.2-liter loaf pan.
Baking temperature: +190 °C (375 °F)
Ingredients:
2 eggs
2 dl (200 ml) fine sugar
150 g butter, melted
4.5 dl (450 ml) all-purpose flour
2 tsp baking powder
1 vanilla pod
A pinch (about the tip of a teaspoon) of ground cardamom
1 dl (100 ml) milk
3 tbsp lemon juice
2 tbsp lemon zest
Preheat the oven. Melt the butter. Measure the dry ingredients (except for the sugar) into a separate bowl. Crack the eggs into another bowl and mix in the sugar. Do not whisk—just stir. This cake batter should only be mixed gently, as it rises easily and could overflow or crack if overmixed.
Add the flour mixture and melted butter alternately to the egg-sugar mixture. Finally, stir in the milk, seeds from the vanilla pod and lemon juice and zest. Just mix until the batter is smooth—don’t overmix.
Grease a metal loaf pan, for example with butter. (If you’re using an old-fashioned tin pan, also coat it with flour.) Pour the batter evenly into the pan and smooth the surface with a spoon or spatula.
Place the pan on the lowest rack in the oven and bake at 190 °C (375 °F) for 30–35 minutes. You can check doneness with a cocktail stick—if it comes out with batter, bake a bit longer.


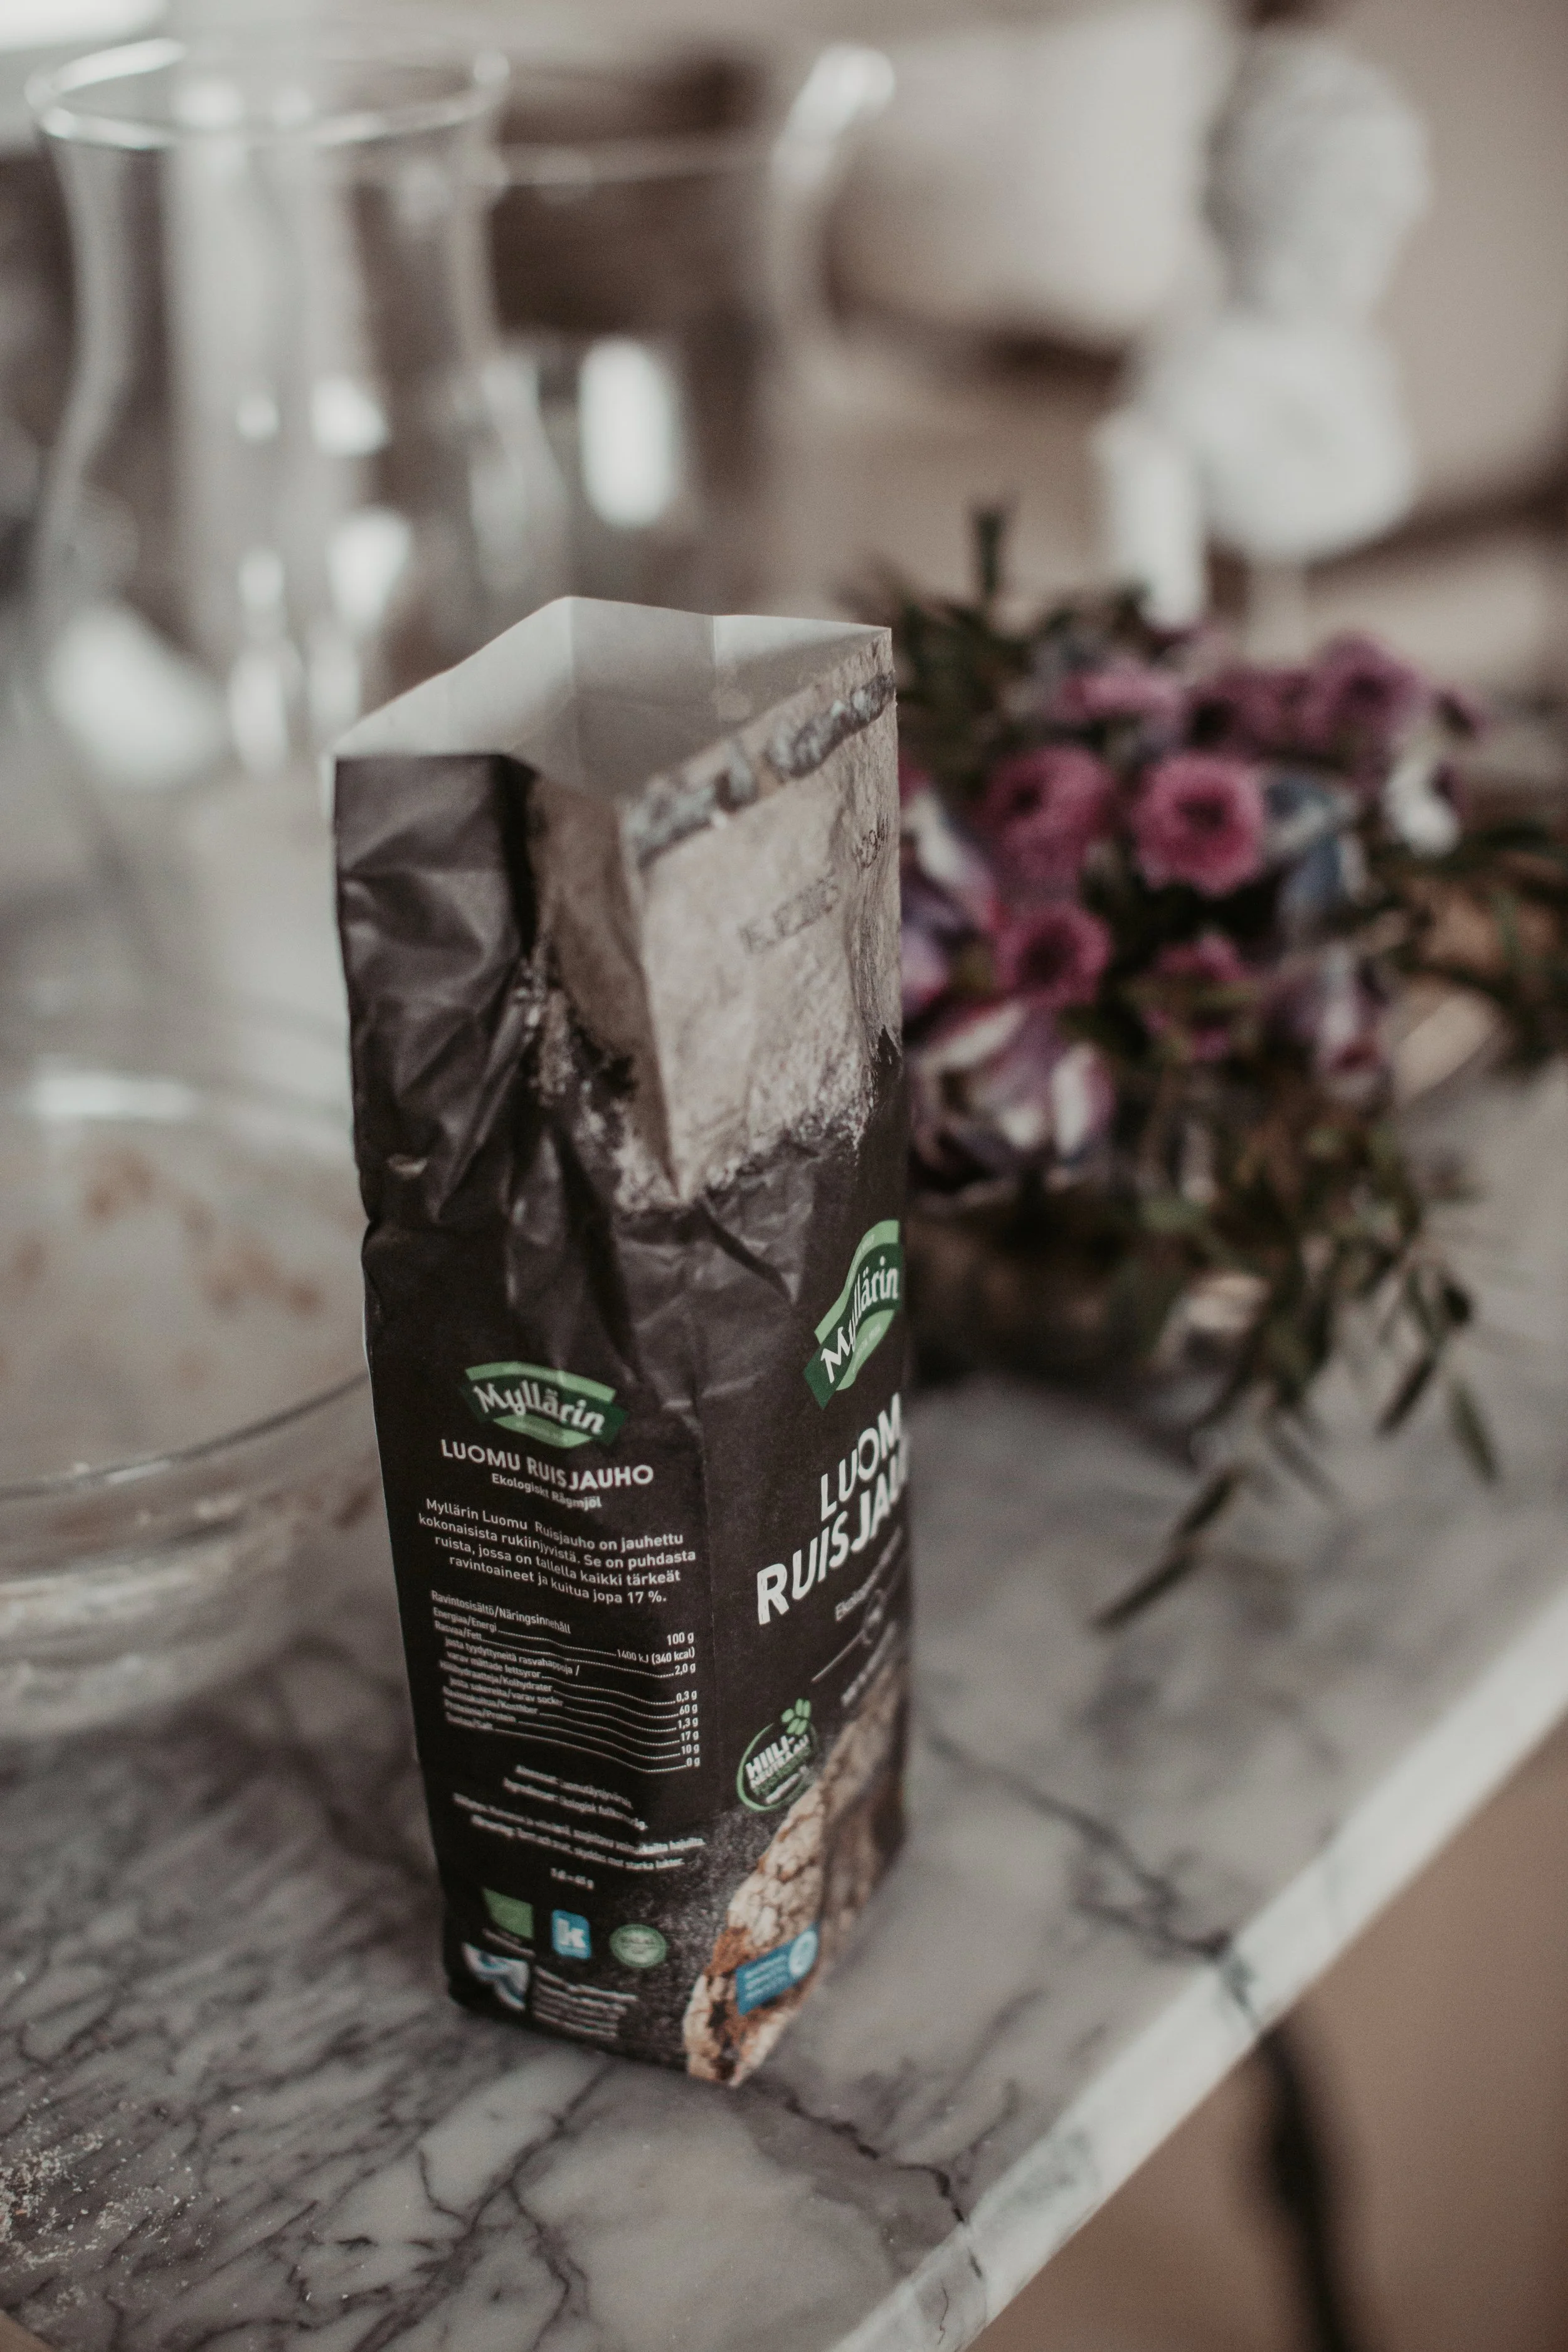
Rye Bread loaves without Sourdough


The rye breads were easily prepared by simply mixing the ingredients together without kneading. The dough required only five ingredients, and none of them were sourdough starter. After a quick mix and a couple of rises, the loaves were ready for the oven, and soon enough, we were enjoying these breads made with 100% rye flour. Even if you are not a baker, these easy loaves are simple to make!
Recipe for Rye Bread without Sourdough
Makes about 8 loaves
Ingredients:
5 dl (about 2 cups) buttermilk
1 packet (11 g) dry yeast
1 tablespoon syrup
about 6.5 dl (about 2.7 cups or 400 g) organic rye flour
2 teaspoons fine sea salt

Instructions:
Warm the buttermilk slightly to about 40 degrees Celsius (104 degrees Fahrenheit). You can do this by heating the buttermilk gently on the stove.
Whisk the dry yeast and syrup into the warmed buttermilk. Let the mixture sit at room temperature for 5-10 minutes to activate the yeast.
Add the rye flour and fine sea salt to the buttermilk mixture. Stir until all ingredients are well combined. You don't need to knead the dough much, just mix until everything is evenly incorporated.
Cover the bowl with a cloth and let the dough rest for about 15 minutes.

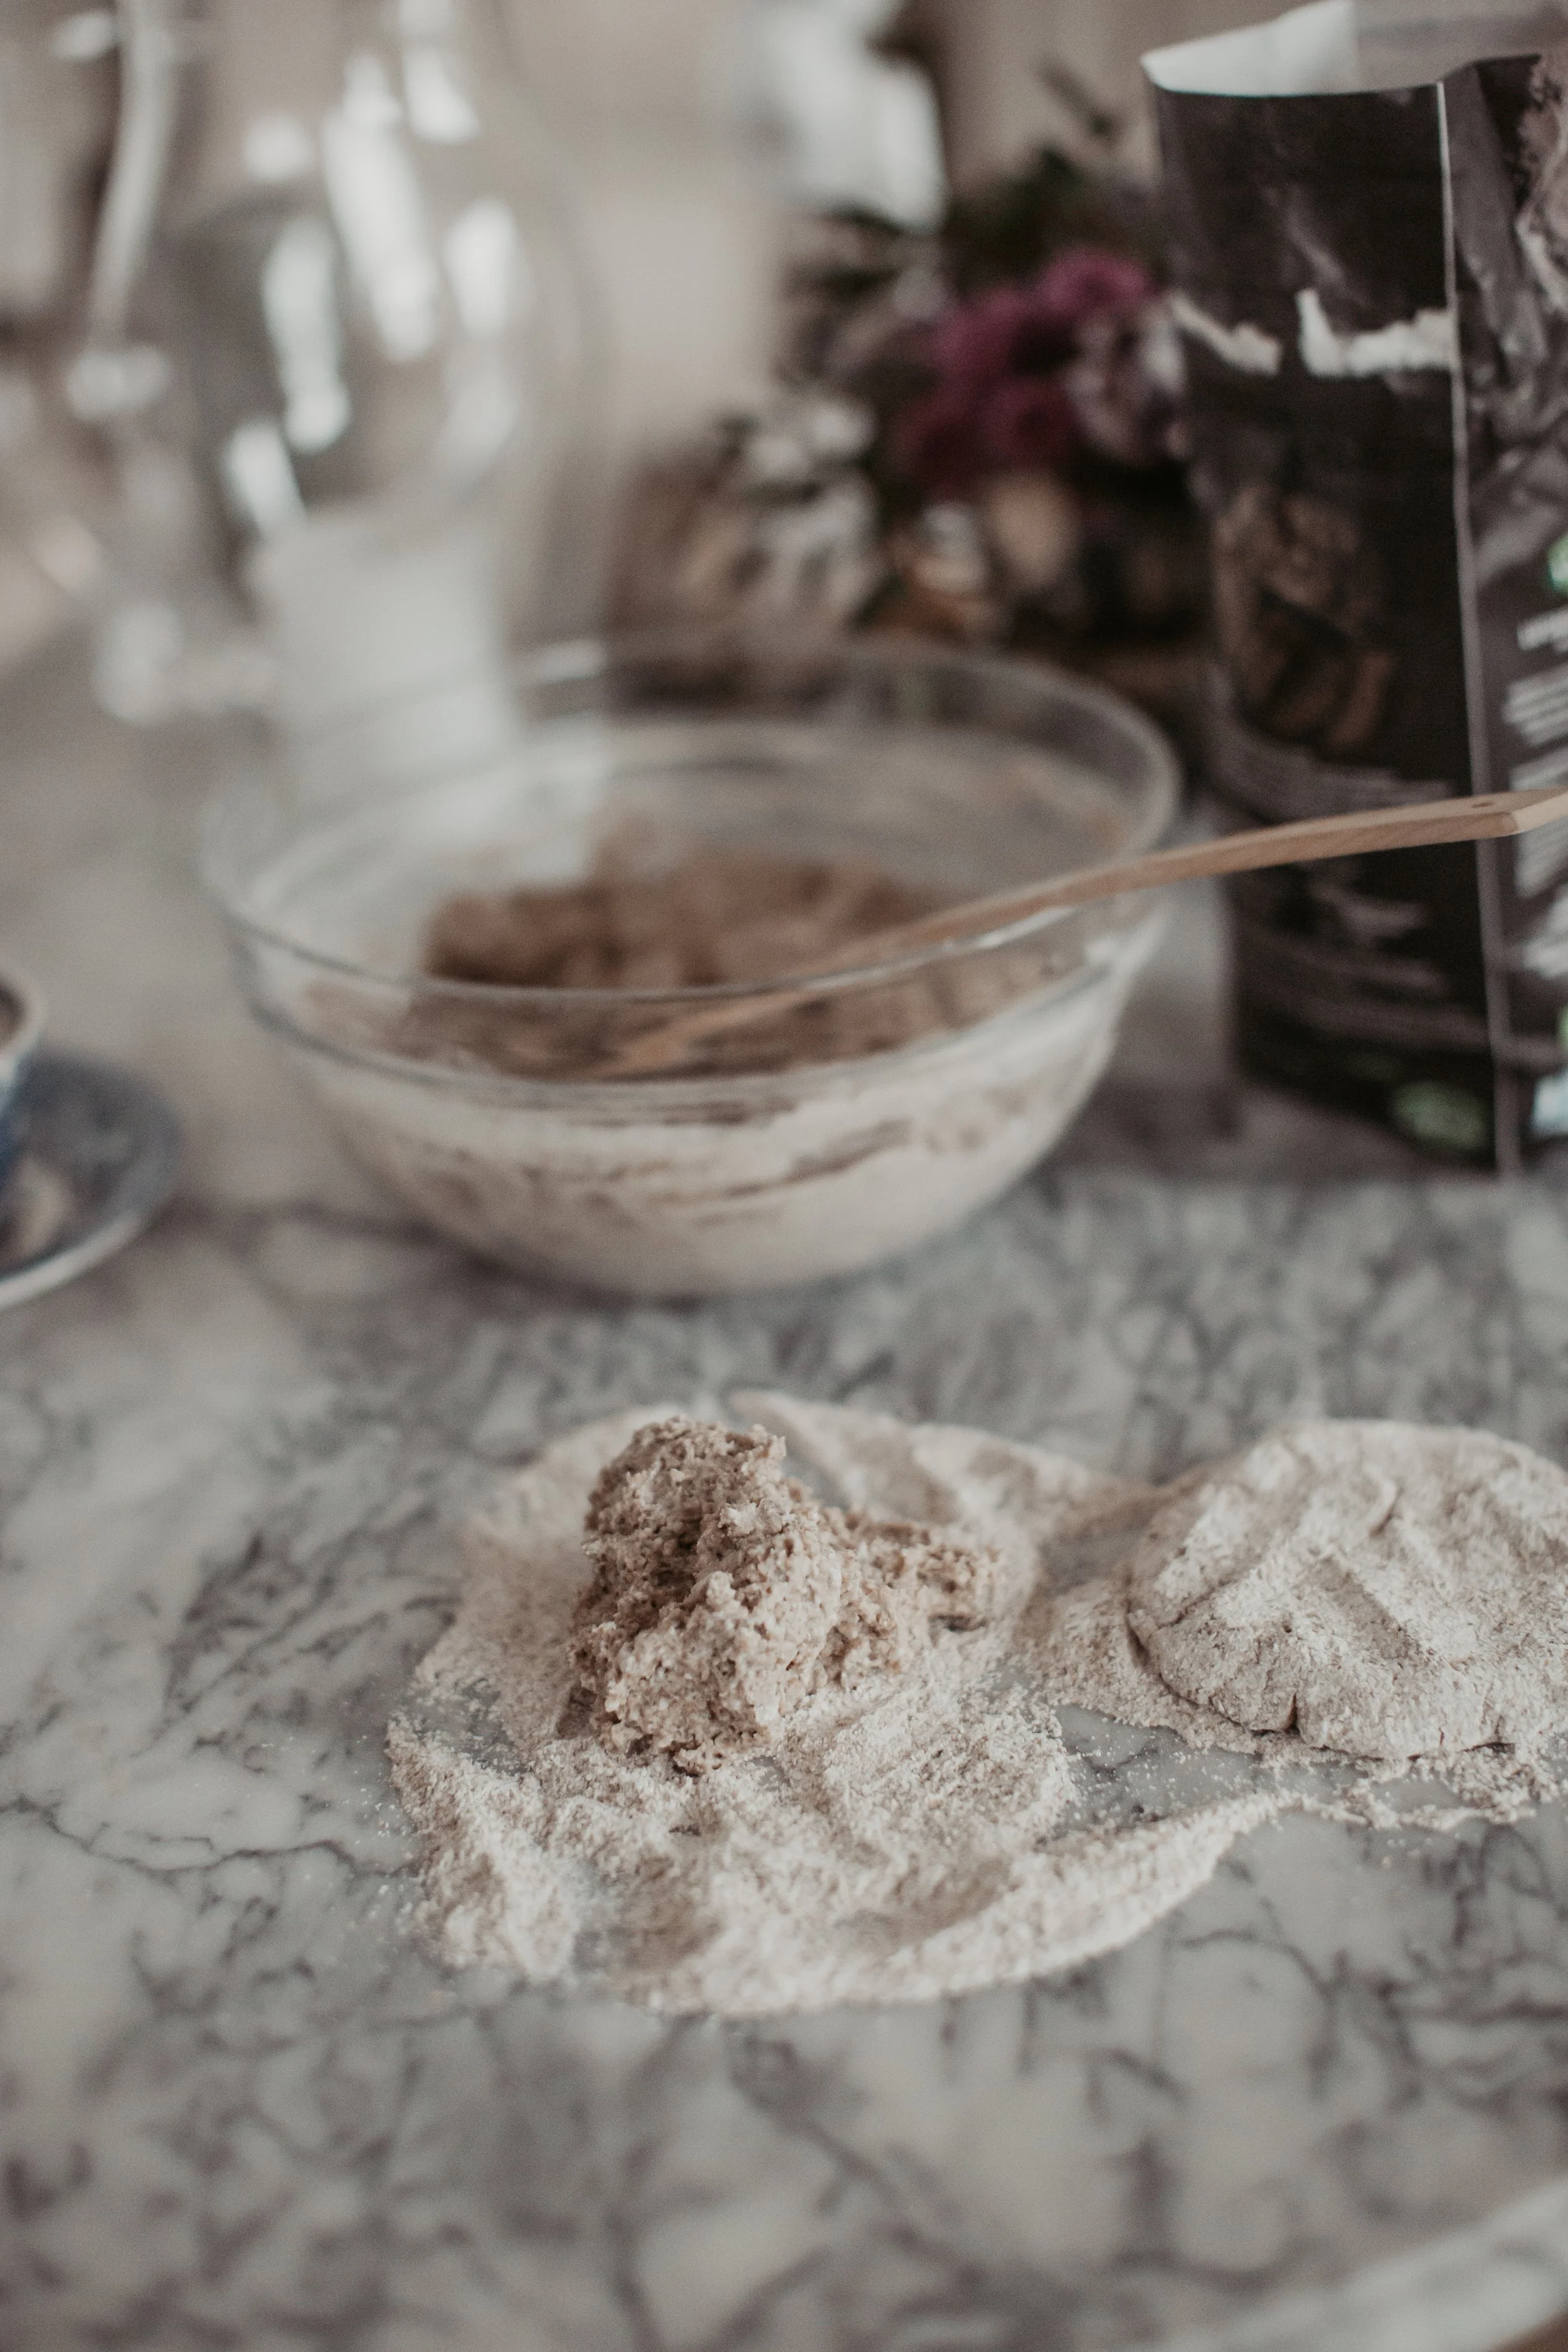


Sprinkle a generous amount of rye flour on your work surface, as the dough will be sticky. Divide the dough into 8 roughly equal portions and place them on the floured surface.
Sprinkle more flour on top. Gently shape each piece into round disks about 1 cm thick. Place the disks on a baking sheet lined with parchment paper.
Let the disks rise for about an hour in a warm place, covered with a kitchen towel.
Before baking, prick the breads with a fork.
Bake at 225 degrees Celsius (435 degrees Fahrenheit) for about 30-35 minutes, until the breads have gained color on both the top and bottom, and the surface of the loaves feels fairly firm.
Allow the breads to cool without covering them with a kitchen towel.
Once cooled, slice the loaves with a sharp knife and press the halves back together until ready to eat to keep the interior soft.

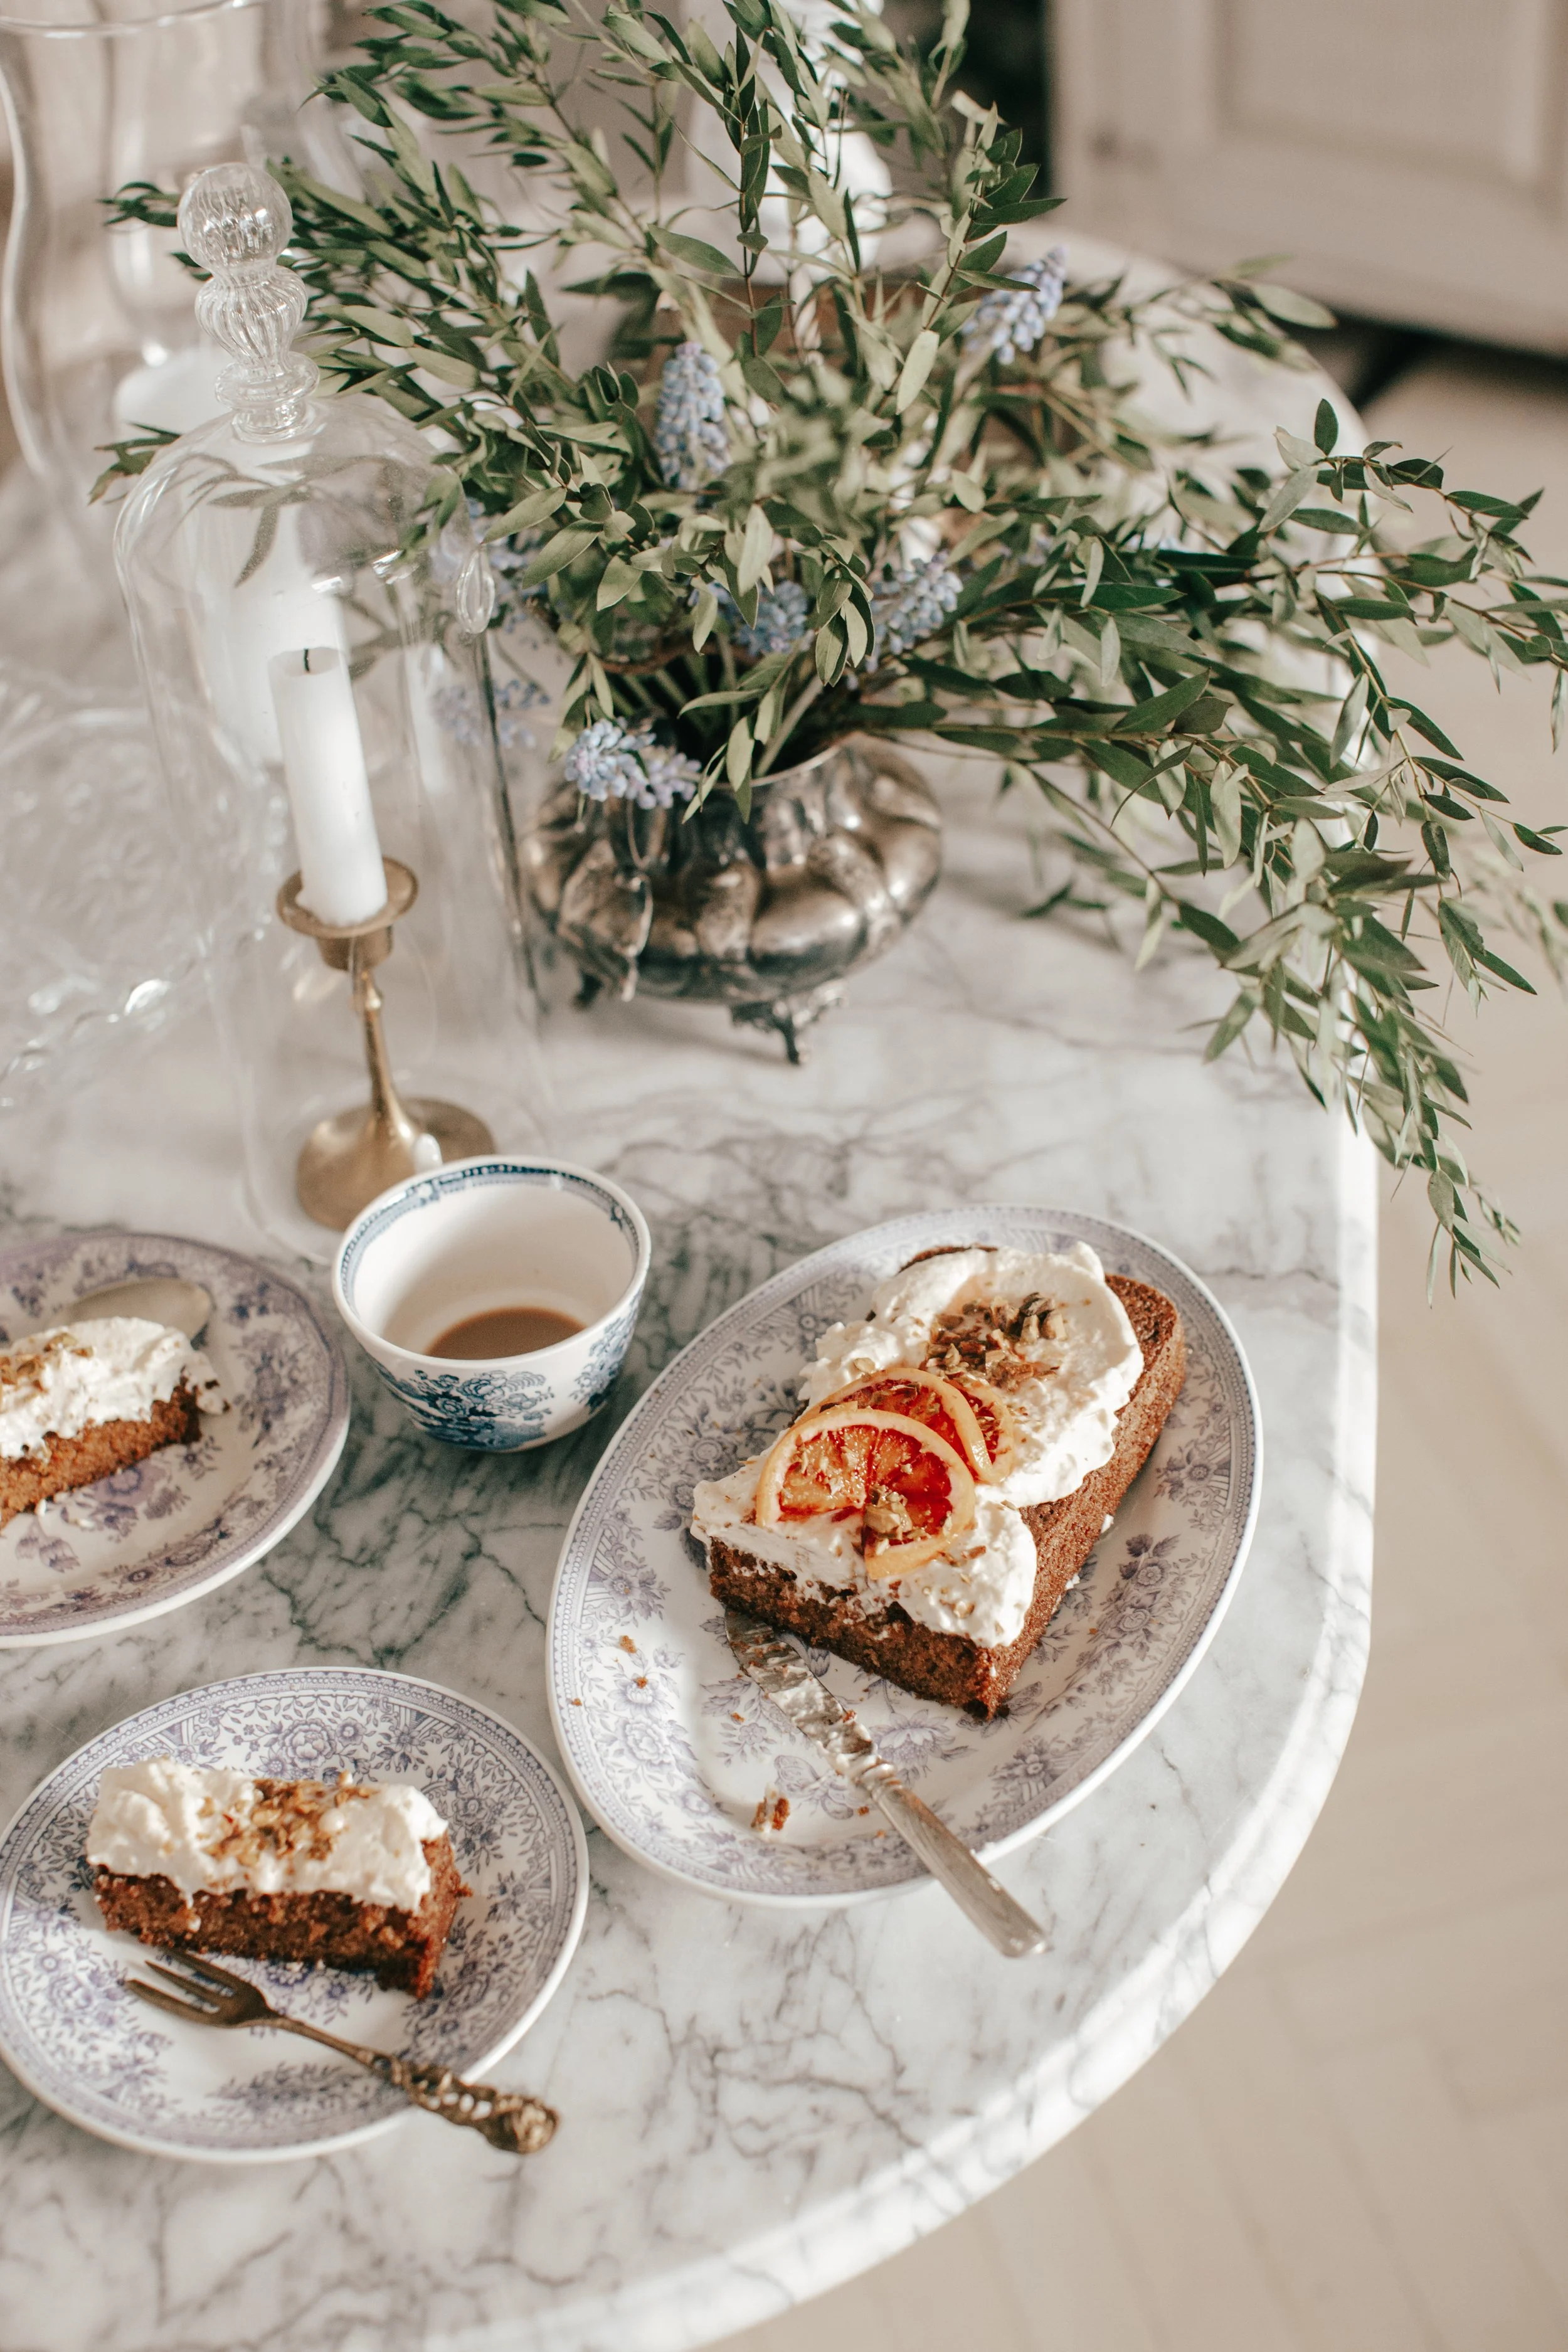
Blood orange pound cake


A blood orange pound cake is great little treat for the weekend that is quick and easy to whip up. The cream cheese butter frosting adds a rich and tangy contrast, while the sprinkle of pistachios provides a lovely crunch and nutty flavour.
January has felt like a long month, we have had beautiful winter days and other days with full rain, where the snow has now fully melted away. It almost feels like a stepping stone to spring, as typically January is very cold and snowy but now it is warmer and no sight of snow for the future. I have found inspiration from fresh bouquets of flowers and cooking new recipes. This month I learned to cook beef bone broth and now I am learning how to bake easy breads with the hope of one day perfecting a sour dough recipe. However, it is blood orange season so I wanted to share this simple pound cake recipe with you all, to cheer up a January weekend. When I made this cake, I actually winged it and didn’t properly measure anything which means you don’t need to be too precise on the measurements. I left the batter fairly running as I wanted a moist cake and feel free to add seasonal spices like cinnamon on or cardamom if you wish to alter the flavour.


Ingredients
3 tablespoons blood orange juice (can also add some zest if you please)
about 50g melted butter
about 1/2- 1dl sugar (depending on how sweet you want it)
pinch of salt
2 teaspoons baking powder
2 teaspoons baking soda
2 eggs
2dl (or slightly under) plain flower
With an electric whisk, mix together the 2 eggs and sugar in a bowl until it becomes light and frothy. Once ready, mix in the blood orange juice and melted butter. With a spoon fold in the flour, baking soda and powder and a pinch of salt.
Take your cake tin (I used a fairly small cake tin) 23cm x 12cm and line it with butter and flour as this helps to prevent the cake from sticking to the sides. Pour in the cake mixture and place it in a pre heated oven of 175C for roughly 40 minutes. it does not matter if the cake mixture comes out soft as this ensures it is moist. Let the cake cool in the tin before taking it out.
Cream cheese butter frosting
1 dl cream cheese
about 40g room temperature butter in small cubes
2 tablespoons icing sugar
tablespoon of blood orange juice
Cake garnish: 2 slices of blood orange, a bit of blood orange juice and crushed pistachio nuts
Then make the butter frosting: In a bowl add your cream cheese, softened butter and icing sugar. Whisk until combined. It helps to whisk everything when all the ingredients have been sitting in room temperature for a while. Mix in the blood orange juice.
Once the cake is cooled, place it on a plate. Add the butter frosting on top of the cake. Place a few slices of blood orange on top. Sprinkle crushed pistachios on top and drizzle some blood orange juice on top.


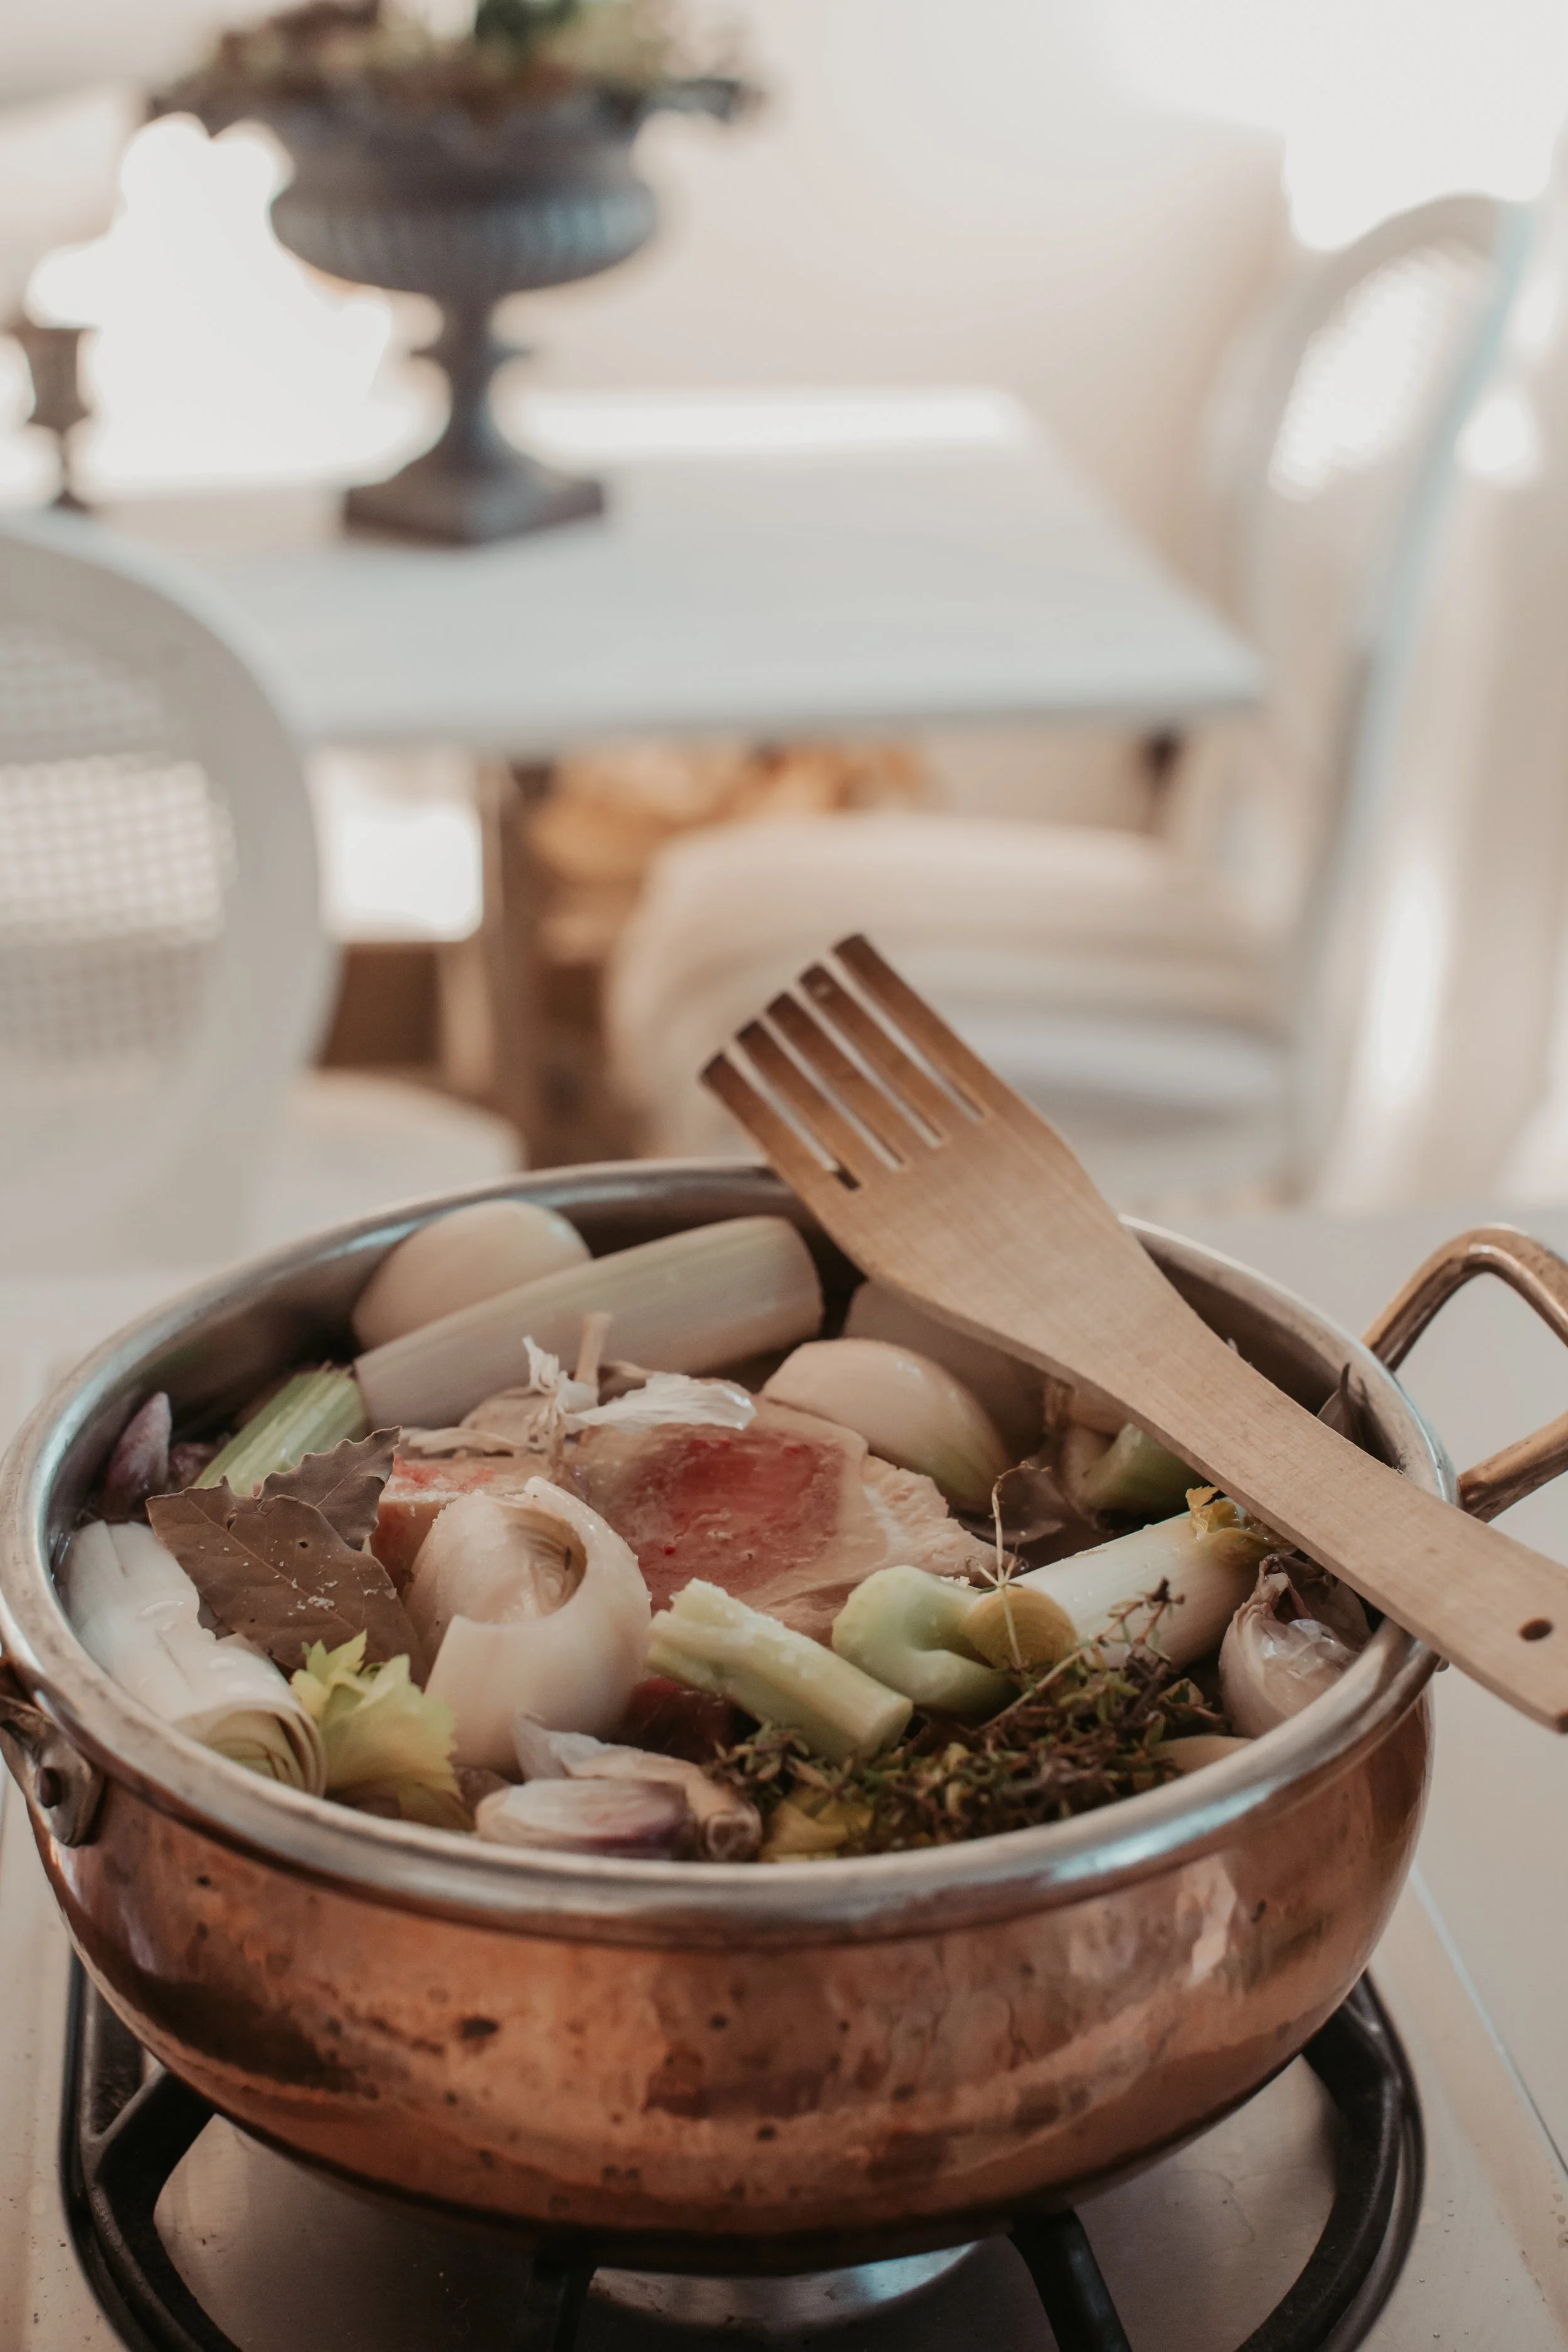
Homemade Beef Bone Broth


Beef bone broth is a nutrient-packed powerhouse that offers a range of health benefits. Rich in collagen, gelatin, and amino acids, it supports gut health, joint function, and skin vitality. It can also boost the immune system, reduce inflammation, and aid digestion. For the best homemade broth, start with beef marrow bones, which are the most nutrient-dense part of the bone. Adding meaty bones like oxtail, shank, short ribs, and knuckles will enhance the flavour and richness.
This January, I learned to make beef bone broth and now have a freezer full of portion sized batches of it to last for a while. Thus far I have done the broth about 10 times and every time it turns out tasty, a really healthy treat for the entire family. I have decided to keep making batches, so we all can drink a small every other day to gain the benefits the broth has to offer. This broth becomes perfectly jiggly when stored in the fridge indicating that it has lots of collagen and consists of gelatin, a form of protein that is rich in anti-inflammatory amino acids, which gives it that property.
The nourishing dish is as good for your gut as it is for your taste buds. I use bone marrow and oxtail to make the broth. This simple yet deeply flavourful recipe brings together the rich, collagen-packed goodness of beef marrow bones and the tender, melt-in-your-mouth oxtail to create a hearty, healing broth that supports gut health and boosts overall vitality.
Beef bone broth has been revered for centuries for its ability to soothe the digestive system, promote joint health, and strengthen the immune system. The marrow bones and oxtail simmered slowly over hours release vital nutrients like collagen, gelatin, amino acids, and minerals that are easy for the body to absorb. the rich, (but not fatty) liquid gold nourishes the body from the inside out.


Ingredients
2-3 stalks of celery
1/2 leek
4-5 cut bone marrows (or one large long one)
5 medium sized oxtail
3 white onions peeled
3 entire garlic bulbs (cut but do not need to peel)
5 bay leaves
3-4 springs of thyme
Sea salt
about 2 tablespoons olive oil
whole black peppercorns
all spice (maustepippuri in Finnish)
1 organic vegetable stock cubes
about 2 L of water (depending on the size of your large pot)


How to make the bone broth
In a large pot add some olive oil. Place onto heat. Add the oxtail and marrows and let them gently simmer and gain a bit of colour on the sides. Add all the vegetables. Add as much water as possible, all the way to the top. I added about 2 litres. Add in all the spices and let it come to boil. Let it gently simmer for 3-4 hours with the lid on. Stir it once in a while. Then you can turn off the heat but keep it on the stove so the pot remains warm. After about 3 hours I turned on the heat again and let it gently simmer for another couple of hours. The key is that the broth is constantly warm for a longer period of time. I let the pot sit on the stove for 1 entire day, 24hours. For the night time, I turn off the heat from the stove but let it sit there with the lid on until the following day. In the morning I turn on the heat again and let it simmer until it the 24h has passed in total. At this point the beef, easily falls off the bones.
After the 24hours, the broth has turned a deep golden brown colour. Strain the broth into a large pot and get rid of the vegetables. Then remove the meet from the bones and save for later.
Pour the clear soup into a container and add the meat into it. Let it cool and place the broth into the fridge until it solidifies into a jelly-like structure. At this point there is a layer of white fat coating on top of the broth. Remove it away into the bin. Now your jelly broth is ready to eaten or frozen into batches.

Christmas Wreath Fish Spread


Looking for a little snack to enjoy over a glass of wine or festive cocktail as you celebrate the days leading up to Christmas? Well look no further, as this easy and quick wreath is exactly what you need. This festive season, elevate your holiday spread with a stunning, wreath-shaped snack that’s as beautiful as it is delicious. Perfect for Christmas gatherings, this white fish appetizer combines the freshness of dill, celery, and cream cheese, while the elegant wreath shape adds a touch of sophistication to your table. Topped with cucumber ribbons, capers, and a sprinkle of lemon zest, it's a light and flavorful dish is quick and easy to make. If you do not like some of the flavours, you can obviously swap things around to your liking. You can make a vegetarian one by using beetroot or avocado and add different seasoning/herbs whatever you have in your household. Once the wreath is done, place the dish in the center and share it with friends. We ate it with crackers on our coffee table around our Christmas tree to celebrate the weekend before Christmas.
This little plating trick makes various spreads look more pretty, where it is shaped into a wreath shape. For this you need two circular moulds with the right proportions; I used a tartare mould and small cake tin to create that wreath shape. I didn’t really use measurments for this mass- but I would say a “sprinkle here” means under a tablespoon. They key is to make the mass rather dense so it stays in shape.
White fish wreath Spread
2 dl cooked white fish of choice (salmon works too)
sprinkle of finely chopped celery
teaspoon of dijon mustard
sprinkle of finely chopped sweet onion
sprinkle of finely chopped dill
salt/pepper to taste
1/2 dl cream cheese
1/2 dl sour cream
Garnish:
Freshly cracked black pepper
Lemon zest
Capers
Cucumber ribbons (using a vegetable peeler)


Directions:
In a mixing bowl, combine the cooked white fish, chopped celery, chopped dill, salt, and pepper. Add the cream cheese and sour cream, and mix until you have a thick, smooth mixture.
To create the wreath shape, place two circular moulds on a plate (I used a tartare mould and a small cake tin). Make sure the proportions work well together for a balanced, elegant wreath.
Spoon the fish mixture into the space between the moulds, pressing it down gently with the back of the spoon to create a smooth surface.
Carefully lift the moulds off to reveal the wreath shape. The result should be a neat, well-formed ring of the fish spread.
Garnish by draping cucumber ribbons around the wreath, then sprinkle with capers, lemon zest, and a dash of freshly cracked black pepper for an extra layer of flavor.
The wreath shape gives a striking presentation, while the garnish adds texture and fresh brightness. This technique is great for appetizers, allowing you to turn a simple dish into something beautifully refined and impressive.


Beetroot Christmas Tarts


Christmas is around the corner and is there anything better than snacking on delicious easy treats before the days leading up to the eve. I have always though that beetroots are a great edition to festive foods, maybe it is the deep, rich red colour instantly evokes the festive hues of Christmas—think crimson poinsettias, red ornaments, and the colours of winter berries. It brings an elegant pop to the table, adding visual appeal to any dish. Whether used in salads, spreads, or as a roasted side, its striking appearance makes it stand out in a holiday spread. Beetroot is in season during the colder months, making it a naturally fitting ingredient for Christmas.
Christmas puff pastries (joulu torttuja) are often eaten in Finland during the Christmas season, whether they are sweet or savoury. This beetroot cream cheese spread is a great option to add on top of the pasty. Essentially it is cooked beets blitzed together with cream cheese and some seasoning. I added salt, lots of black pepper and a small drizzle of honey. Once the puff pastry is cooked in the oven (200 Celsius degrees) for ten minutes, I added the beetroot spread on top. Garnish with some chopped dill, chopped hazelnut and a bit more black pepper.
Beetroot creamcheese filling
1-2 cooked beetroots
1/2 cup of creem cheese
1 teaspoon of honey
salt/pepper
garnish: dill, hazelnut
Here is another puff pastry filling recipe with cured rainbow trout


This is how you make the puff pastry shape: cut the pastry into squares, then make L shapes on the opposite ends and fold them over each other.


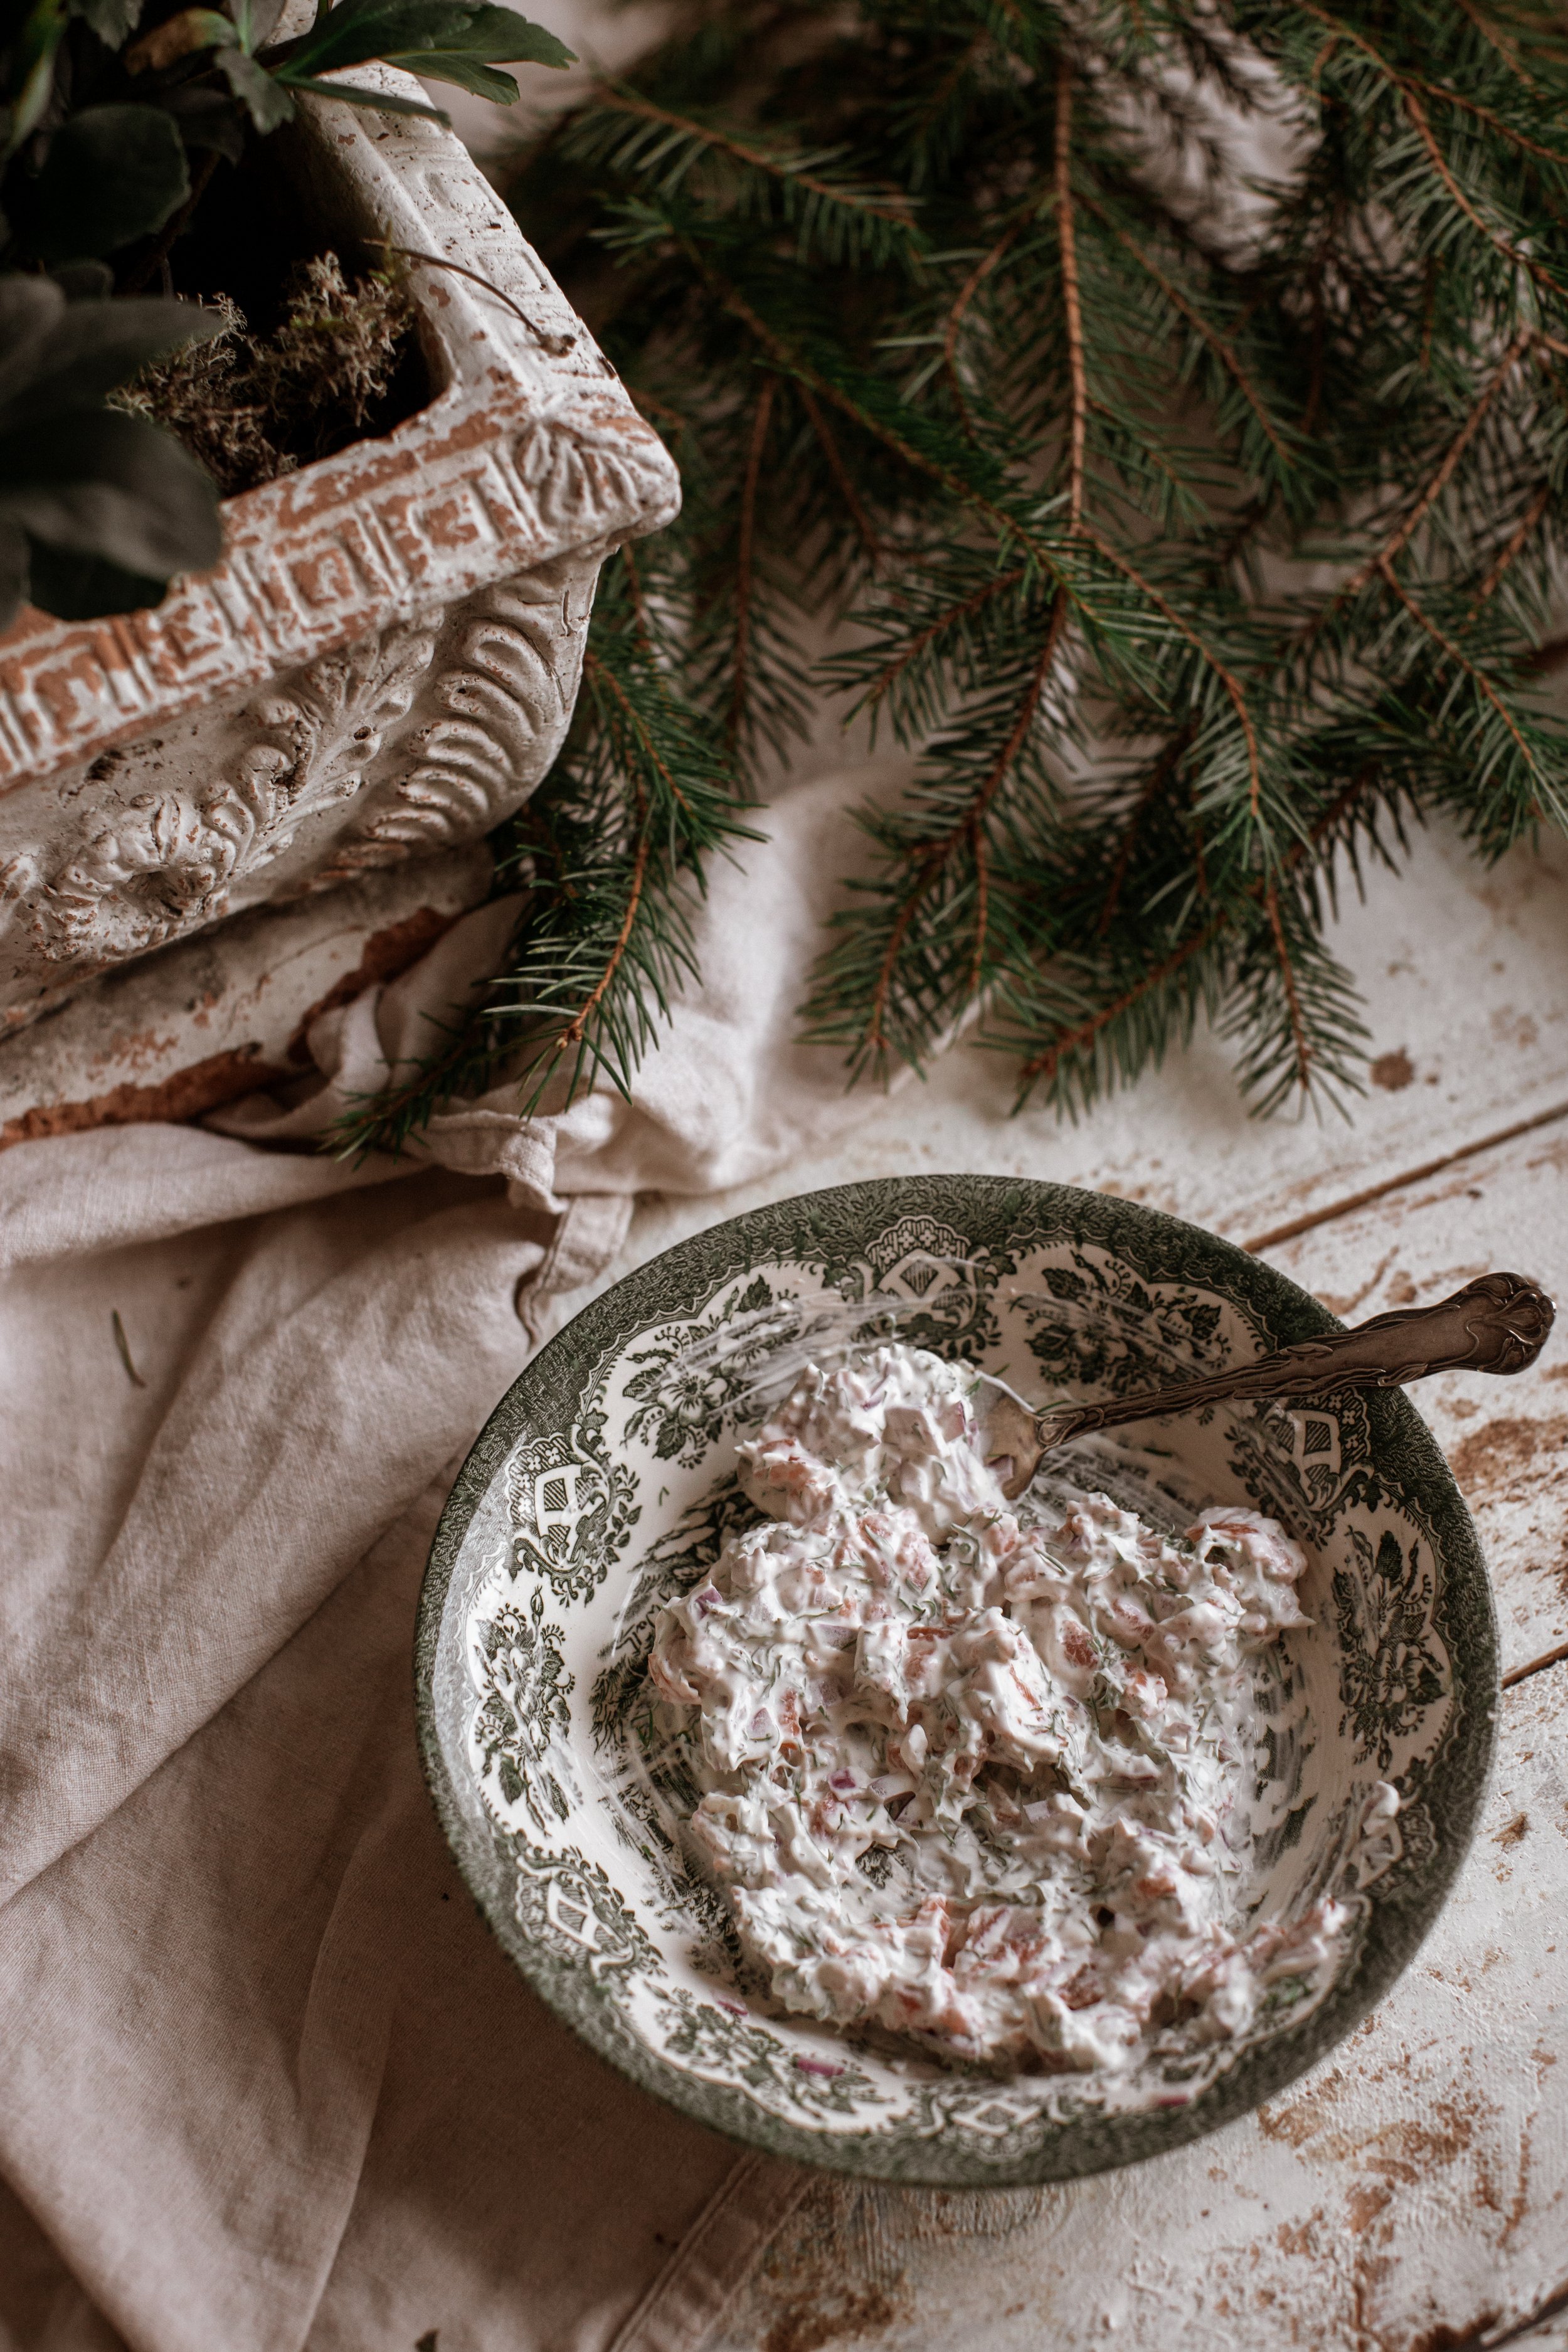
Cold Smoked Salmon Tartare
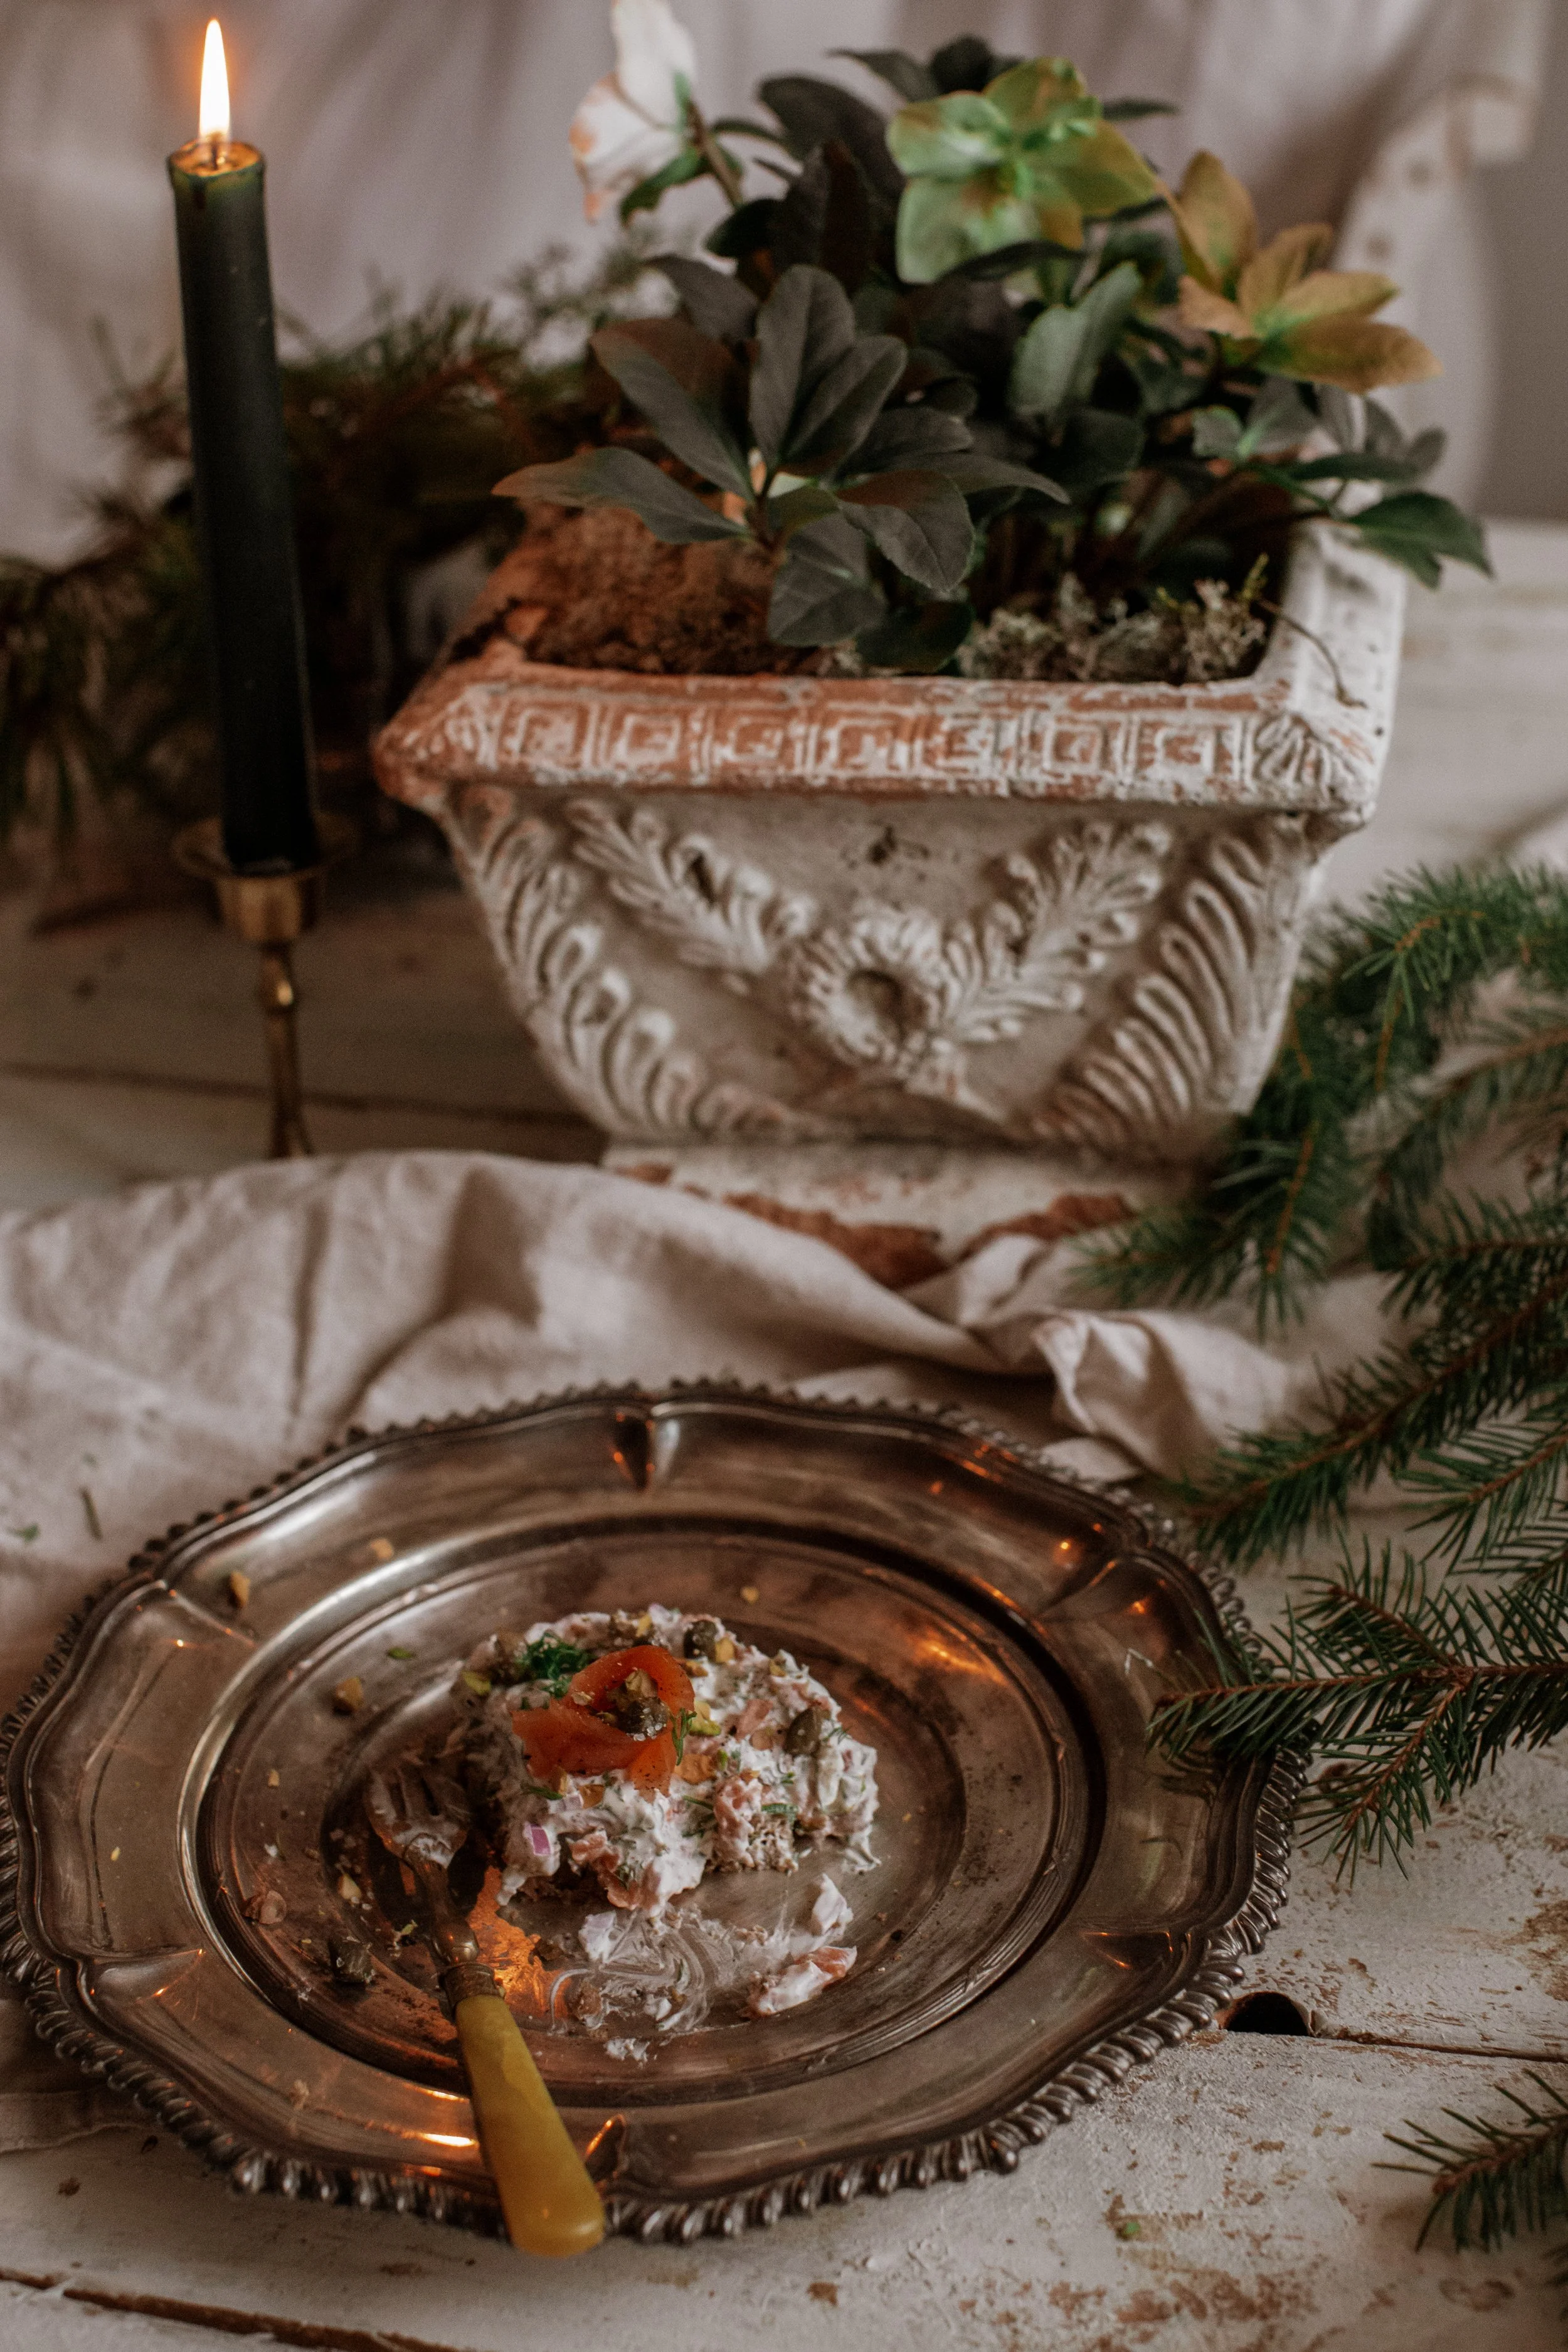

Cold Smoked Salmon Tartare Mousse
This Cold Smoked Salmon Tartare Mousse on Danish Rye Bread is the perfect appetizer to elevate any occasion, offering both elegance and flavour in a simple yet impressive presentation. With its delicate salty and sweet textures, it’s a showstopper that’s surprisingly quick and easy to prepare. The rich, smoky flavour of the salmon, paired with the creamy crème fraîche and the subtle tanginess from the grated lemon, creates a harmonious bite that will delight your guests. Garnished with fresh dill, pistachios, and zesty lemon, this dish is not only a treat for the taste buds but also a feast for the eyes. Whether you're hosting a festive gathering or a special dinner, this tartare mousse is sure to impress and bring a touch of easy sophistication to your table.
Ingredients:
200g cold smoked salmon, finely chopped
1 small red onion, finely chopped
A handful of fresh dill, finely chopped
150g crème fraîche
Salt and freshly ground black pepper, to taste
Zest of 1 lemon
1-2 tbsp pistachio nuts, chopped
1 tbsp capers, drained and chopped
Extra dill and black pepper, for garnish
Instructions:
Prepare the Ingredients:
Finely chop the cold smoked salmon, red onion, and dill. Place them in a large mixing bowl.
Make the Mousse:
Gradually add the crème fraîche to the bowl, mixing gently. Be careful not to make the mixture too liquid – the texture should be thick and mousse-like as this helps to create shape with the mould. Add salt and black pepper to taste.
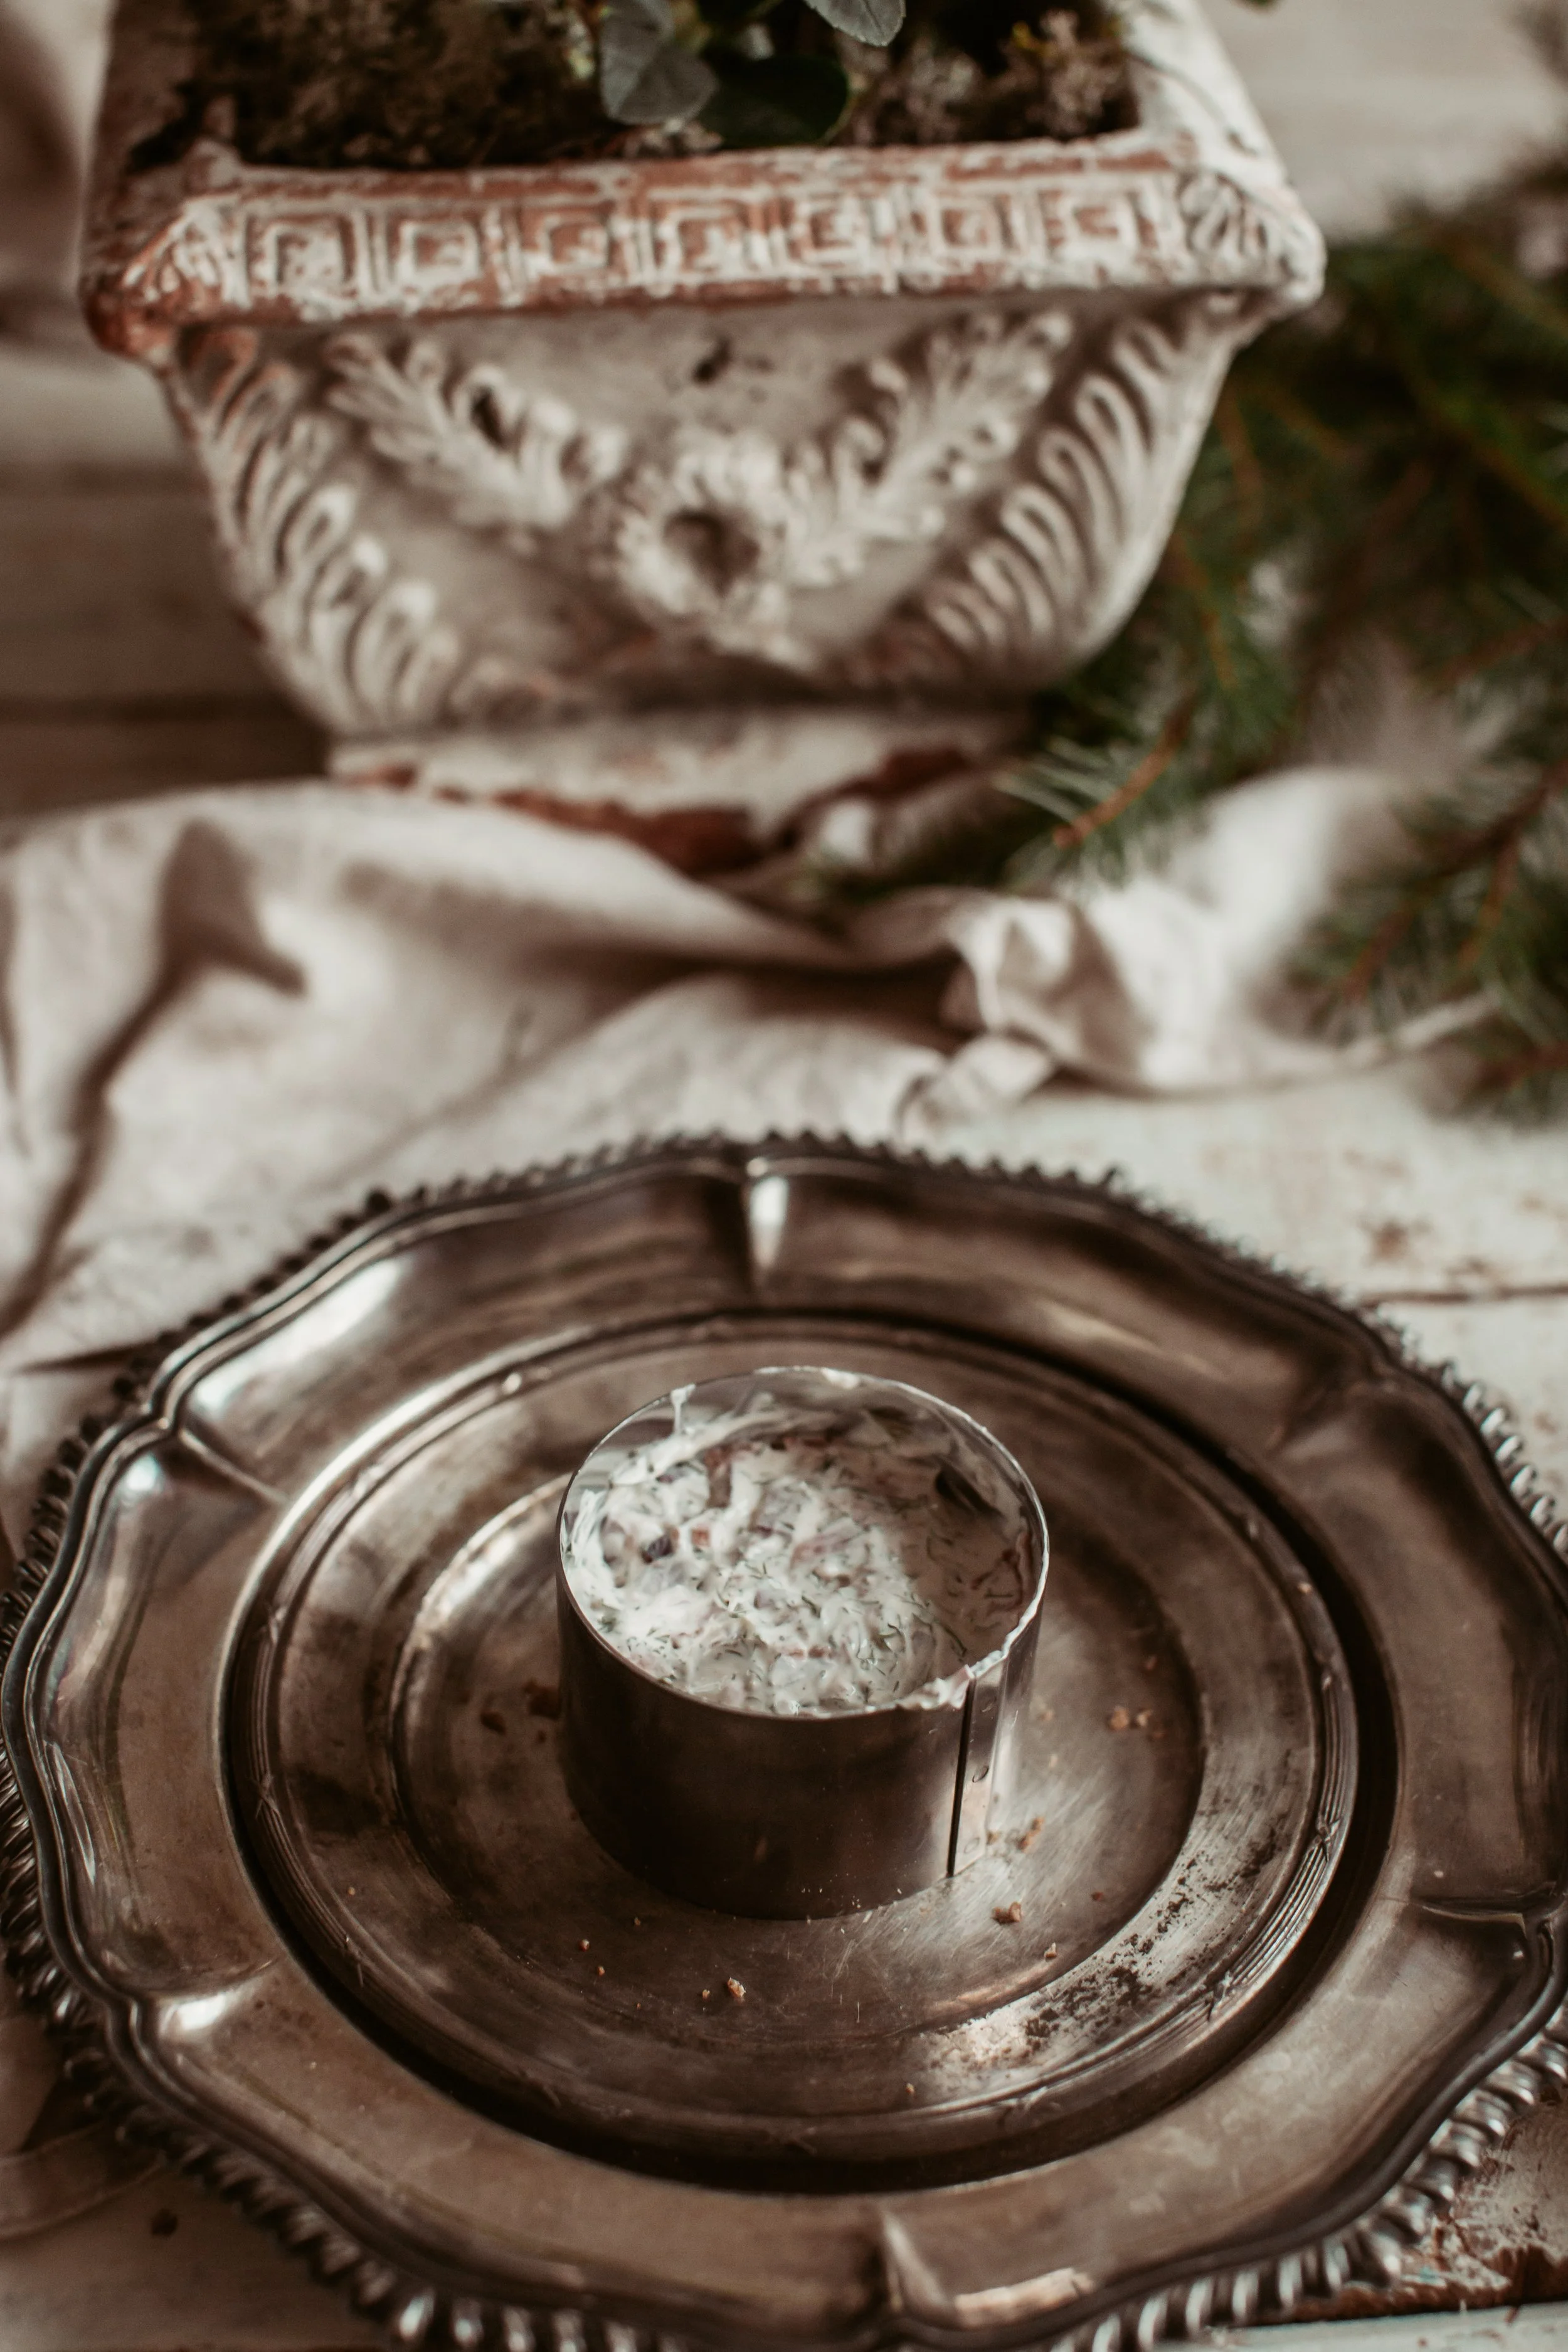
Mould the Tartare:
Using a circular mould or ring (to create a neat presentation), place the rye bread in the bottom and pierce through to make it into a circle shape. Leave it in the bottom of the mould. Then carefully press the salmon mixture into the mould on top of the bread to form a compact, even layer. Remove the mould.
Garnish:
Top the tartare with a sprinkle of lemon zest, extra chopped dill, freshly ground black pepper, chopped pistachios, and capers for an added burst of flavour and crunch.
Serve:
Serve the tartare chilled, as a refreshing appetiser, with toasted bread or crackers on the side. An impressive starter for a elegant festive dinner party.

Steps how to make the tartare


Beautiful snowy roads to lift up our Christmas Spirit


Finnish Suppilovahvero mushroom salad


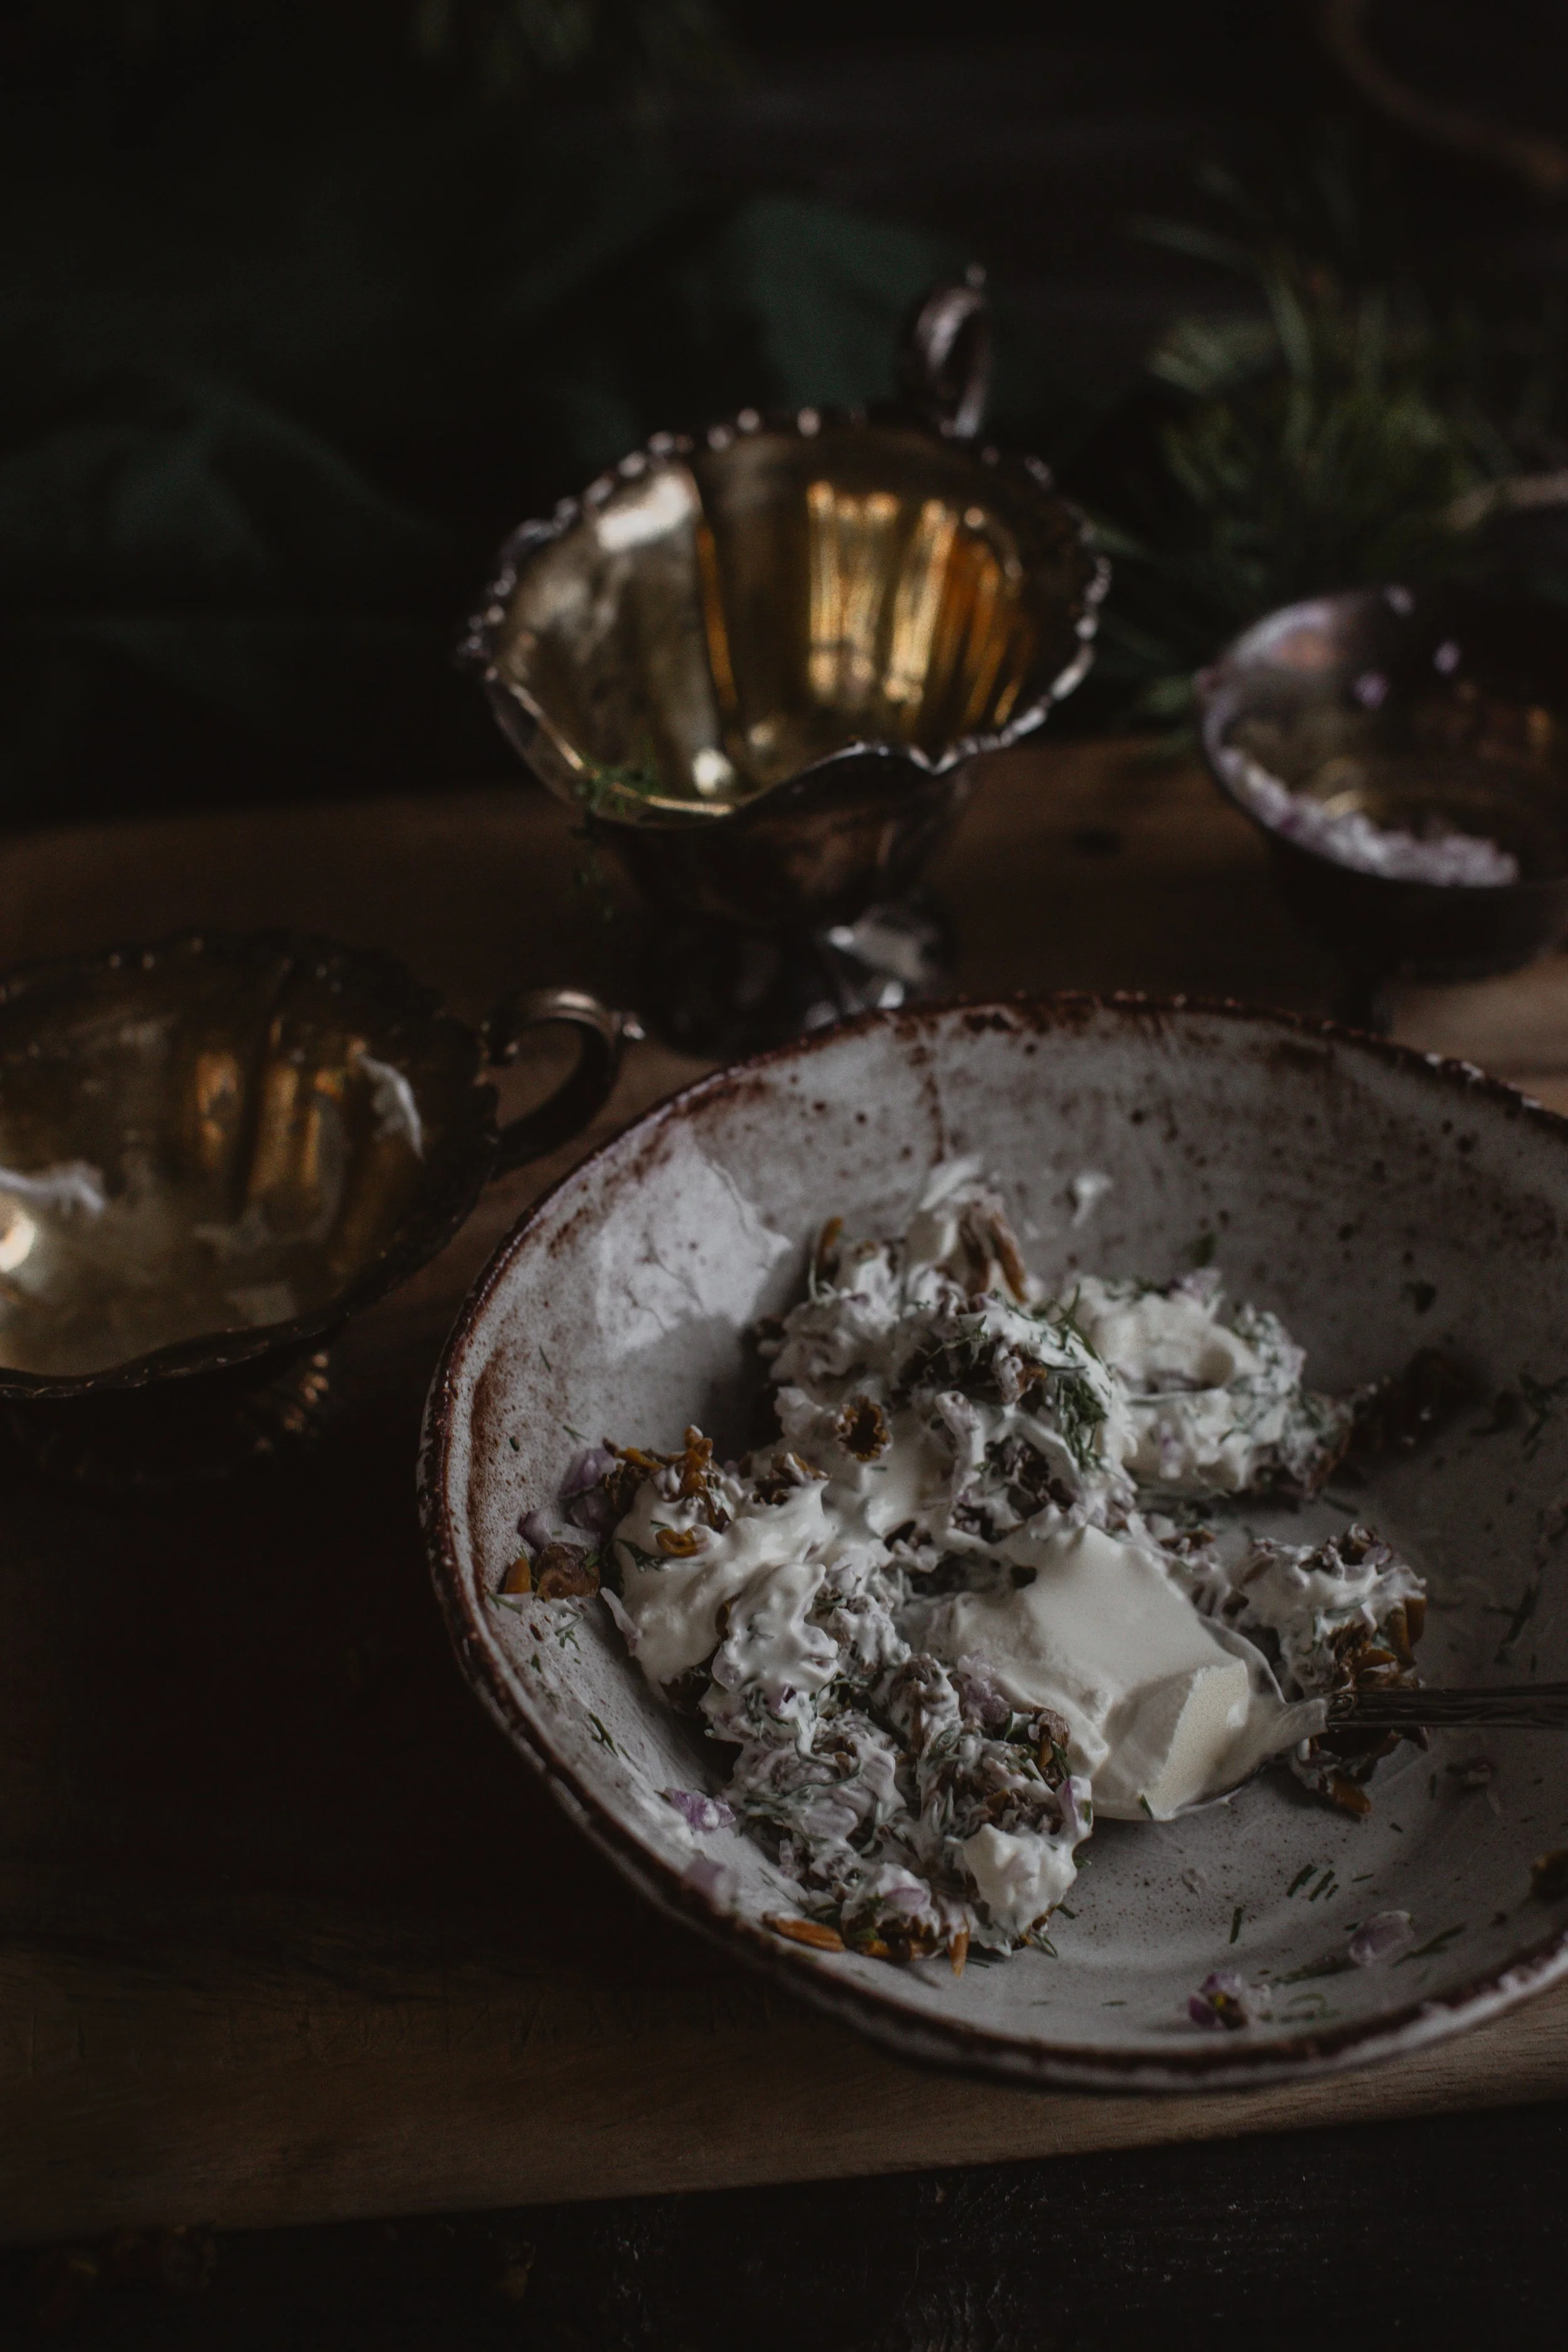
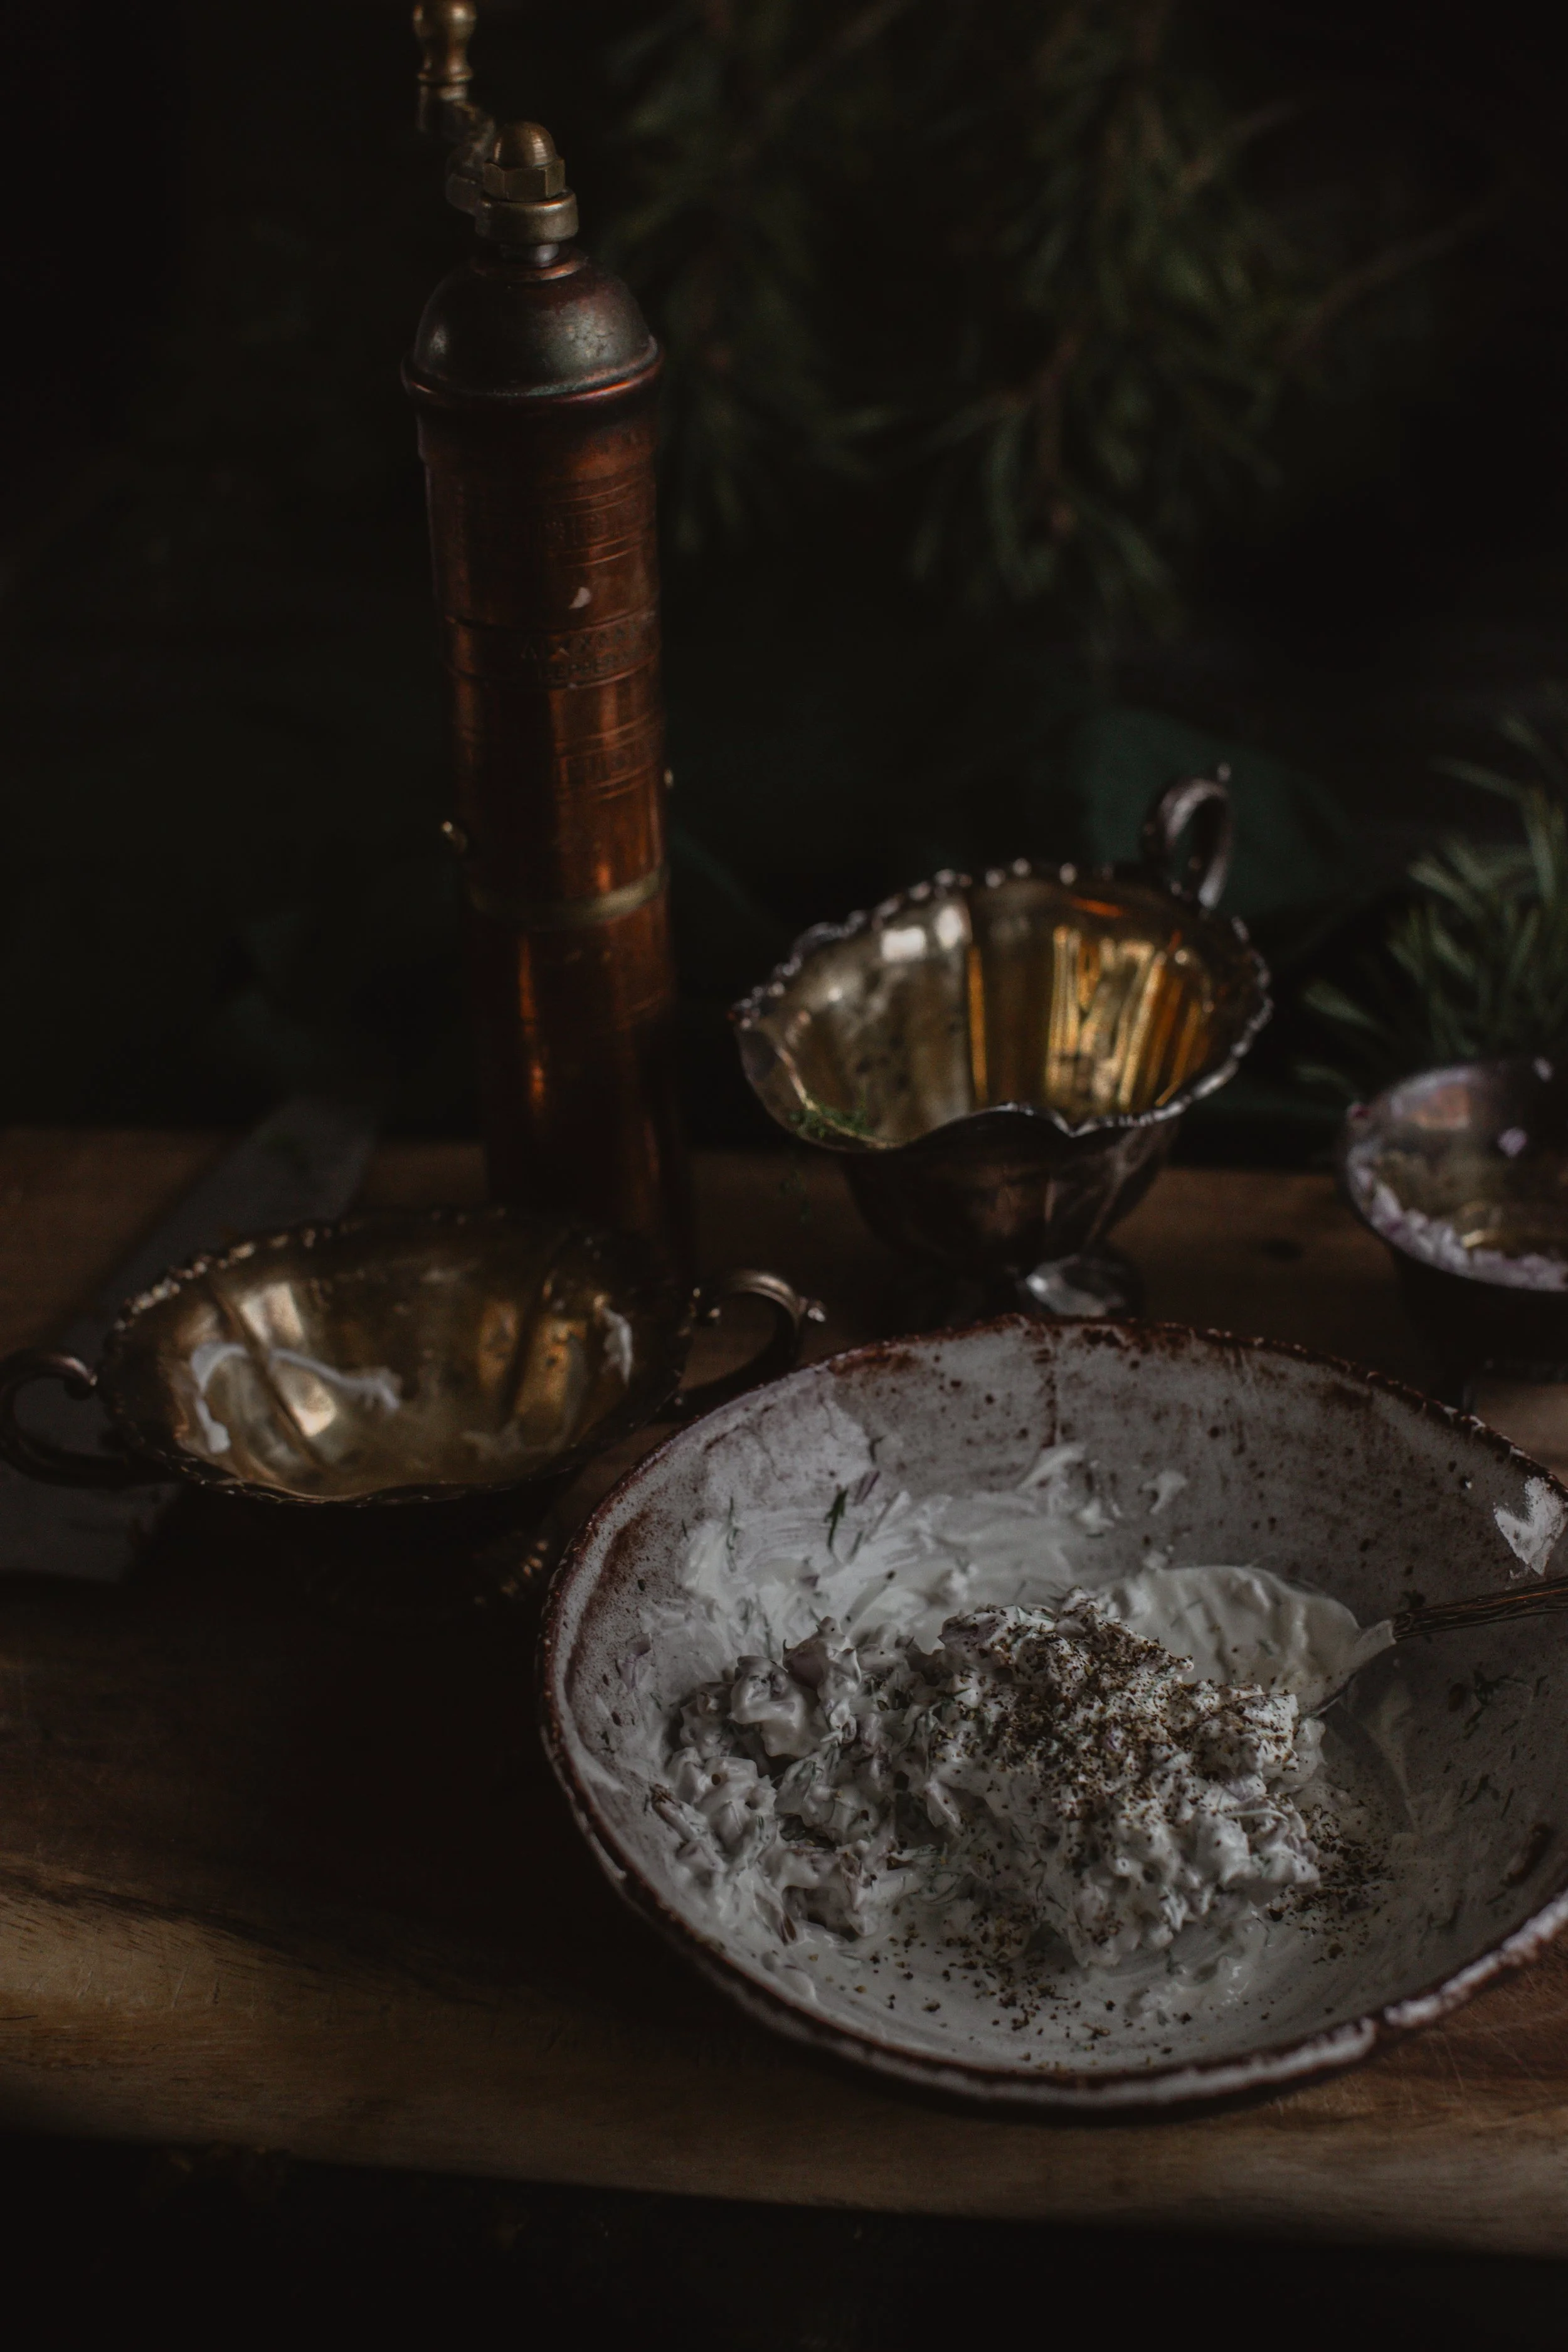
Traditionally, a smetana based mushroom salad is part of a Finnish festive table, that is made from foraged mushrooms like pickle milk caps (haaparousku in Finnish). In late autumn our forests are filled with yellowfoot chanterelles and still often by the end of November- December, they can be found. Thus, I wanted to try the tradition recipe with mushrooms that are easily accessible in the woods. With hand to heart, I was very impressed with how the yellowfoot chanterelle mushrooms tasted in this recipe. It only takes a few minutes to make and requires, onion, dill and crème fraîche or smetana. This quick little spread tastes absolutely perfect on a piece of toasted rye bread or even a blini.
Festive Finnish Yellowfoot Chanterelle Salad
Around 3 dl yellowfoot chanterelle (suppilovahvero) mushrooms
1 red onion, chopped
Salt
Black pepper
about 1 dl crème fraîche (or smetana)
handful of chopped dill
Add the yellowfoot chanterelle mushrooms to a hot pan and sauté them (without any fat) until all the moisture has evaporated. Let them cool. If needed, press any excess water away with kitchen paper. Finely chop mushrooms, onion and dill. Mix all the ingredients together in bowl. When adding crème fraîche, add gradually so the texture does not become too runny. the Add salt and lots of black pepper. Taste to make sure the seasoning is to your liking. Serve
Suppilovahveroista en ole salaattia ennen tehnyt, eli tämä oli ihan uusi kokeilu, mutta oli todella hyvää ja menee ehdottomasti jatkoon. Sienisalaatti on helppo ja nopea tehdä. Suppilovahvero on siitä hauska sieni, että se kyllä kasvaa niin myöhään syksyyn, kun vaan kelit ovat edes vähän plussan puolella. Itse asiassa olen myöhimmillään käynyt jouluaattona noukkimassa sieniä niin sen takia, tämä sopii kivasti juhlakattaukseen.

Juhlava Suppilovahvero salaatti
noin 3dl Suppilovahveroita
1 puna Sipuli silputtuna
kourallinen tilliä
Suolaa
Mustapippuria
about 1 dl creme fraiche (or smetana)
Lisää suppilovahverot kuumalle pannulle ja pyörittele niitä (ilman mitään rasvaa) kunnes neste on haihtunut kokonaan pois. Anna jäähtyä. Pilko sienet, sipuli ja tilli. Sekoita kaikki aineet keskenään. kun lisäät crème fraîchiä niin älä laita liikaa kerrasta ettei koostumuksesta tule liian juoksevaa. Maista että mausteita on omaan makuusi sopivasti.

Easy Rowan Berry Recipes


Rowan berries, also known as mountain ash berries, are small, vibrant fruits that begin to ripen in the late autumn, making them a perfect symbol of the transition from the cooler months to the heart of the festive season. Their bright red hue and striking clusters make them a popular choice for creating beautiful, natural wreaths, adding a touch of seasonal charm to any home. As November rolls in and we prepare for the holidays, these berries mark the stepping stone to more festive traditions.
Beyond their aesthetic appeal, rowan berries offer a wealth of health benefits and can be transformed into a variety of delicious recipes. Packed with vitamin C, antioxidants, and fiber, these berries have long been used in folk medicine for their ability to support immune health, improve digestion, and even help with inflammation. They are also known for their natural ability to boost circulation and maintain heart health.
In the kitchen, rowan berries can be used in a range of delightful treats, from homemade jams to soothing teas. A warming cup of rowan berry tea is perfect for cold evenings, while rowan berry compote can add a tangy twist to your breakfast spread.
Rowan Berry Compote Recipe
If you prefer a simpler, less sweet option than jam, a rowan berry compote can be made, which is perfect for serving with desserts like ice cream, yogurt, or pancakes. To slowly introduce Christmas season, we had it with rice porridge this weekend.
Ingredients:
500 g fresh rowan berries
1/2 cup sugar (or to taste)
1 cup water
1-2 cinnamon sticks
1/2 teaspoon lemon juice
Instructions:
Prepare the Berries:
Rinse the rowan berries and remove them from the stems.
Cook the Berries:
Place the rowan berries in a saucepan with the water and bring to a simmer over medium heat.
Add the sugar, cinnamon sticks, and lemon juice, stirring to dissolve the sugar.
Simmer:
Simmer the compote for about 20-30 minutes, stirring occasionally, until the berries are soft and the mixture thickens into a syrupy consistency.
Cool and Store:
Once the compote has thickened, remove from heat and discard the cinnamon sticks.
Allow the compote to cool before transferring it to a jar or serving dish.
Store in the refrigerator for up to a week.


Rowan berry tea is a delightful, warming beverage that combines the tartness of the berries with the aromatic flavors of herbs and spices. Here’s a cozy Rowan Berry Tea Recipe that incorporates rosemary, honey, and a touch of cinnamon for an added festive touch.
Rowan Berry Tea with Rosemary, Honey, and Cinnamon
Ingredients:
1/4 cup fresh rowan berries (about 20-30 berries)
1-2 sprigs fresh rosemary
1 cinnamon stick or 1/2 teaspoon ground cinnamon
1-2 tablespoons honey (adjust to taste)
2 cups water
Optional: a slice of lemon or a few cloves for extra flavor
Instructions:
Prepare the Berries:
Rinse the rowan berries thoroughly. If using fresh berries, crush them lightly with the back of a spoon or a muddler to release their flavor.
Boil the Water:
In a small saucepan, bring the water to a boil. Once boiling, reduce the heat to a simmer.
Add the Ingredients:
Add the crushed rowan berries, rosemary, cinnamon stick (or ground cinnamon), and any optional spices like cloves or lemon slices to the water.
Simmer the Tea:
Let the mixture simmer for 10-15 minutes, stirring occasionally, until the flavors meld together, and the water takes on a deep, reddish hue from the rowan berries.
Strain and Sweeten:
Remove from heat and strain the tea into a cup, discarding the solid ingredients (or keeping the rosemary sprig for decoration).
Stir in honey to taste, adjusting the sweetness to your preference.
Serve:
Enjoy the tea warm, and if desired, garnish with a small sprig of rosemary or a thin slice of lemon.
Tips:
If you prefer a stronger flavor, you can let the tea steep for a longer time or crush the rowan berries more to release more of their juices.
Rowan berries are naturally quite tart, so the honey will help balance that out. You can also experiment with other sweeteners like maple syrup or agave if you prefer.
The cinnamon and rosemary complement the rowan berries nicely, but feel free to adjust or add other spices like cloves or star anise for a more festive, spiced aroma.
This rowan berry tea, with its mix of herbs, spices, and natural sweetness, is perfect for warming up during the colder months and can become a comforting ritual as you get ready for the holidays.


Stuffed Zucchini Flowers


These stuffed zucchini flowers take me right back to our Italian holidays, where every meal felt like a celebration of simple, fresh ingredients. I remember sitting ifor cozy dinners, savouring the delicate crunch and creamy filling of these flowers, each bite capturing the essence of Italian summers. The vibrant colors, the fragrant herbs, and the creamy ricotta filling wrapped in a light, crispy batter make these zucchini flowers not just a dish, but a delightful memory of warm evenings and leisurely dinners. They’re the perfect appetizer to share with loved ones, bringing a touch of Italy to our table every time.
Stuffed zucchini flowers are a delicate and delicious Italian appetizer. Here’s a classic recipe:
Ingredients:
12 zucchini flowers
200g ricotta cheese
50g grated Parmesan cheese
1 garlic clove, minced
1 tablespoon chopped fresh basil (or parsley)
Salt and pepper to taste
about 100g all-purpose flour
1-2 egg yolks
Vegetable oil for frying

Enjoying cosy cooking and dinners under the pergola, listening to the sound of nature as the evening sky falls into sunset
Instructions:
Prepare the zucchini flowers:
Gently rinse the zucchini flowers under cold water and pat them dry with a paper towel. Carefully remove the stamens from inside the flowers without tearing the petals.
Make the filling:
In a bowl, mix the ricotta cheese, grated Parmesan, minced garlic, chopped basil (or parsley), salt, and pepper until smooth and well combined.
Stuff the flowers:
Using a small spoon or a piping bag, gently stuff each zucchini flower with the ricotta mixture. Be careful not to overfill them, and twist the petals at the top to close the flower.
Dip the flower in egg yolk, then roll in a bit of plain flour. Add a pinch of salt.
Fry the zucchini flowers:
Heat vegetable oil in a large frying pan over medium heat. The oil should be hot but not smoking.
Carefully place the coated flowers into the hot oil and fry until golden brown, turning them occasionally, for about 2-3 minutes on each side.
Drain and serve:
Remove the fried zucchini flowers from the oil using a slotted spoon and place them on a paper towel-lined plate to drain excess oil.
Serve immediately


enjoying the beautiful countryside view in Umbria from our villa


Lilac & Violet syrup in 10 min

Lilac & violet syrup served with ice & tonic water


I have a serious love affair with flowers and that is why I love using lilacs and violets when they are in season. Lilacs are not only beautiful but also edible. Just be sure that the lilacs you pick are pesticide-free. In Finland, lilac trees bloom wild in the countryside and I’m lucky to have a sister and mother in law that both have lilac trees in their gardens, that I can pick from. I have a balcony filled with violets, which is why I also incorporated them into this recipe. There are many simple culinary uses for lilacs, such as infusing sugar, alcohol, syrups or honey. This syrup is perfect for sweetening cocktails or mocktails and is incredibly easy to prepare in just 10 minutes. It also works as a sauce for cakes or pancakes or even a base when freezing popsicles.
When making lilac syrup, use only the blossoms, removing any leaves or stems before infusing. Gently rinse the lilacs in a fine mesh strainer to remove any dirt and insects. This ensures your syrup is clean and ready to add a delightful floral note to your drinks or on top of cakes.
Helsinki is experiencing a lengthy heatwave, so a few small drops of the syrup mixed with ice and soda water (or tonic water) makes a great refreshing drink during warm days. Our two year old absolutely loved this combination, we enjoyed it on our balcony garden.
Water and Granulated sugar: No fancy sugars needed. Just your basic granulated sugar.
Lilac & violet blossoms: You are fresh and aromatic lilacs that are pesticide free.
Blueberries (or other dark berries): Lilac syrup by itself is kinda brown in colour. I add a small handful of blueberries/lingonberry to give it a pretty purple colour.
Ingredients
3dl sugar
2dl water
1dl blueberries (or partly lingonberry)
2dl mixture of lilacs and violet flowers
Boil the water and sugar until the sugar has melted. Add in the berries and edible flowers and let it boil for 10 minutes. Strain, let it cool and bottle. Store in Refrigerator.


